How do I set up an integration between CleanManager and Dynamics 365 Business Central?
Note
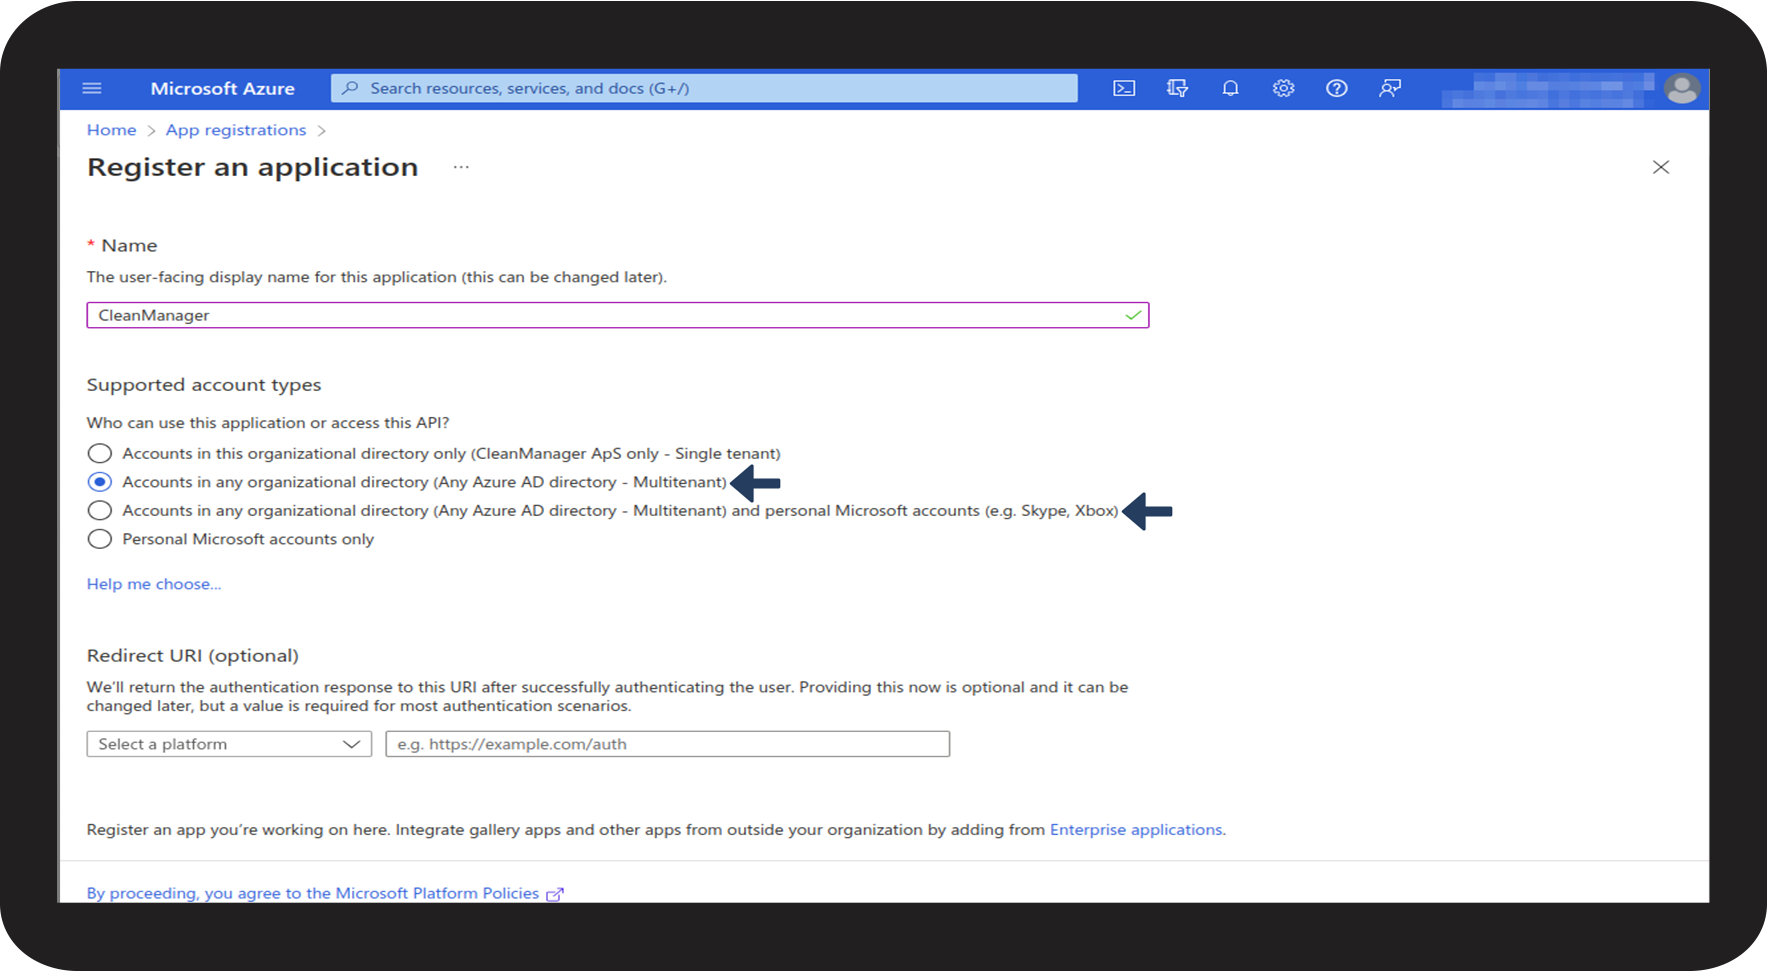
CleanManager only supports Single tenant Business Central with authentication through Microsoft Azure.
To be able to integrate CleanManager with Dynamics 365 Business Central, the following three accesses are required:
- Admin access to Azure
- Admin access to Dynamics 365 Business Central
- Admin access to CleanManager
Should you not have admin access to one of these three software, it is vital that you contact those who have, since without, it will not be possible to achieve a successful integration.
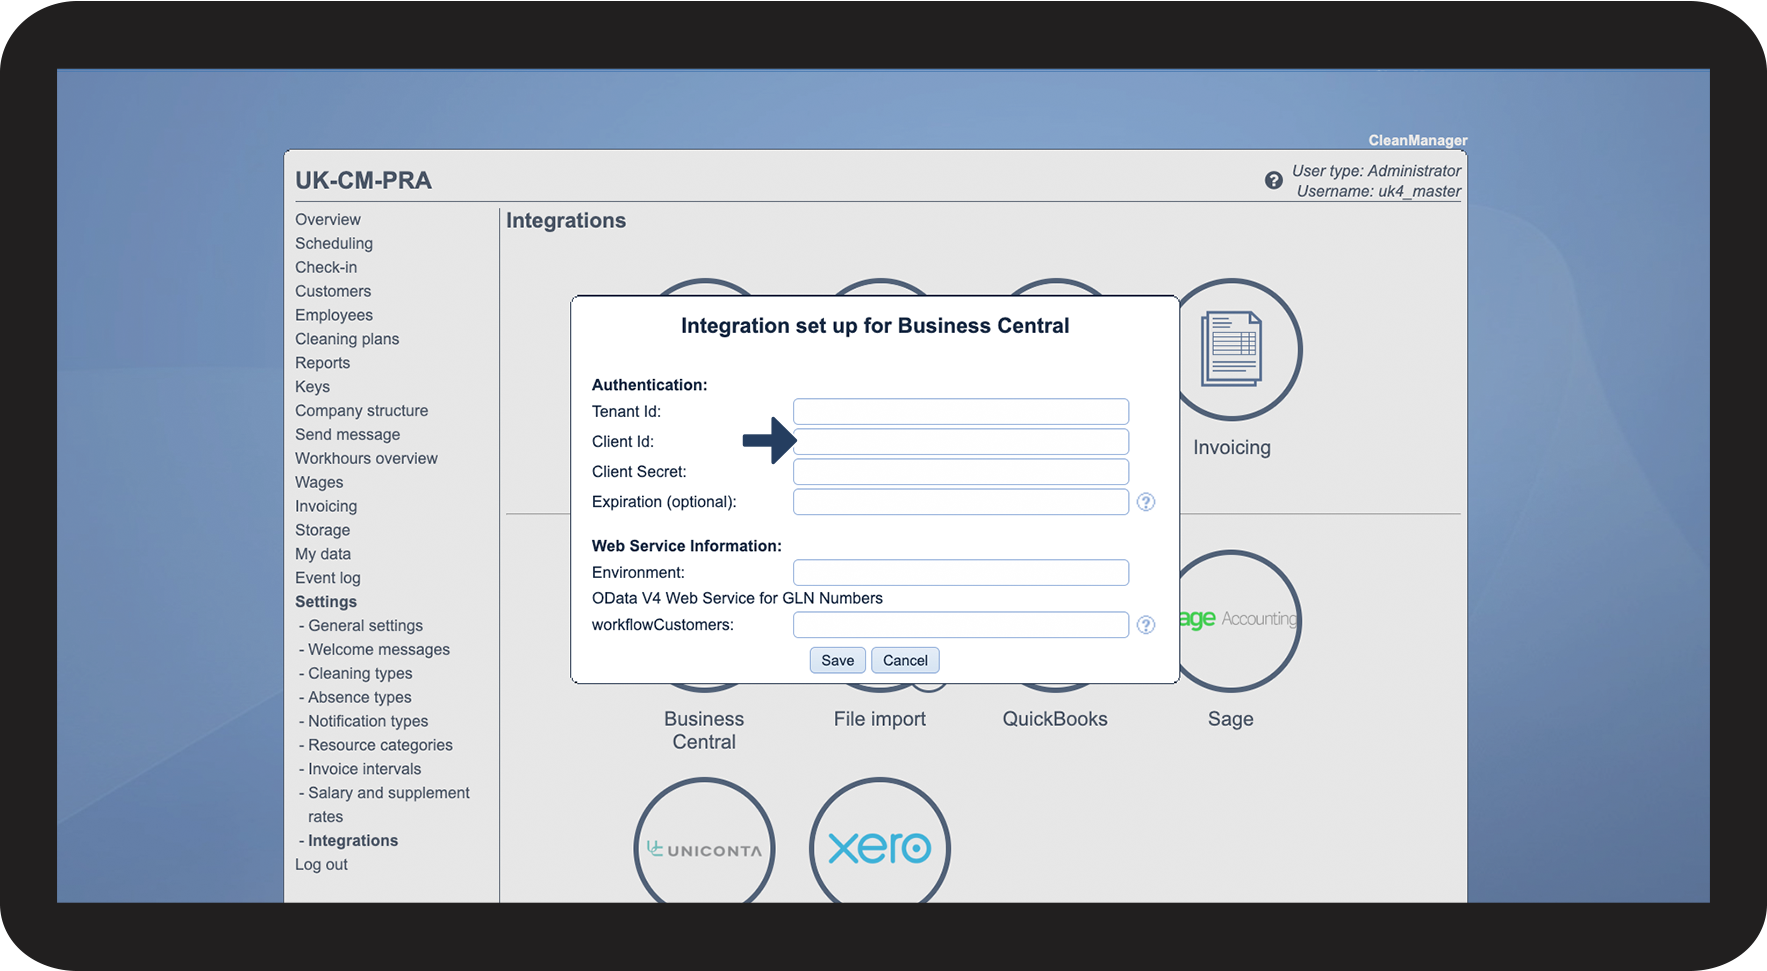
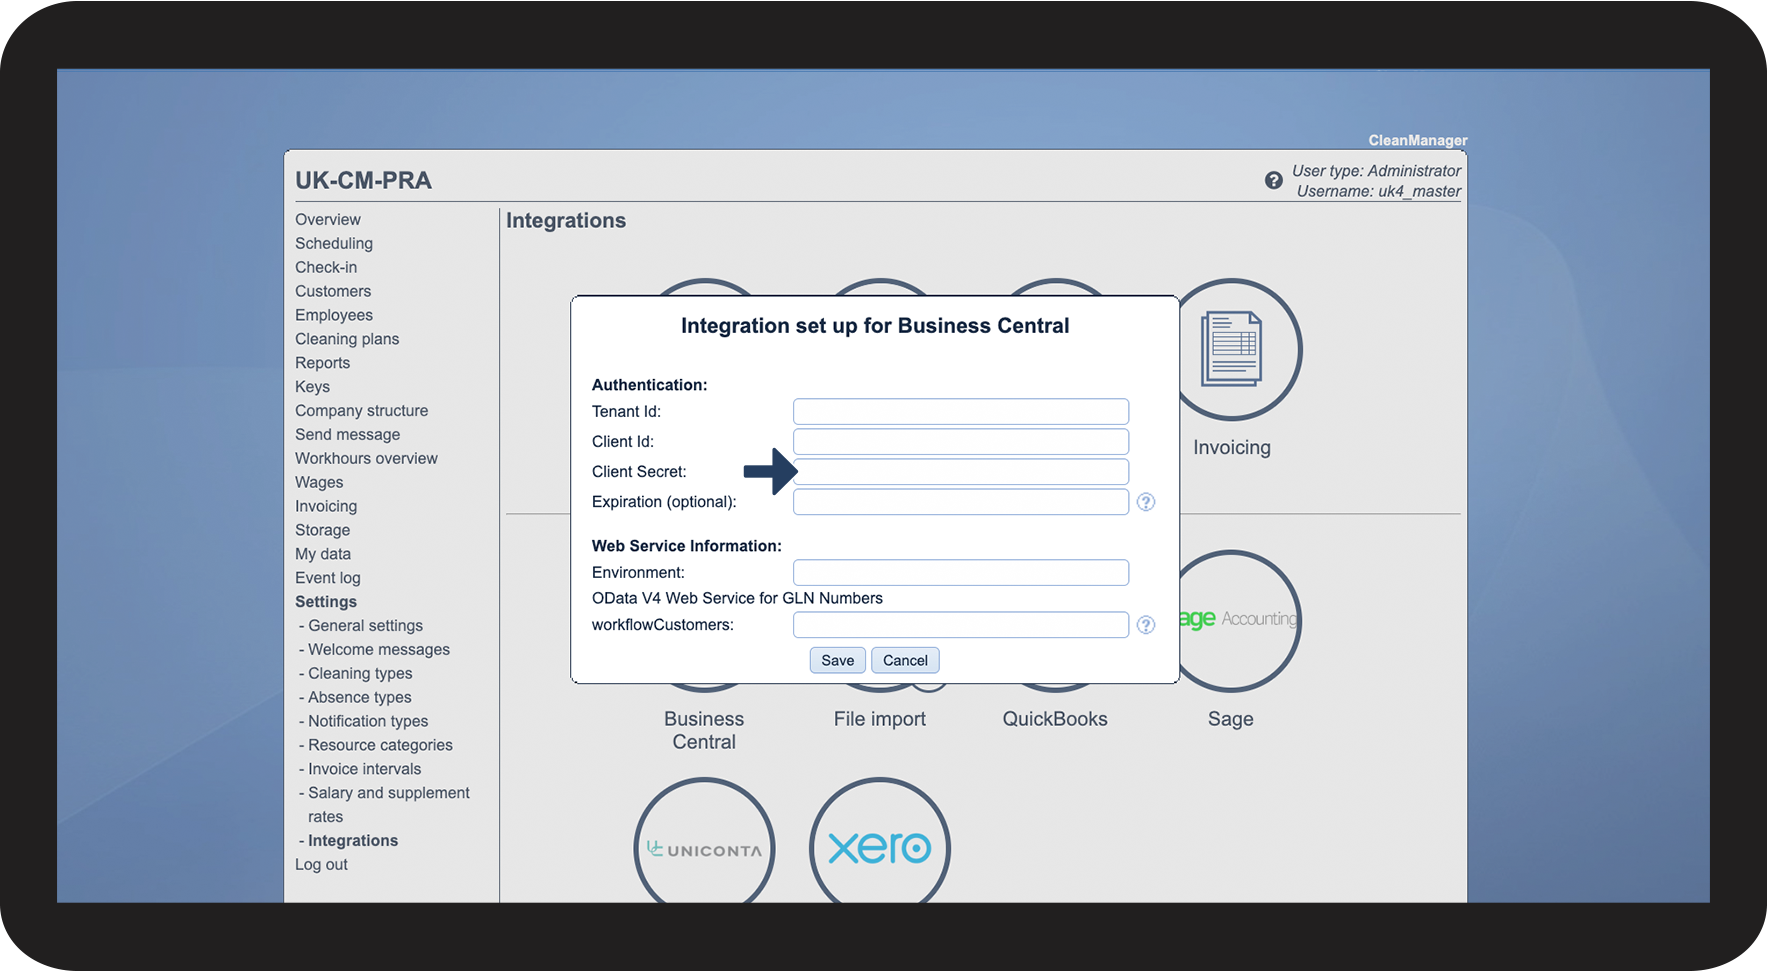
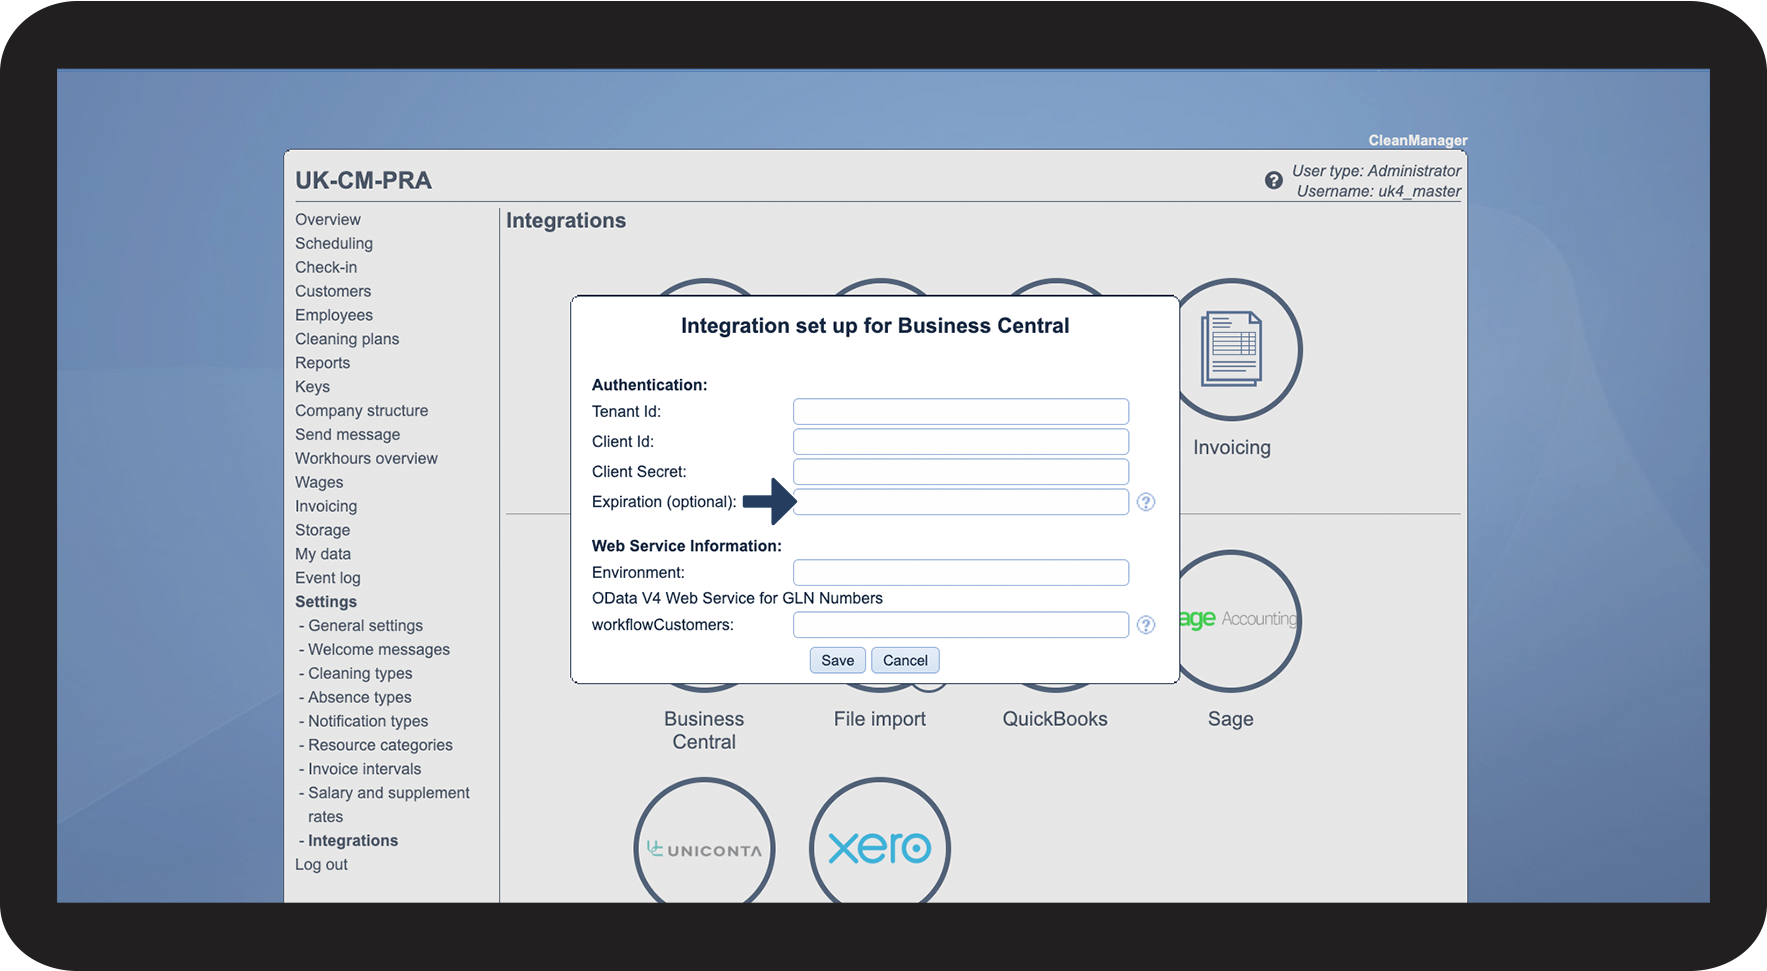
The required information from Azure, for the integration with Cleanmanager is:
- Client (Application) ID
- Directory (tenant) ID
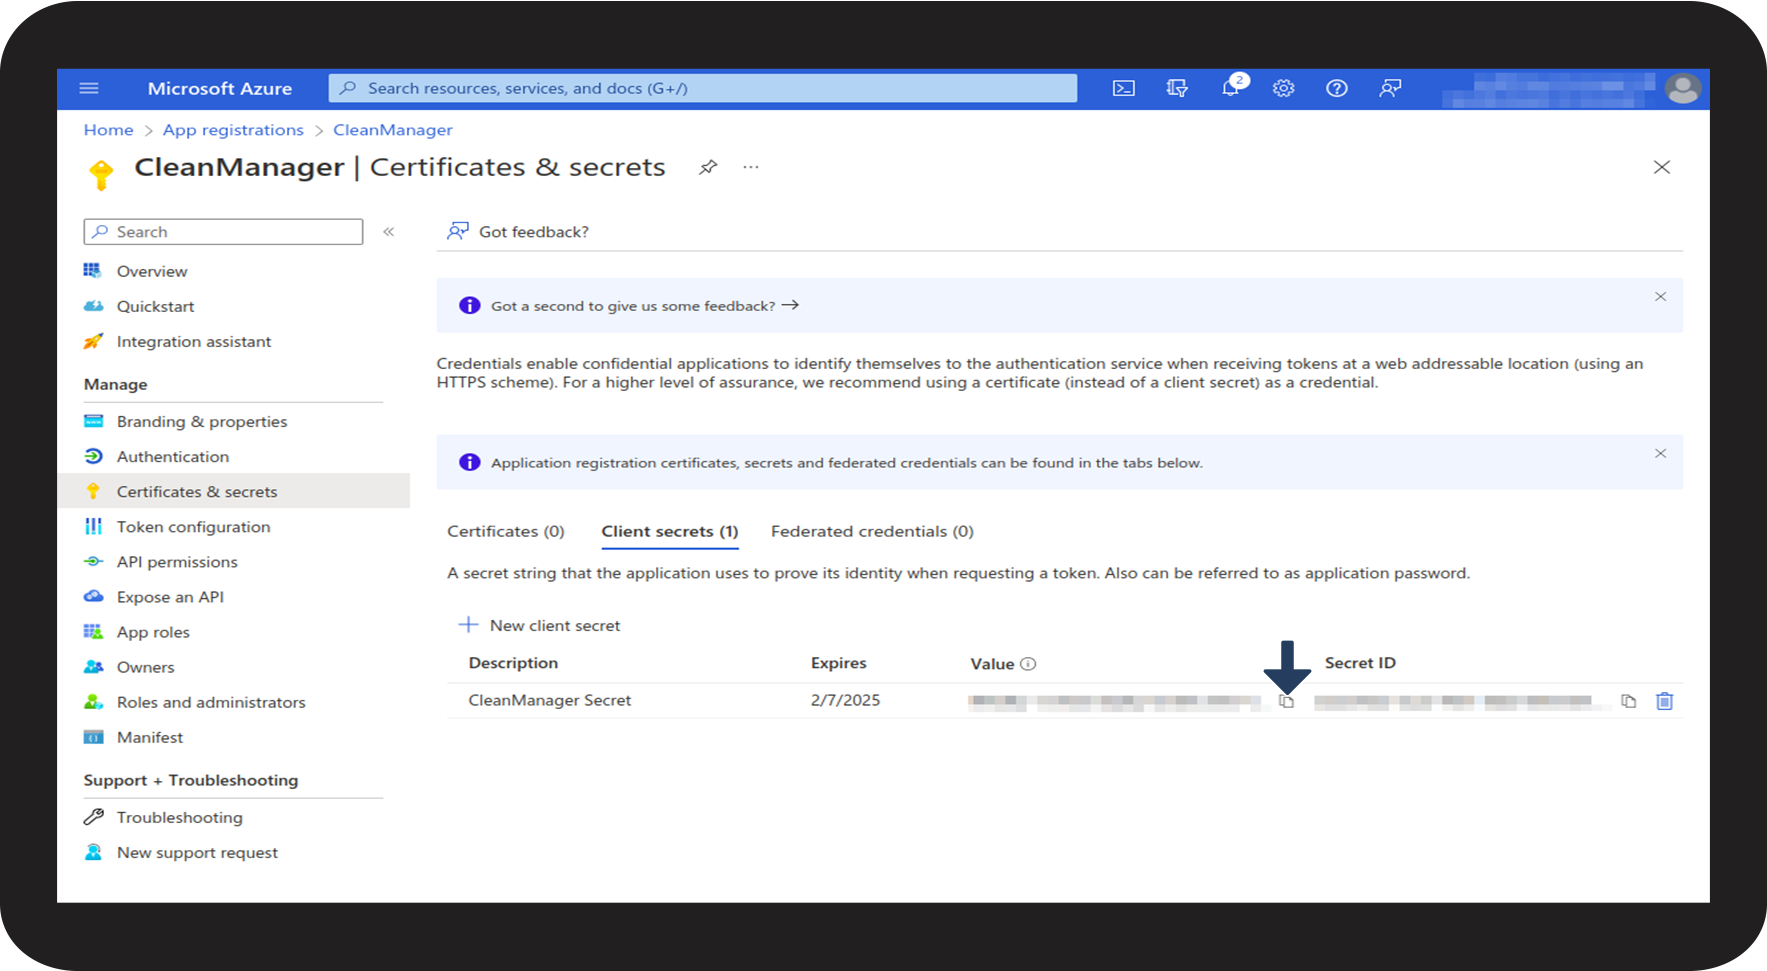
- Secret value
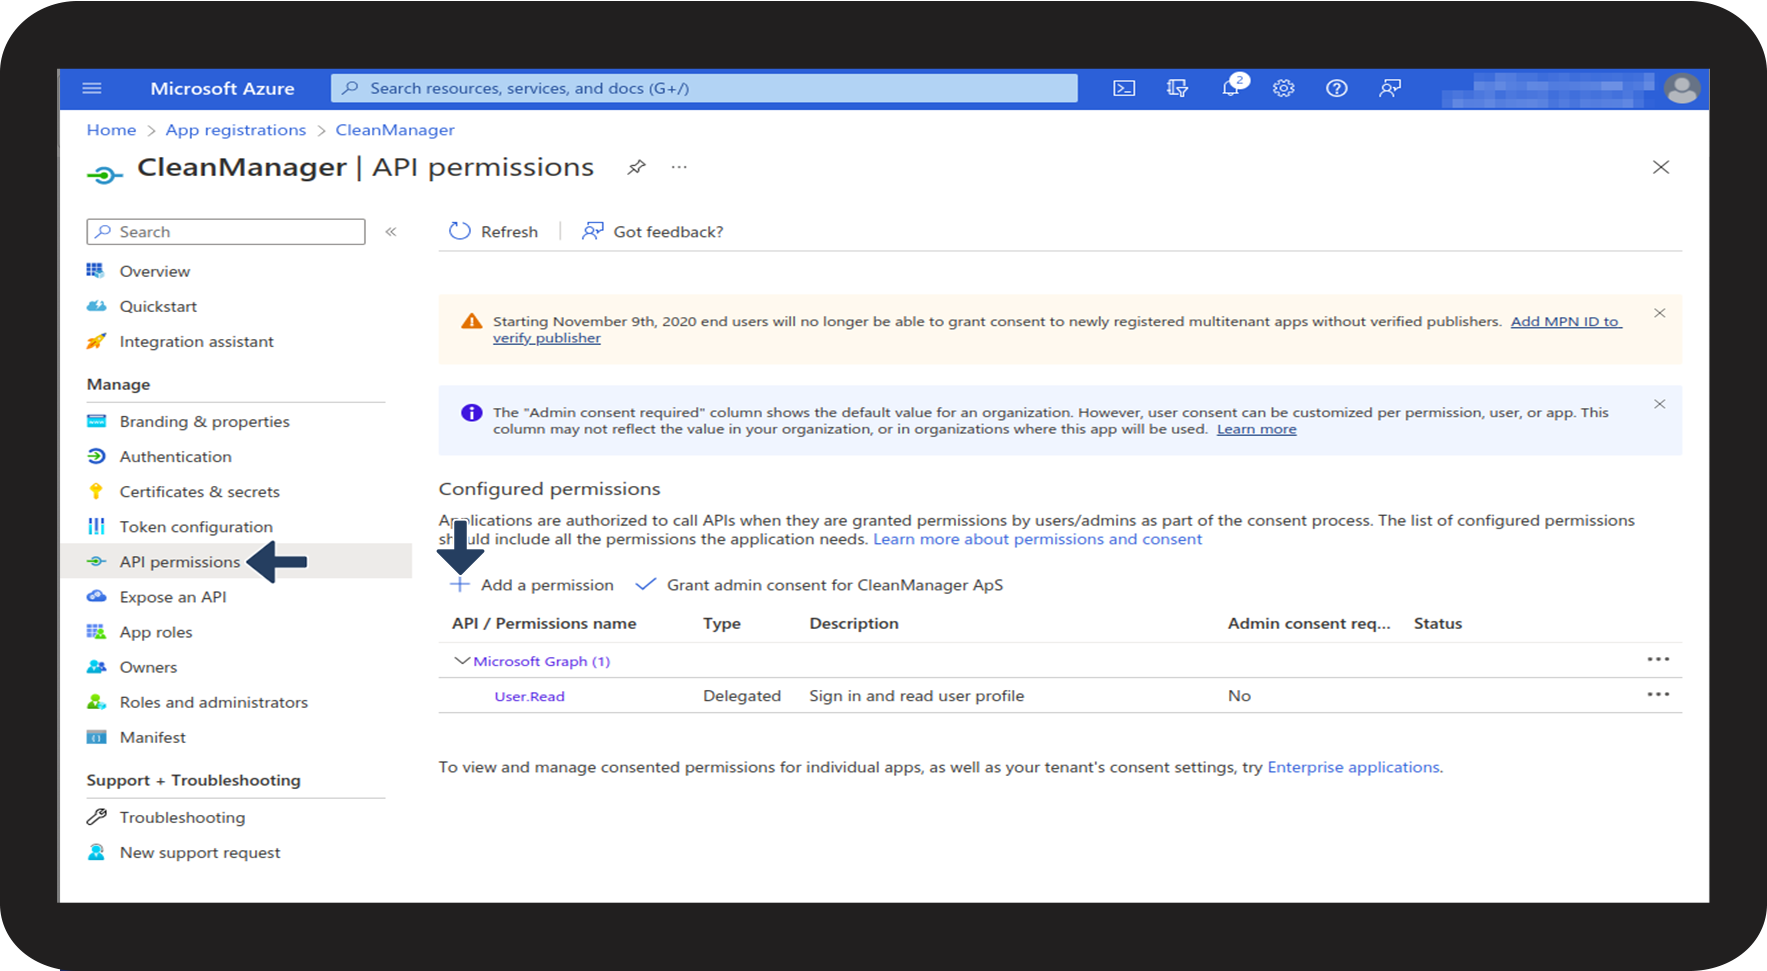
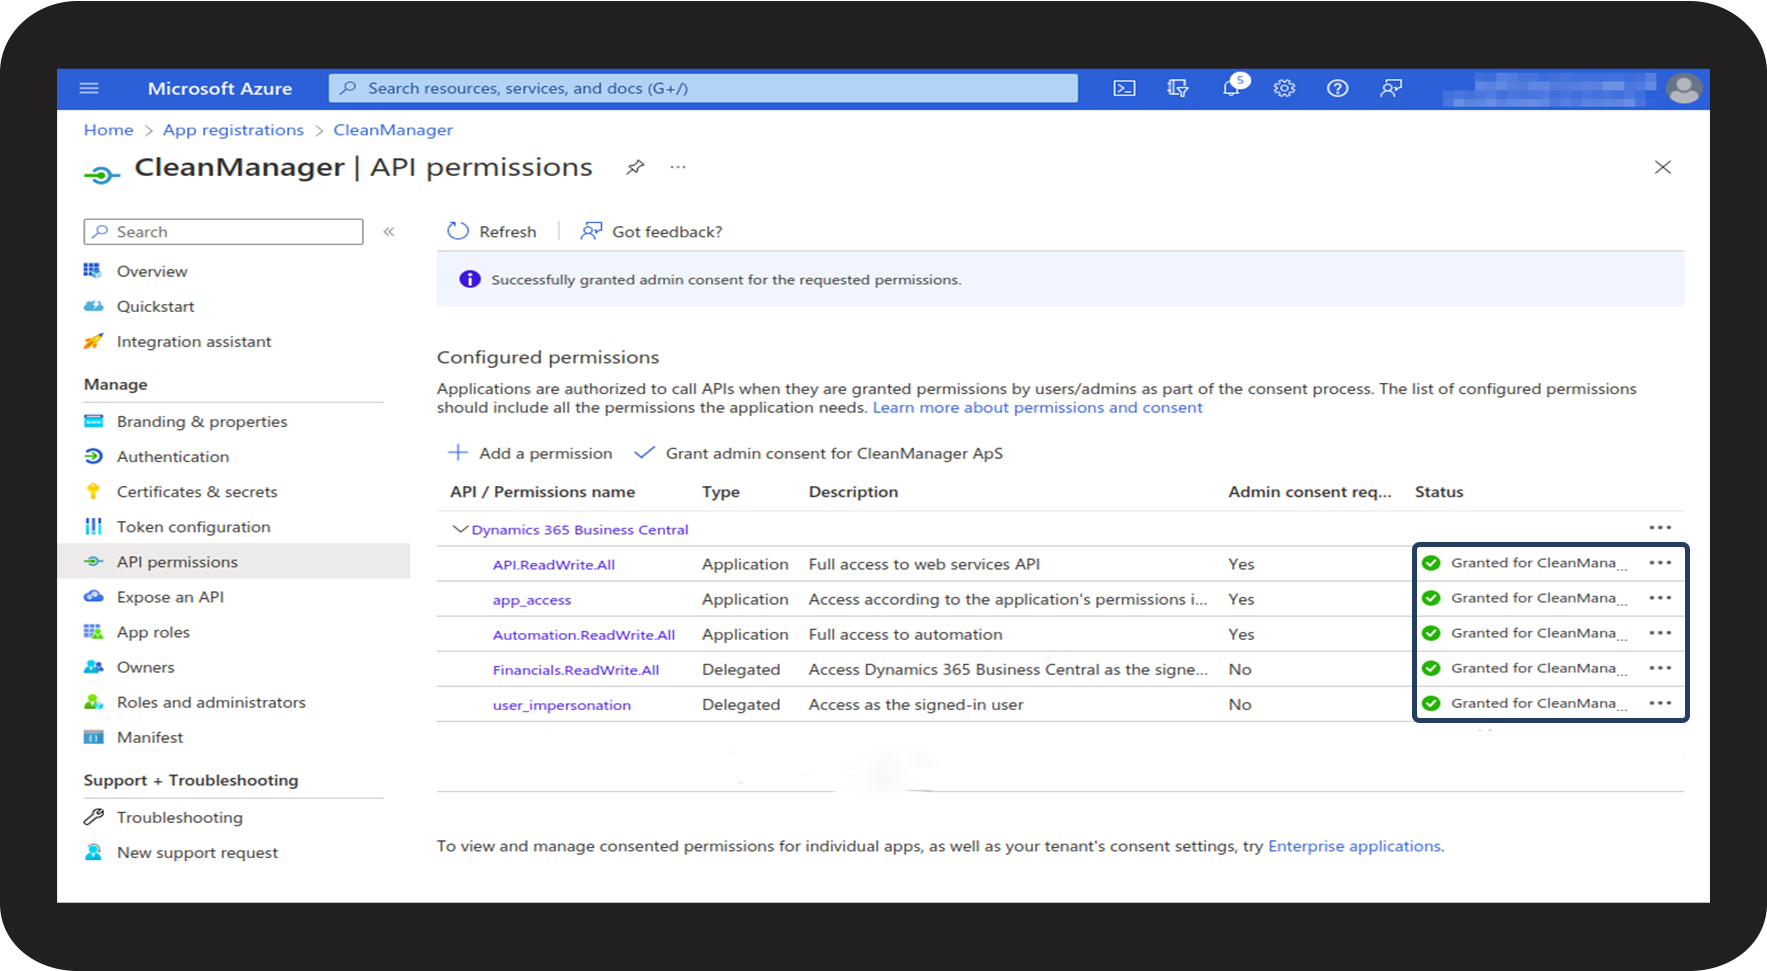
- API permissions for CleanManager
Read more about the successful integration of Dynamics 365 Business Central with CleanManager:
-
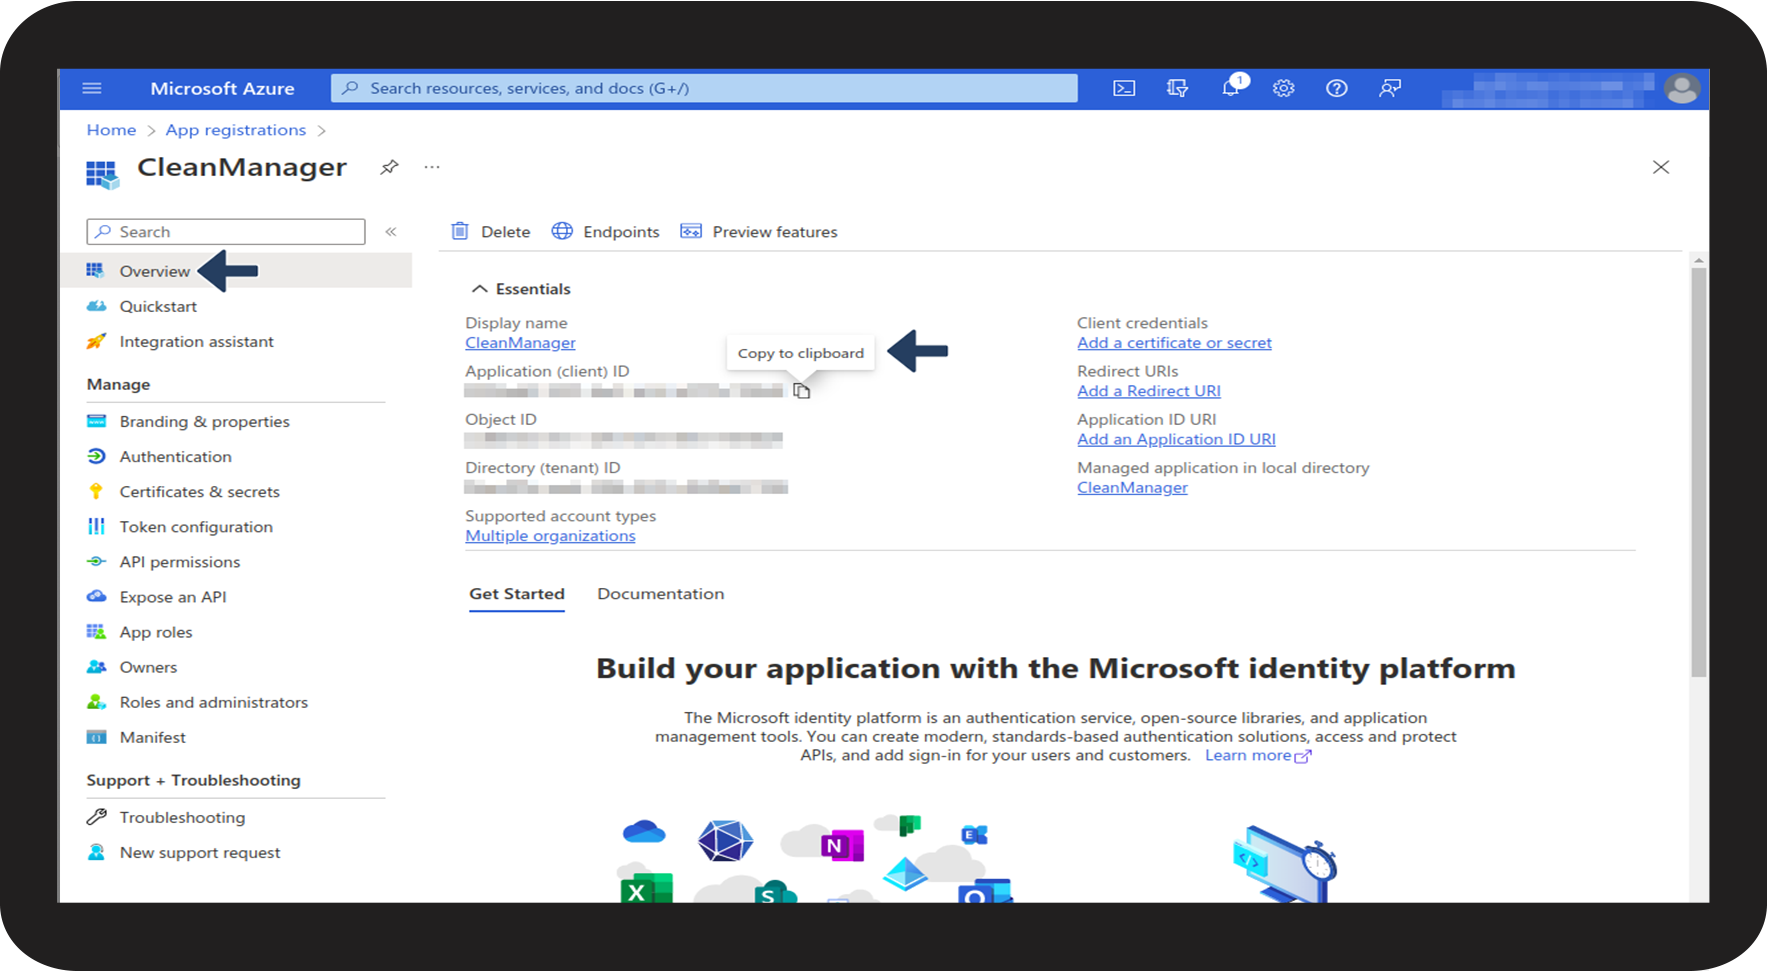
1. Part: Where do I find the Client ID and Tenant ID in Azure?
- 1.2 Part: How do I assign a permission for Dynamics 365 Business Central in Azure?
- 1.3 Part: How do I complete the setup in Azure?
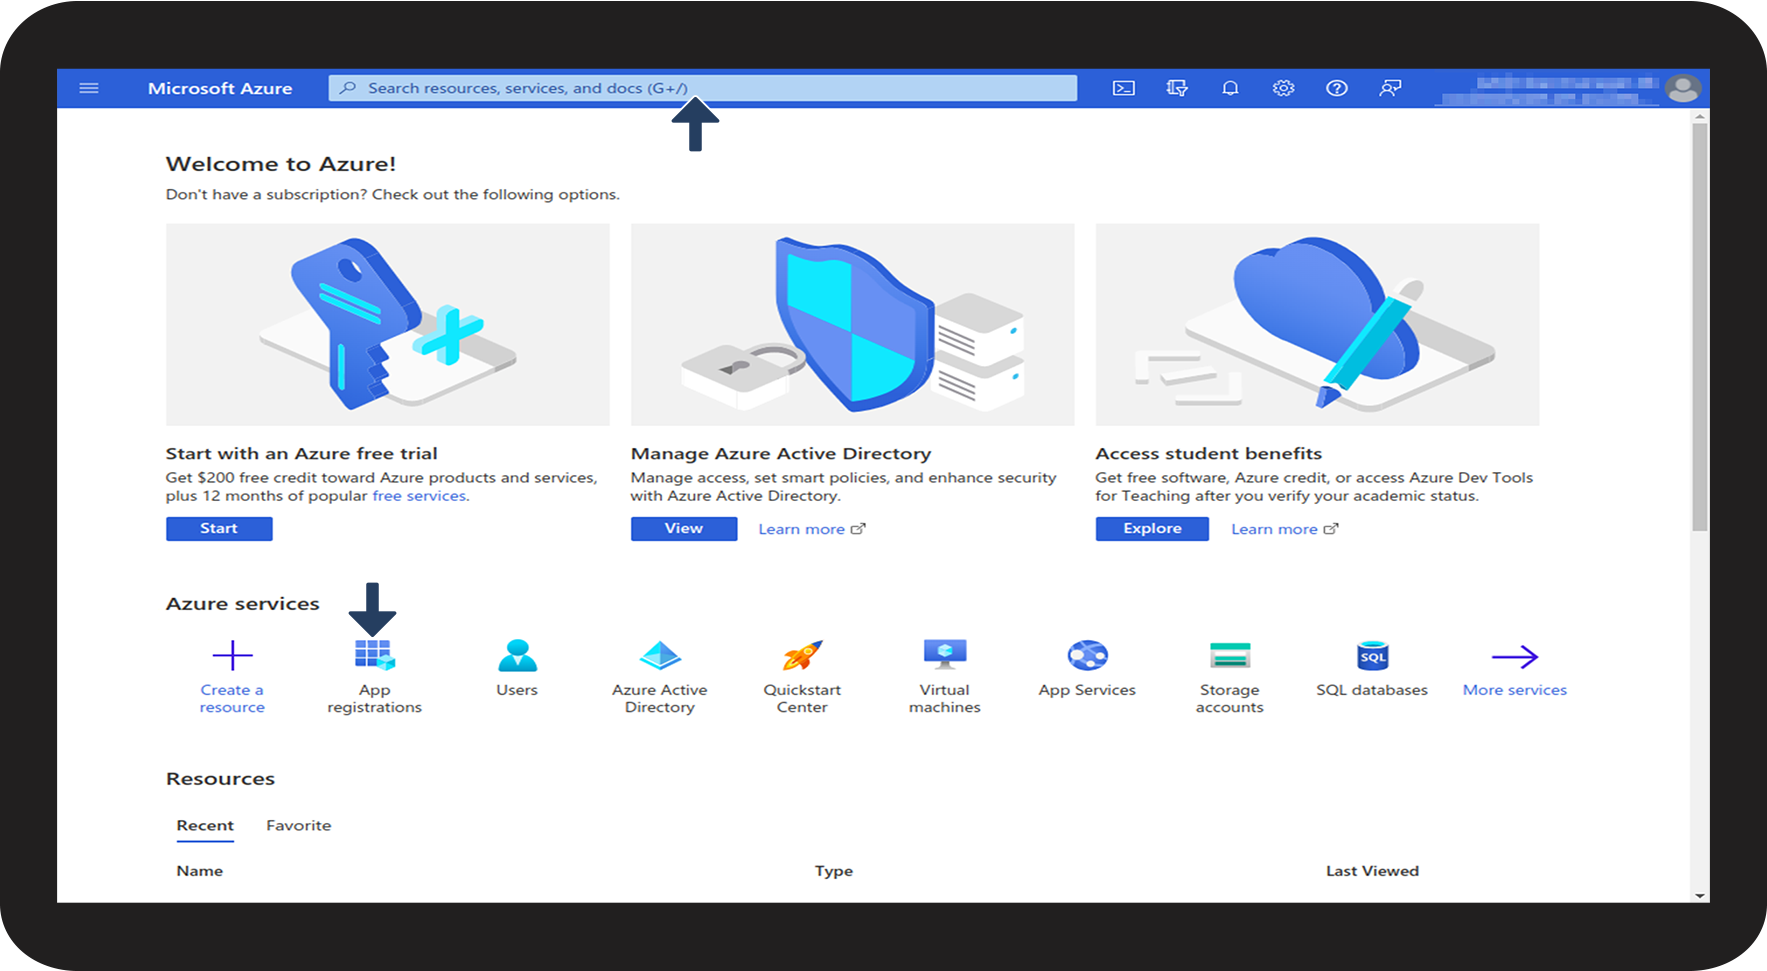
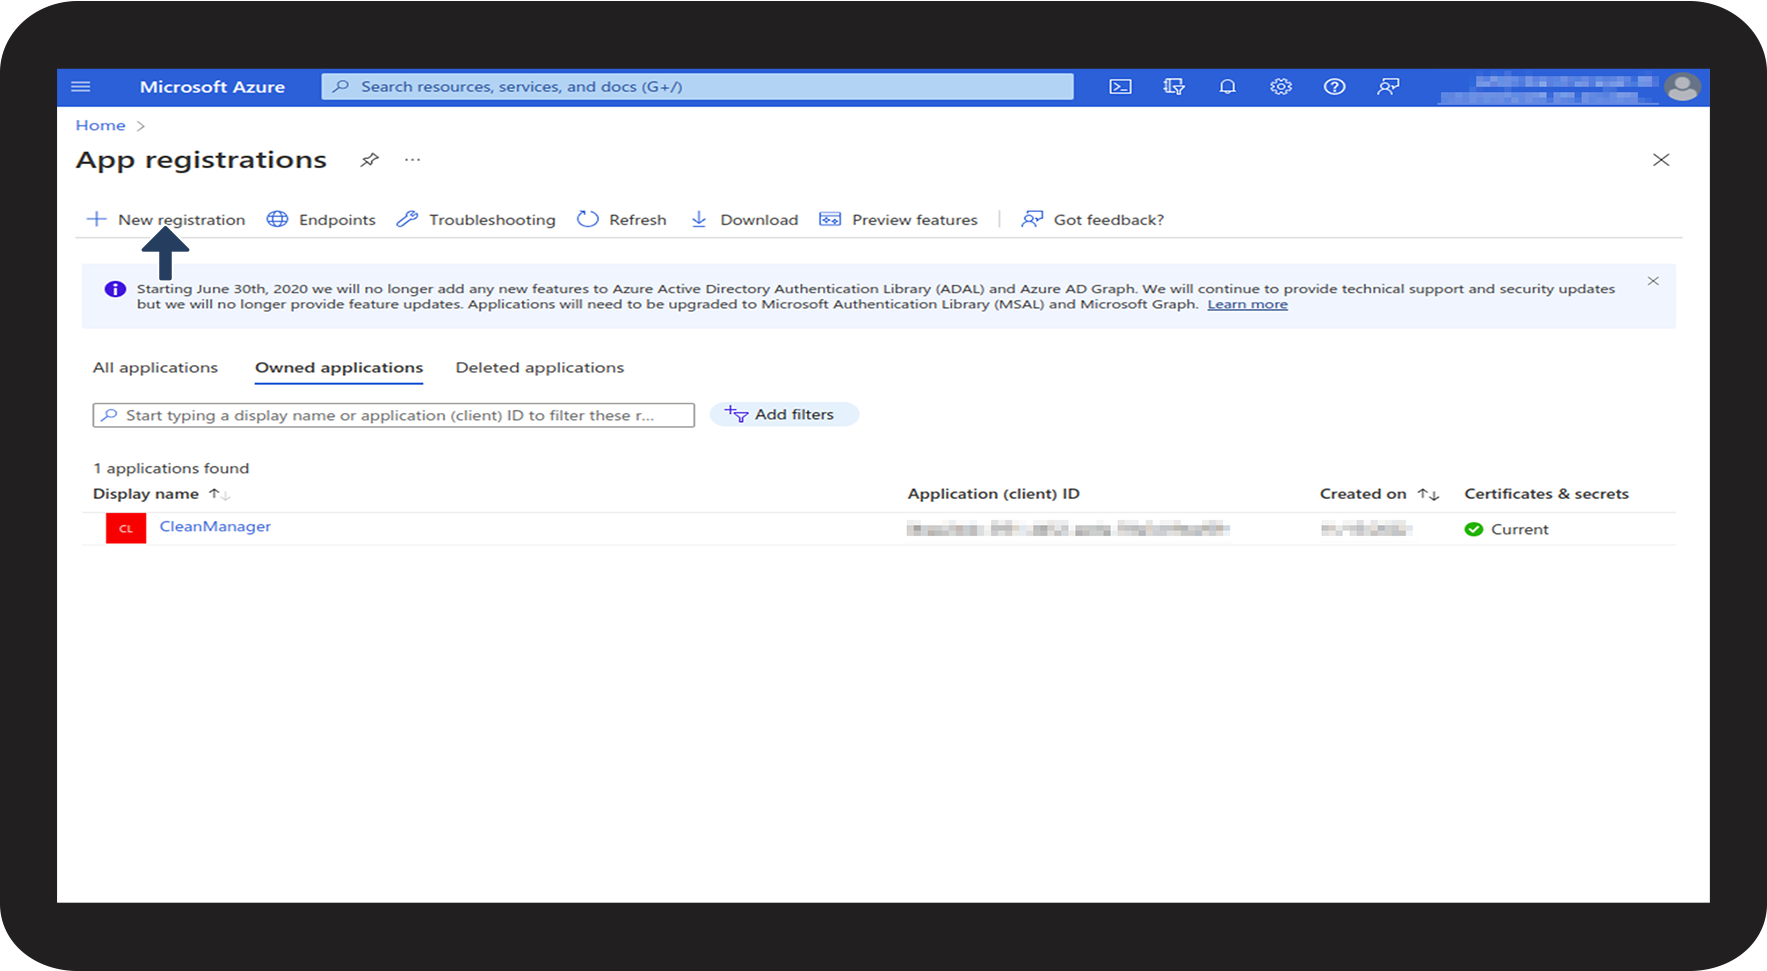
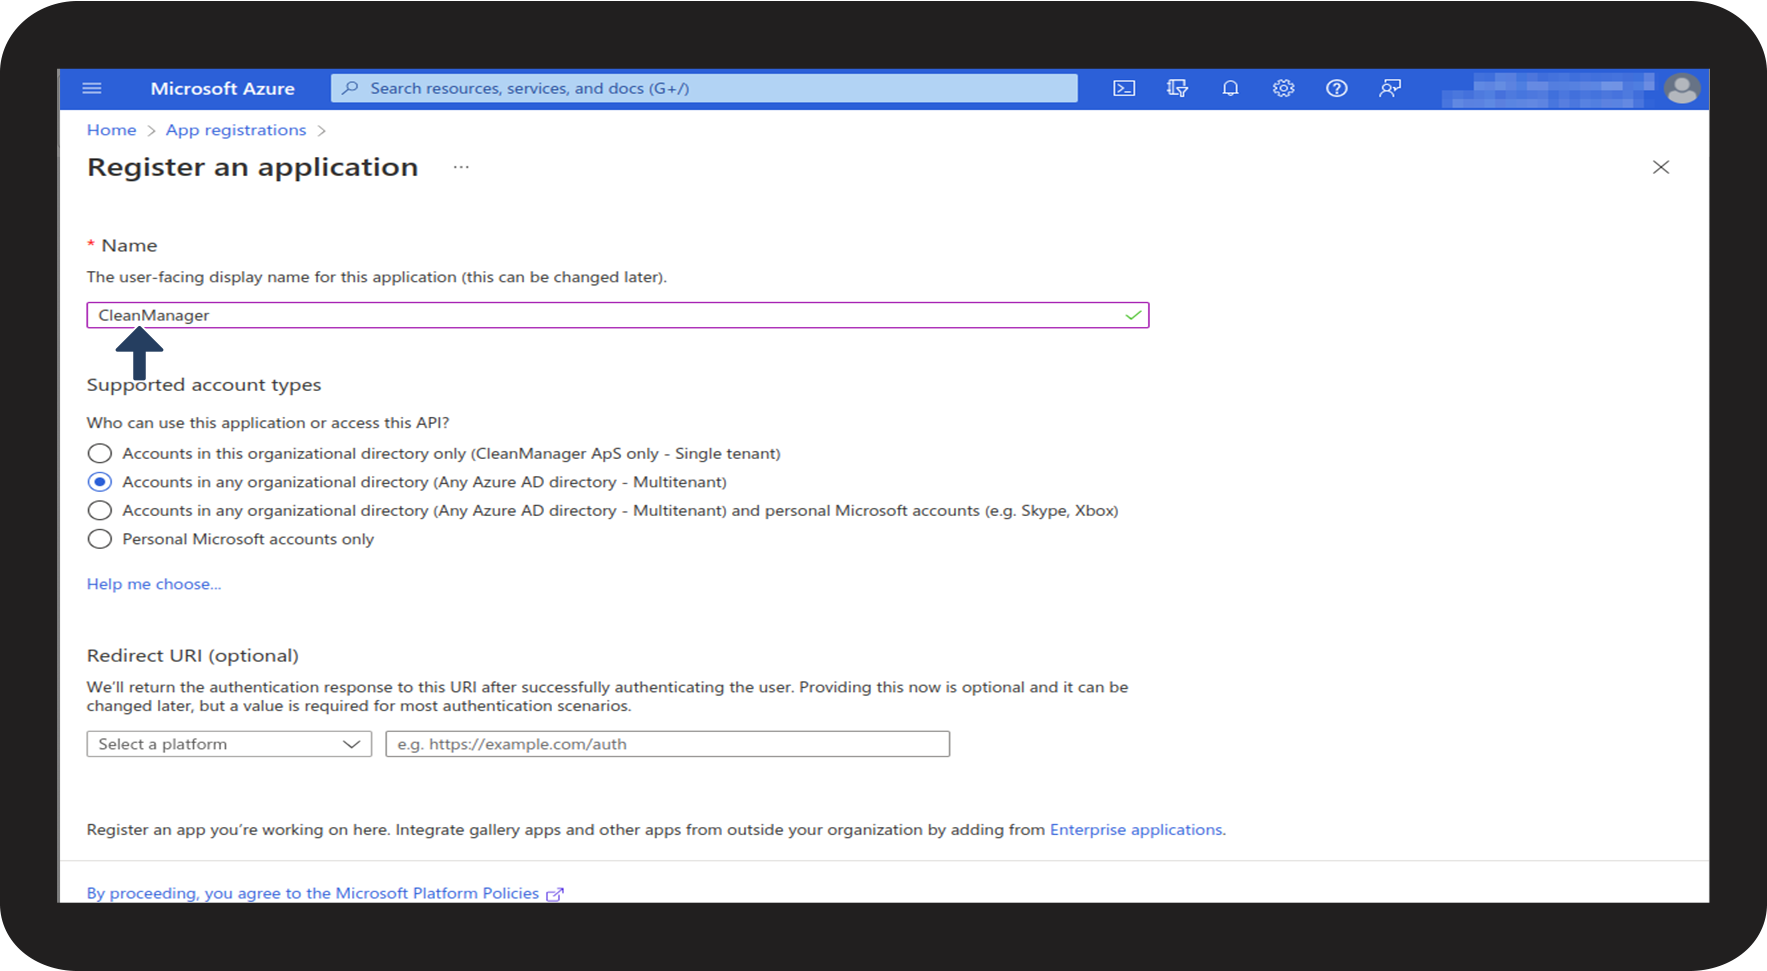
Part 1: This is how you find your Client ID and Tenant ID in Azure
This guide will explain the required steps to take in Azure, to be able to set up an integration between Dynamics 365 Business Central and CleanManager.
Things you need for this part:
- Admin access to Azure
- Admin access to Dynamics 365 Business Central
- Admin access to CleanManager


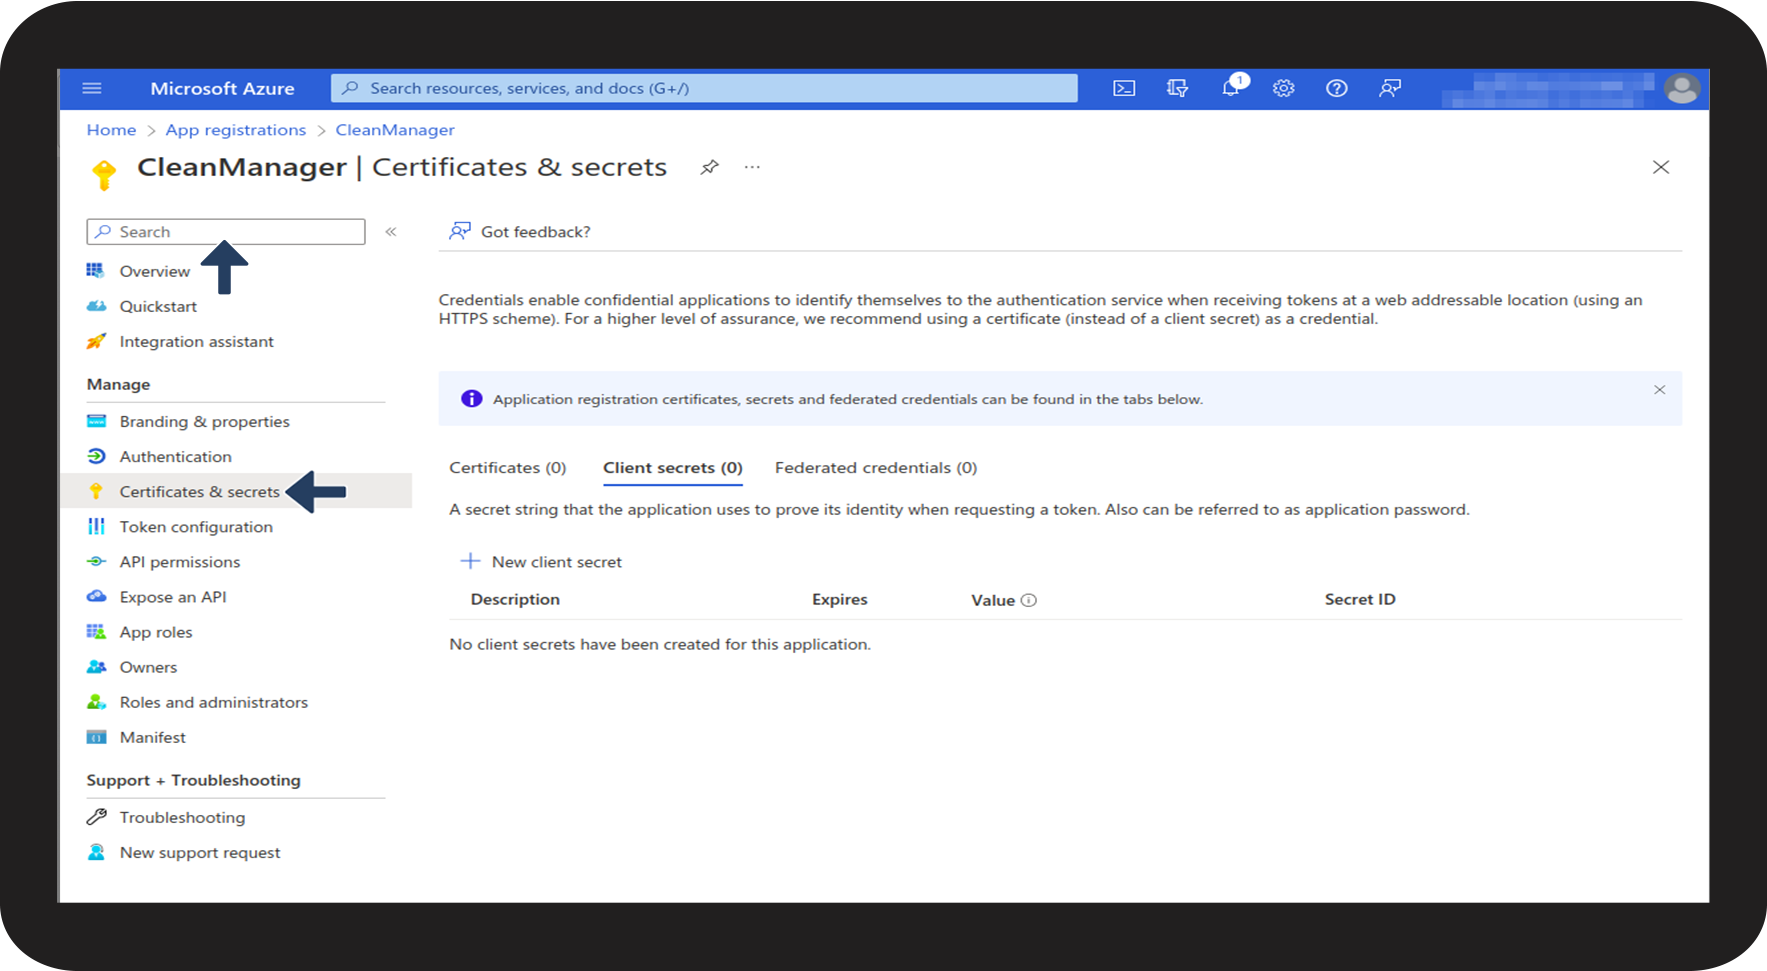
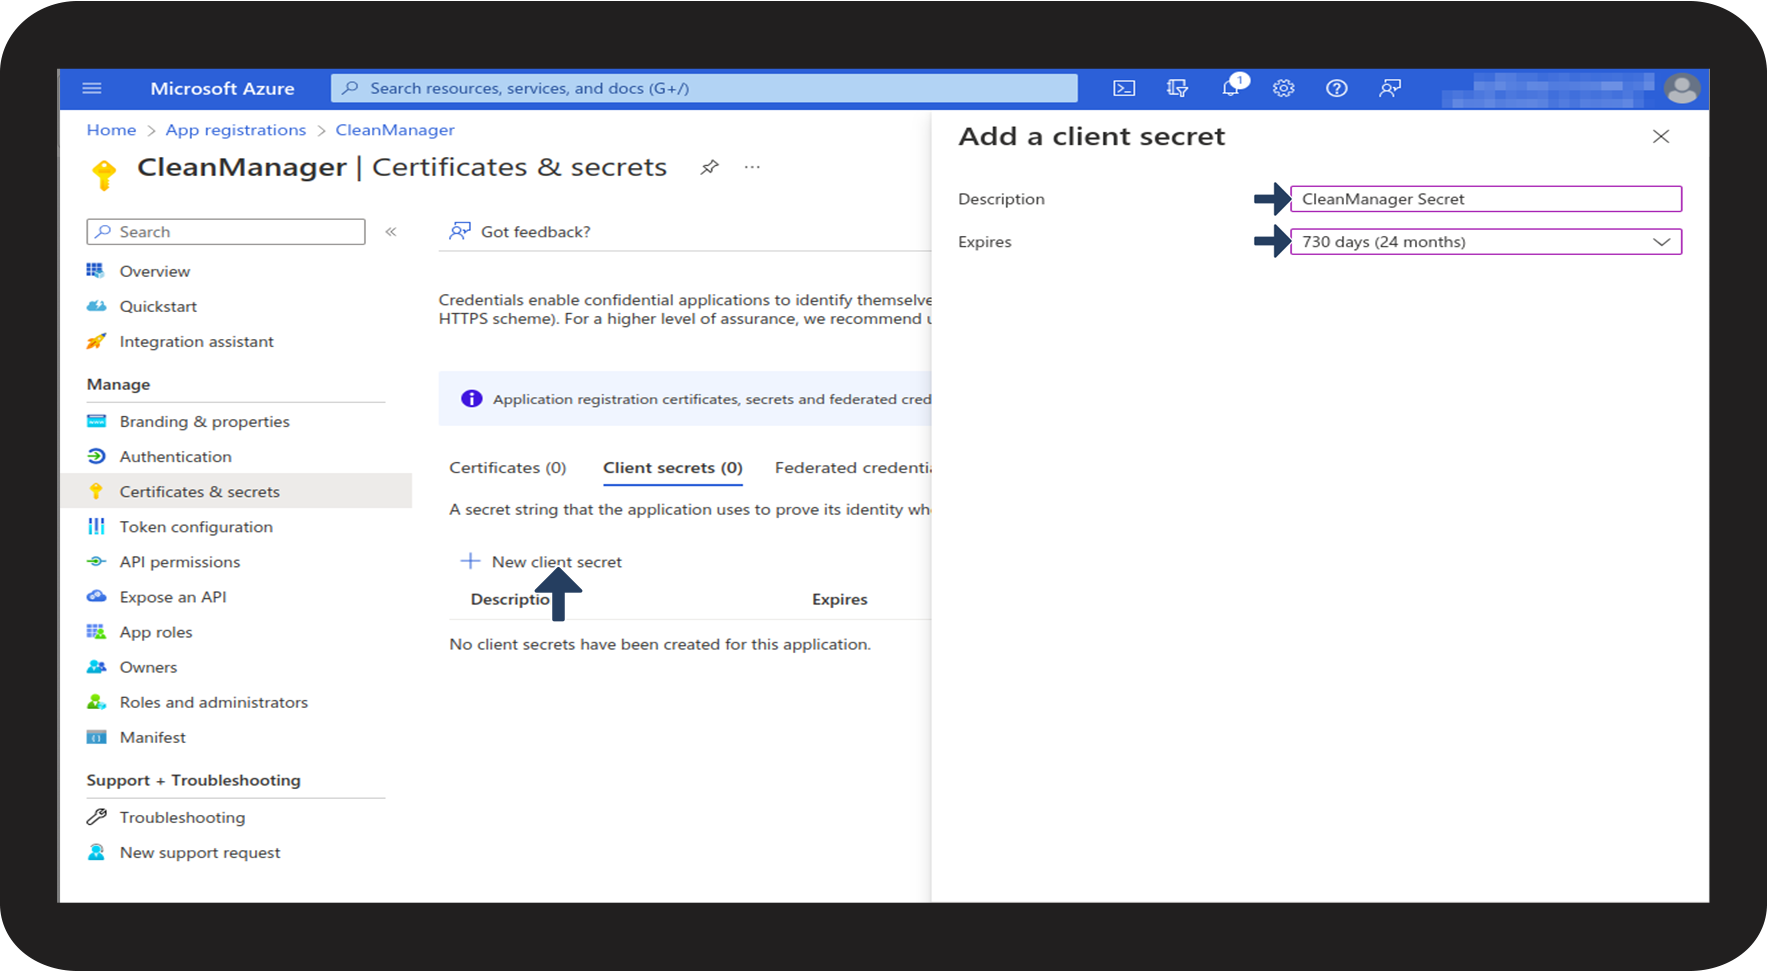
Part 1.1: This is how you find your Client Secret in Azure
Having completed the before mentioned steps in Part 1, you can now look for your Client Secret in Azure.
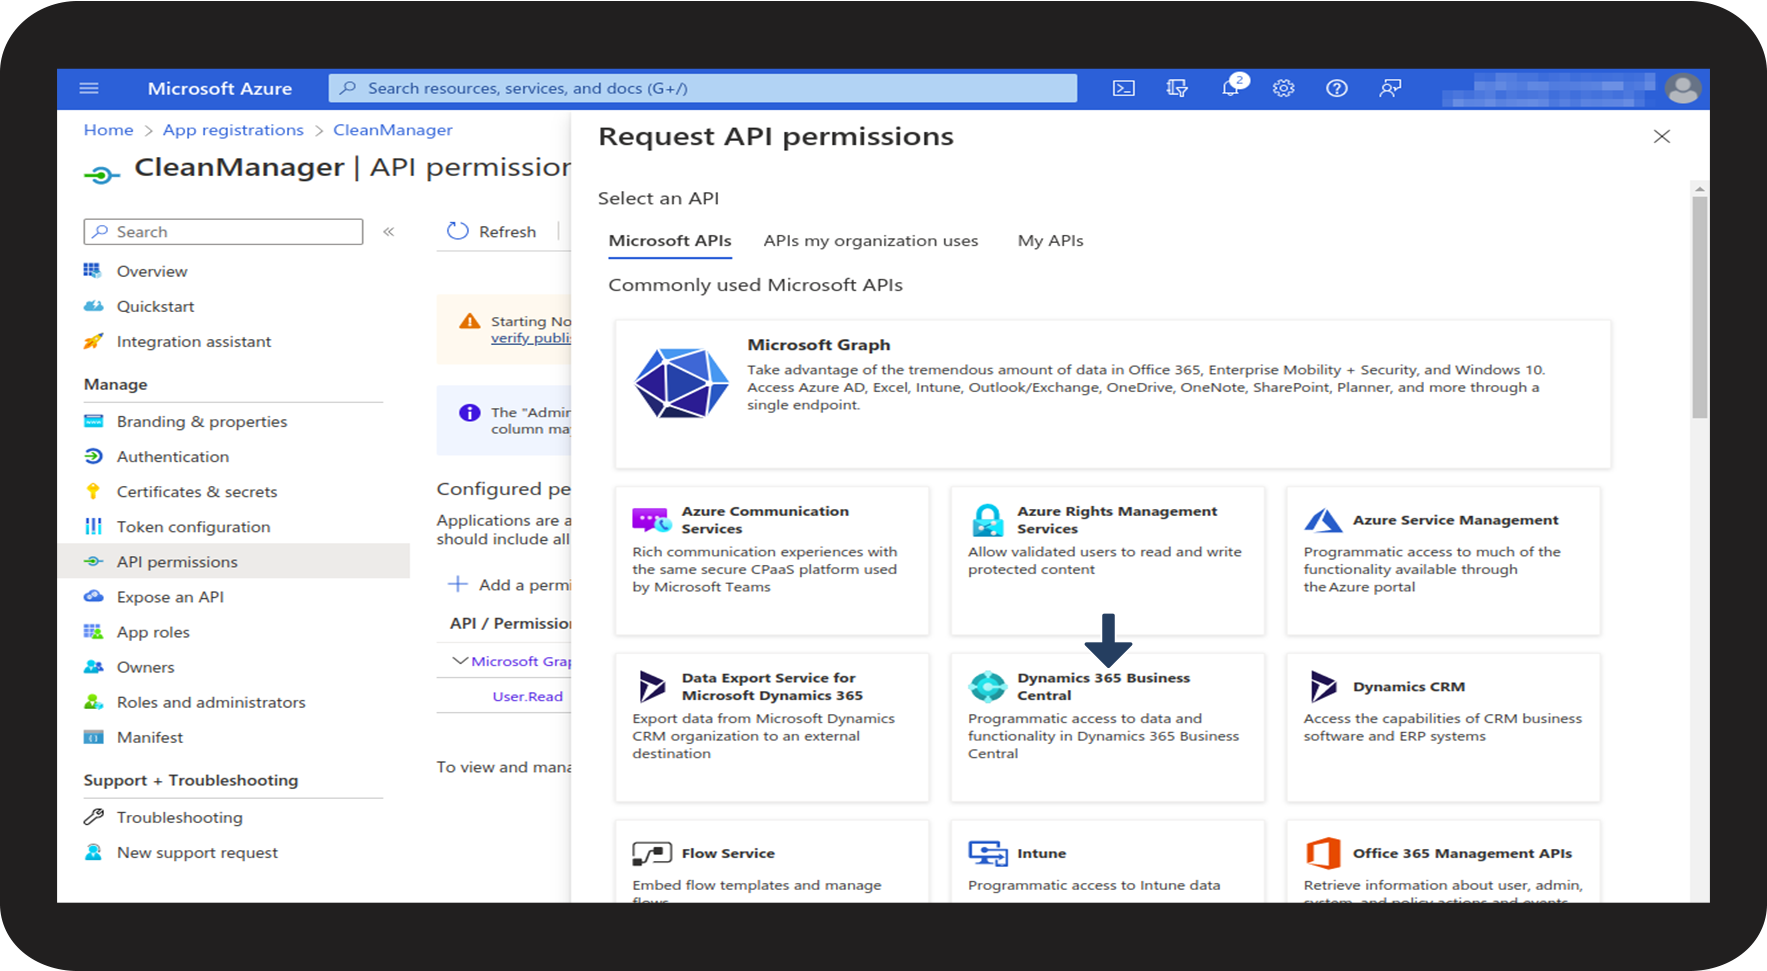
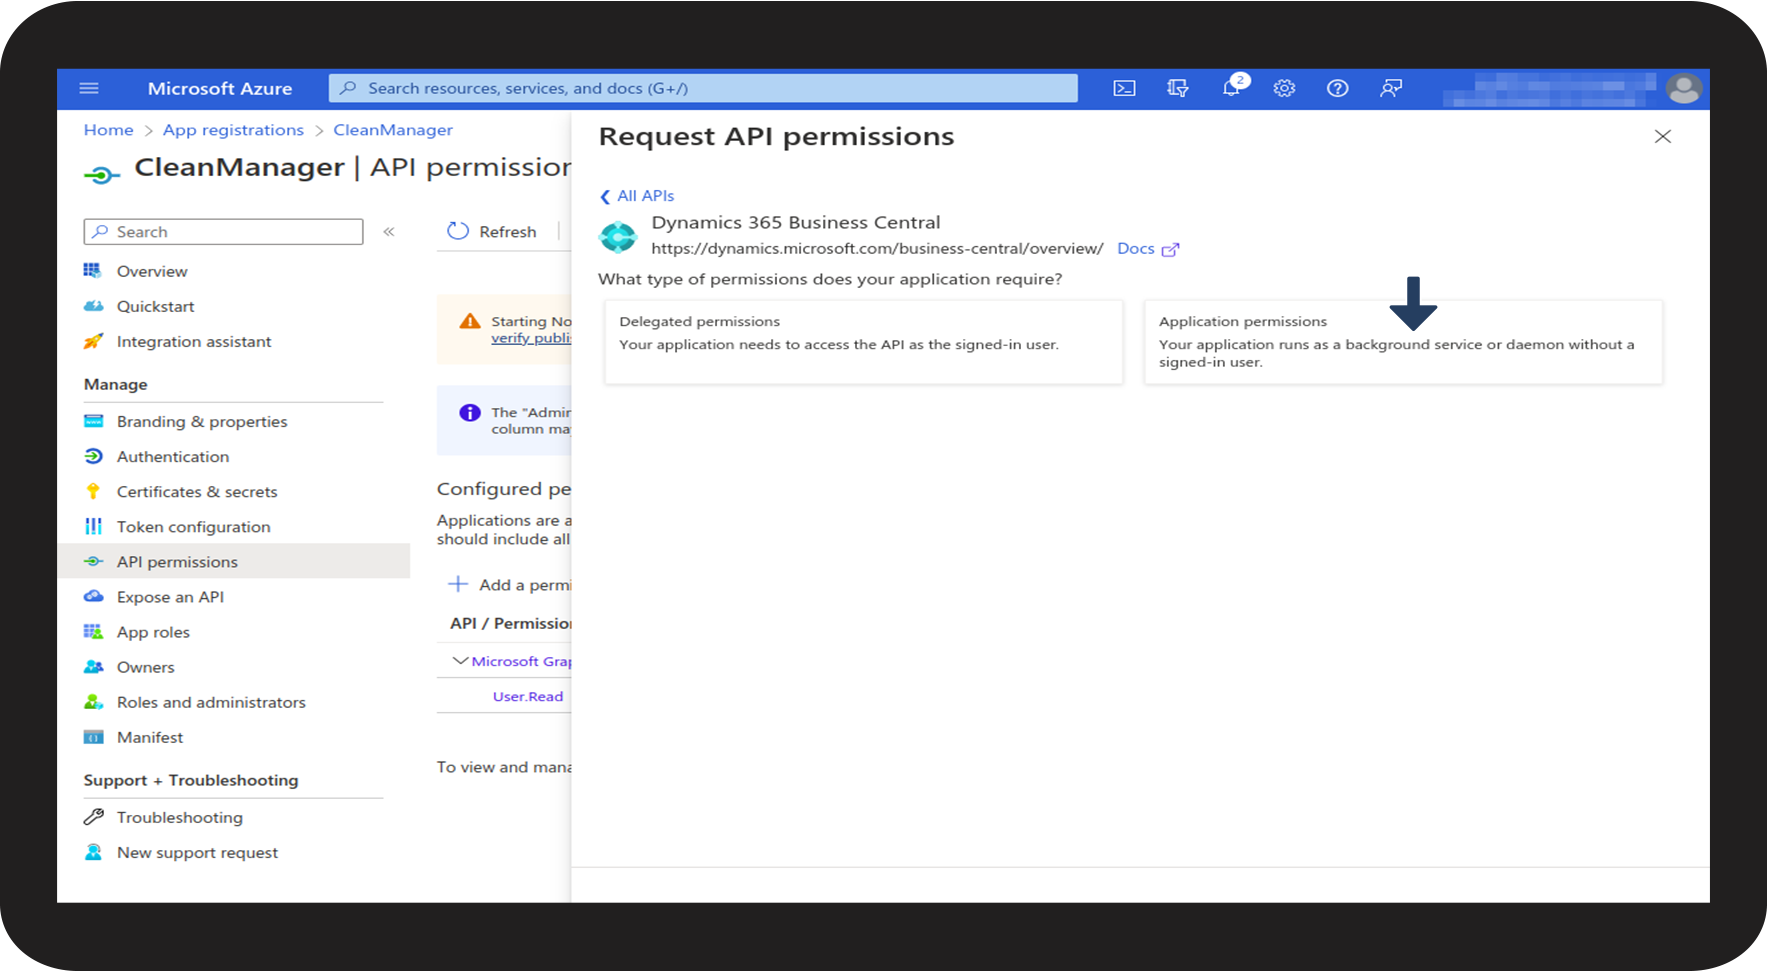
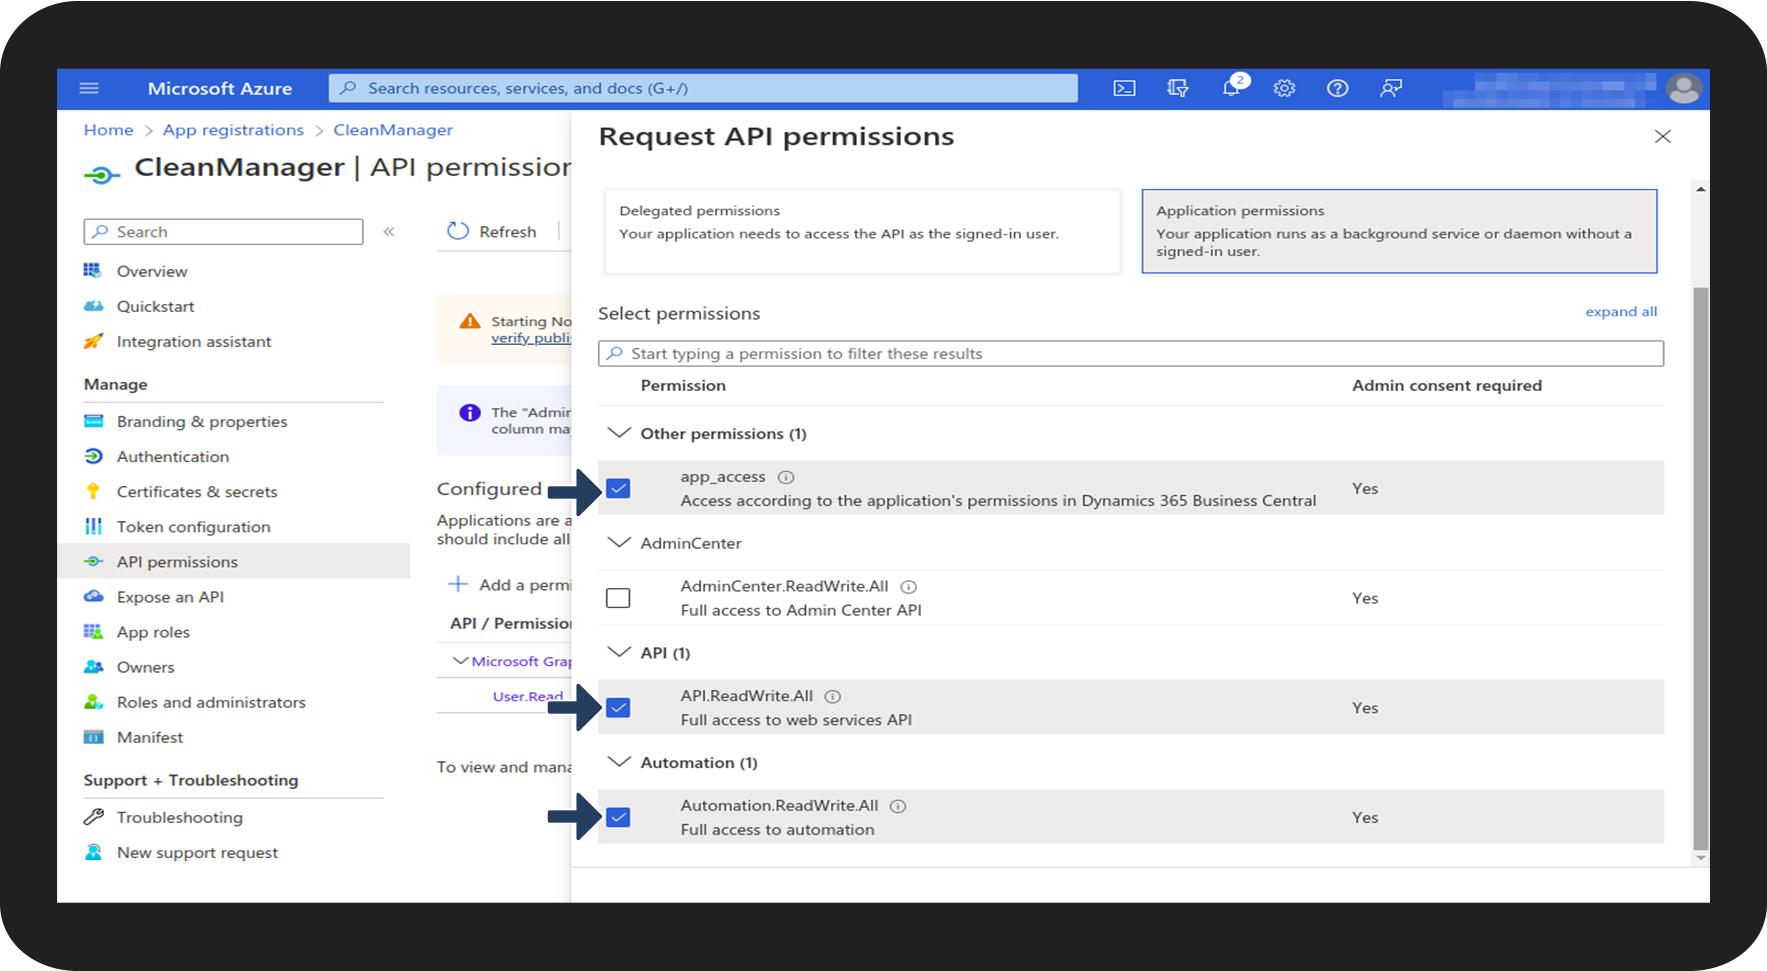
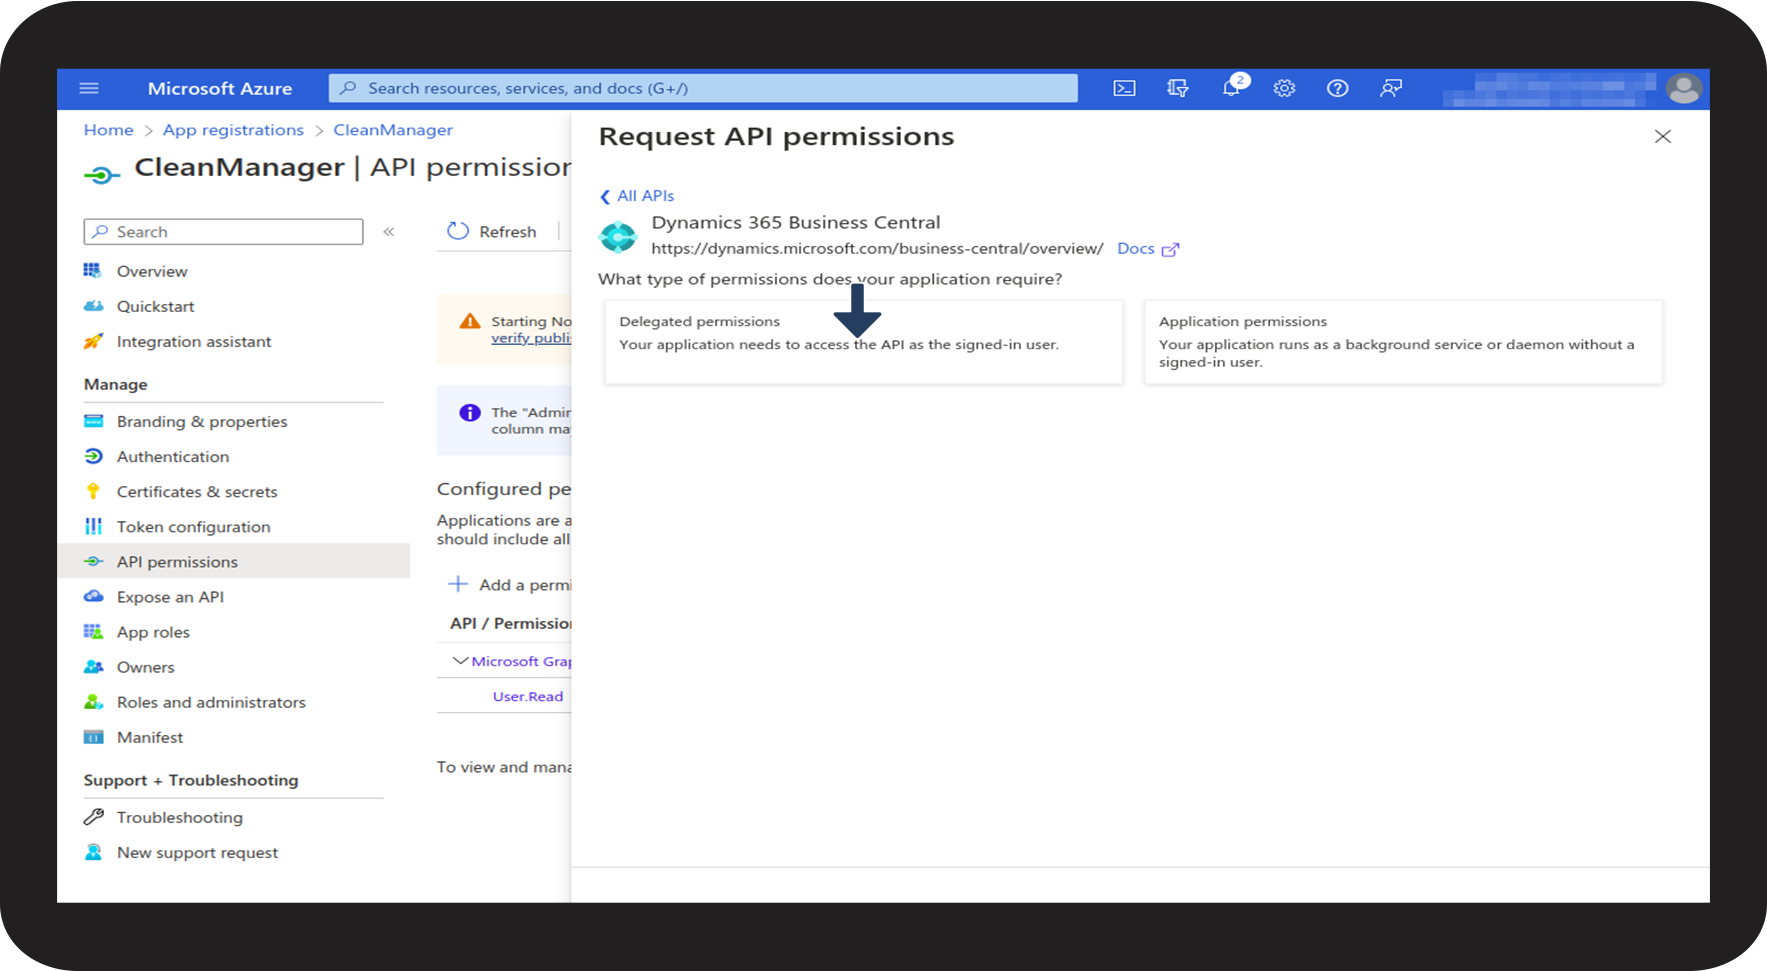
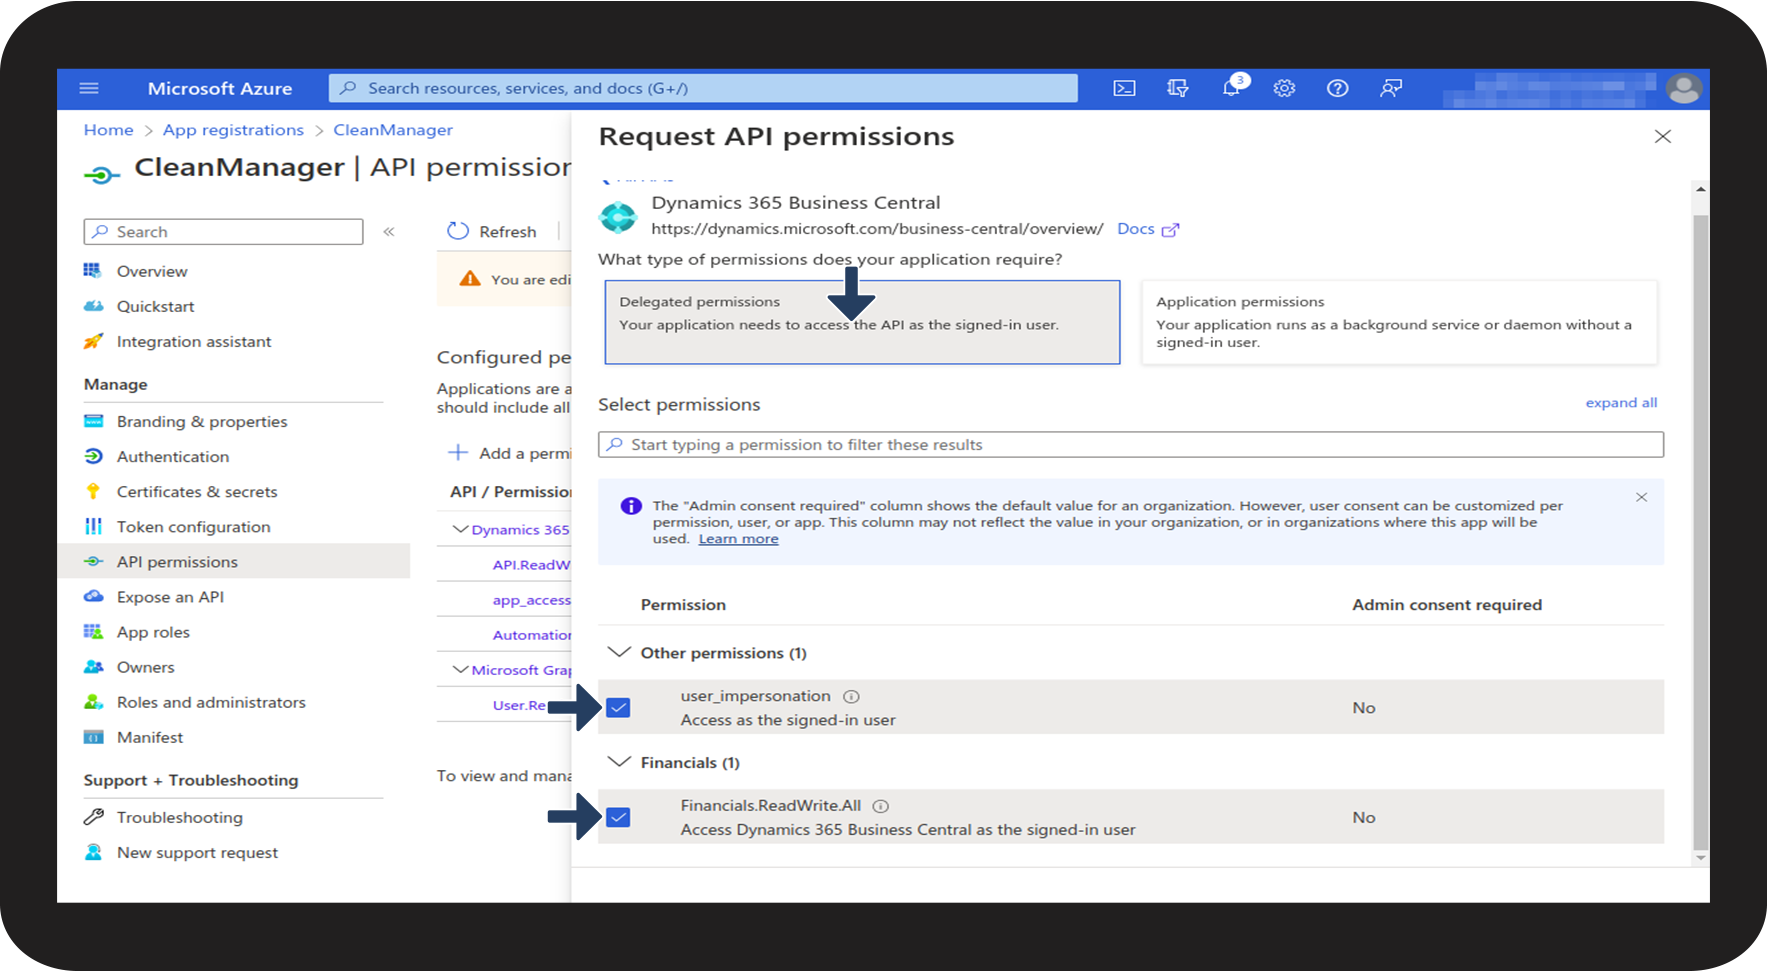
1.2 This is how you grant a permission to Dynamics 365 Business Central in Azure.
To be able to successfully set up an integration between CleanManager and Dynamics 365 Business Central, it is important to grant a permission for this in Azure.
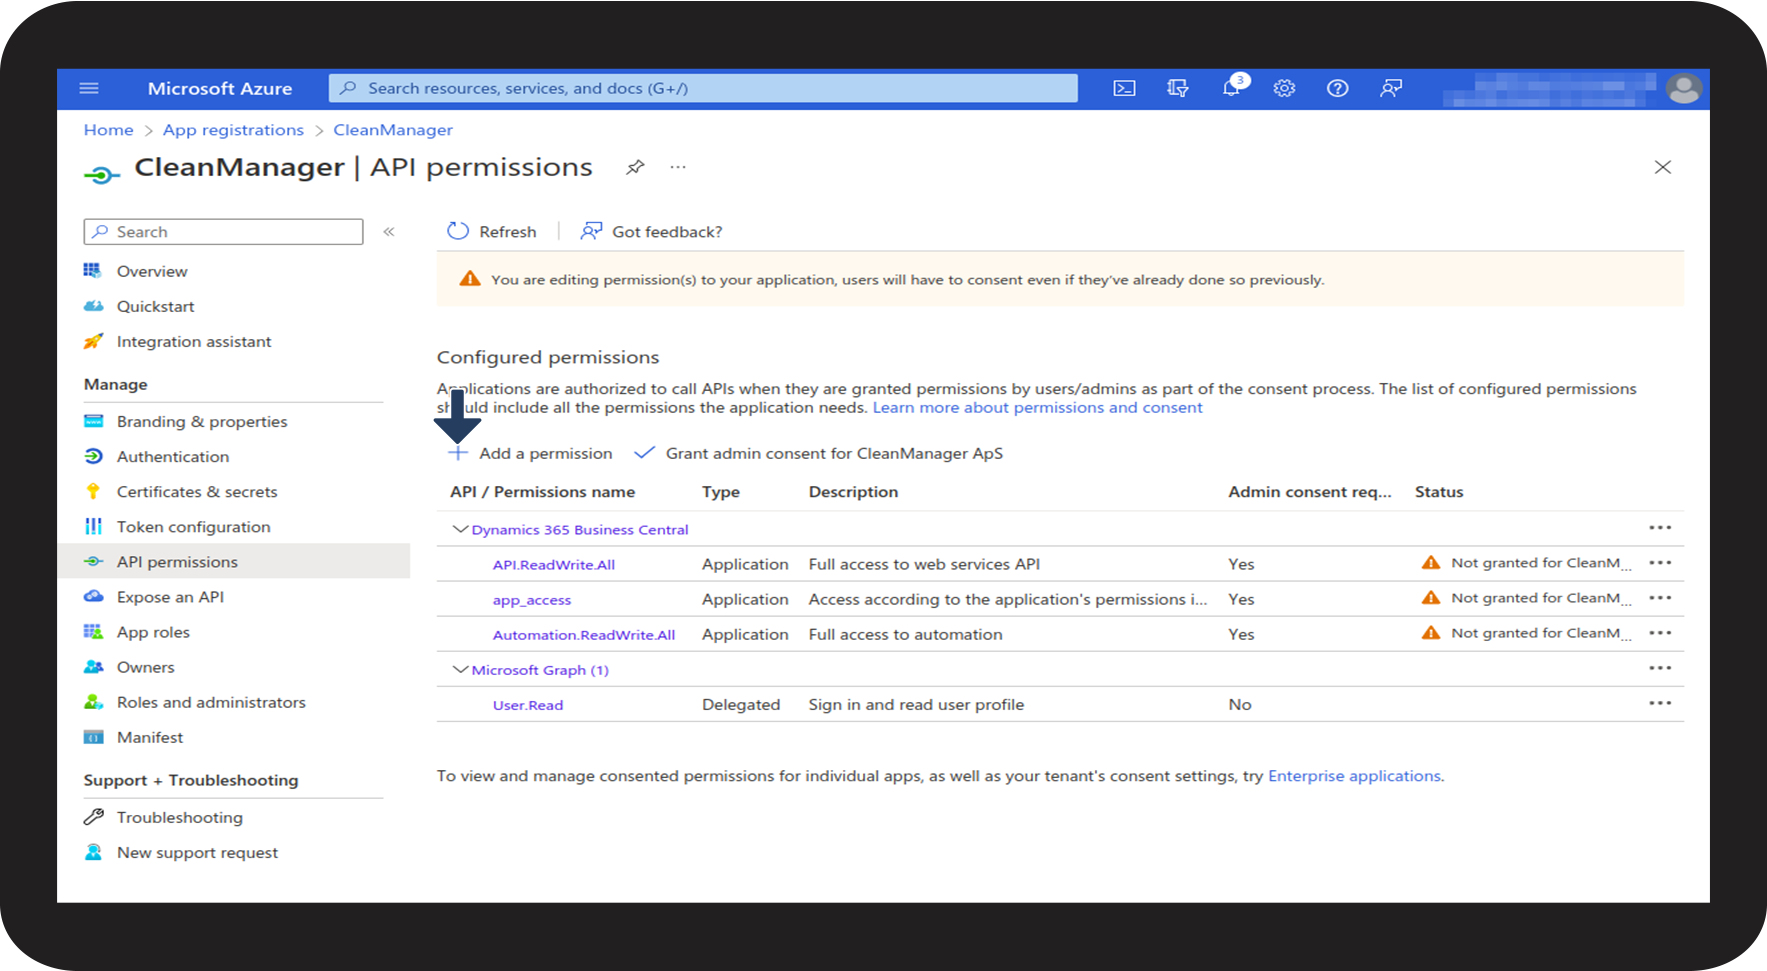
1.3 Part: This is how you complete the setup in Azure

Continue to the second part of the integration for Dynamics 365 Business Central - PART 2: Business Central
Read about how to set up the integration in Business Central: Integration setup for Dynamics 365 Business Central - Part 2: 365 Dynamics Business Central