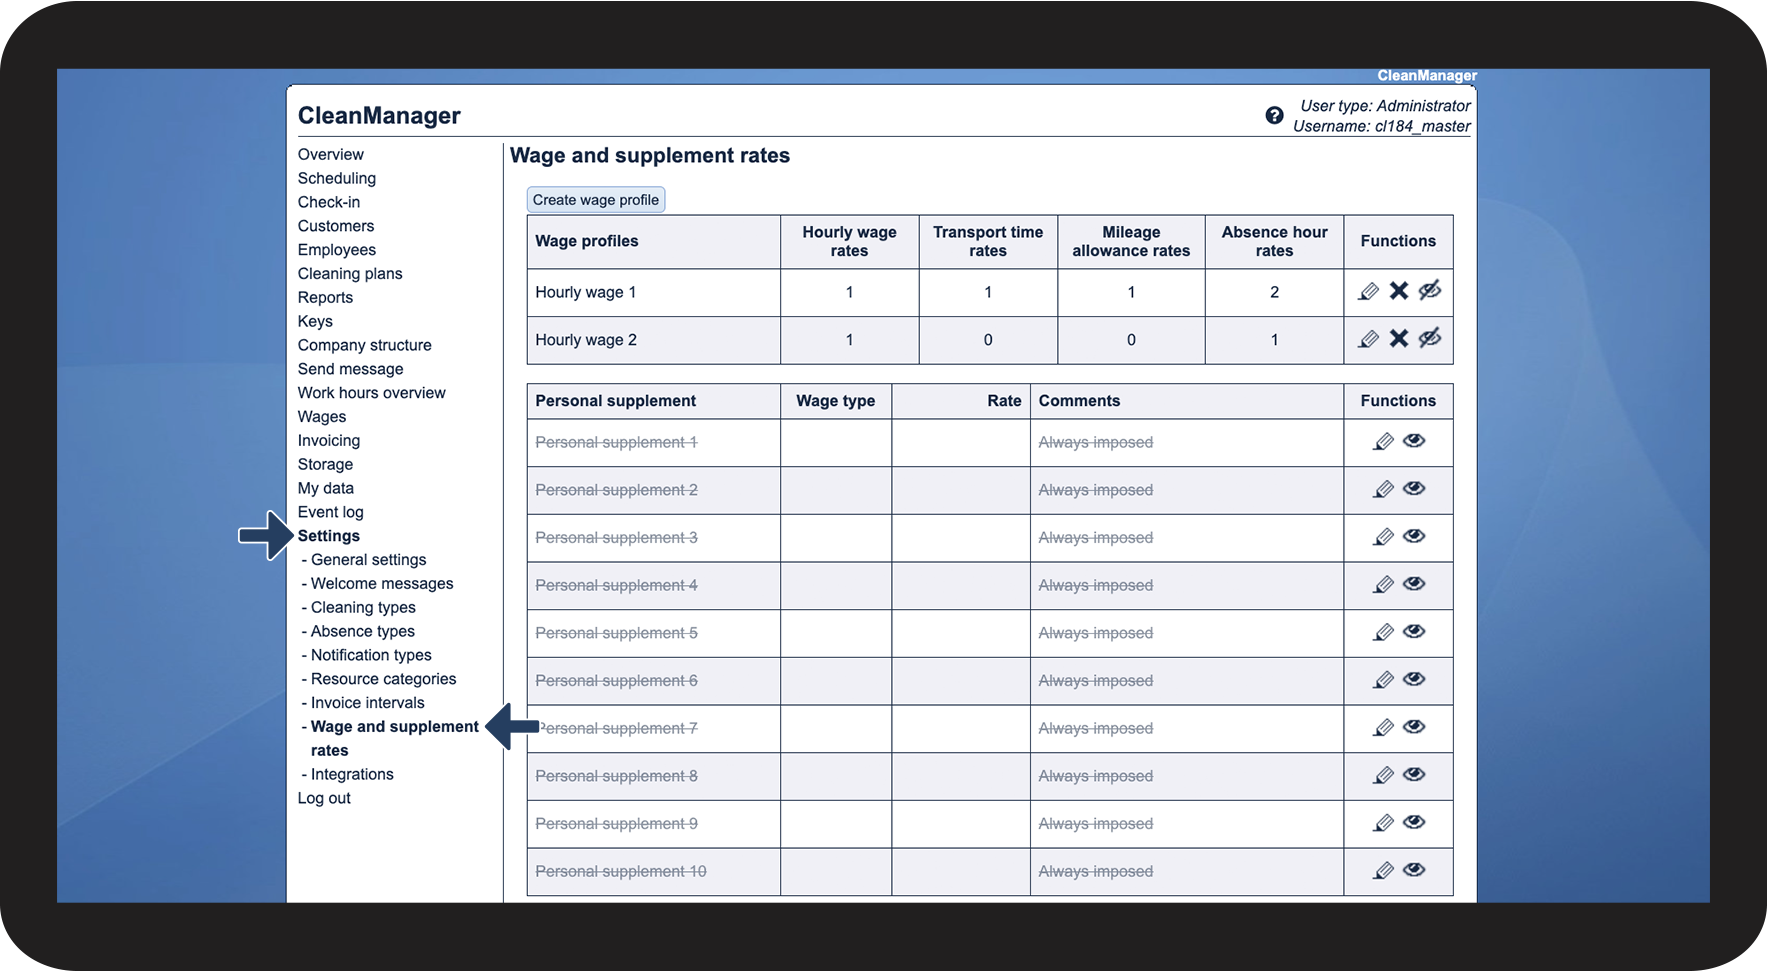
What are wage profiles, and how can I use them to set up the hourly wages of my employees?
Wage profiles are customizable settings within the system that determine the hourly rates for various aspects of work, including regular working hours, transport time, distance travelled, and absence hours. These wage profiles can be assigned to employees, to ensure that all employees get their correct individual wages. Wage profiles can also be set up to change between different rates automatically depending on the employee's months of employment.
In this article, you will learn how to set up wage profiles and assign them to employees:
- How do I set up a wage profile?
- How do I edit a wage profile?
- How do I hide a wage profile?
- How do I delete a wage profile?
- How do I assign a wage profile to an employee?
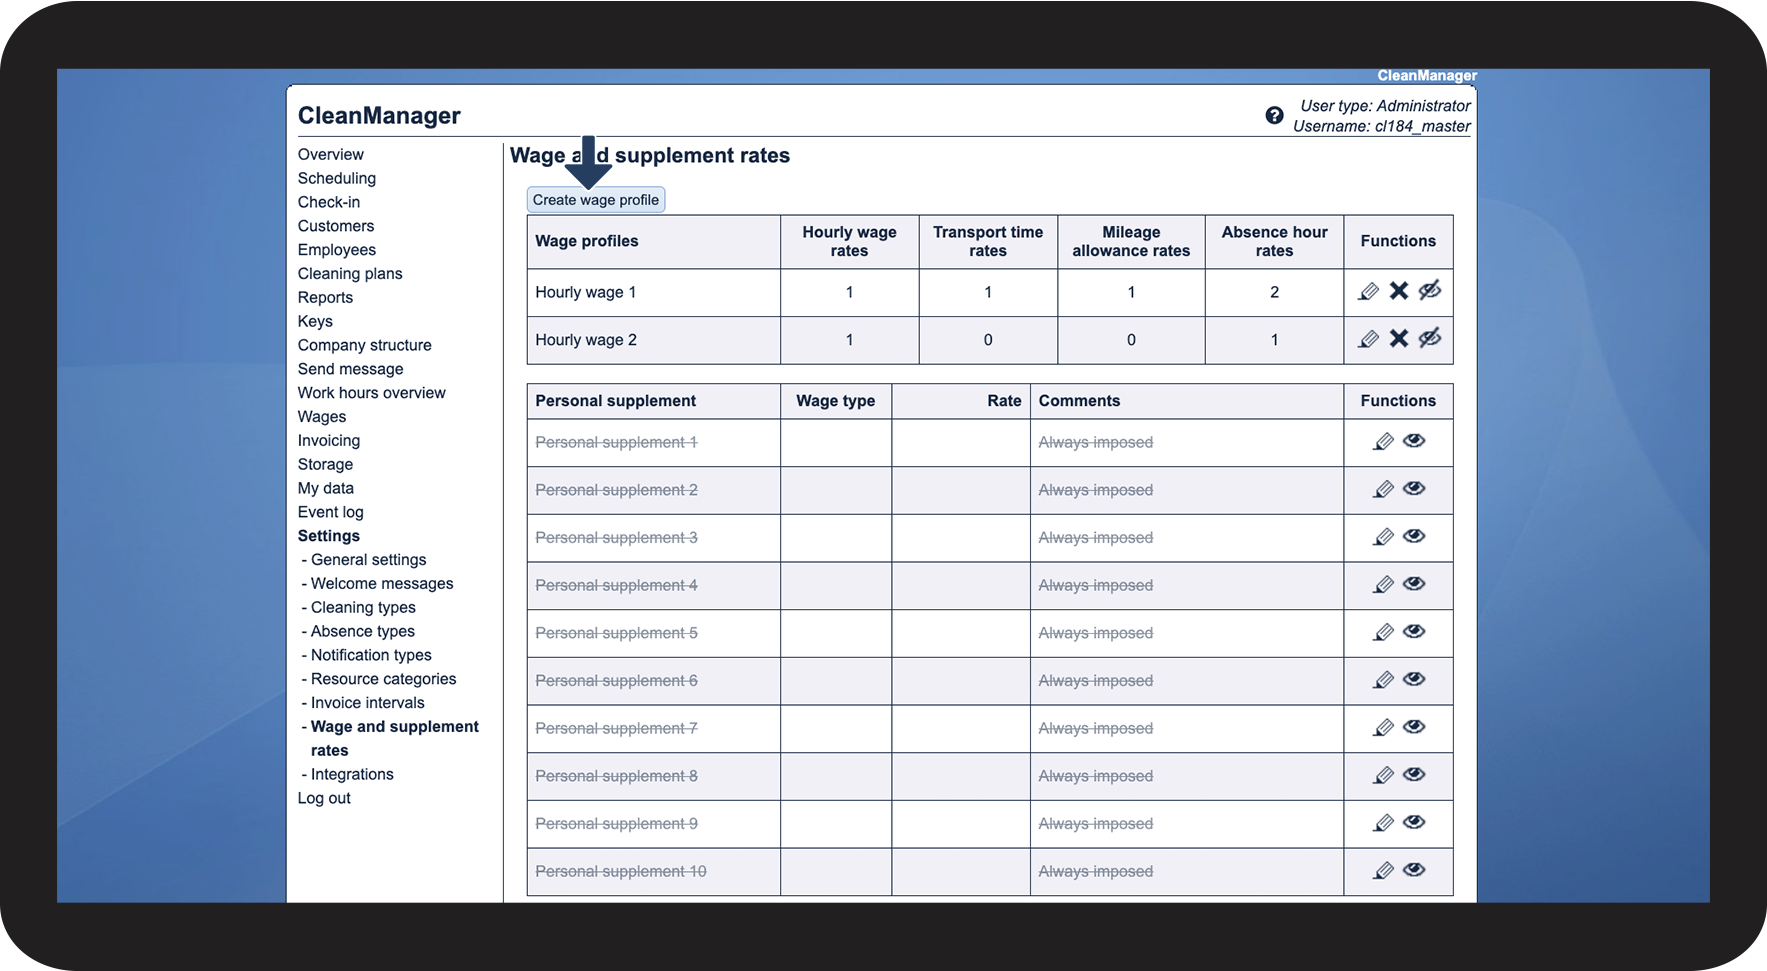
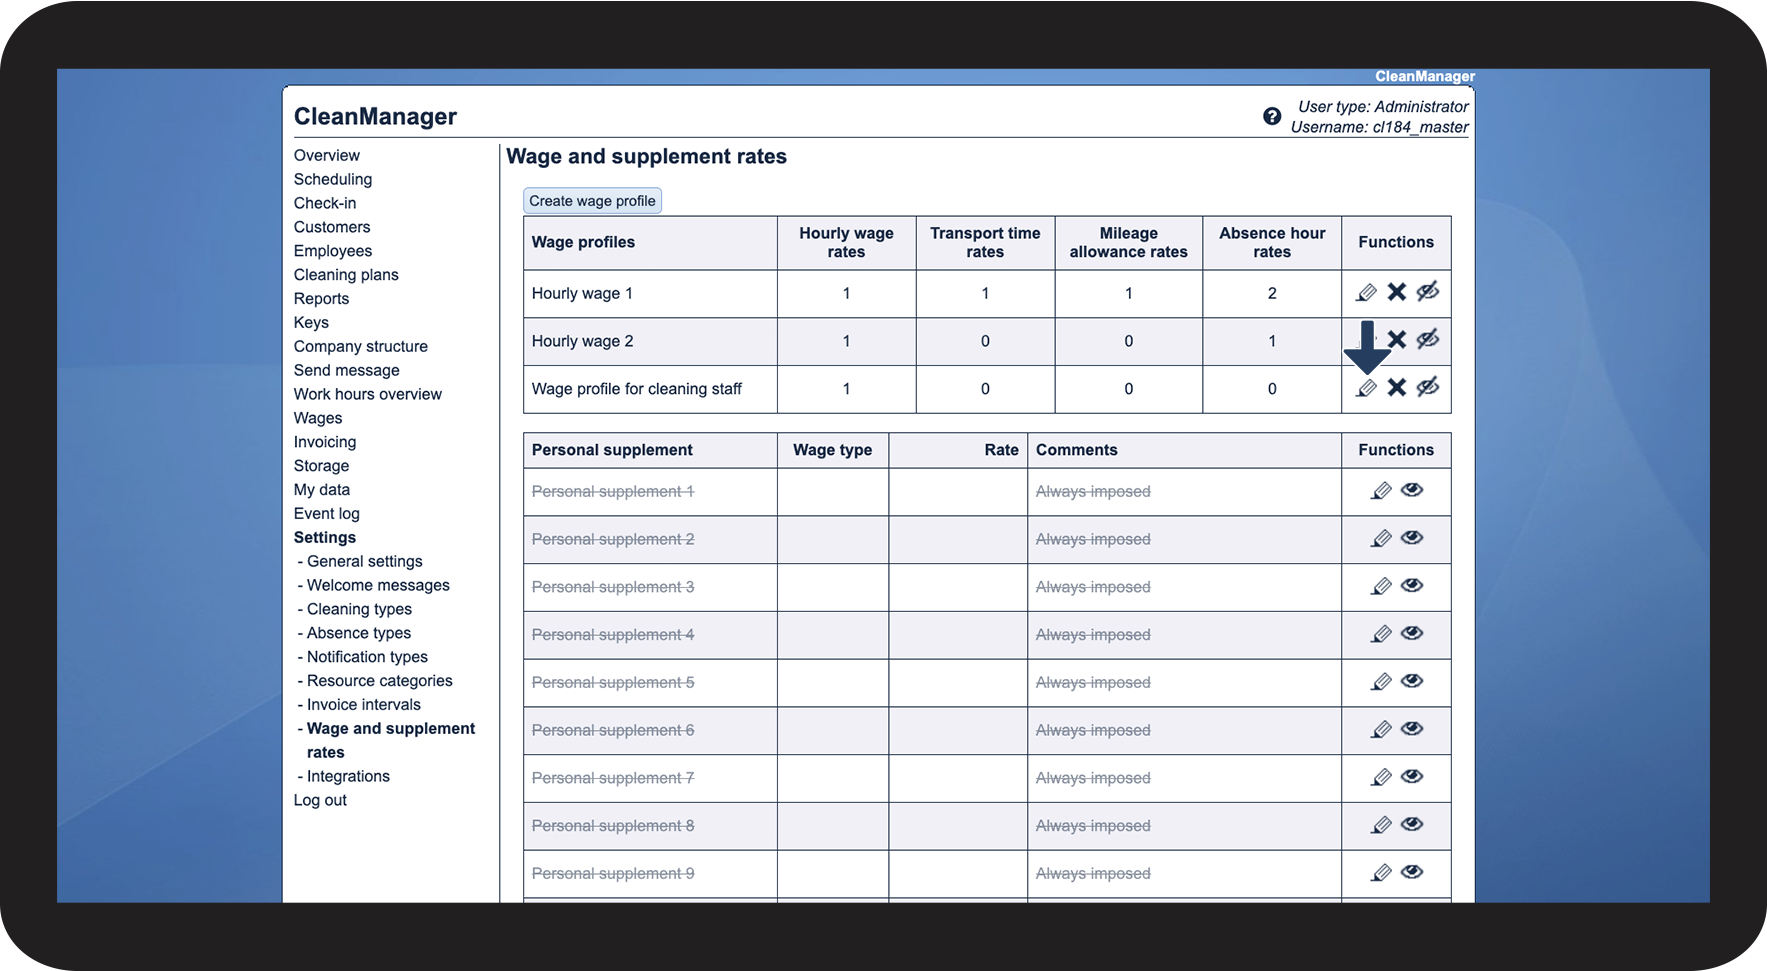
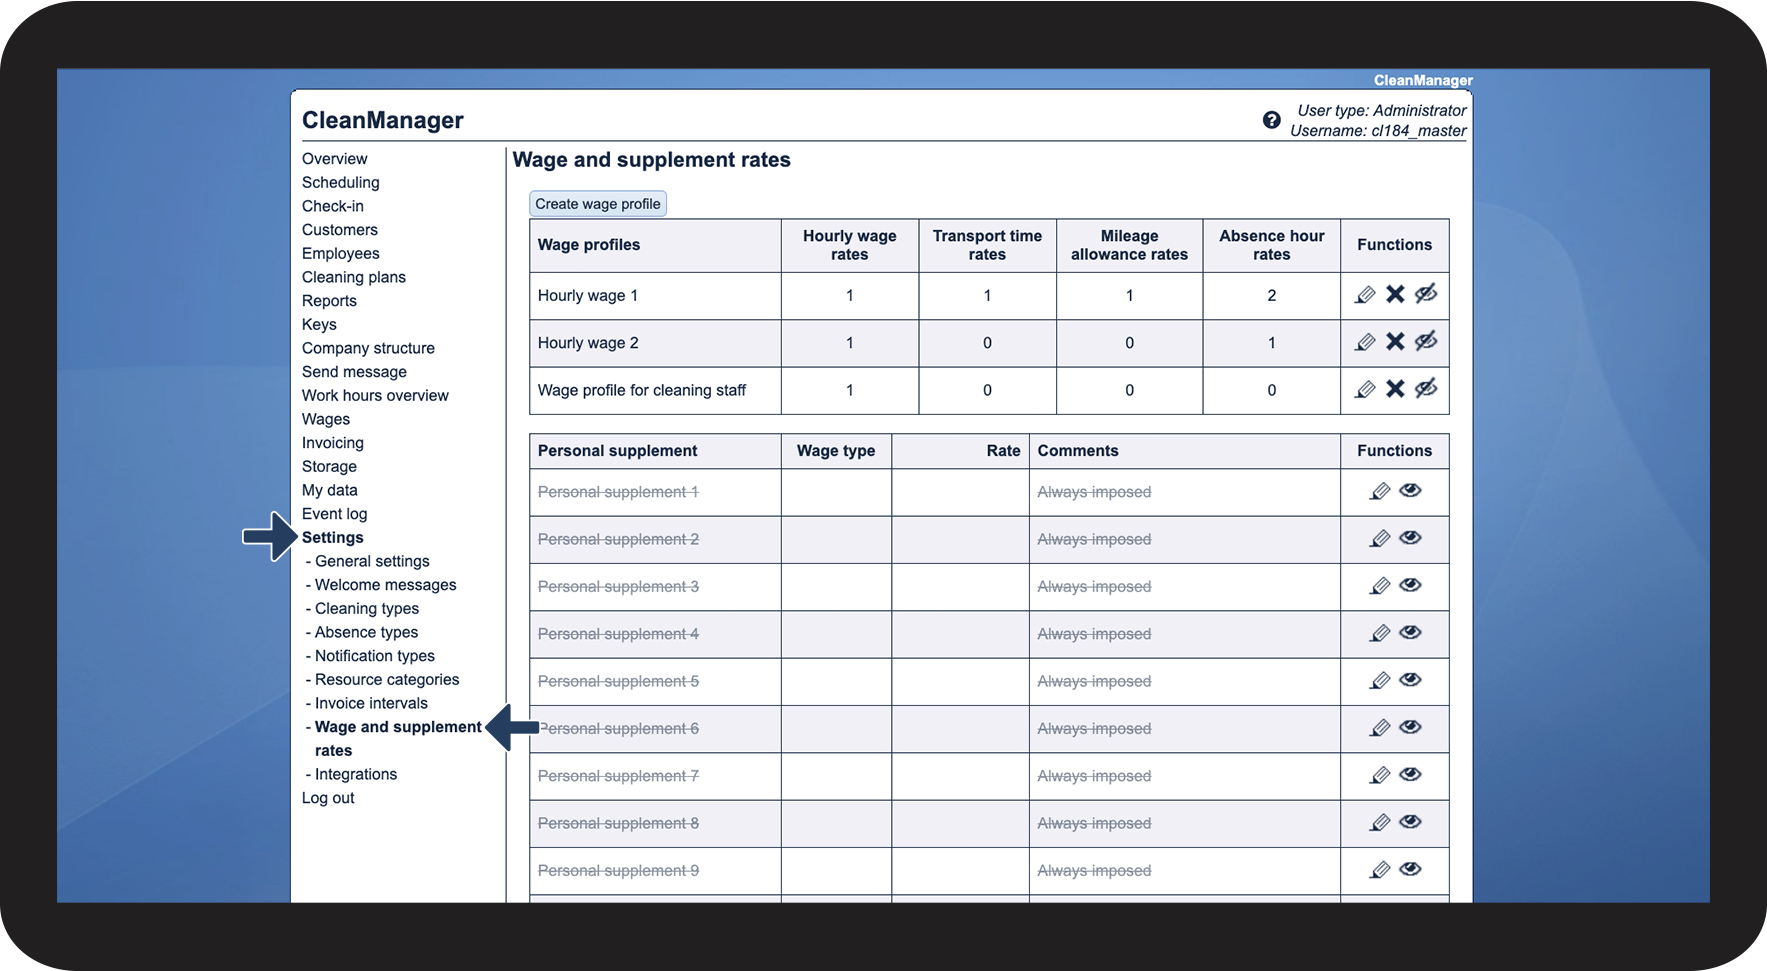
Setting up a wage profile
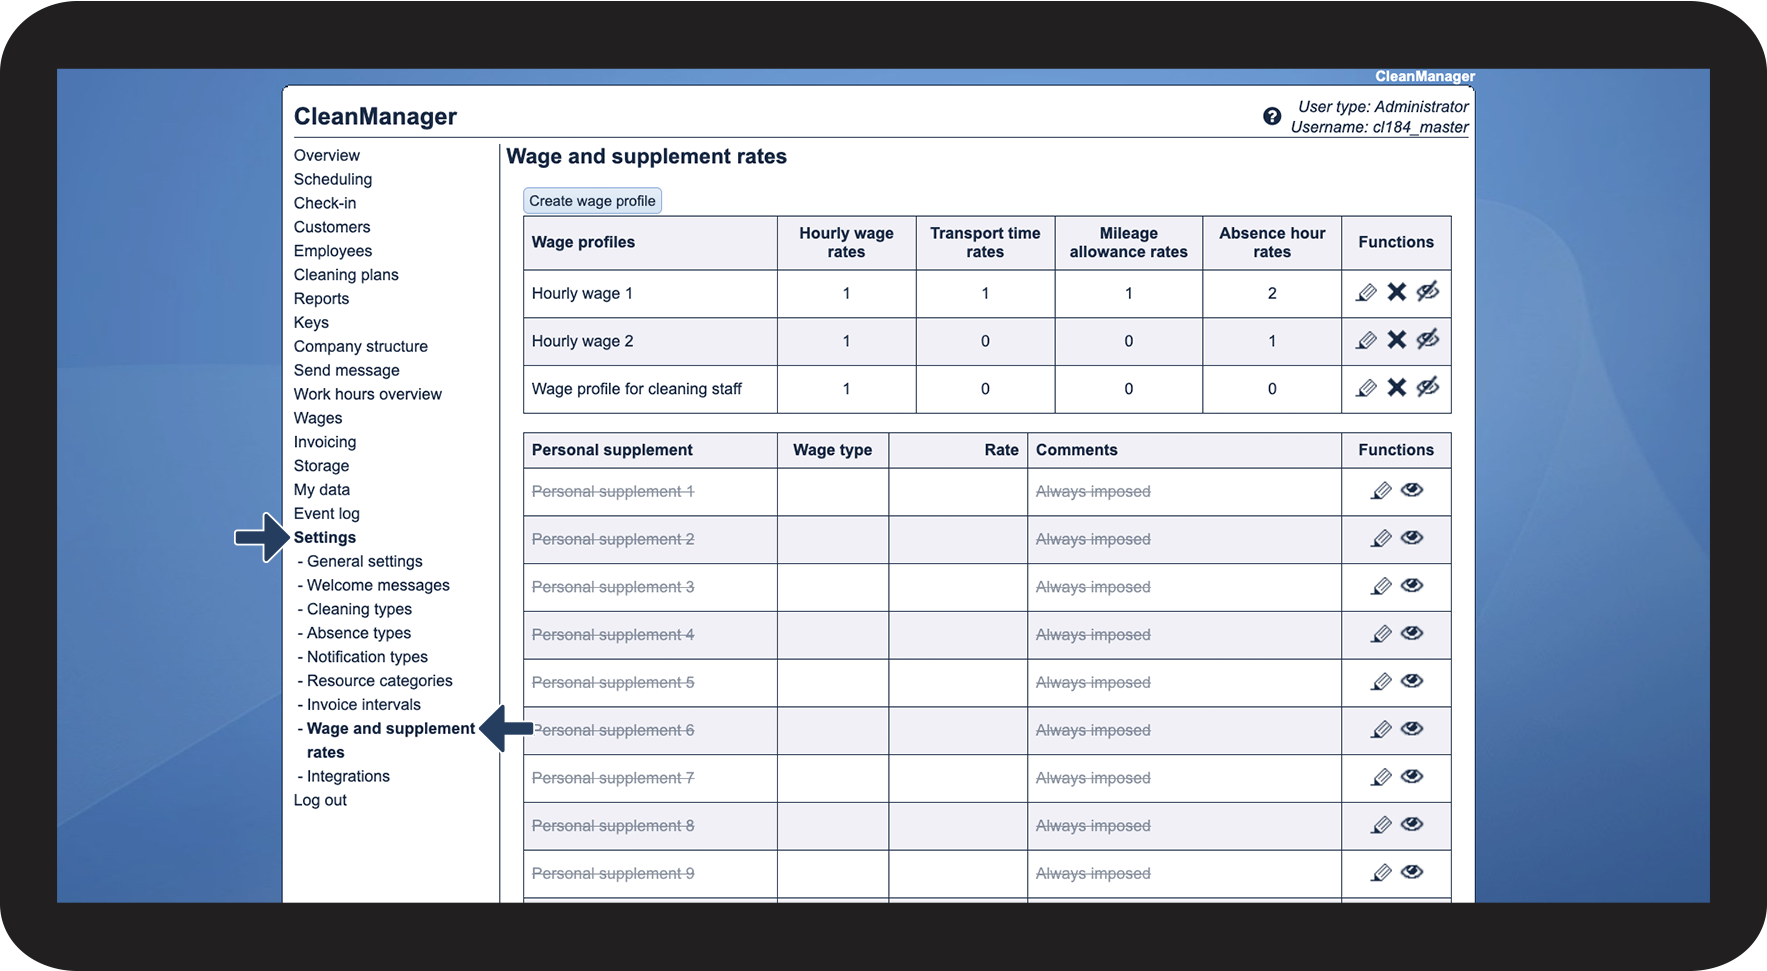
When you create an account in CleanManager, a default wage profile named Hourly wage 1 will be automatically generated for you. This serves as the starting point for configuring your wage settings.
Transition for Users with Wage Calculation Add-On
For users who had activated the Wage Calculation add-on module prior to the update, their existing three hourly rates will be converted into three separate wage profiles. This ensures a smooth transition and preserves previous settings.
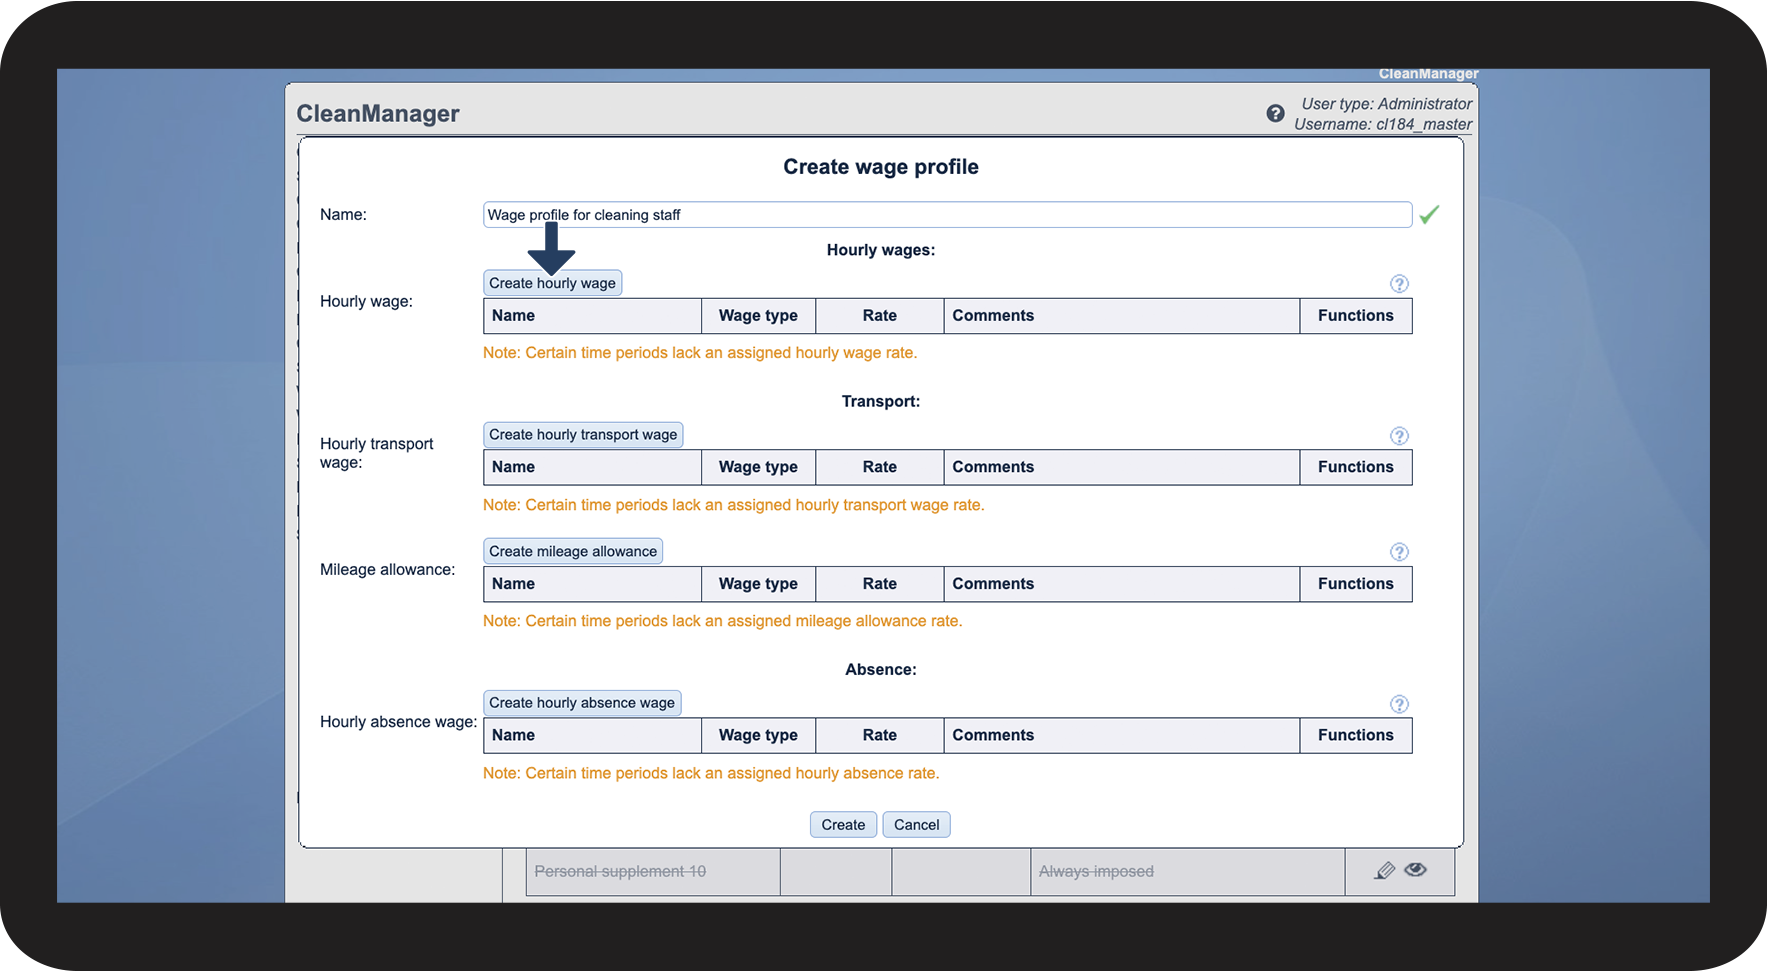
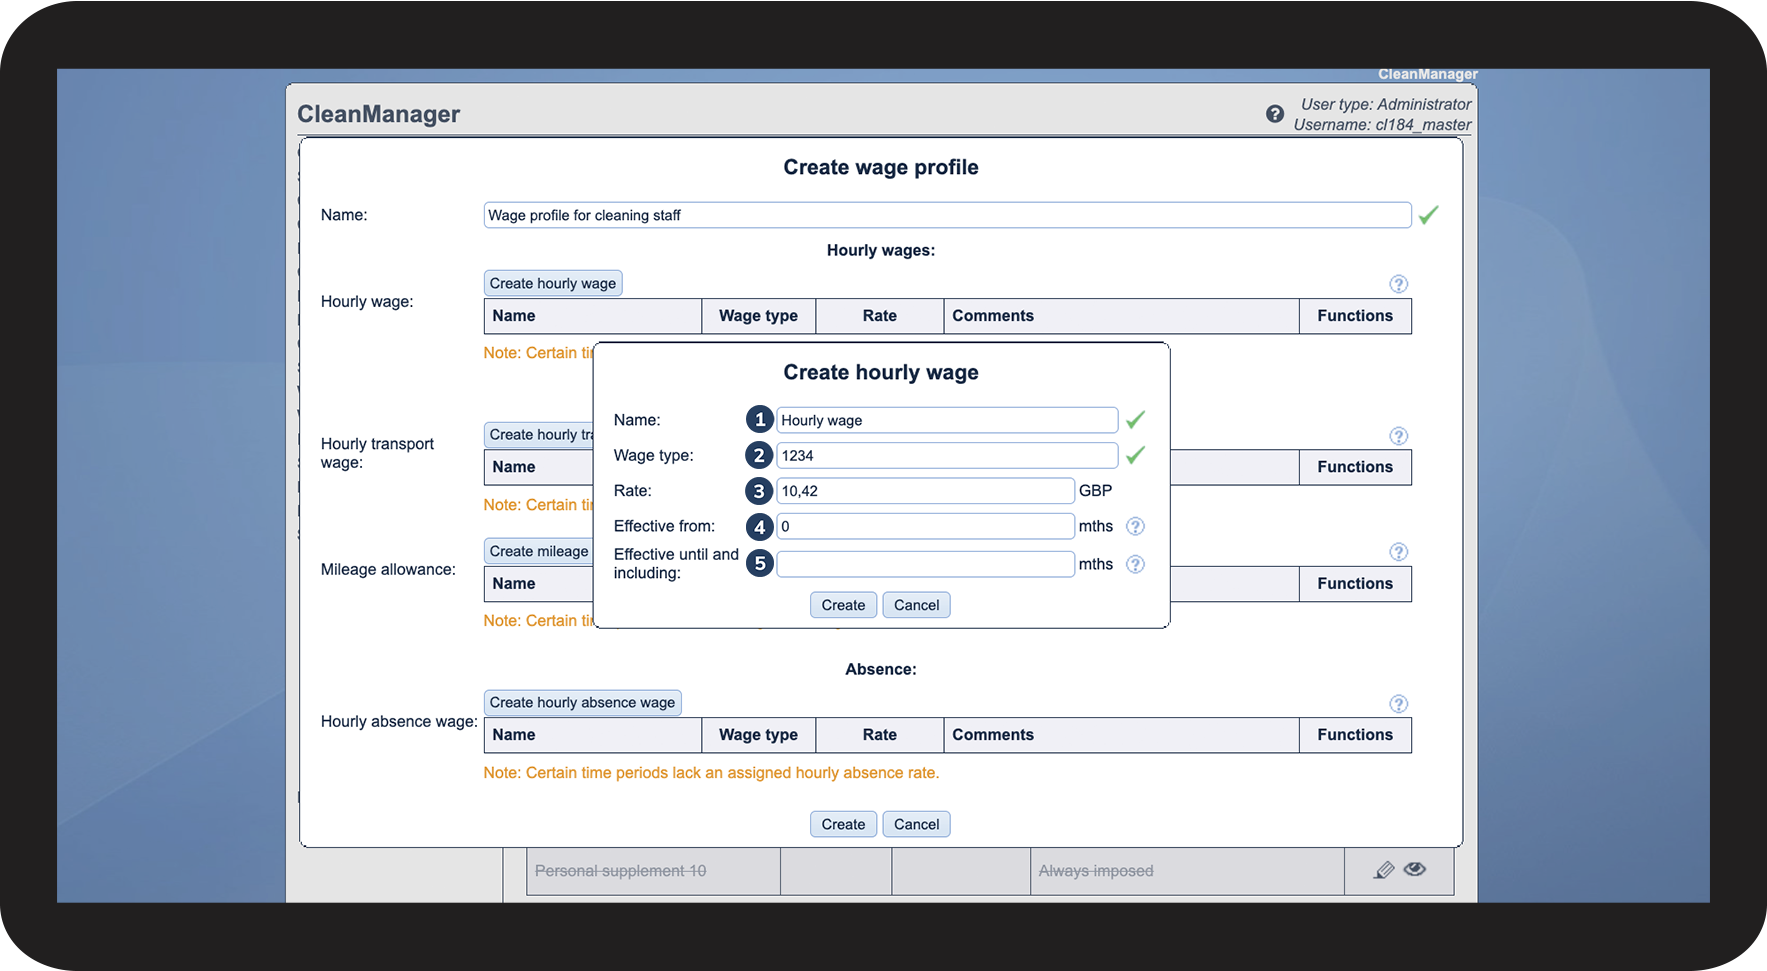
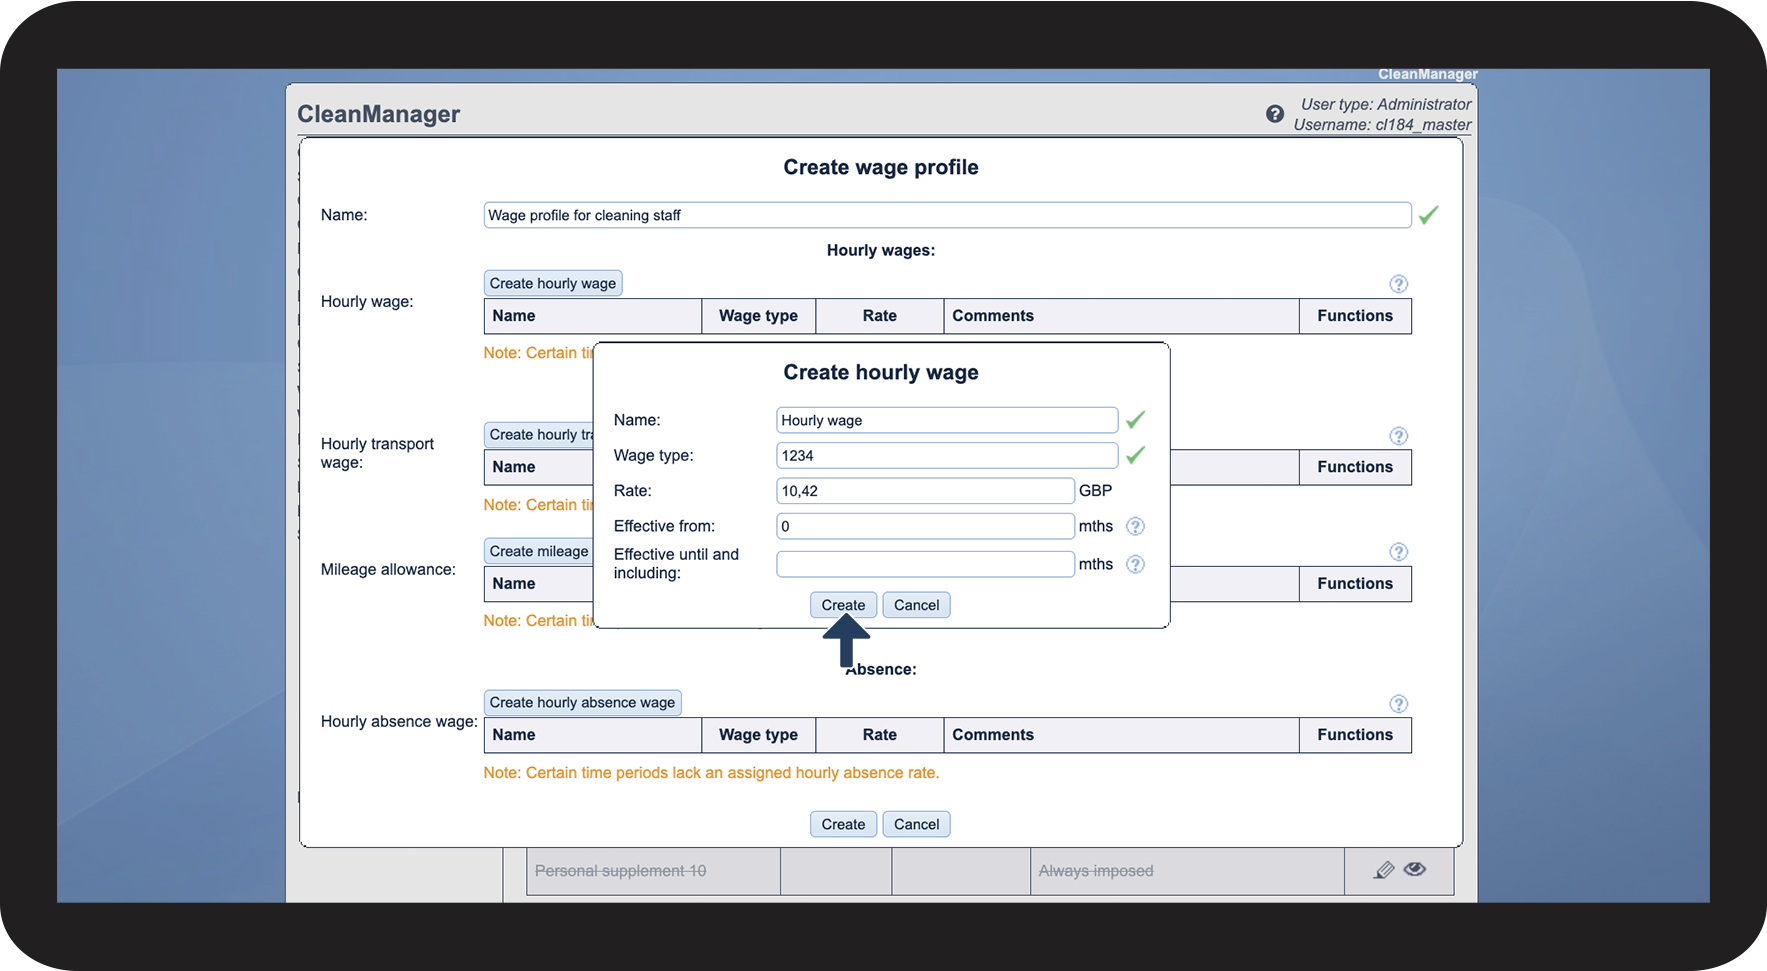
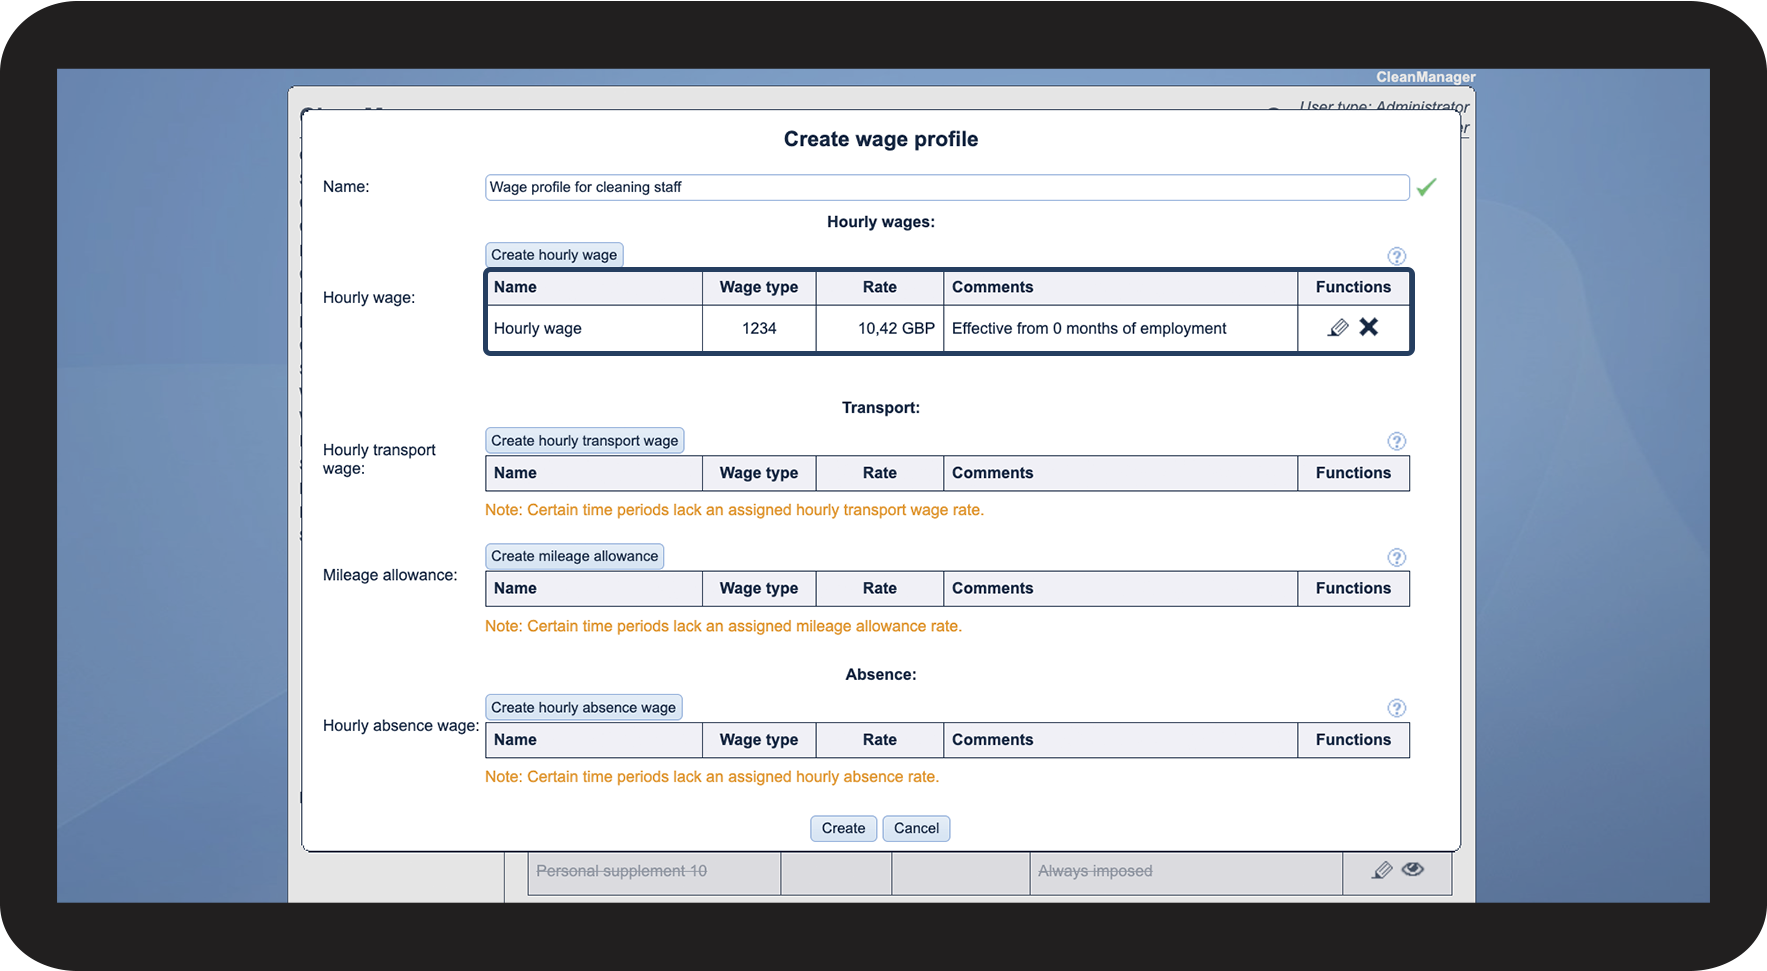
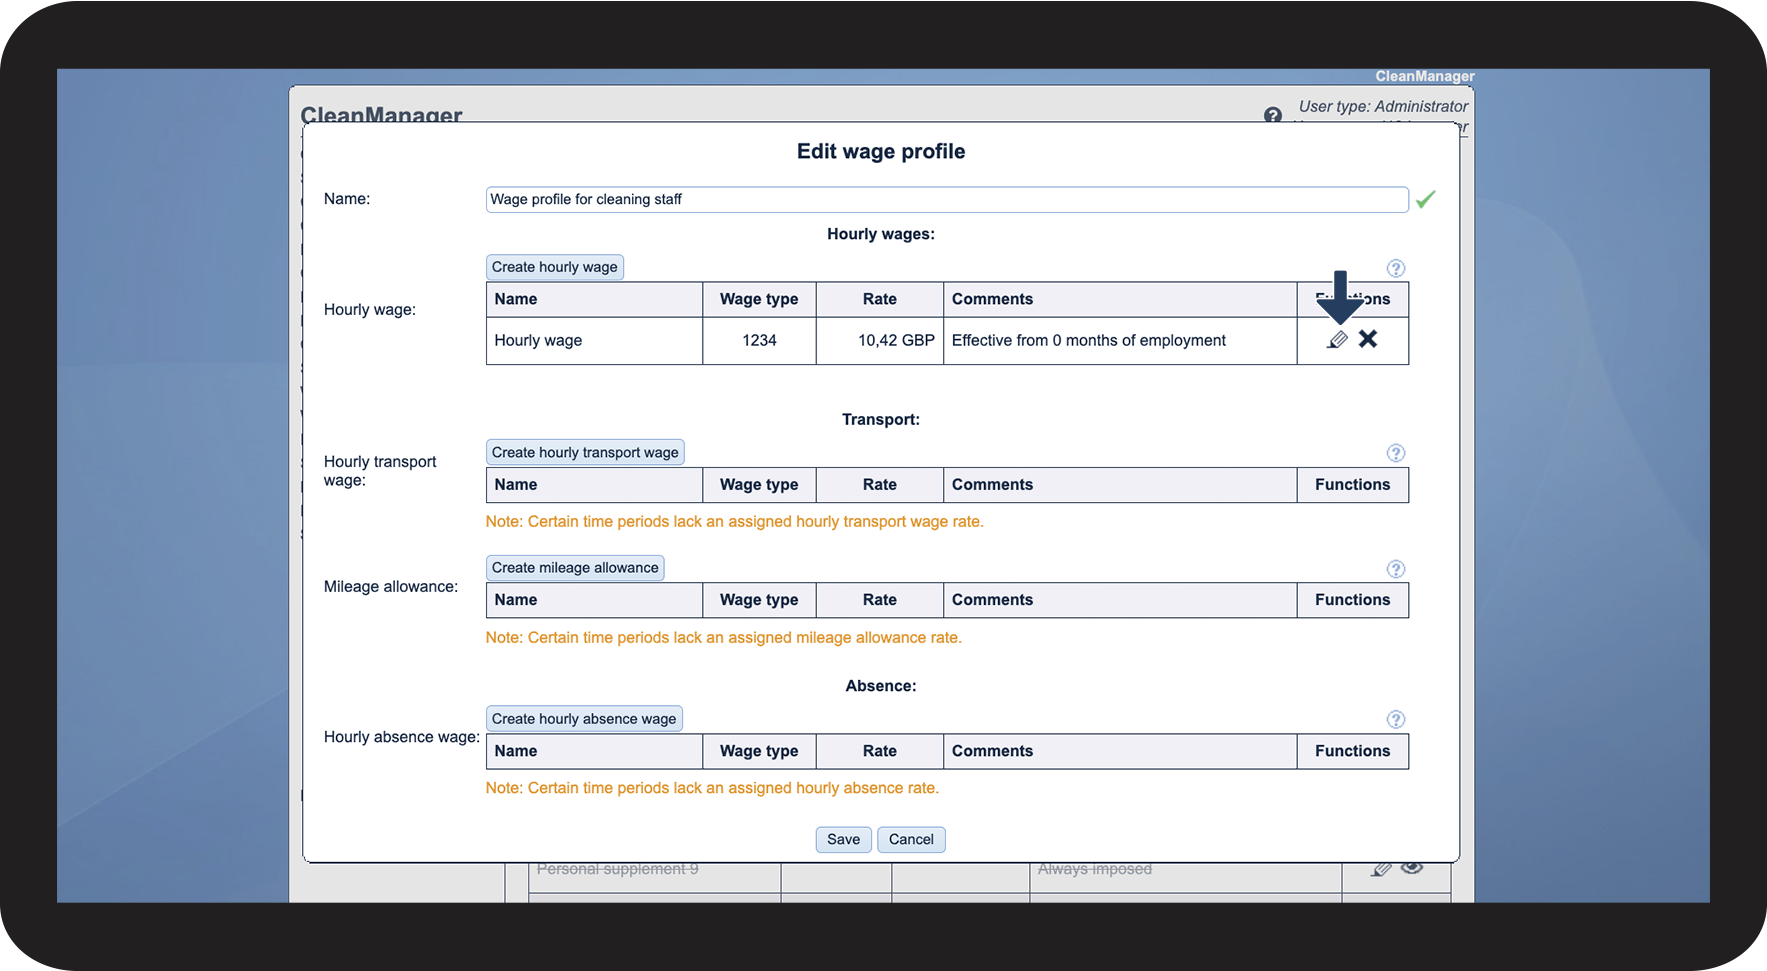
To illustrate the process, let us walk through the creation and setup of a brand-new wage profile:
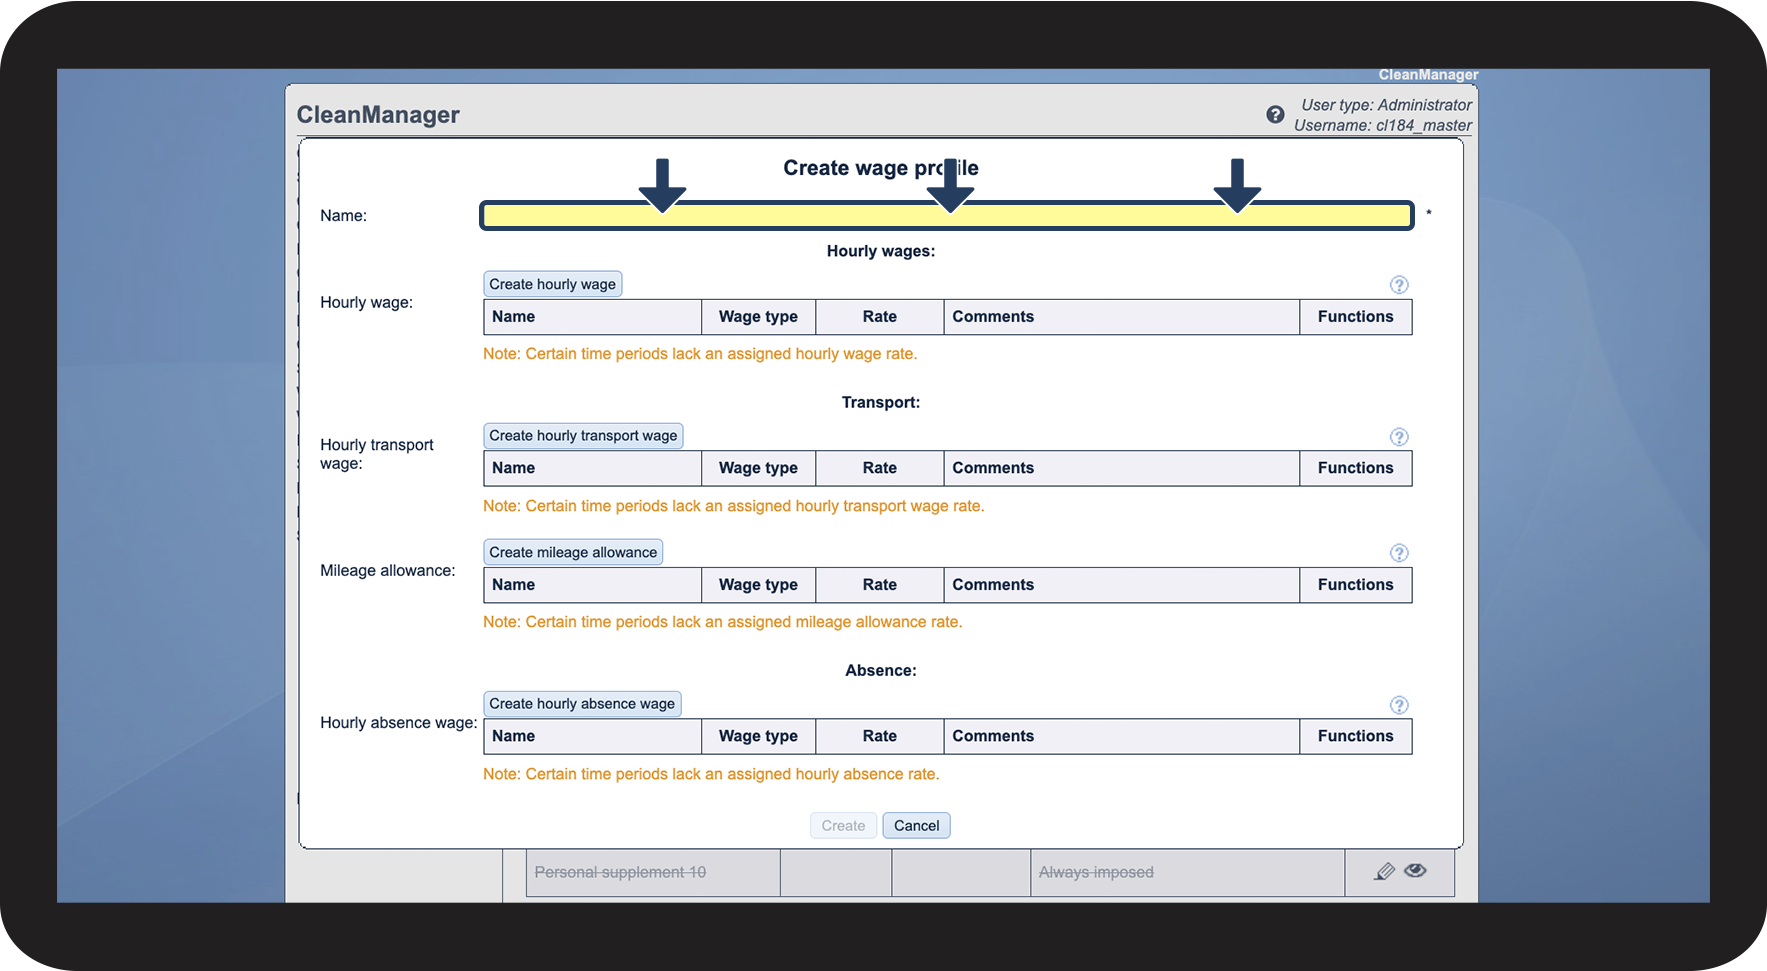
Note:
You cannot create multiple wages in one wage profile, where the time periods overlap.

INFO:
Would you like to add hourly transport wages and/or mileage allowances to your wage profile? Learn more about how to create them here: Transport rates
Would you like to add absence hour rates to your wage profile? Learn more about how to create them here: Adding rates for absence hours to the wage profiles
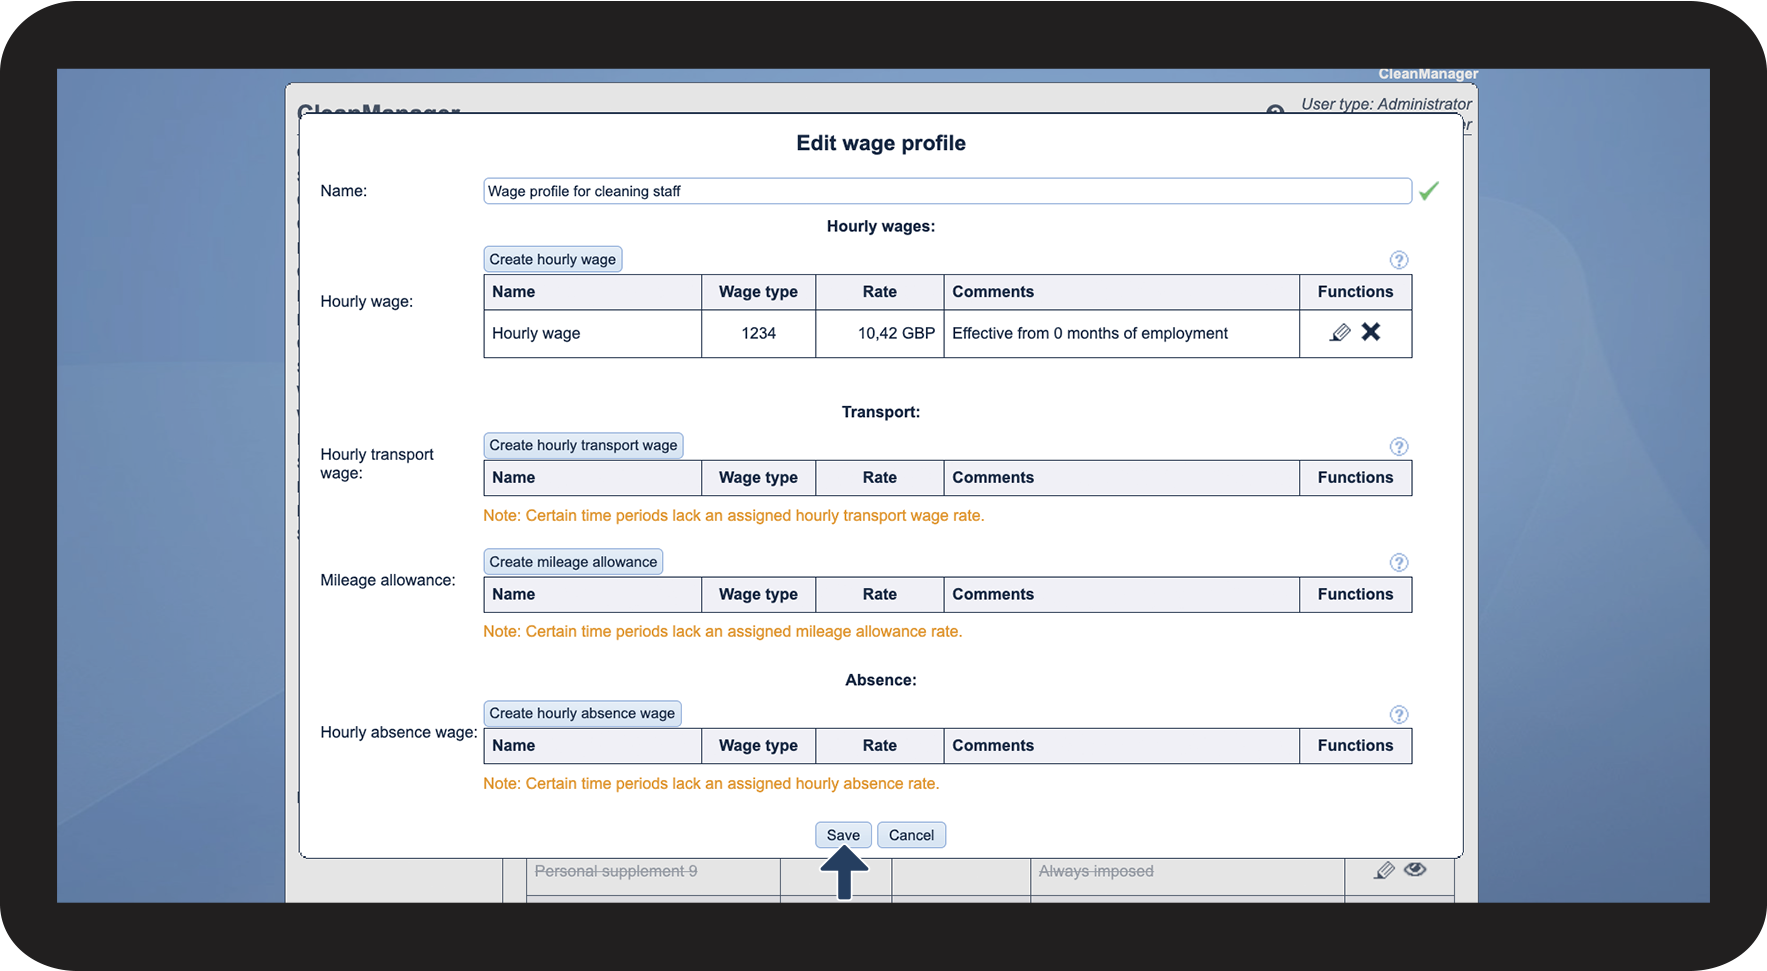
Editing a wage profile
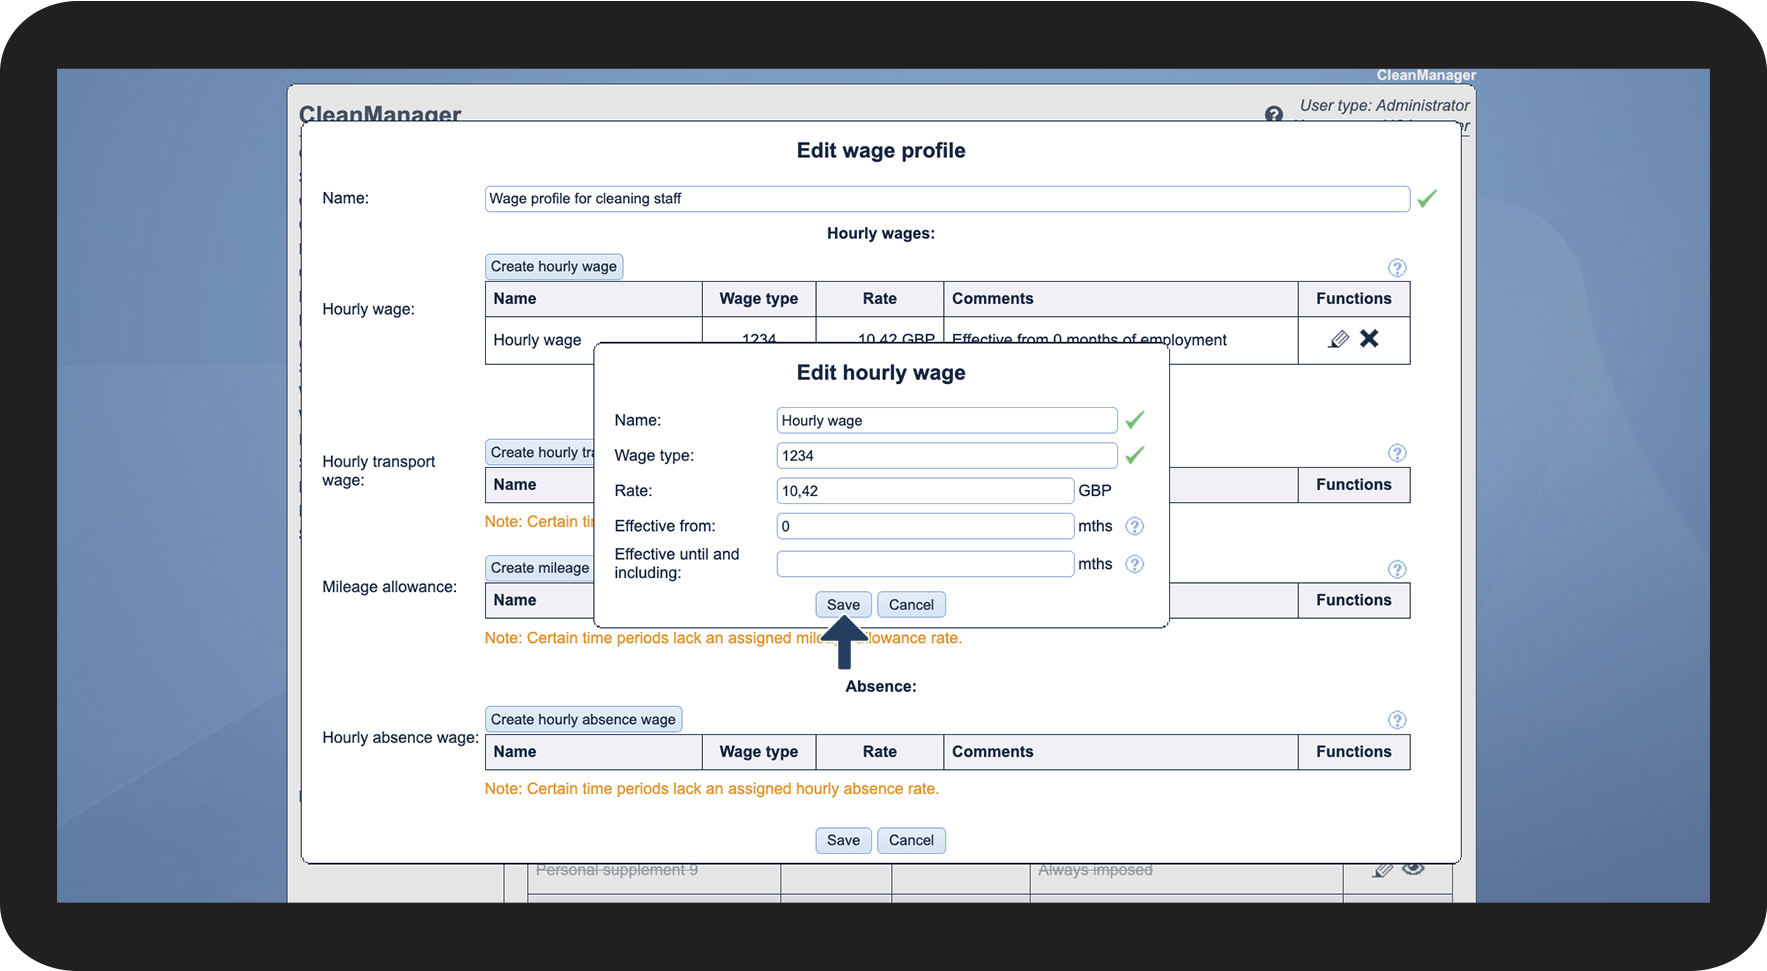

 next to the rate, you would wish to remove, then confirm the action by clicking Accept.
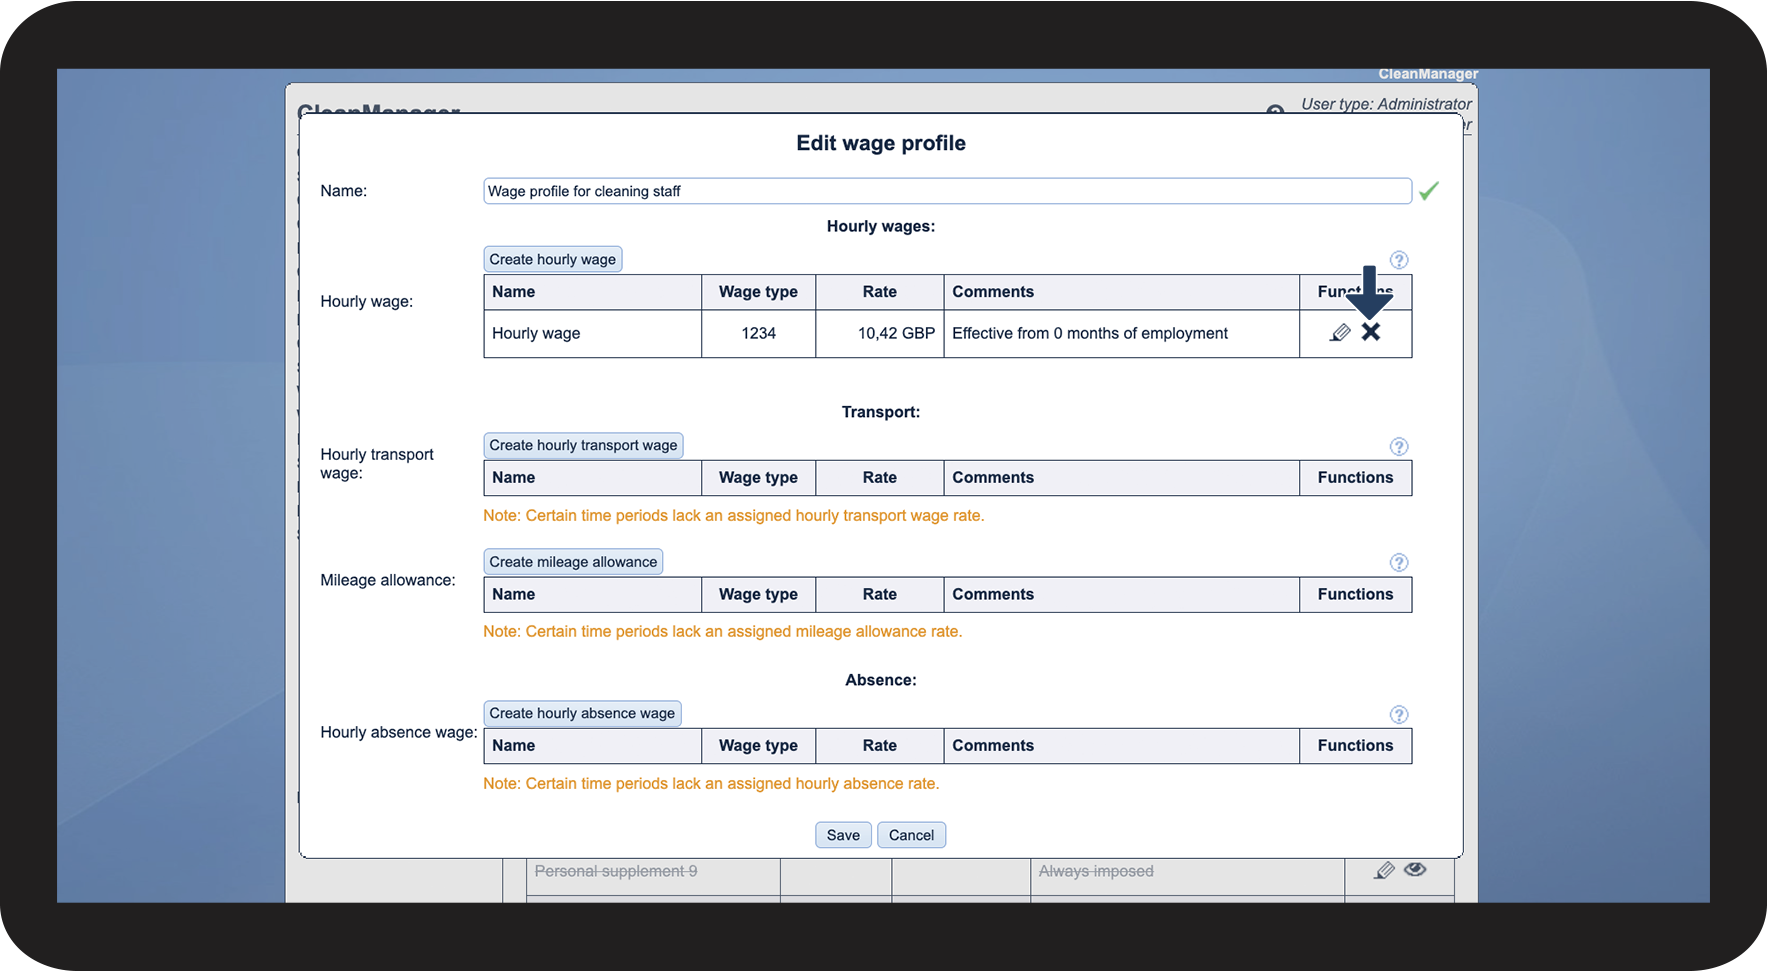
Hiding a wage profile
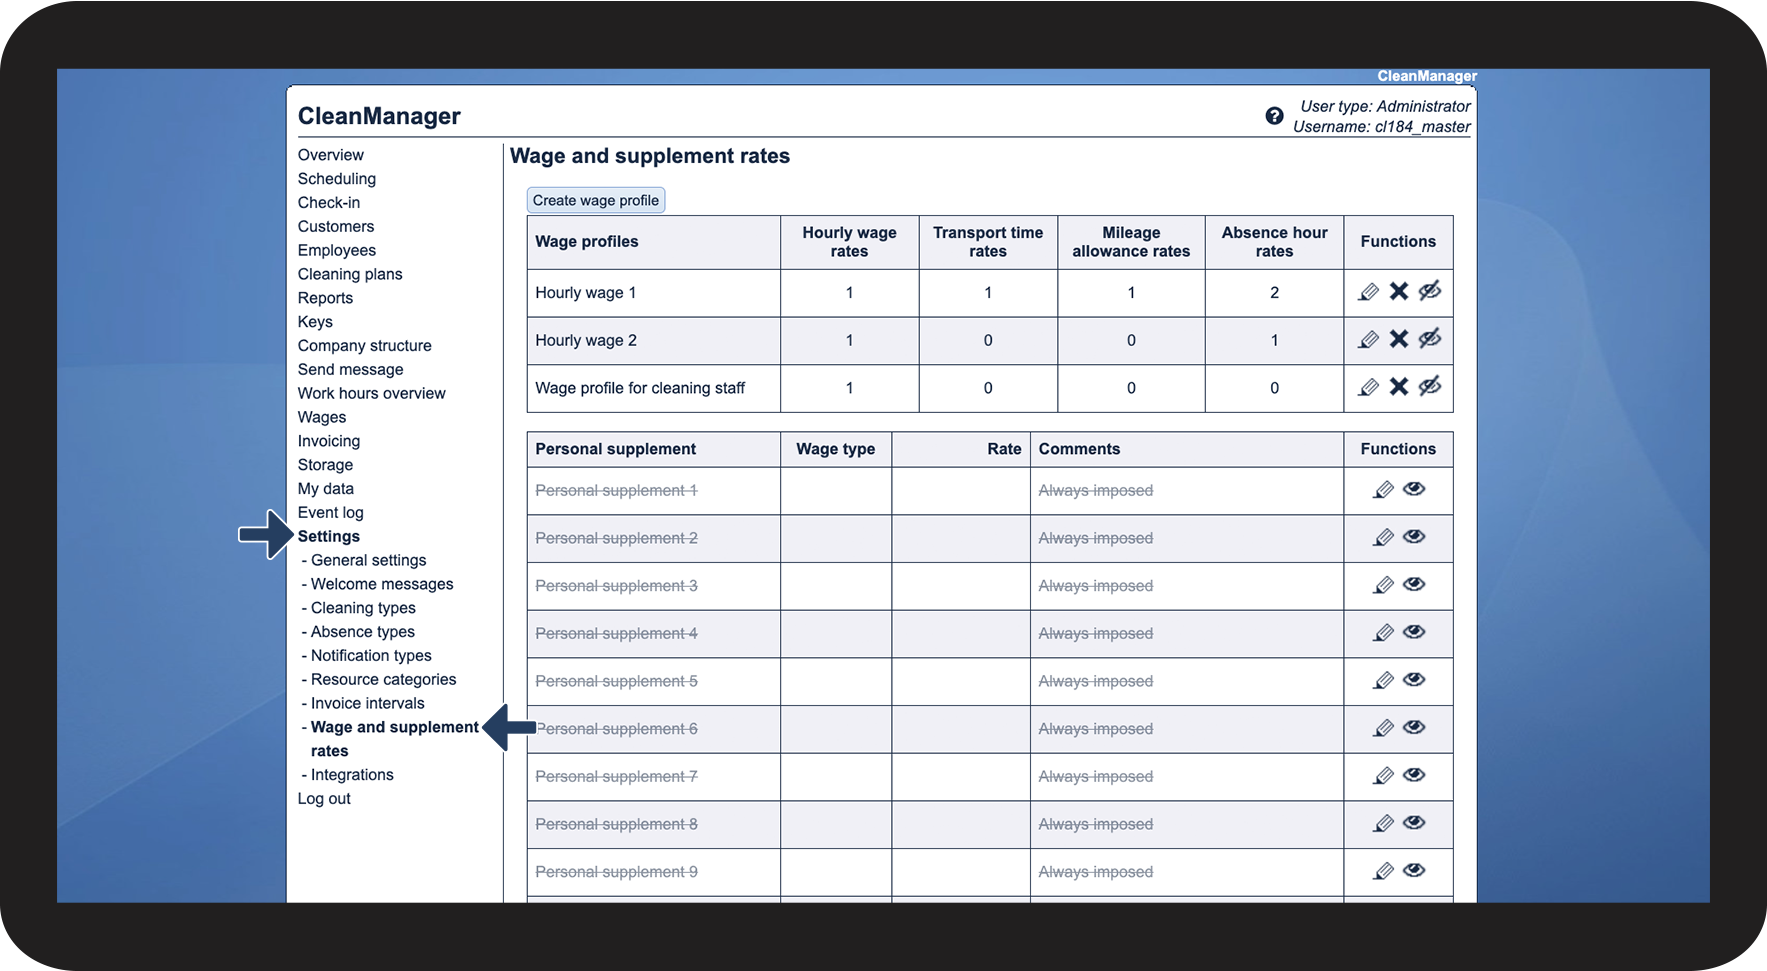


Note:
If a wage profile has been hidden, its rates will continue to be applied to the employee's work hours. If you wish to exclude the wage profile from the calculation of wages for an employee, you will need to assign them a different wage profile. Read more about it here: Assigning a wage profile to an employee
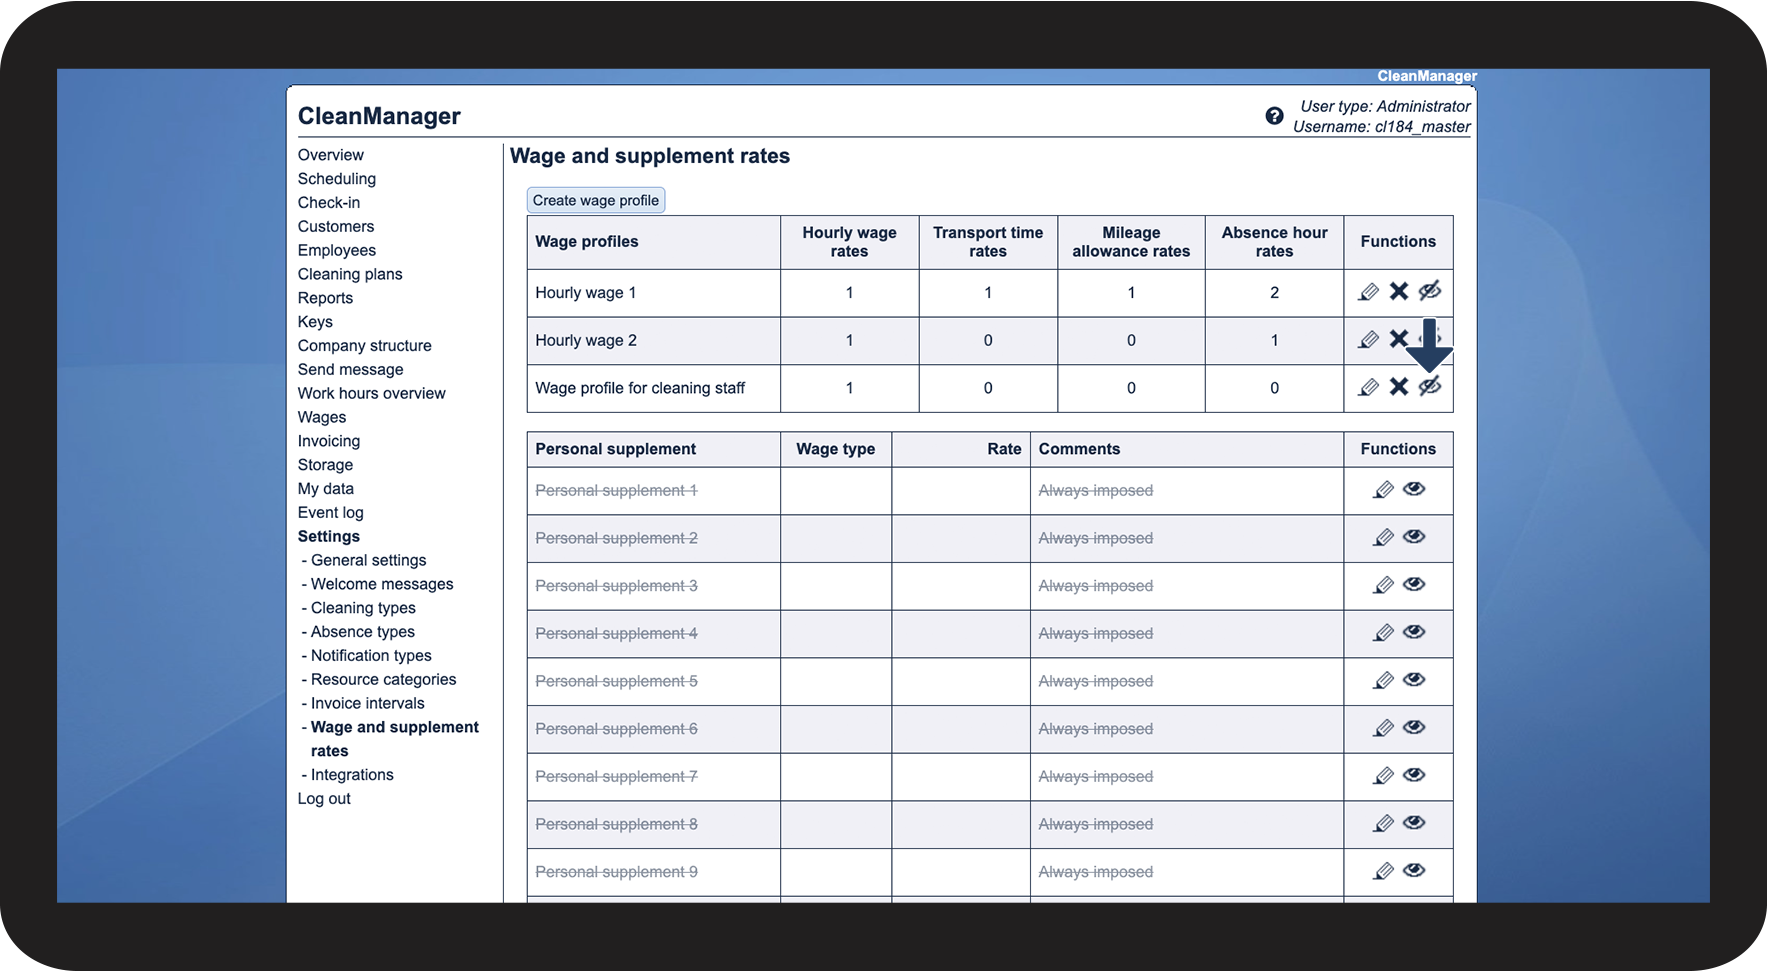
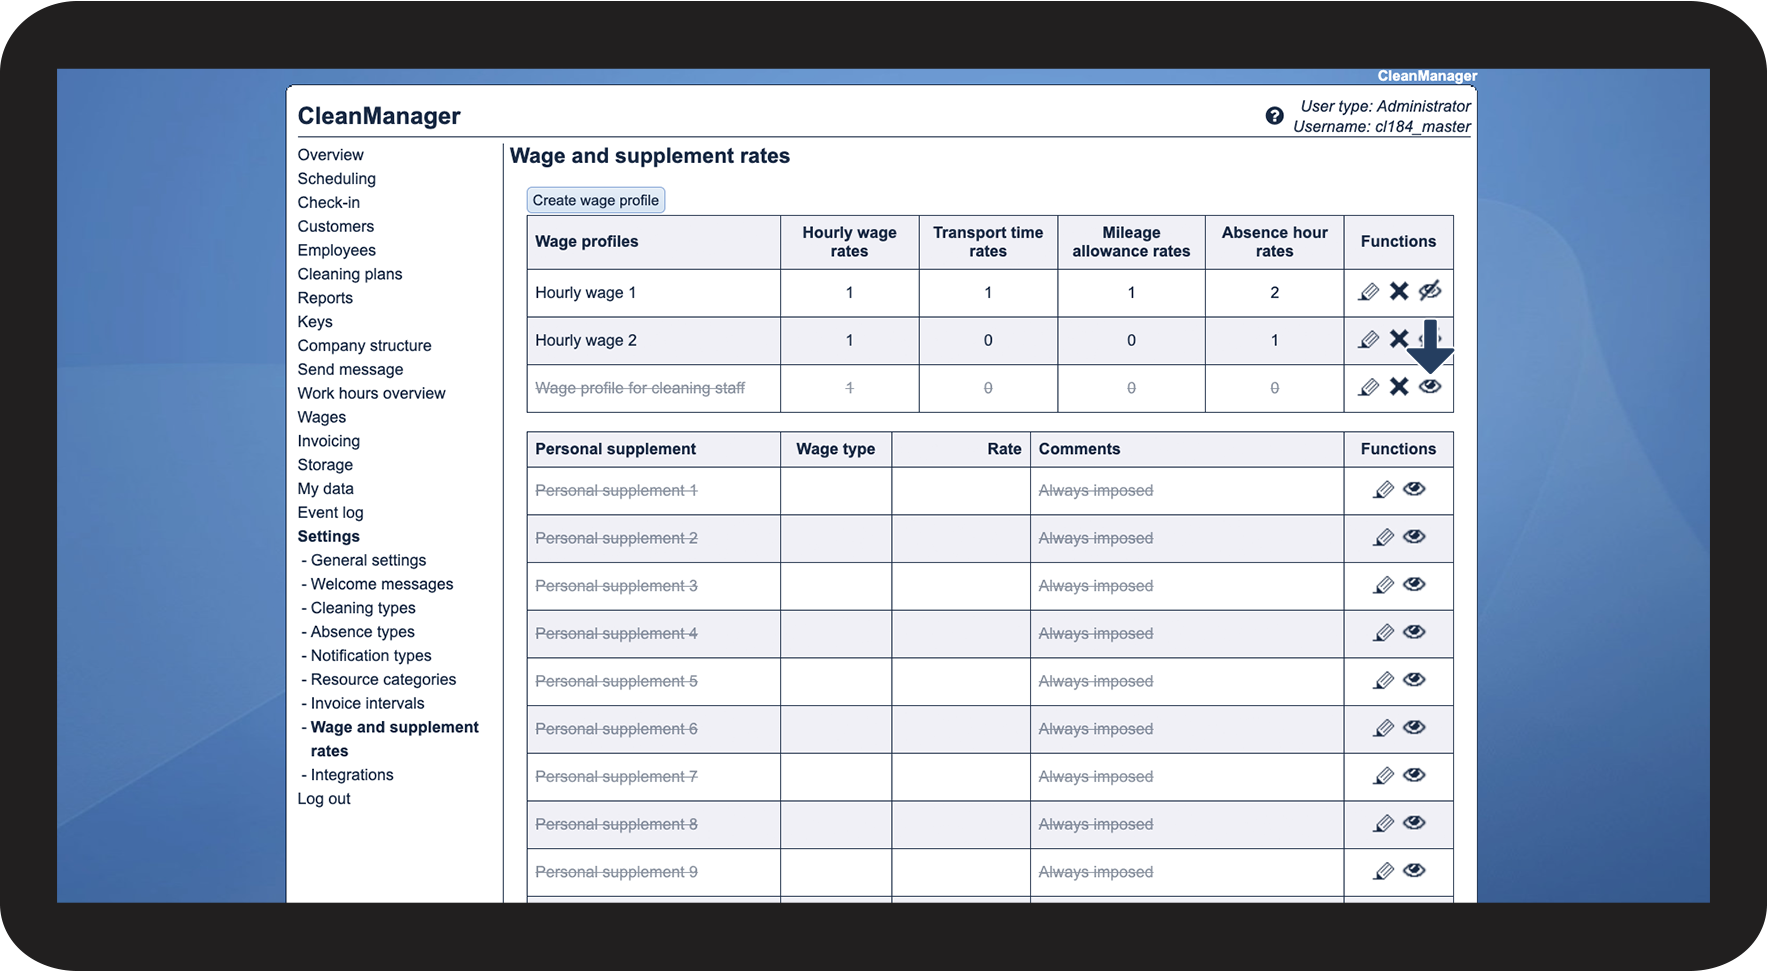
Deleting a wage profile
 next to the wage profile you want to delete
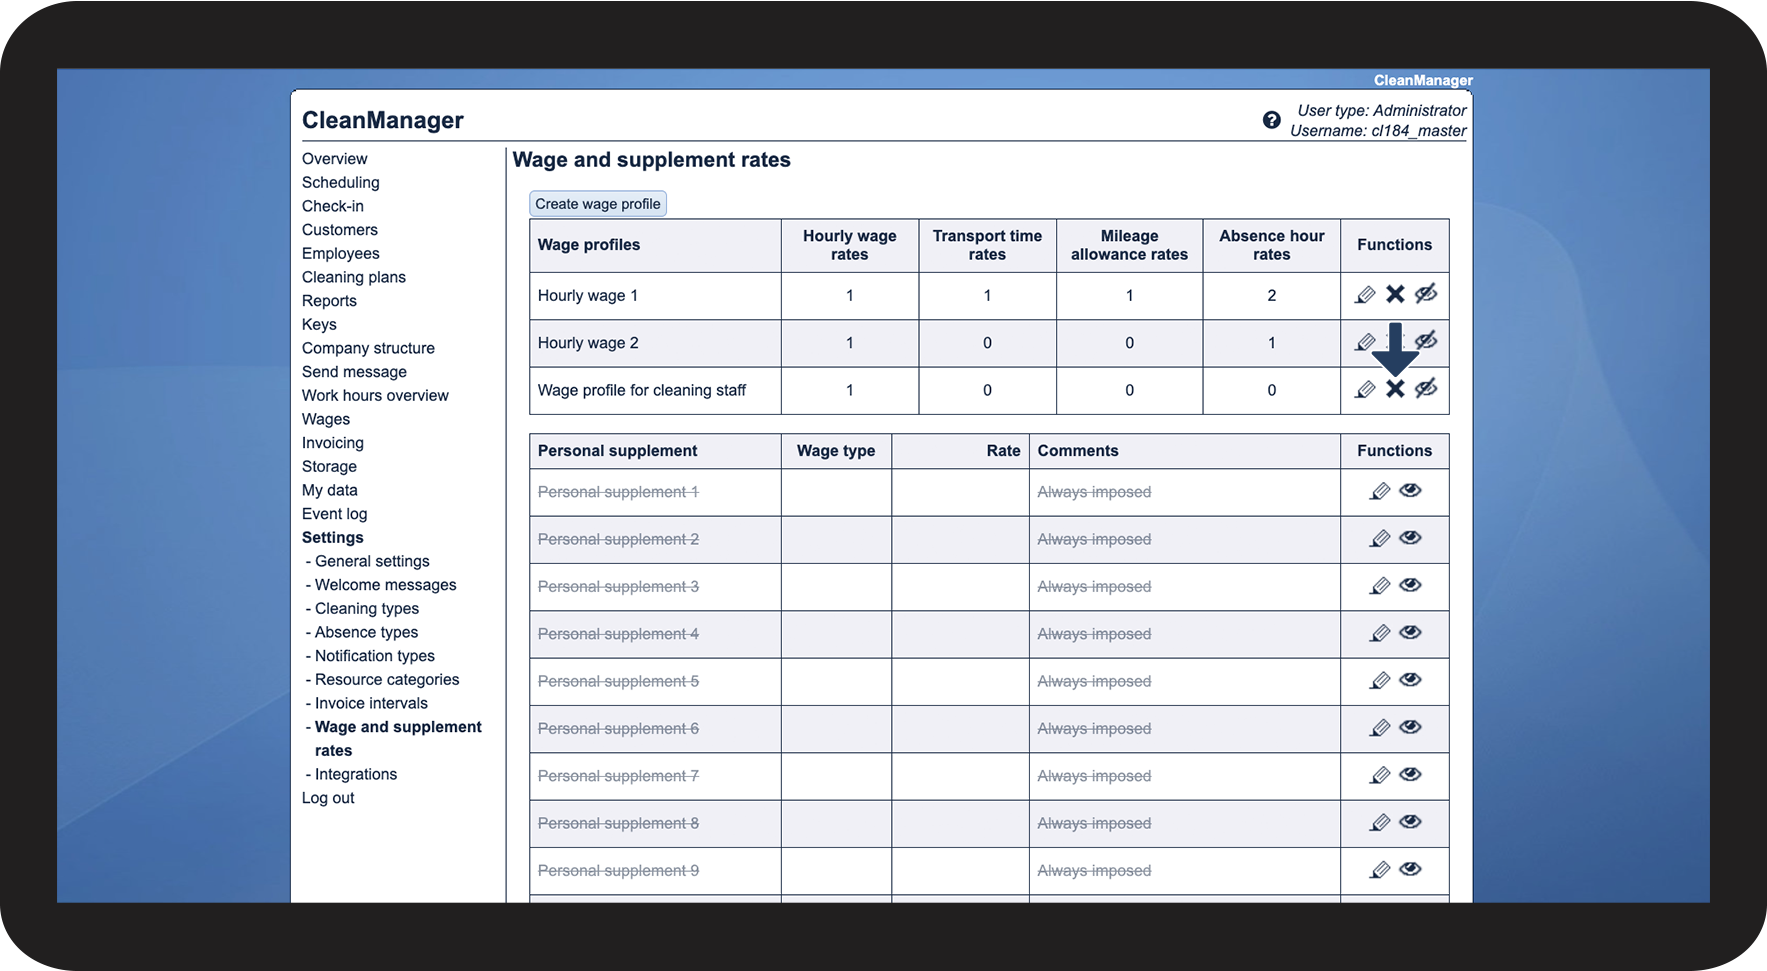
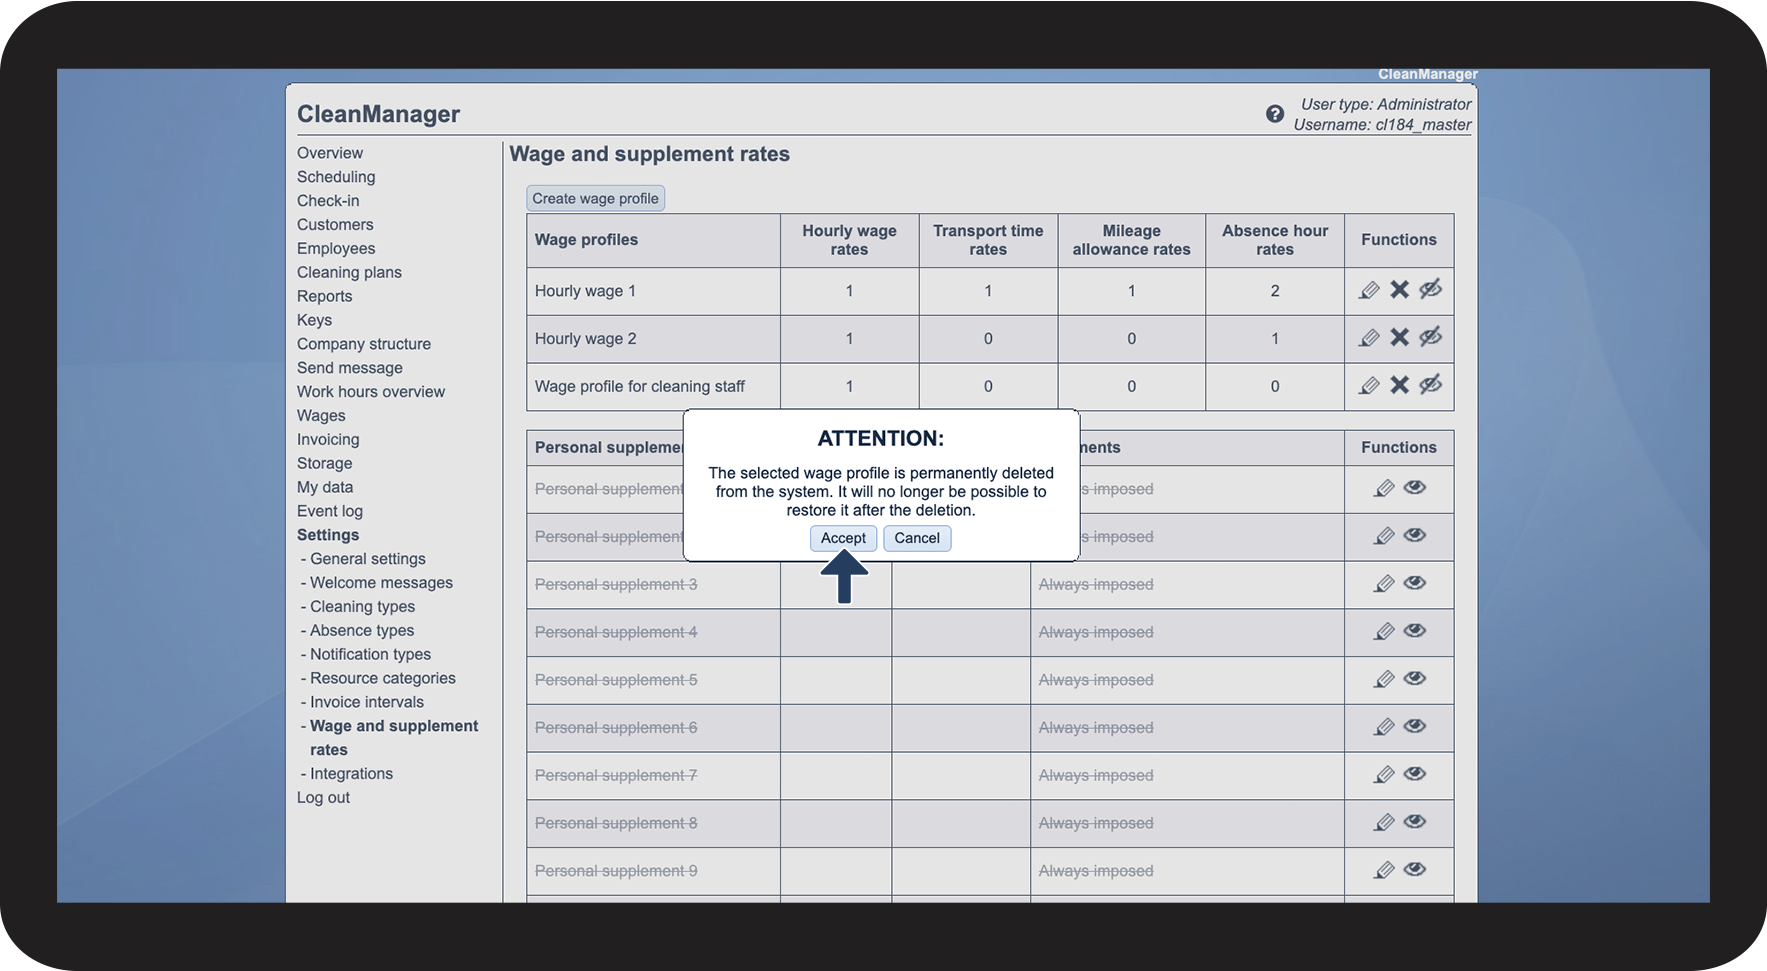
Note:
A wage profile can only be deleted if it is not currently assigned to any employees. This also applies to employees in the archive. Read more about it here: Assigning a wage profile to an employee
As an alternative, you can always hide your wage profiles. Read more about it here: Hiding a wage profile
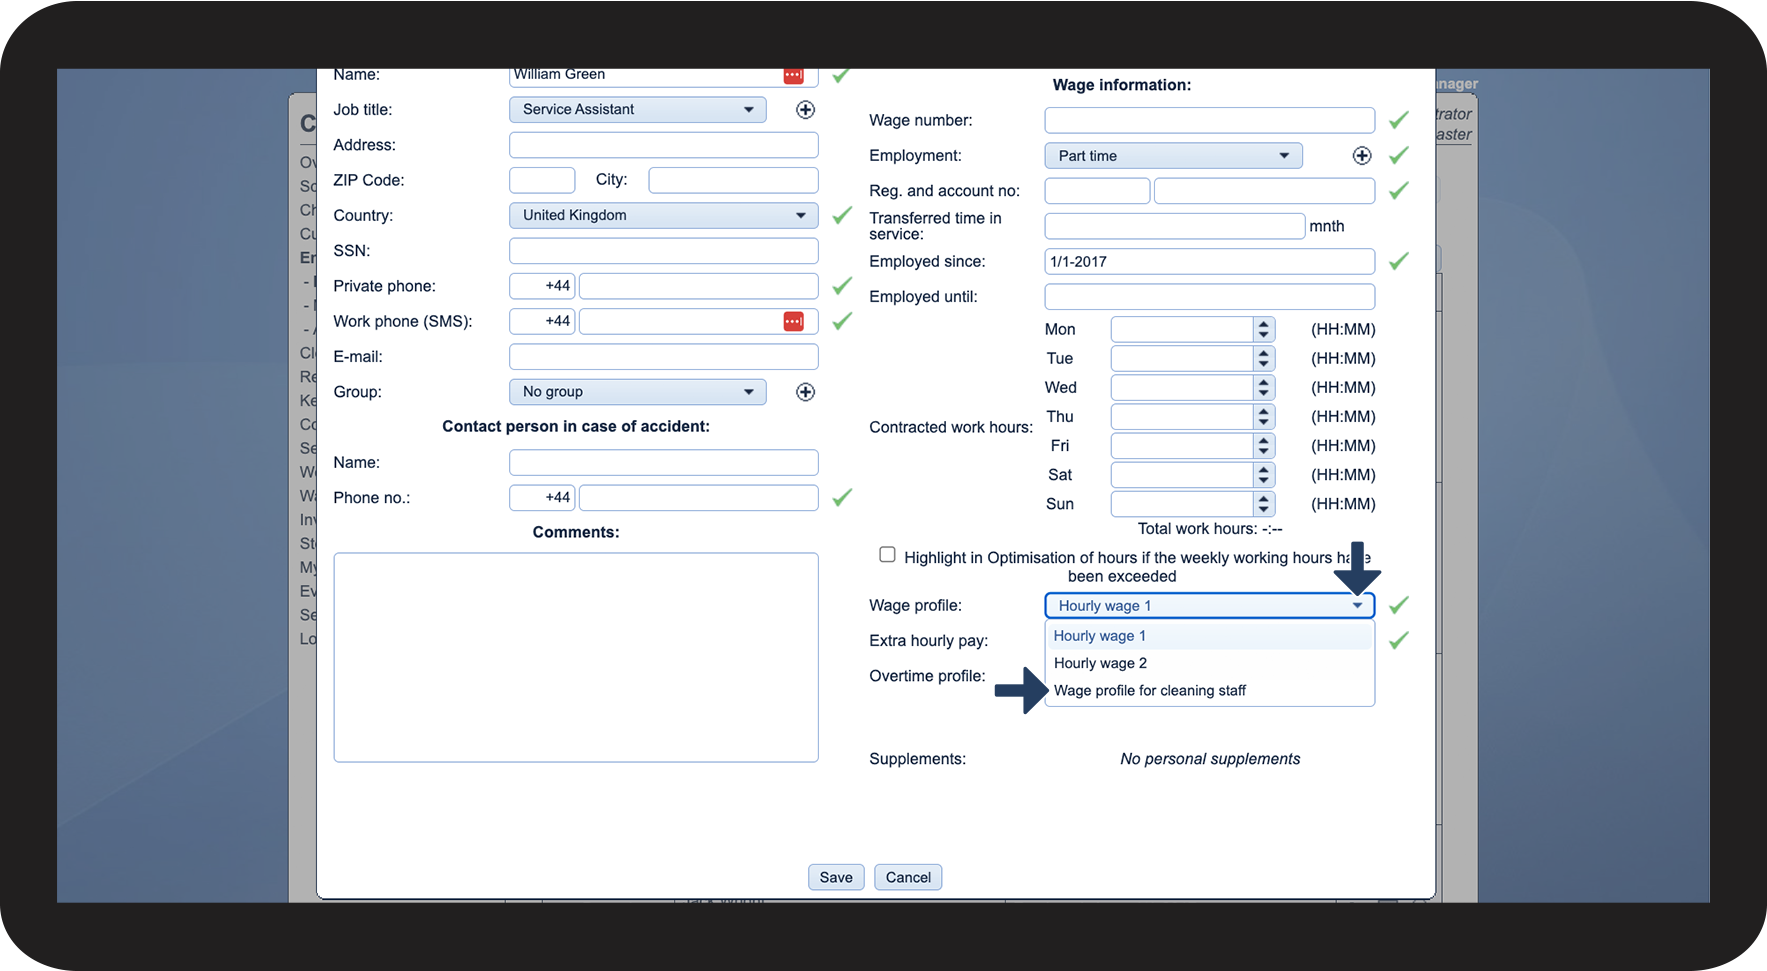
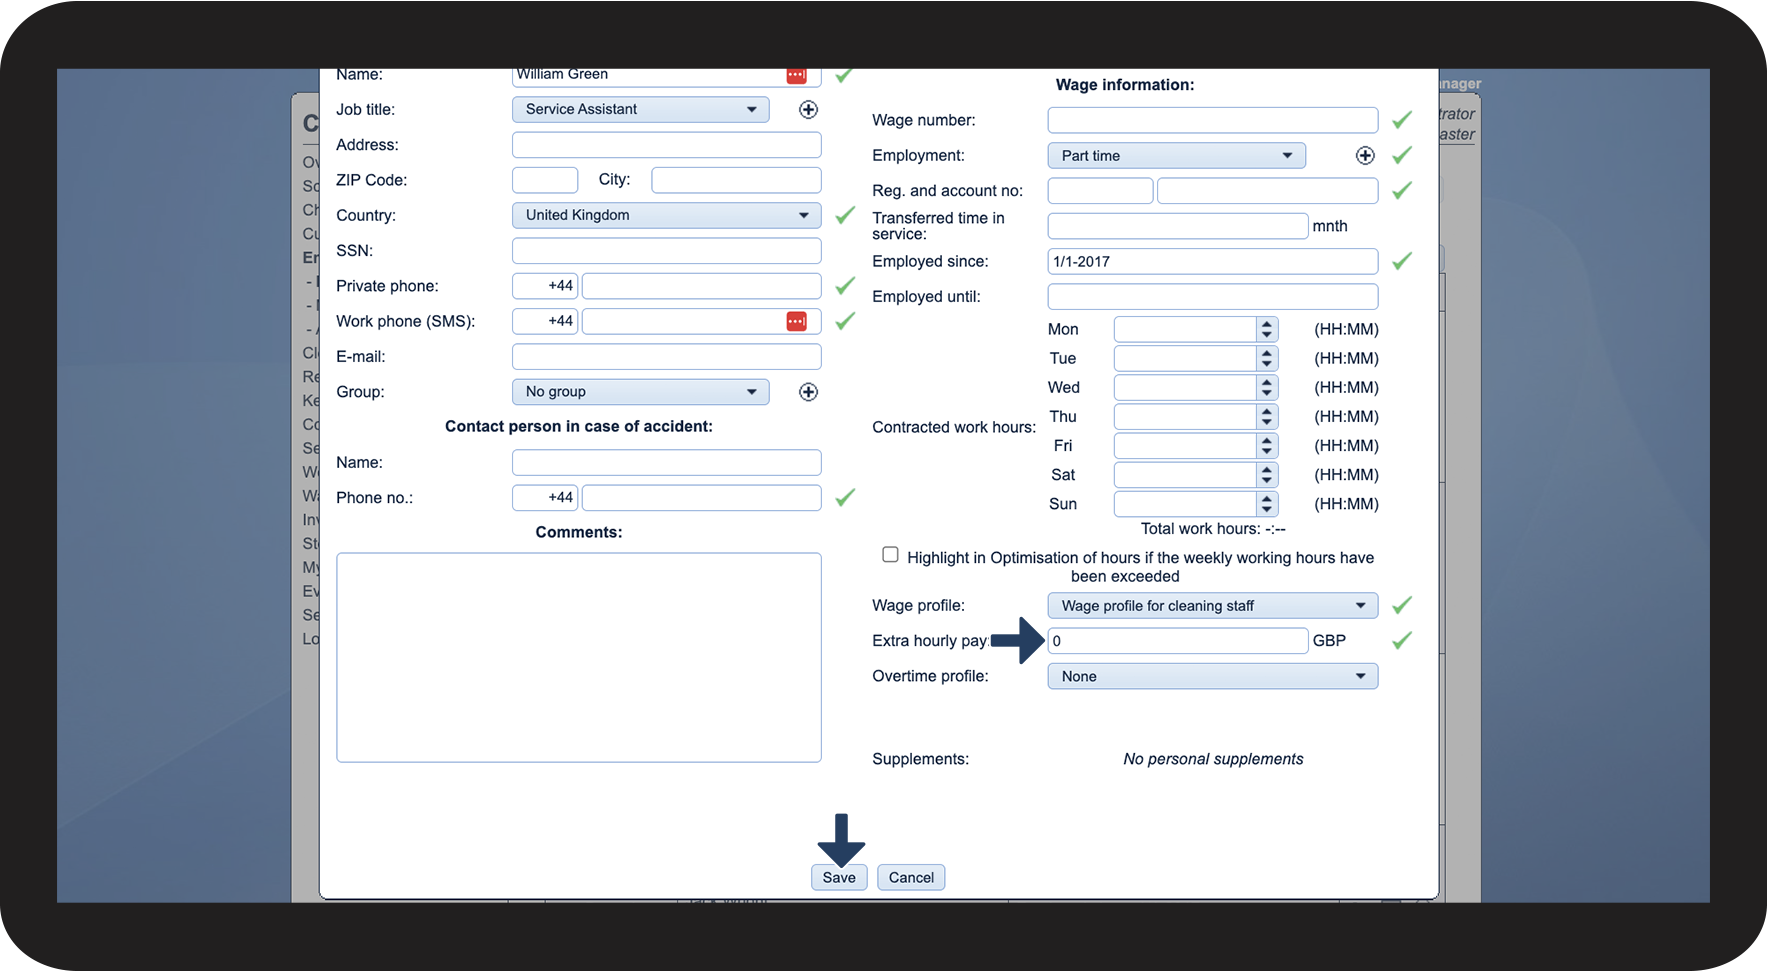
Assigning a wage profile to an employee
For a wage profile to take effect, it must first be assigned to an employee.
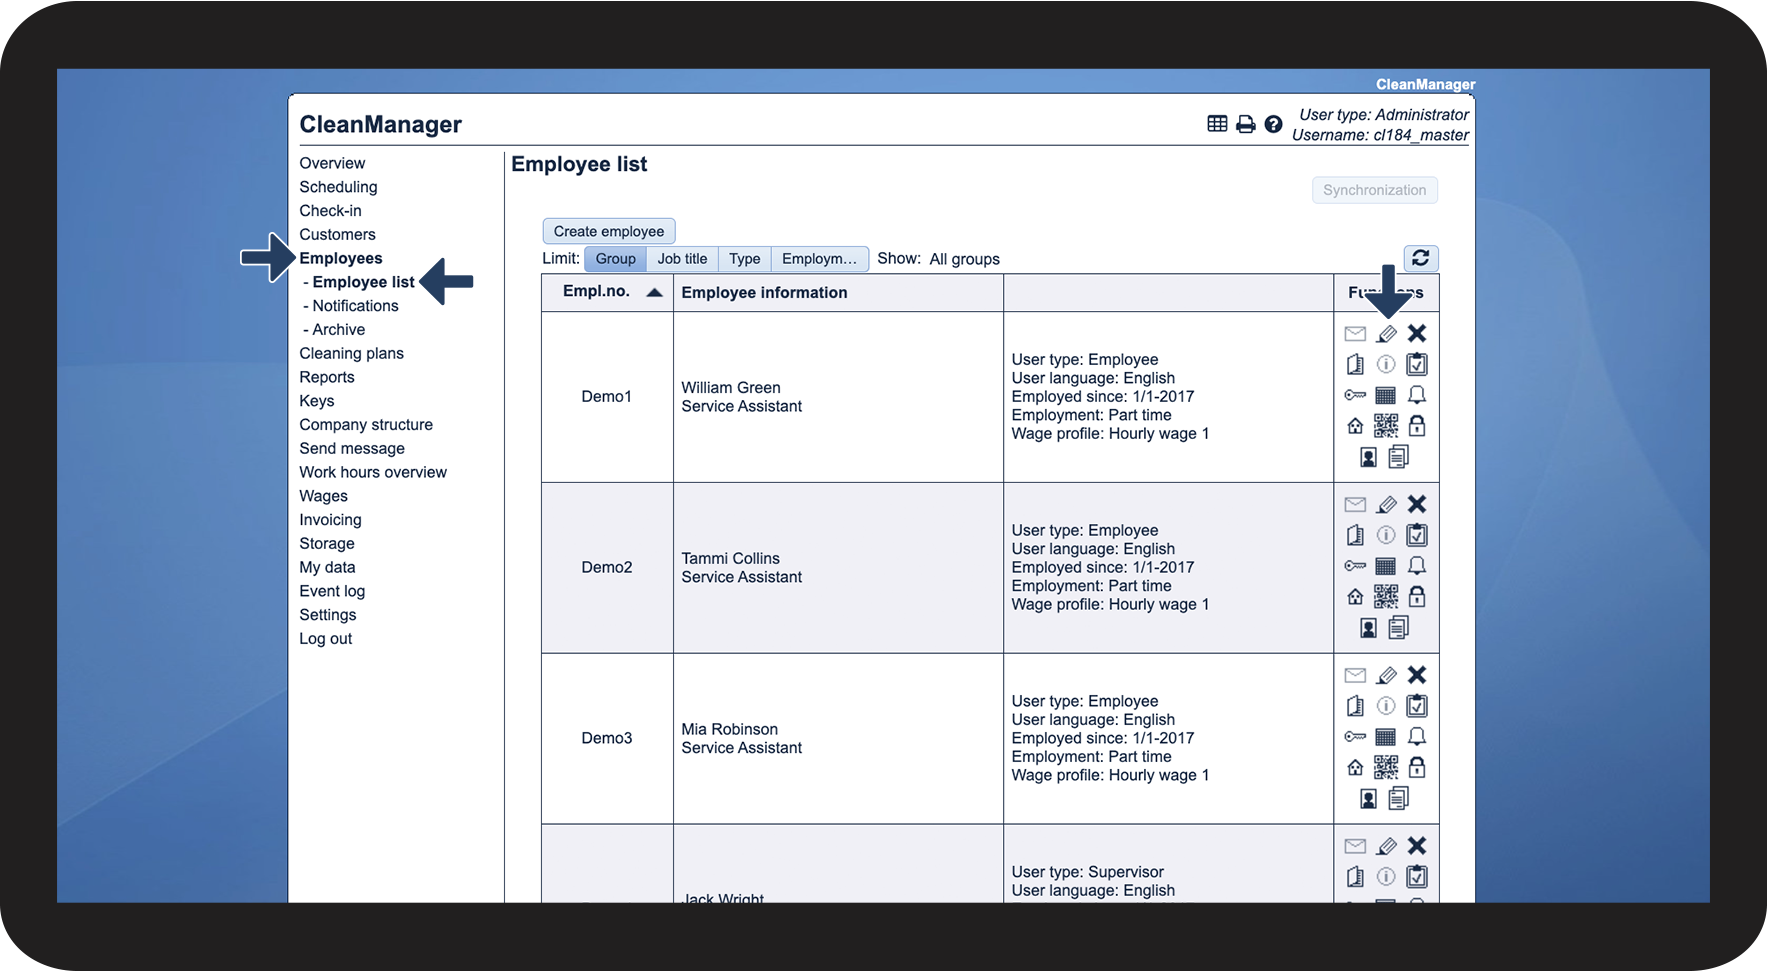
Note:
Hourly wage 1 is the wage profile normally assigned to an employee when creating a user for them in the system.
Changing the rate of the hourly wage will change the rate for all employees, to whom this wage profile has been assigned.
If you would like to set up more dynamic and extensive personal supplements, you can find more information about the process here: