Which settings can I use to adjust what is shown in the work hours overview?
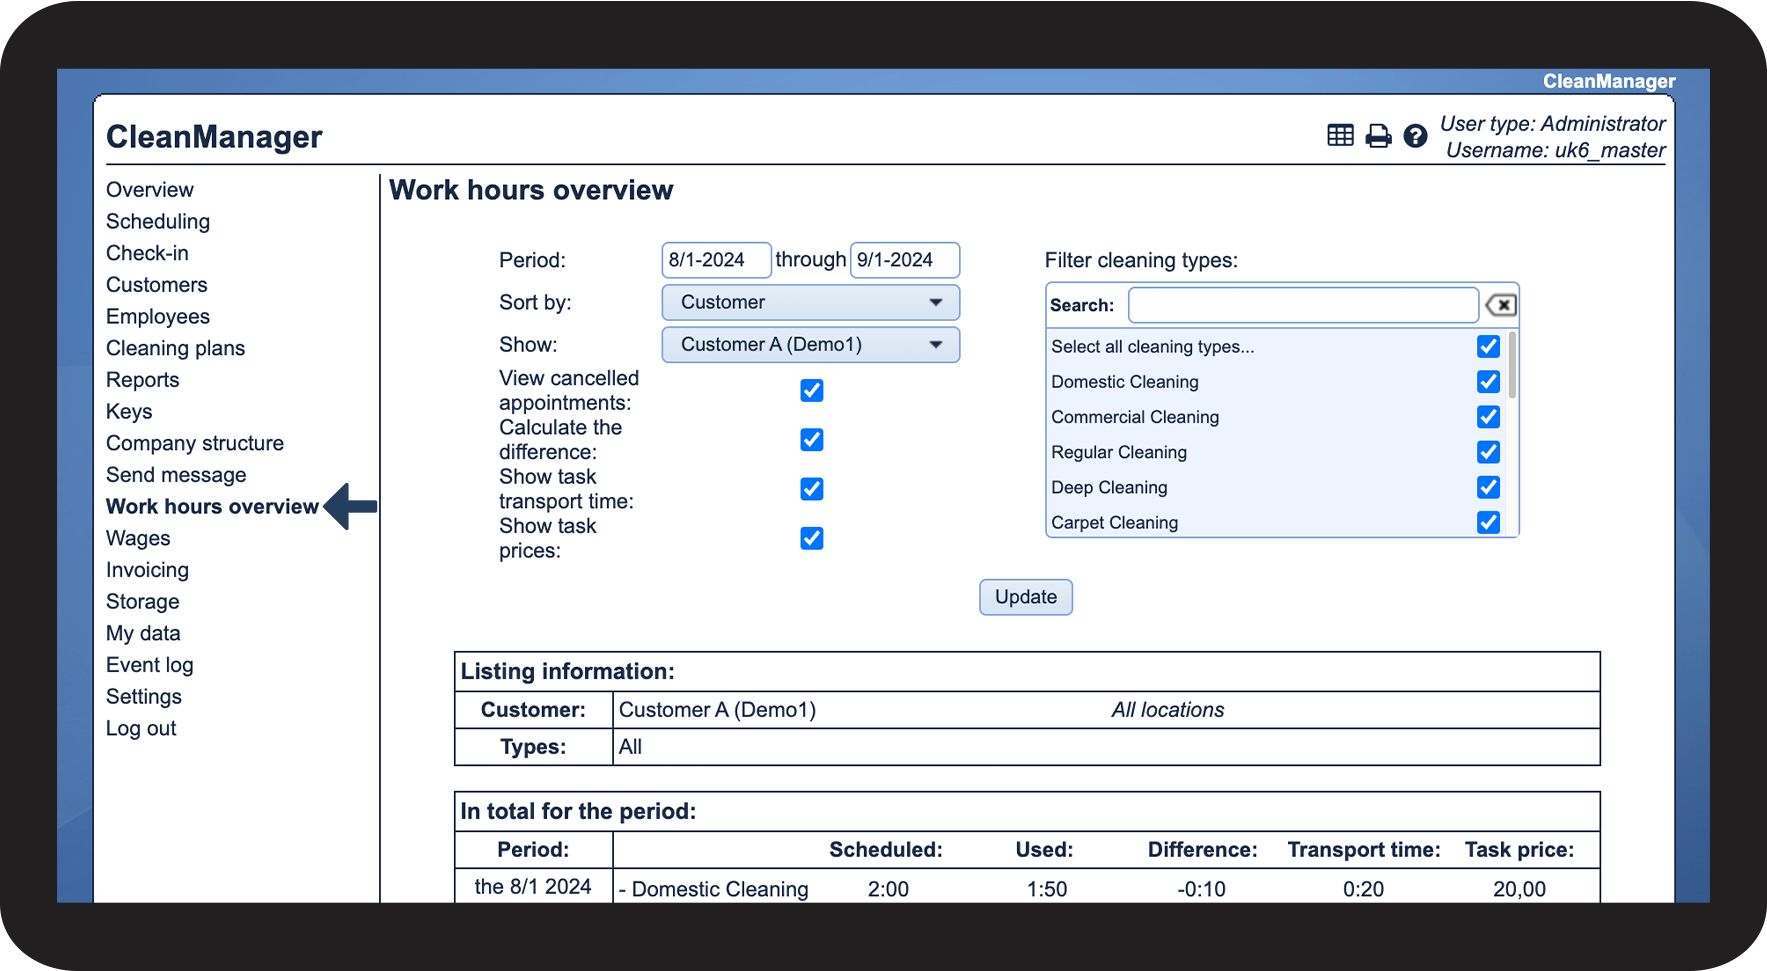
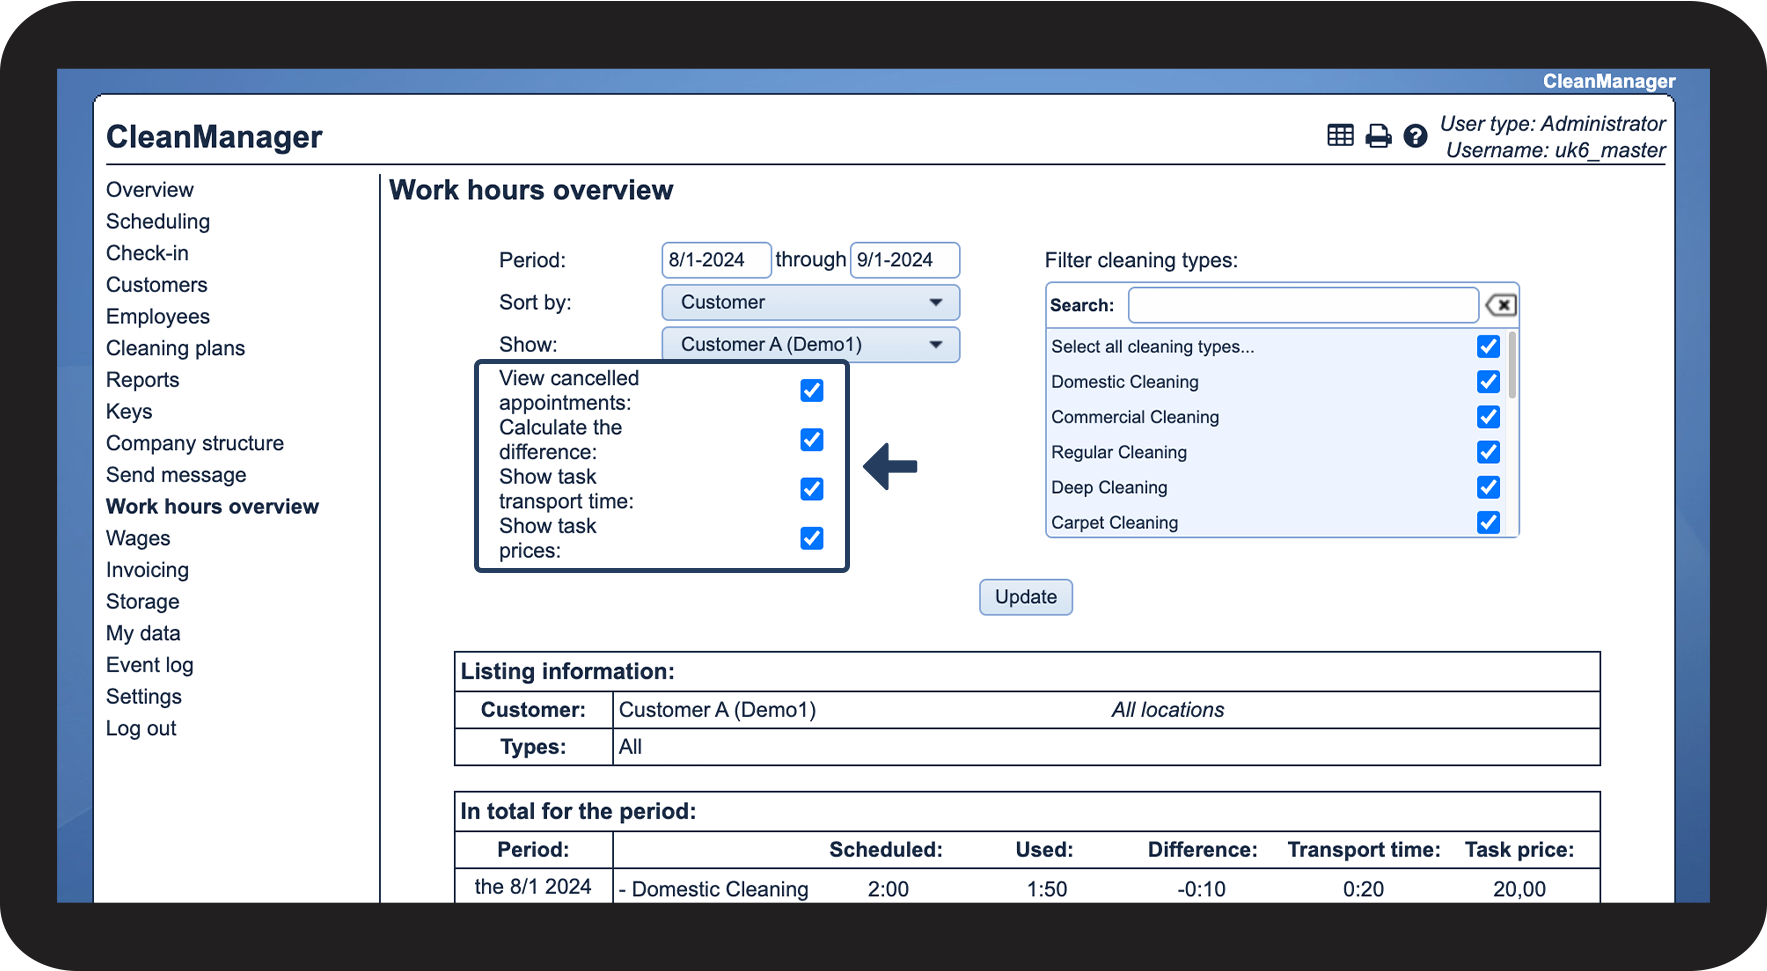
As the administrator or a supervisor, you have the option to enable or disable four functions in the work hours overview.
These four functions affect your view of the work hours overview. This article will review the four settings and how they modify the view, whether they are enabled or disabled.
In this article, you will learn how to adjust what is shown in the work hours overview:
- How do I find the work hours overview?
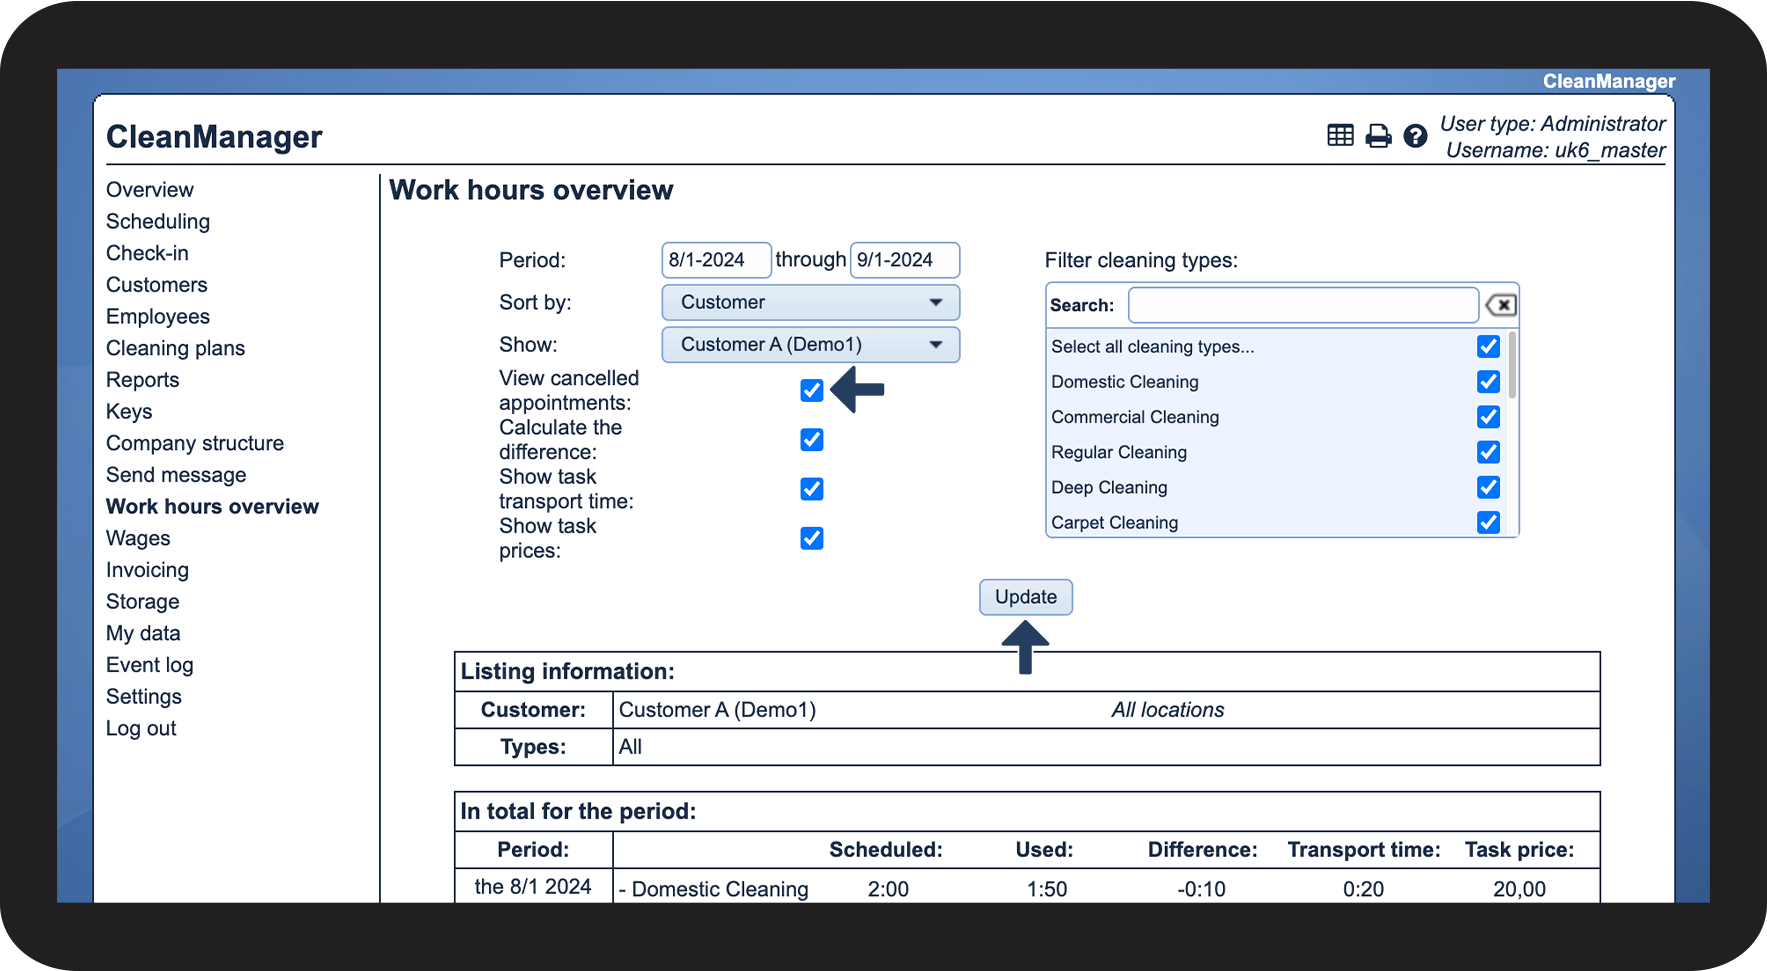
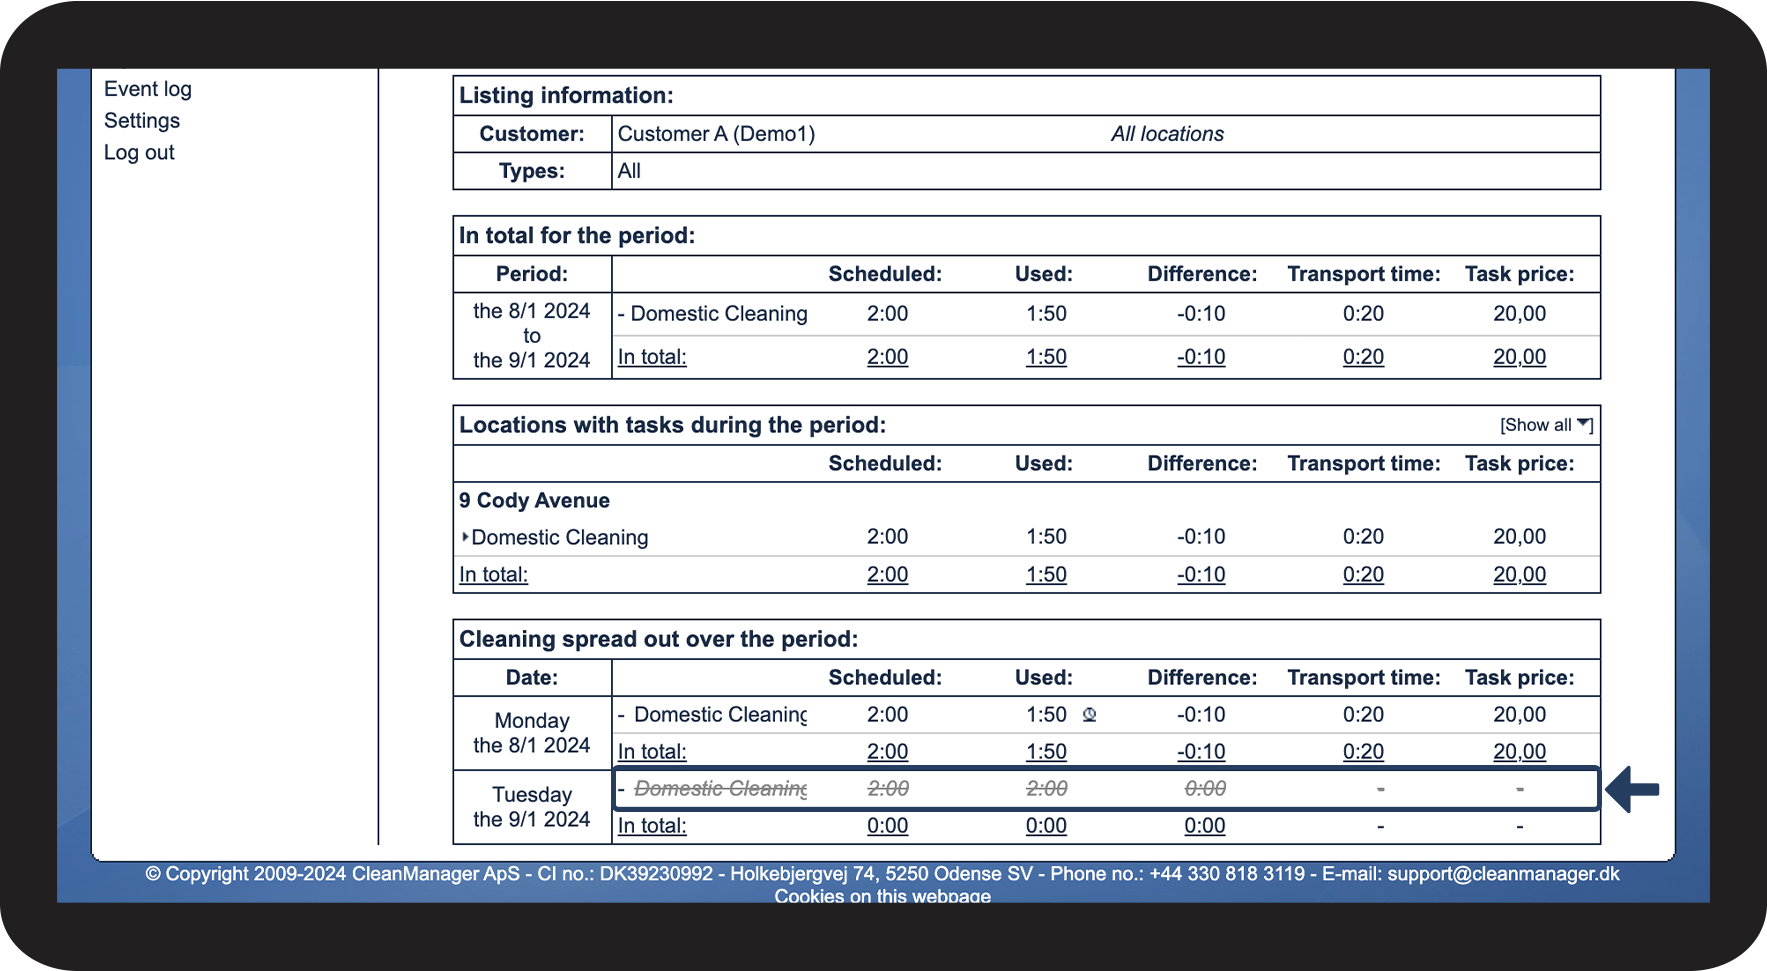
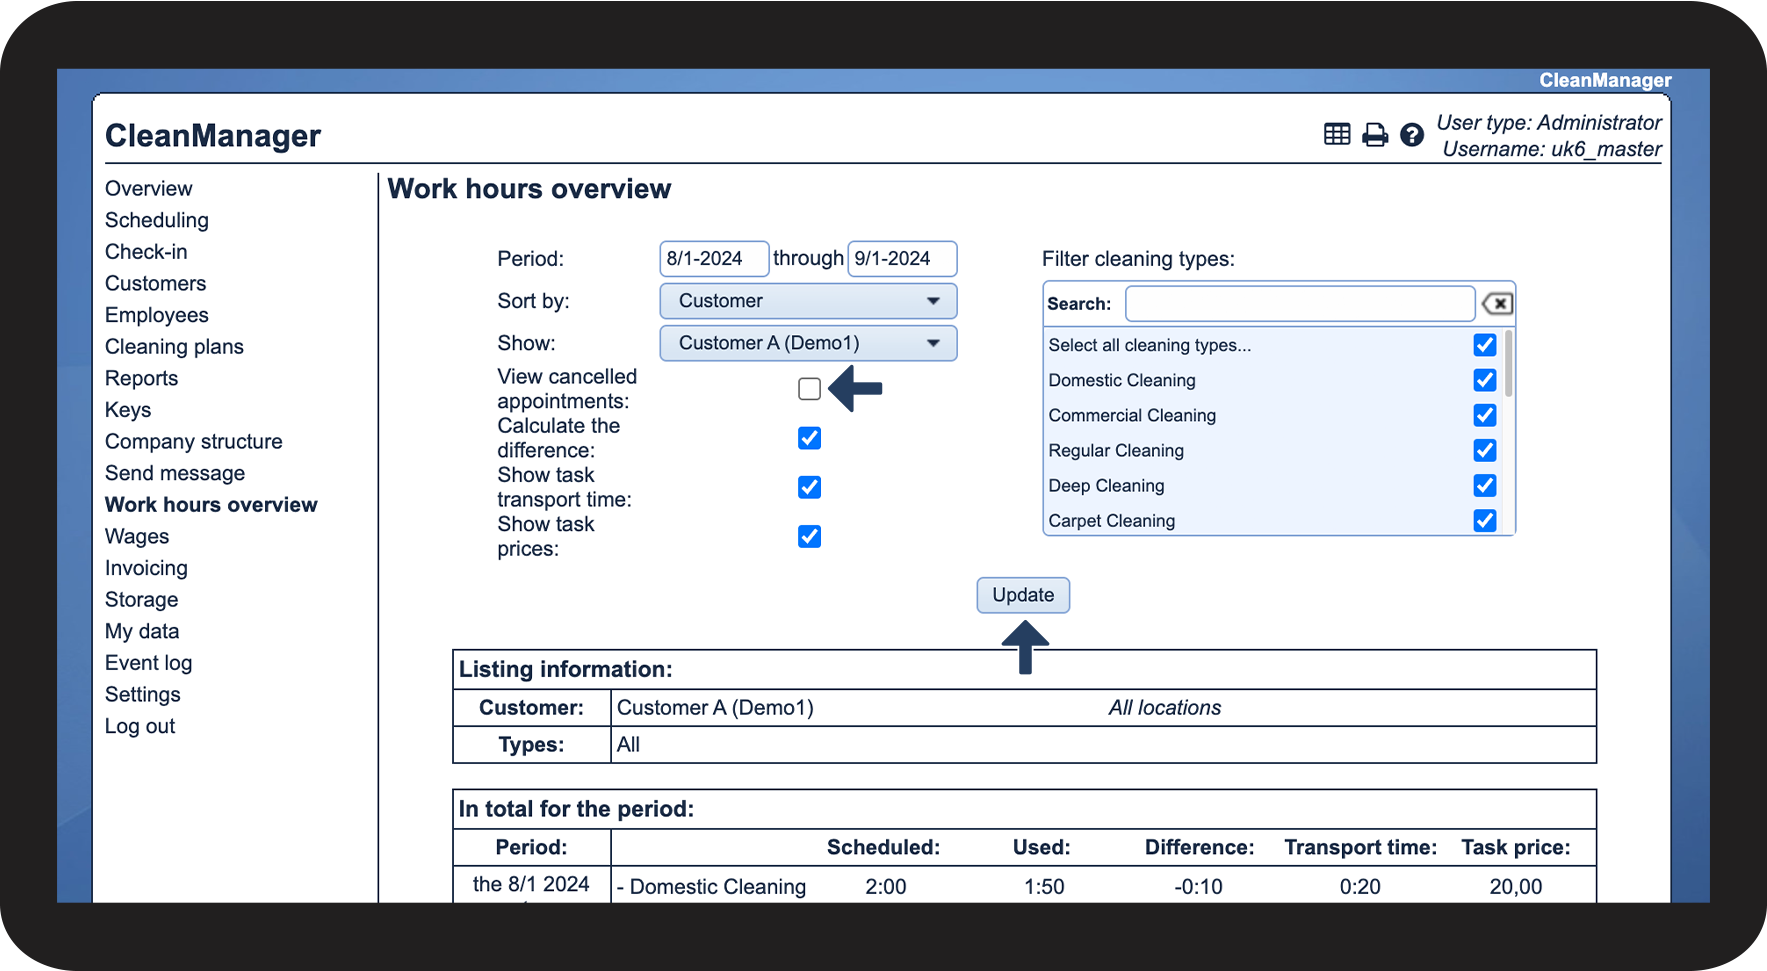
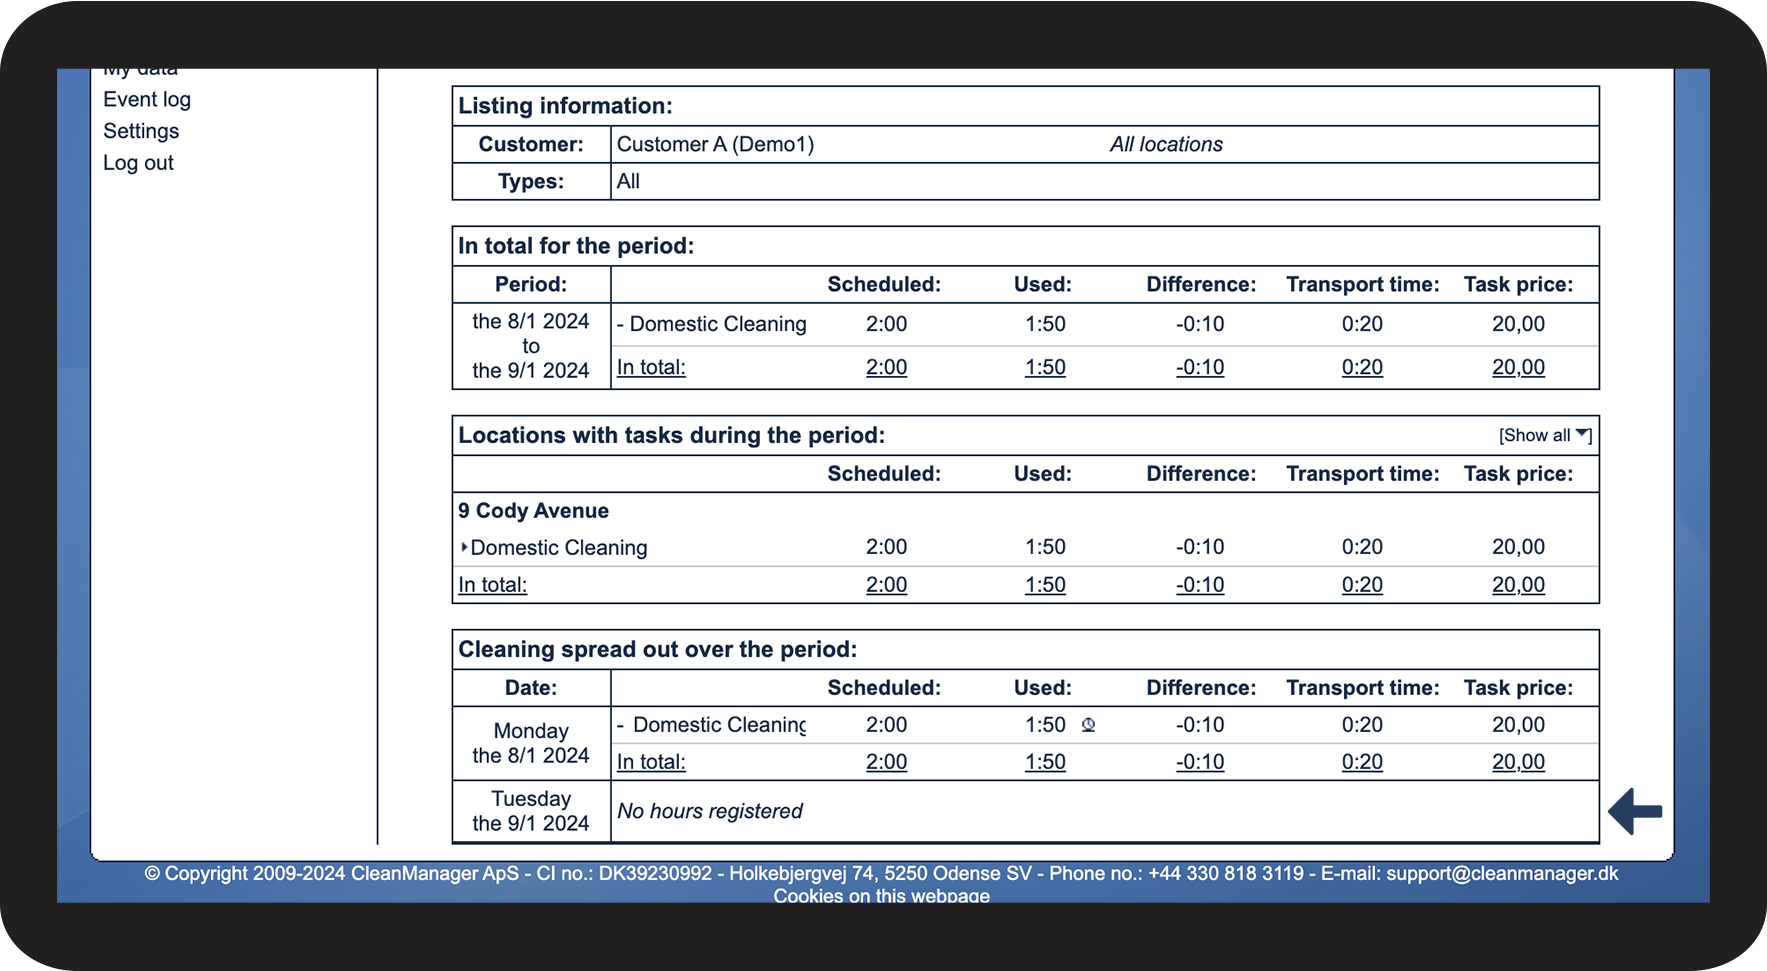
- View cancelled appointments
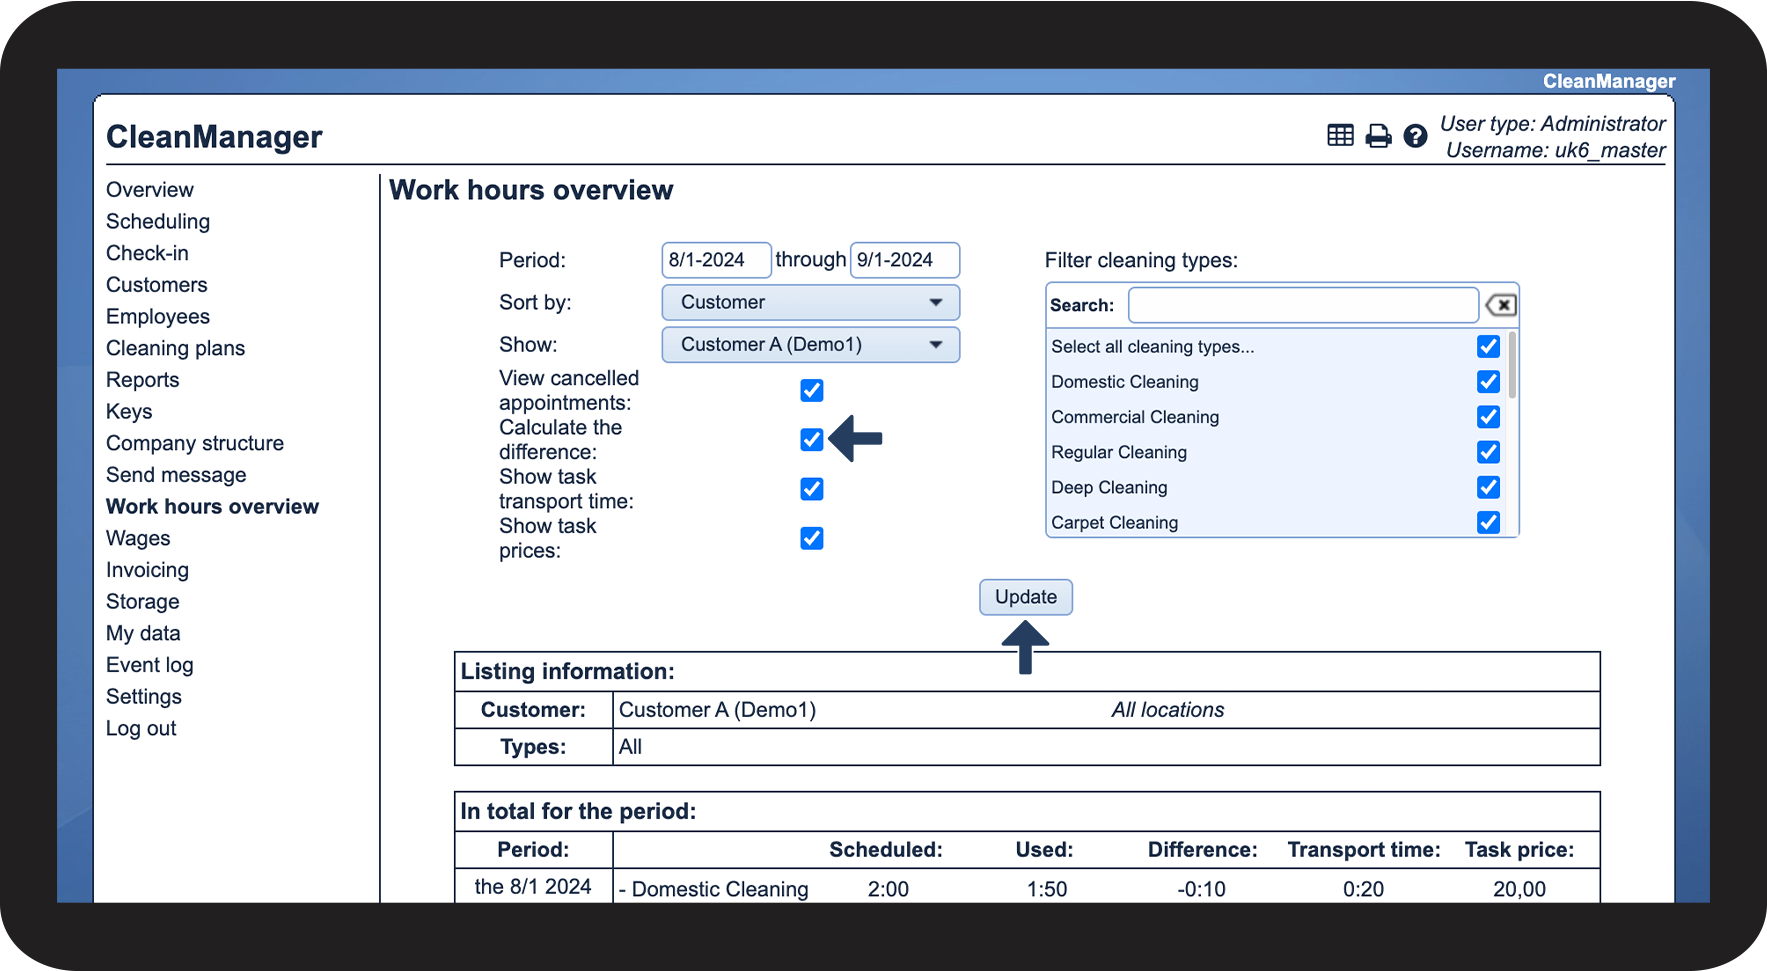
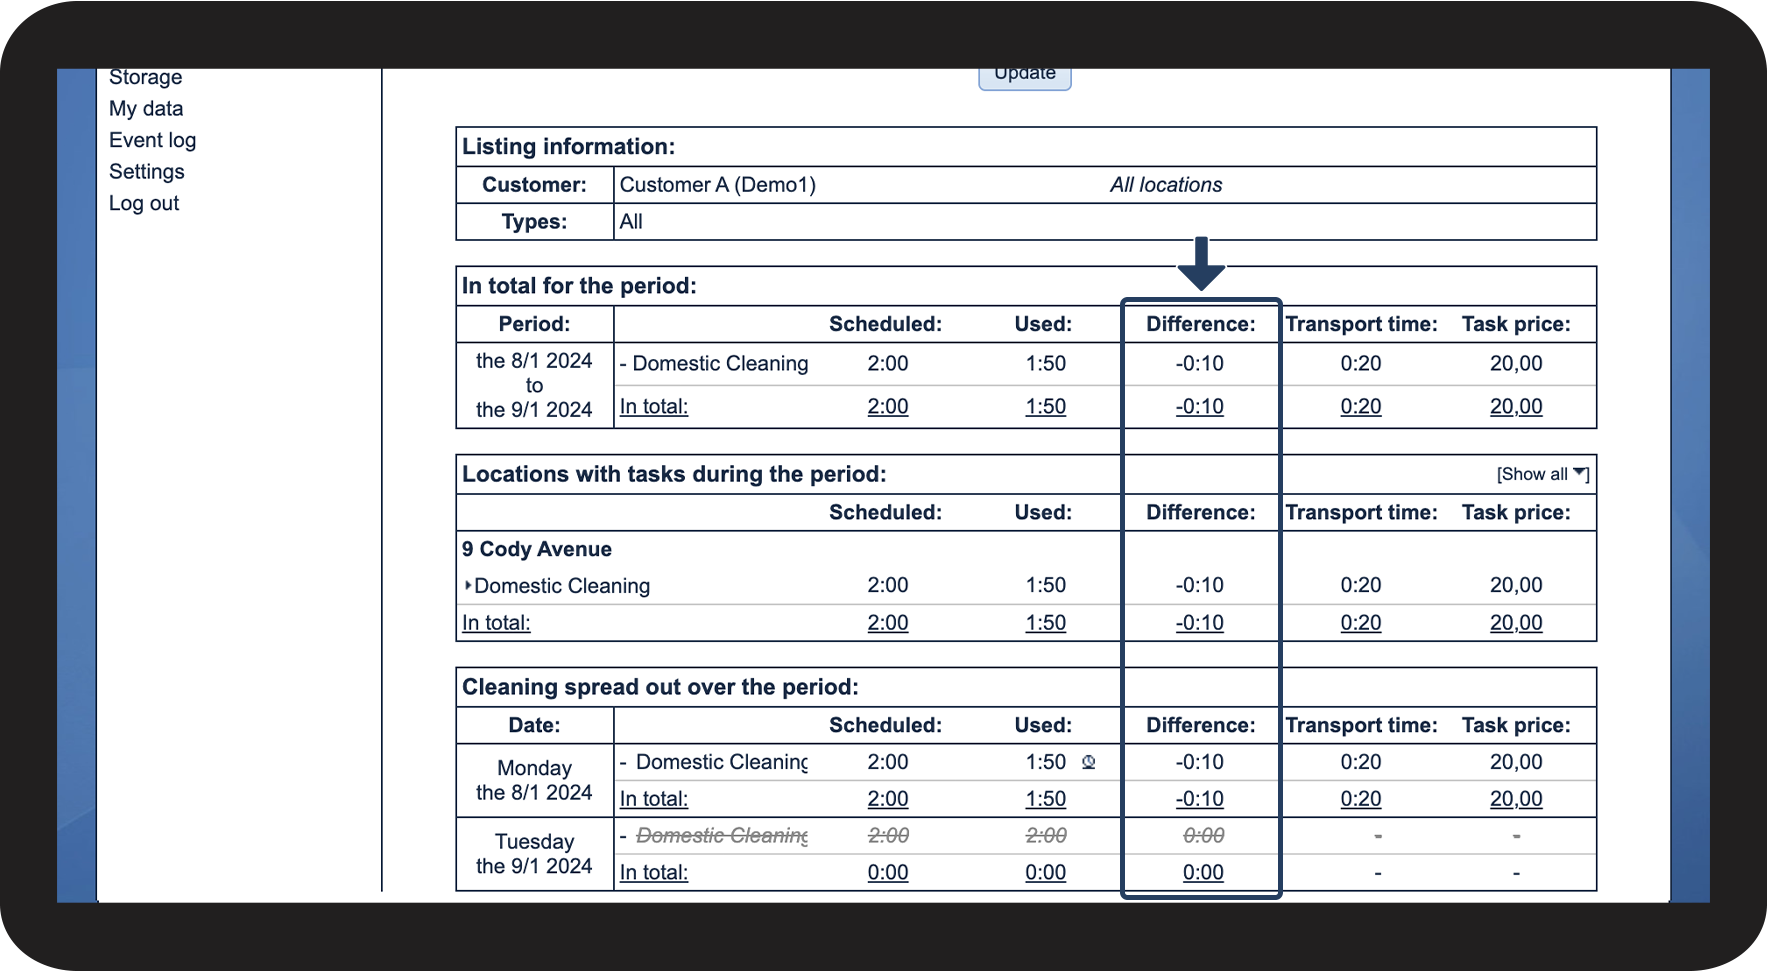
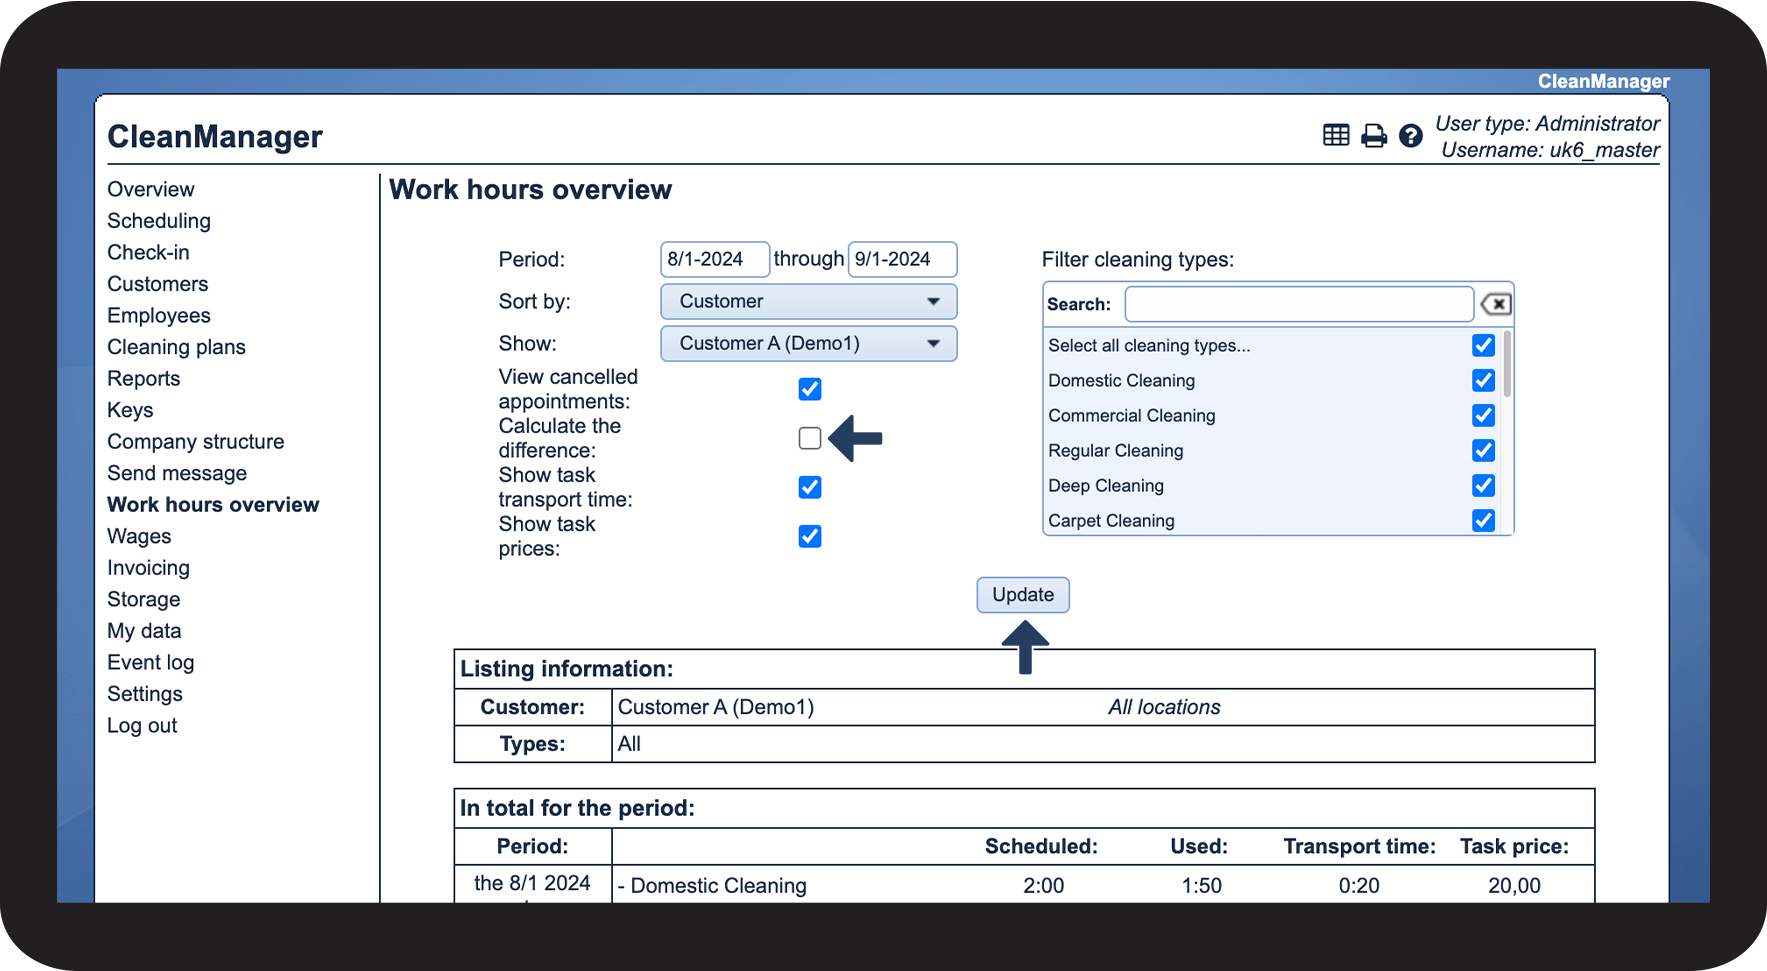
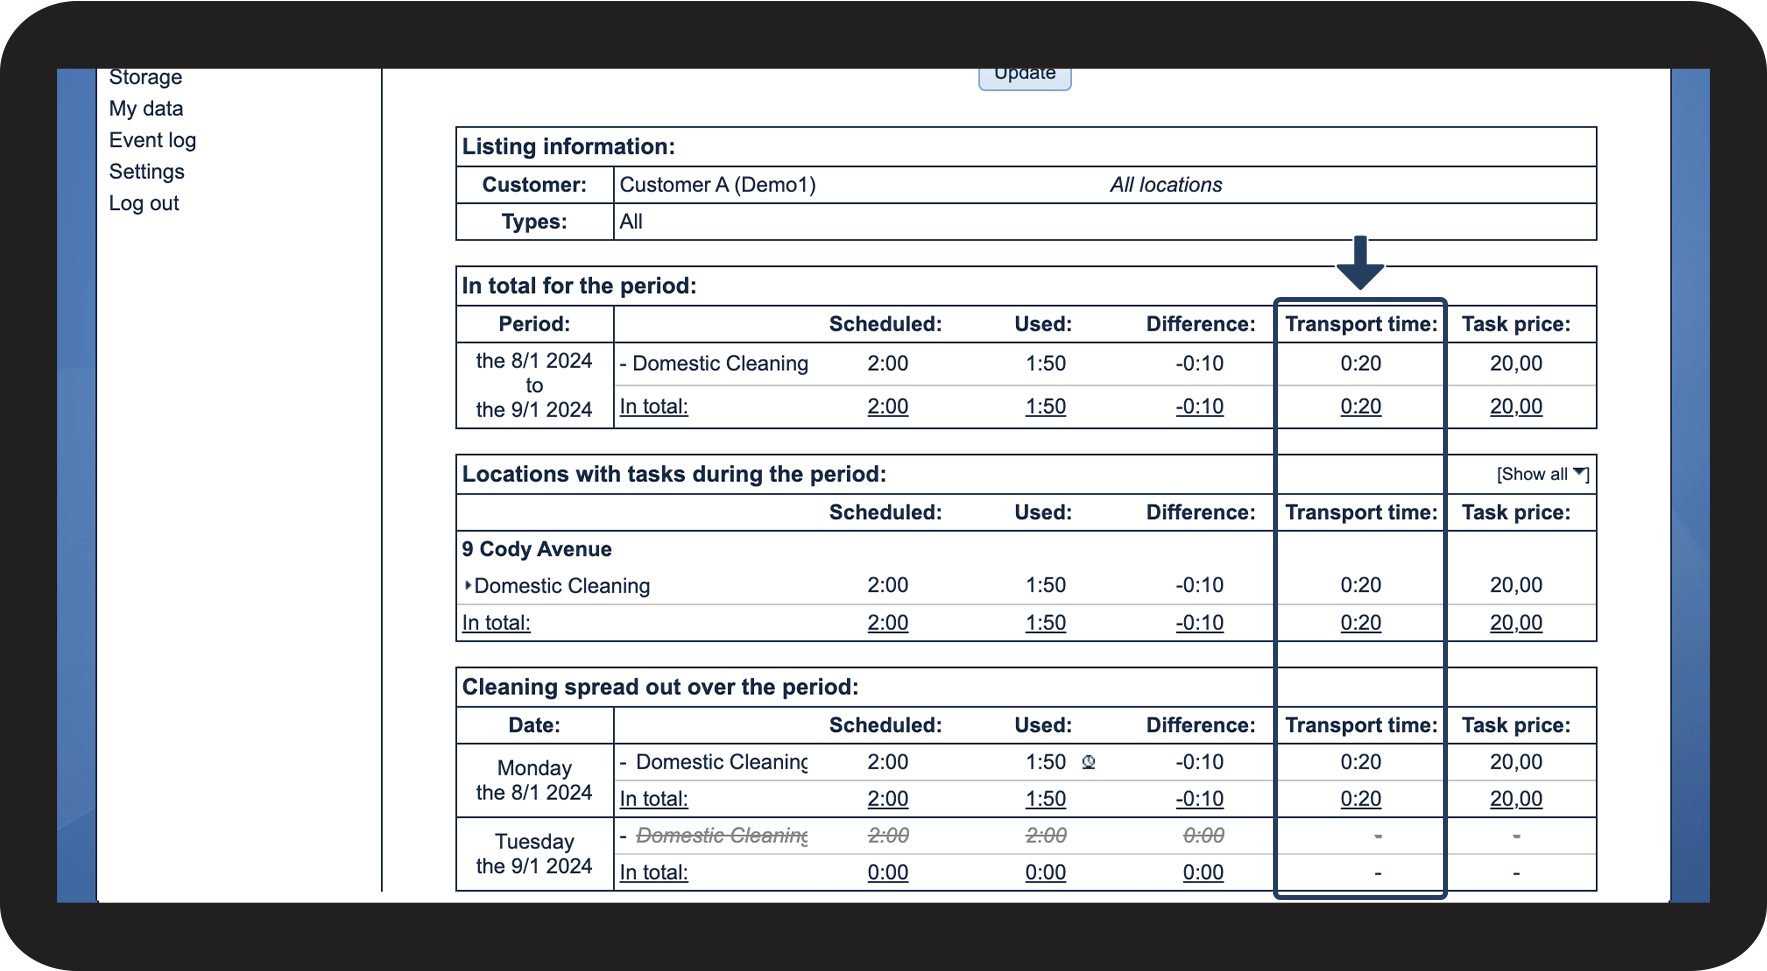
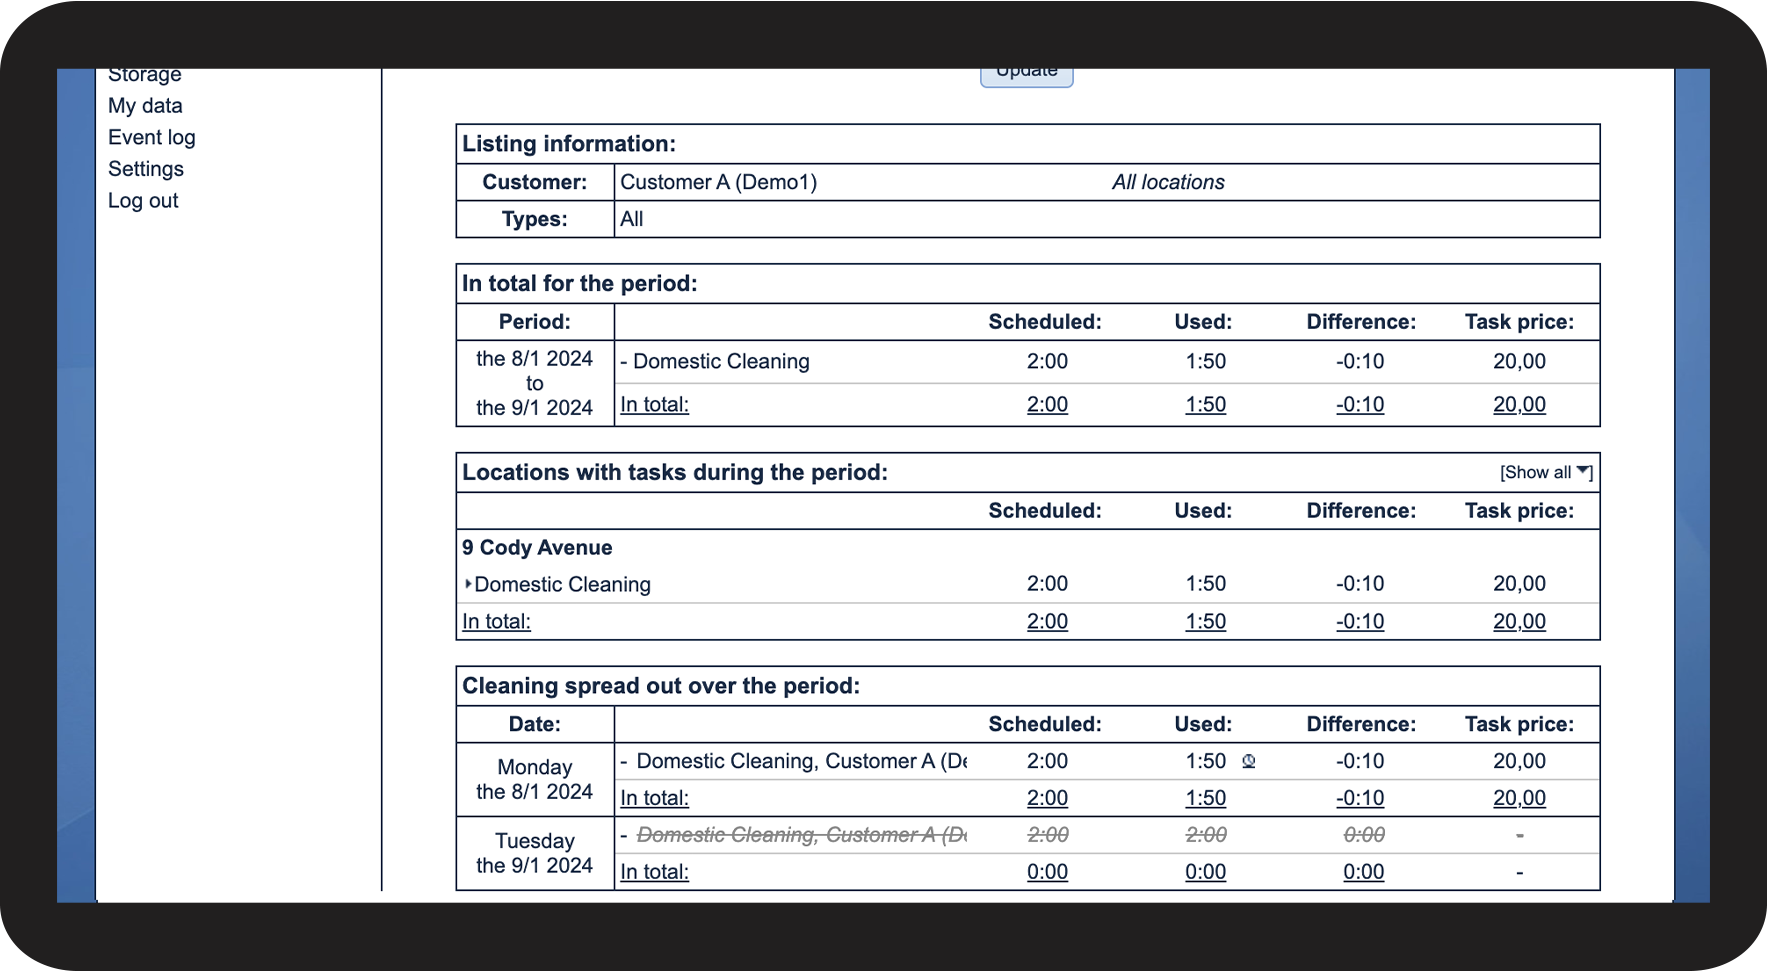
- Calculate the difference
- Show task transport time
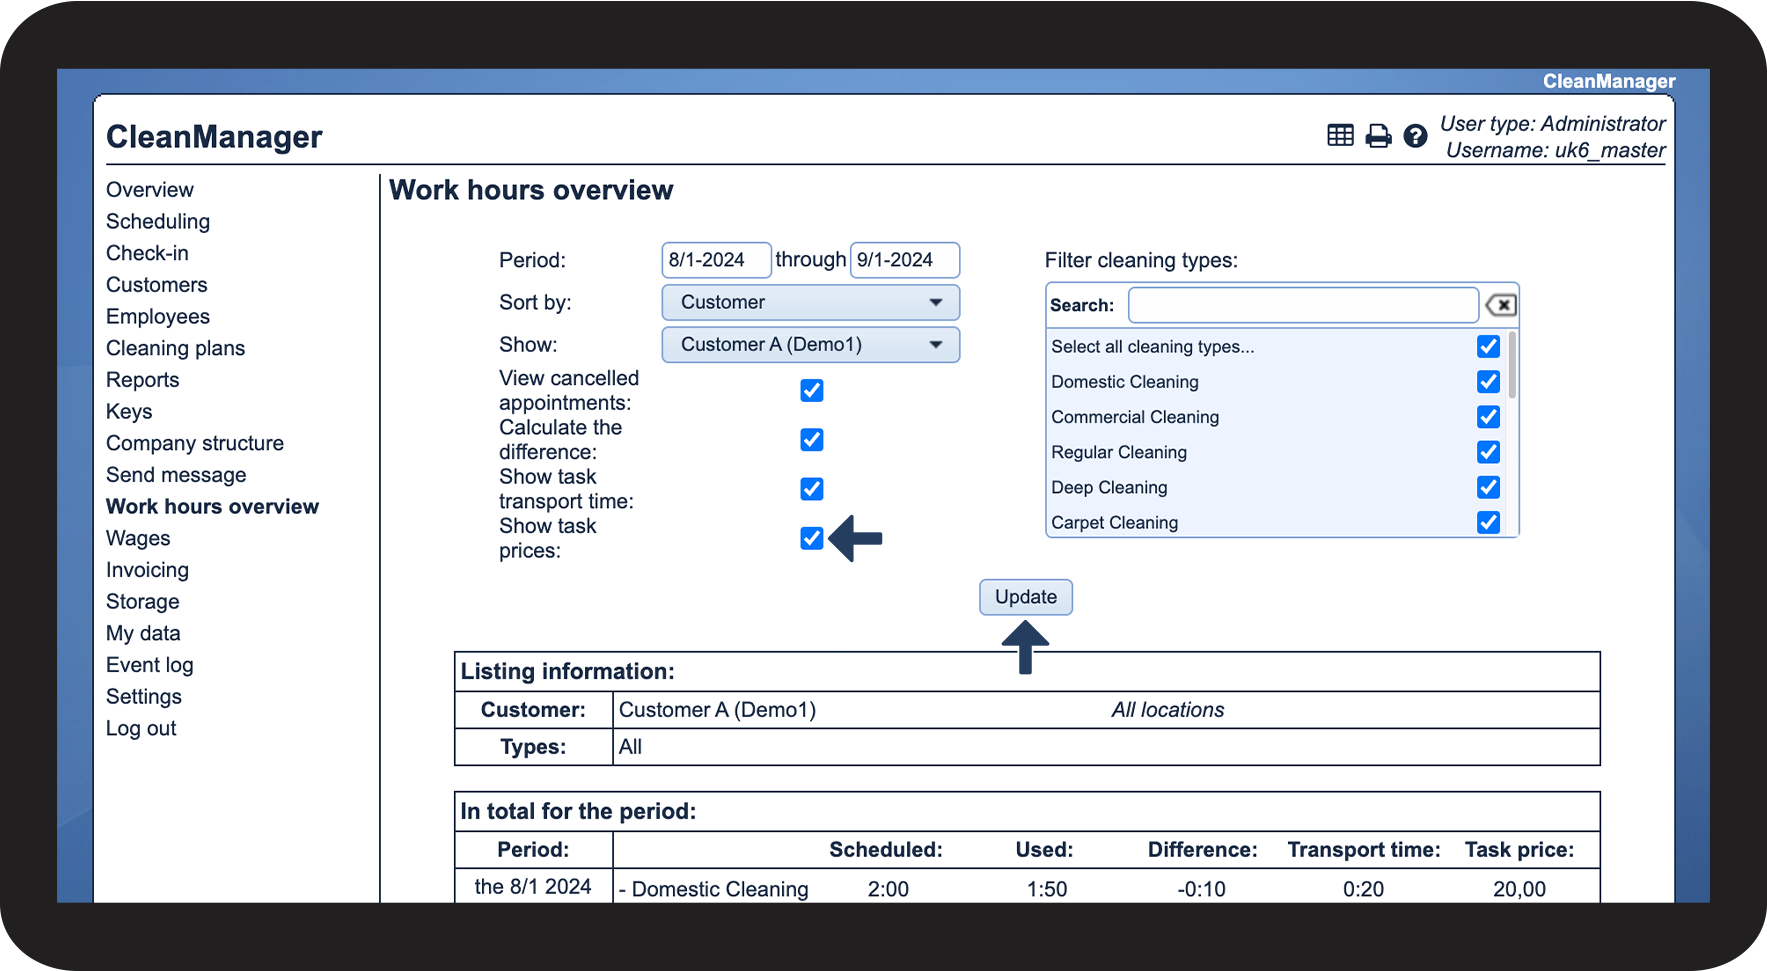
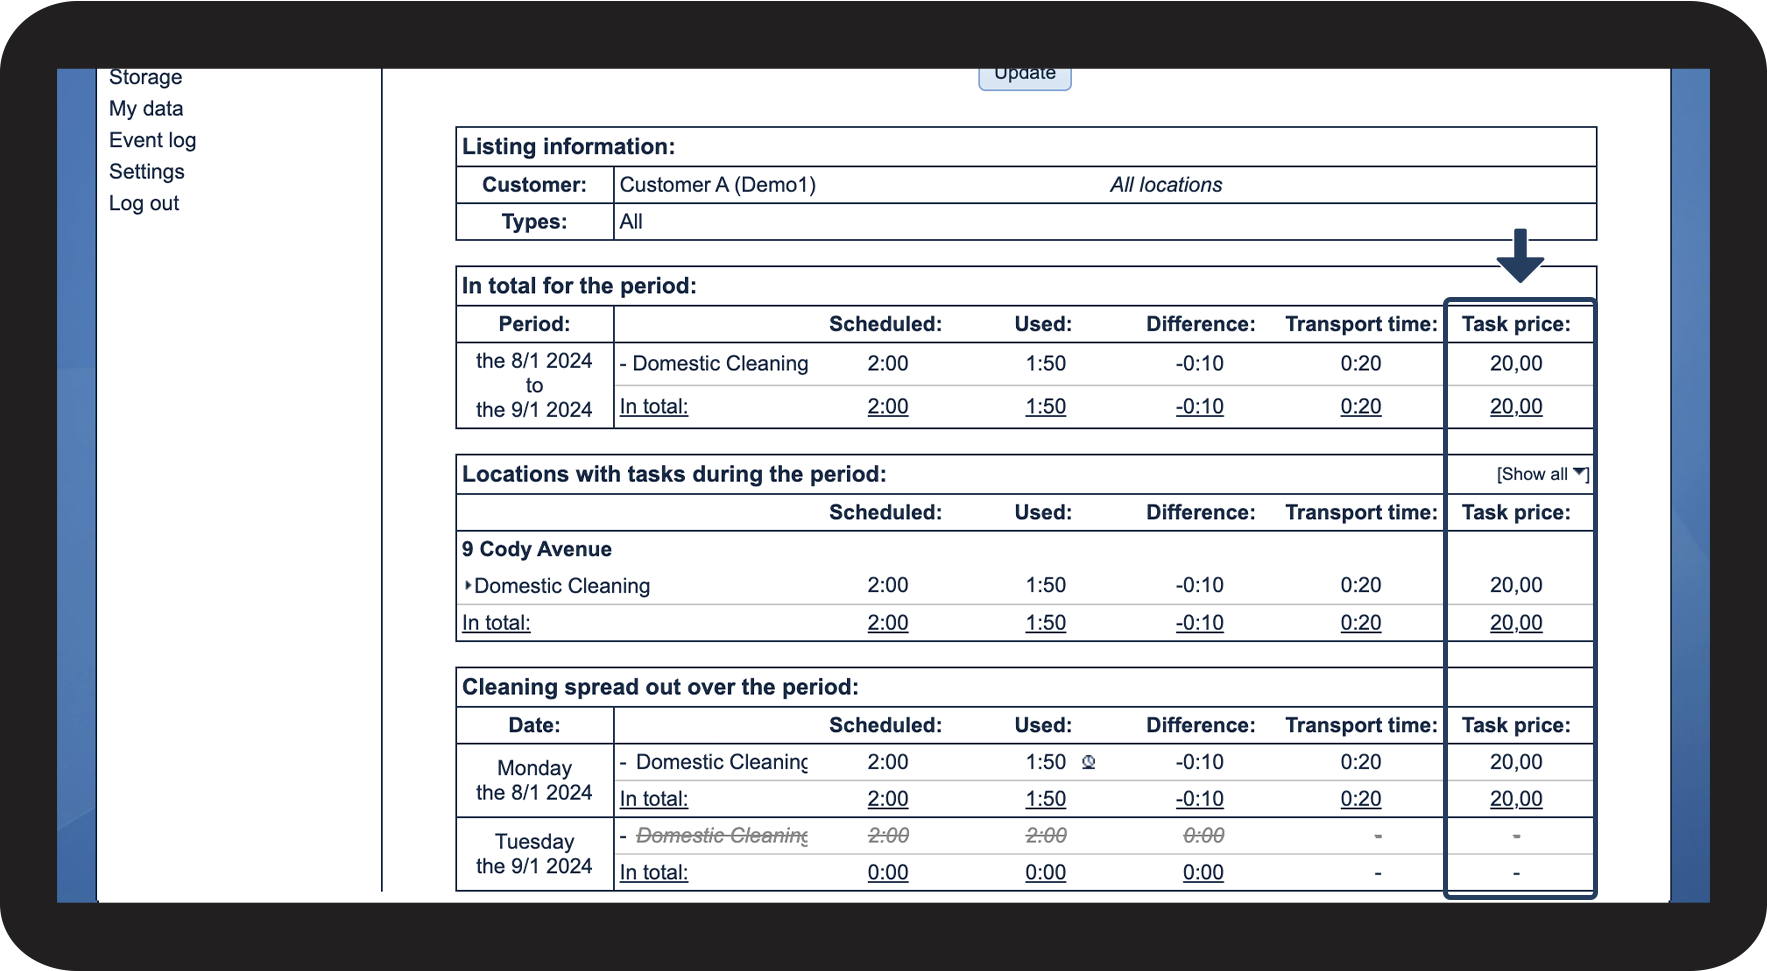
- Show task prices
How to find the work hours overview
View cancelled appointments
INFO:
To learn more about how to create closing days as well as cancelling a task, go to the following articles: Creating closing days and Cancelling a task
Calculate the difference
INFO:
The used time can be registered via the calendar in the web system or through the app if the add-on module App with Time Registration has been activated. If no used time has been registered, the used time will default to the scheduled time.
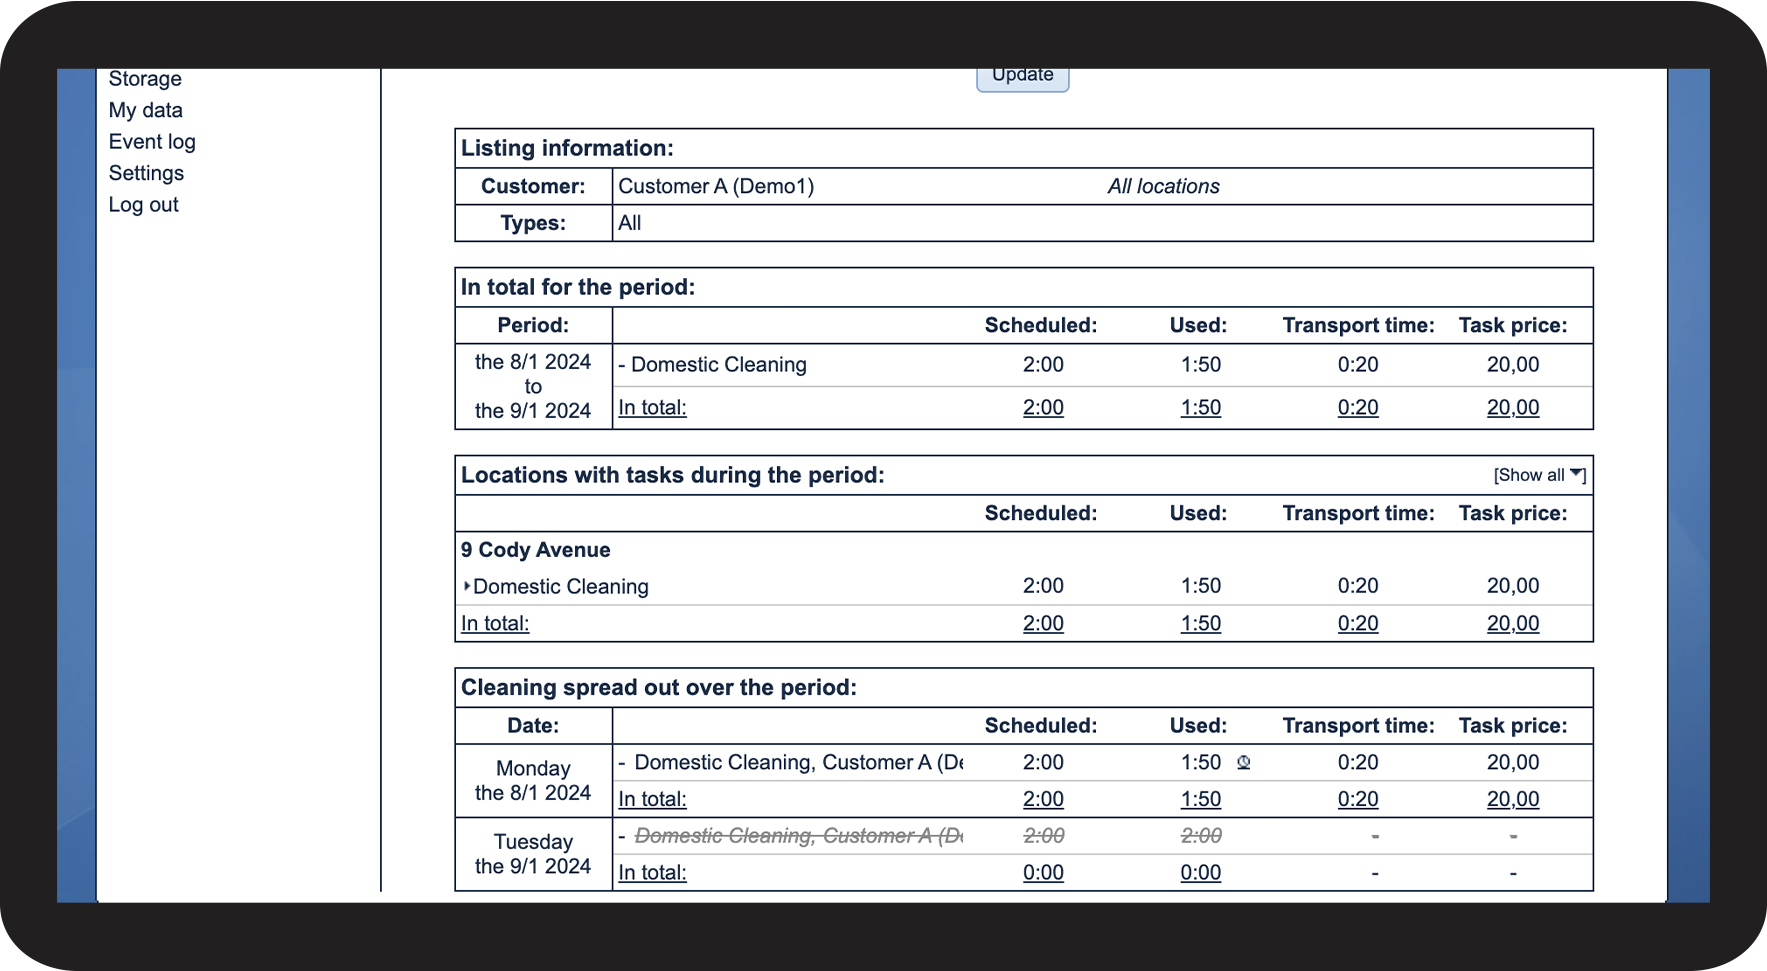
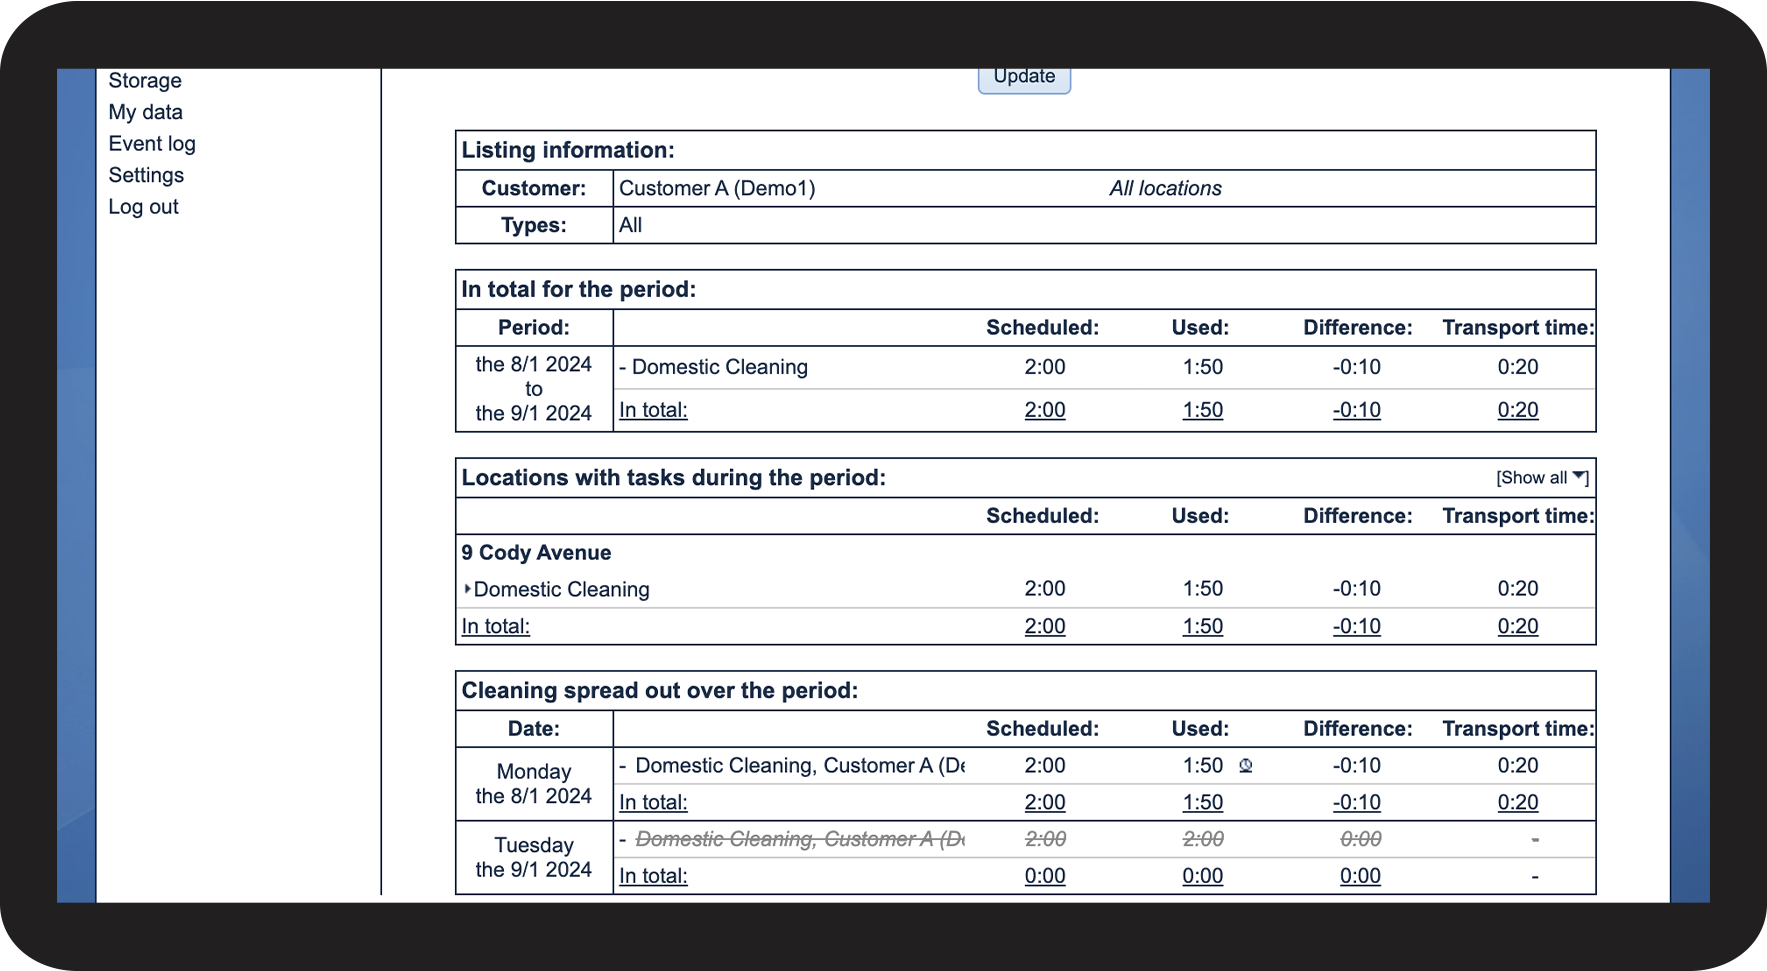
Show task transport time
OBS:
The function Show task transport time will only be visible if the setting Report transport on the individual tasks in the calendar has been activated.
Read more about the settings for reporting transportation here: Transport. To register transportation via the app, see the following article: Registration of transport on tasks.


Show task prices
NOTE:
The column Task price can only display an amount if the price has been added to the task itself in the calendar.