Skip to content
English
  • There are no suggestions because the search field is empty.

Setting up products

How can I set up products?

The administrator can create products, which can either be consumer items for customers or cleaning products, which the employees use to execute their tasks. They can order the products in the CleanManager app. Learn more about how to order products here: Order products.

When a product has been set up, you can attach product and safety information. In this article, you will read about how your employees can access this information through the app: Product information.

As a supervisor, you can add, edit, and delete products. However, it is required that the administrator enables this setting first. The following article will give you insight into how you can grant supervisors access to the storage administration: Storage.


In this article, you will learn how to set up, edit, and delete products:


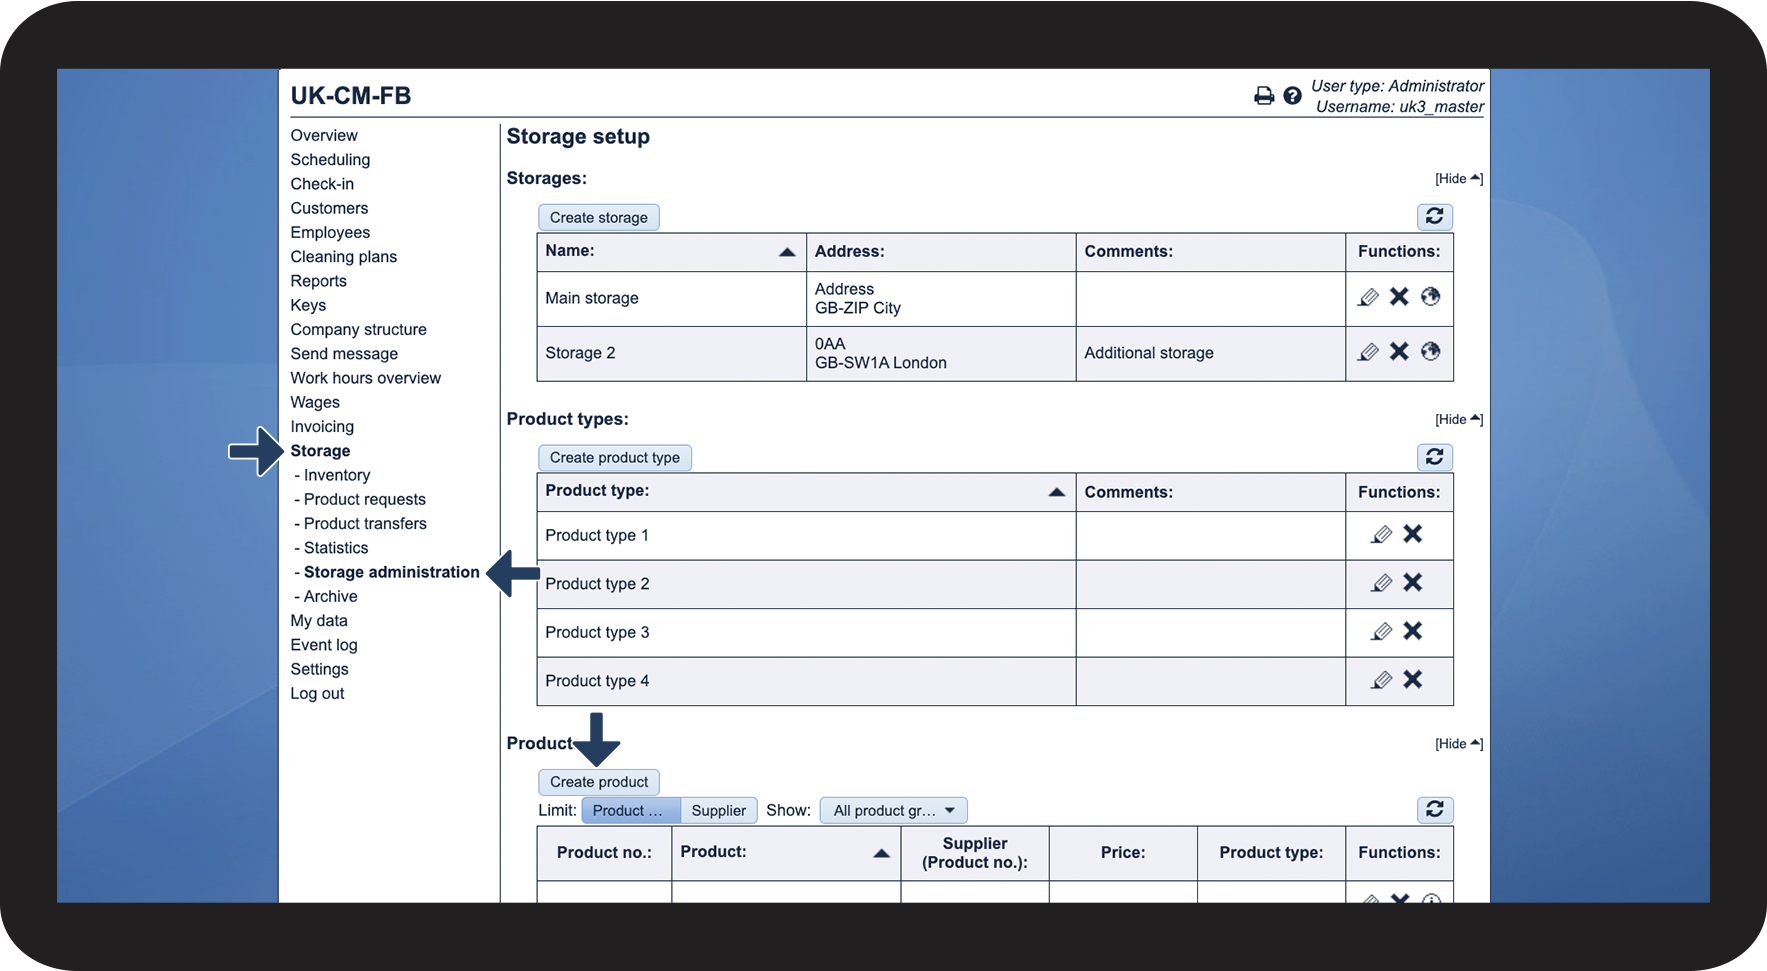
This is how you set up a product

number_1.png

In the menu, go to Storage > Storage administration


Thereafter, click on Create product

1.1.png

number_2.png

Fill in the necessary data


Data

Required/

Not required

Product no.

Required

Name

Required
Supplier
Not required
Supplier product no.
Not required
Product type
Not required
Price
Not required
Comment
Not required

1.2.png

No-number copy.png

Click on Create

1.3.png


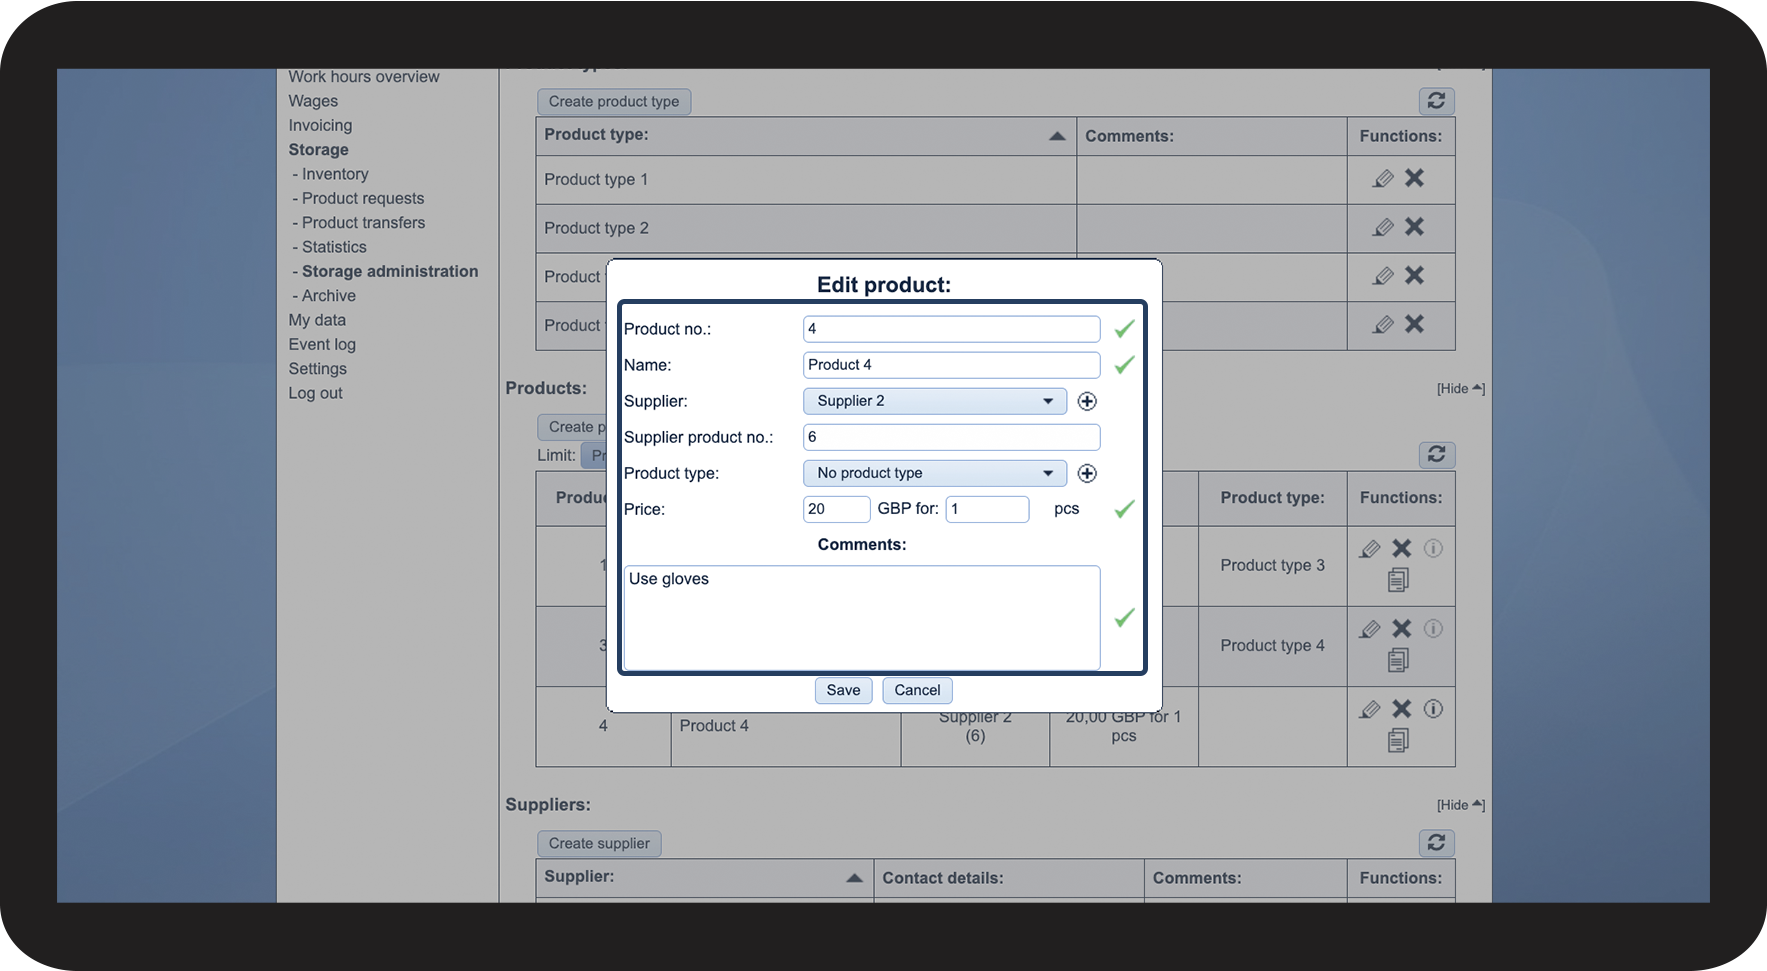
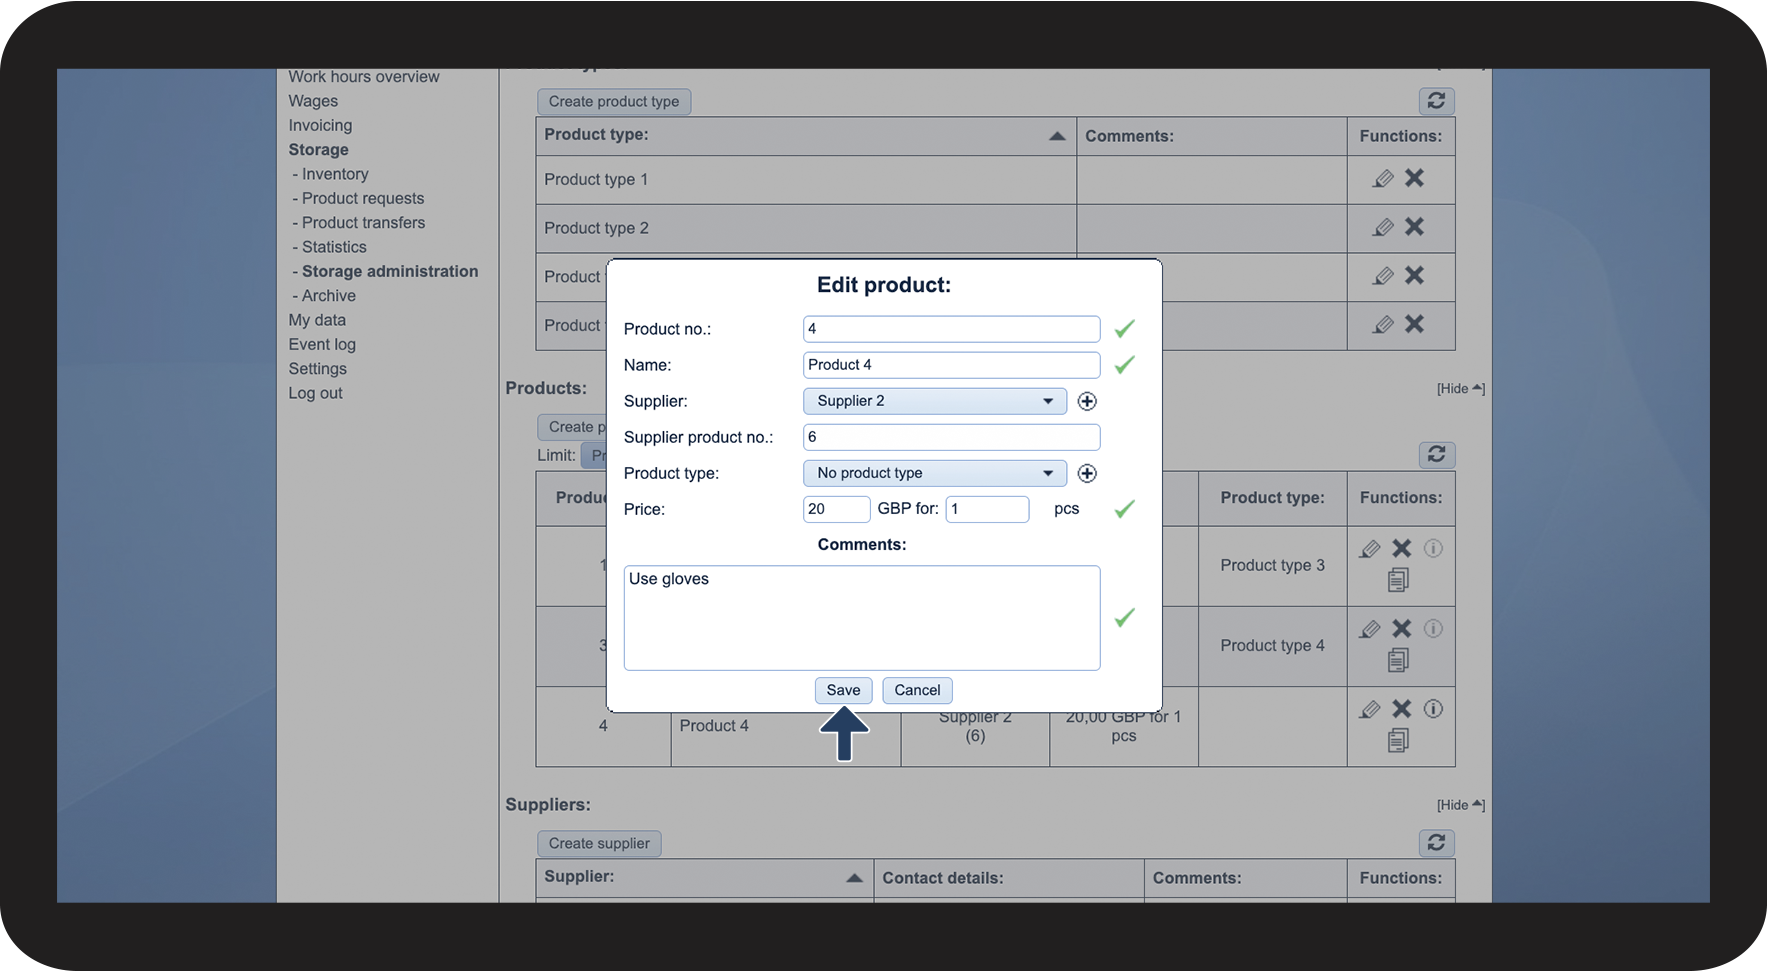
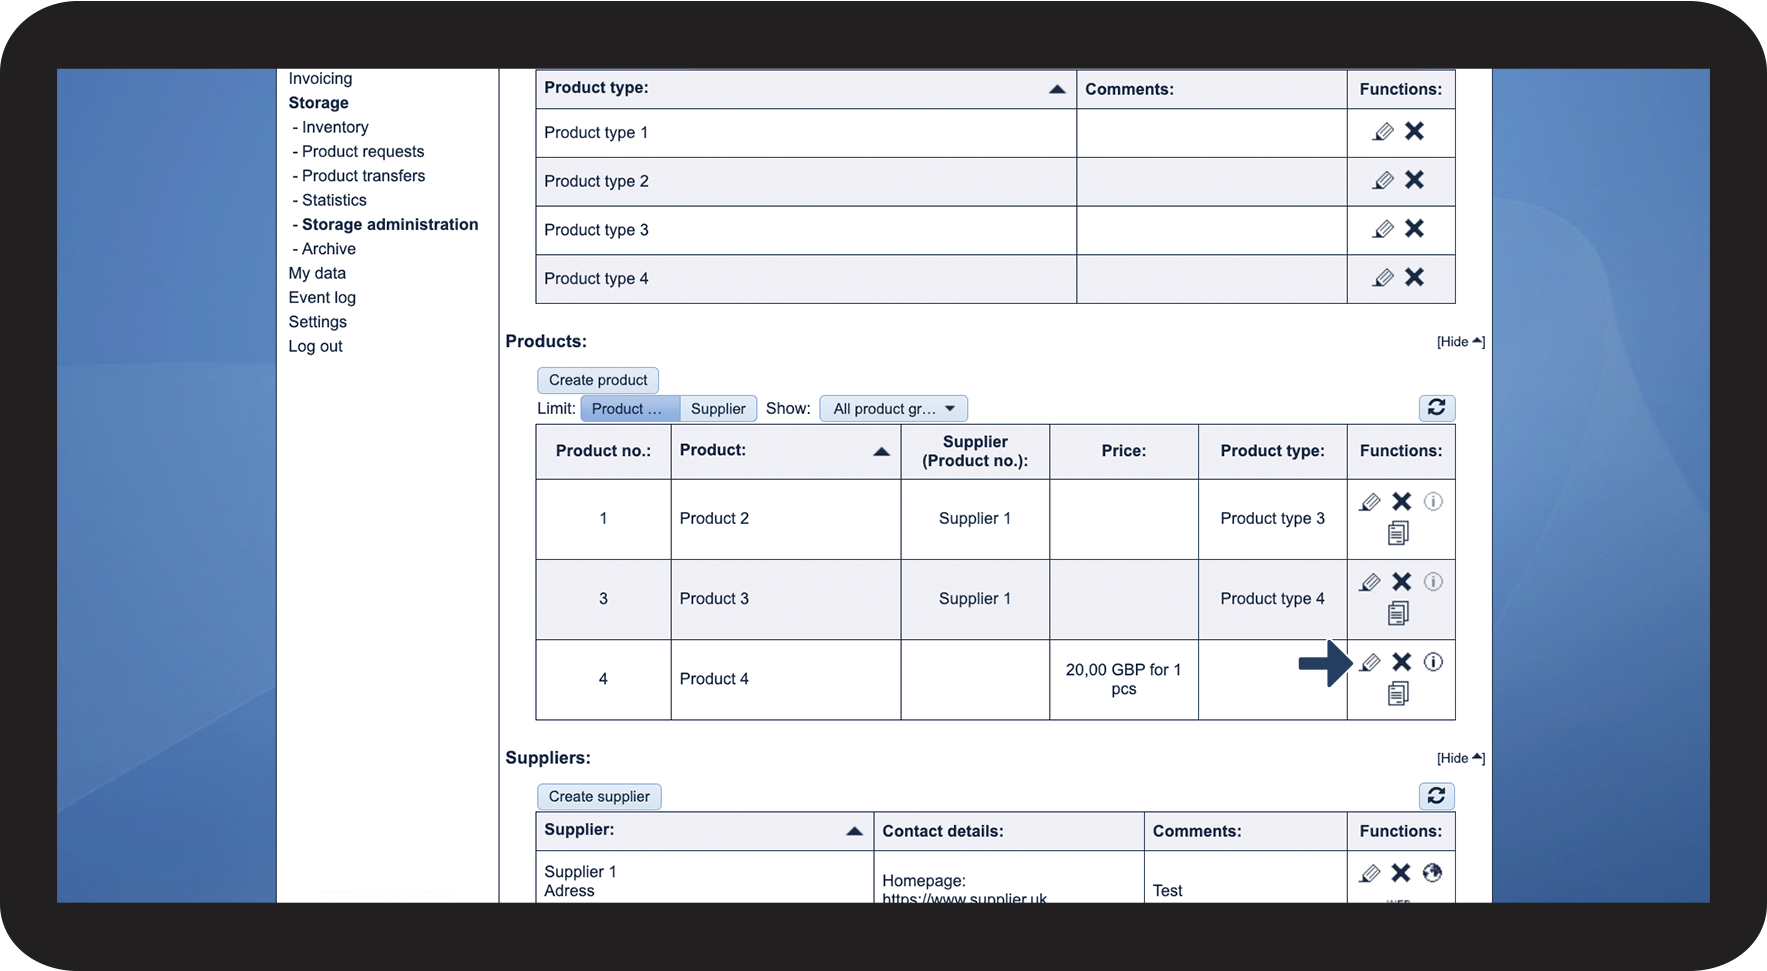
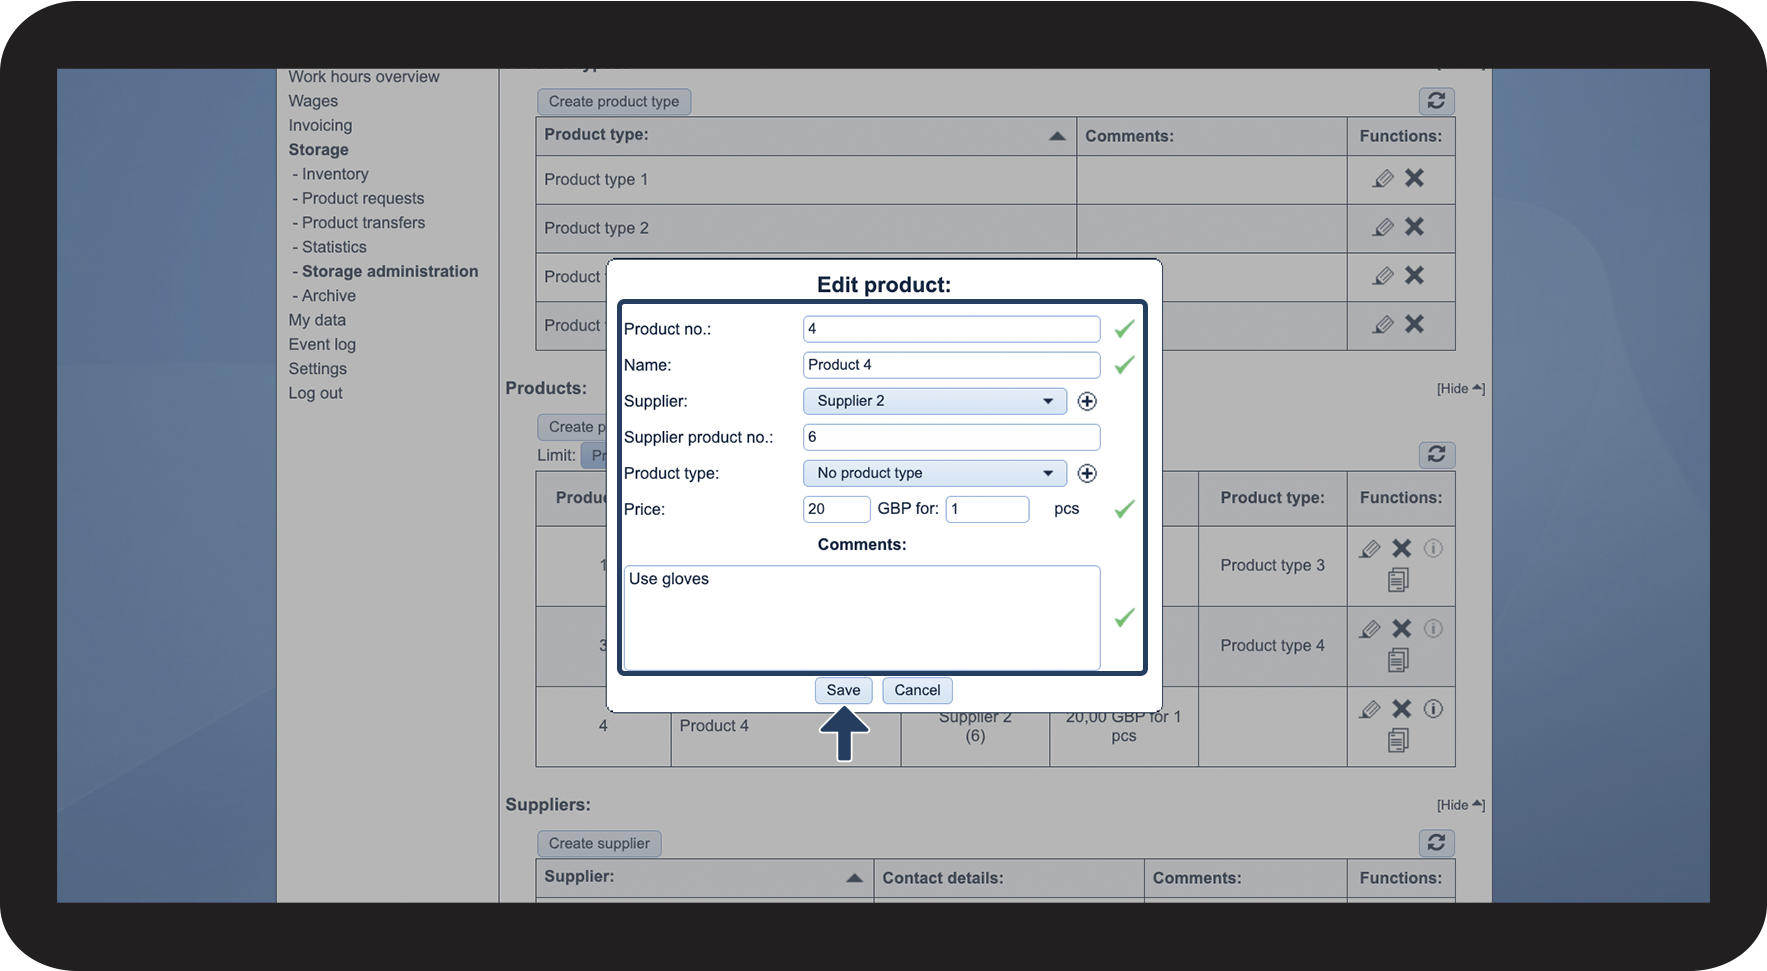
This is how you edit a product

number_1.png

Click on Edit product rediger.png

2.1.png

number_2.png

Edit the relevant data


Thereafter, click on Save

2.2.png


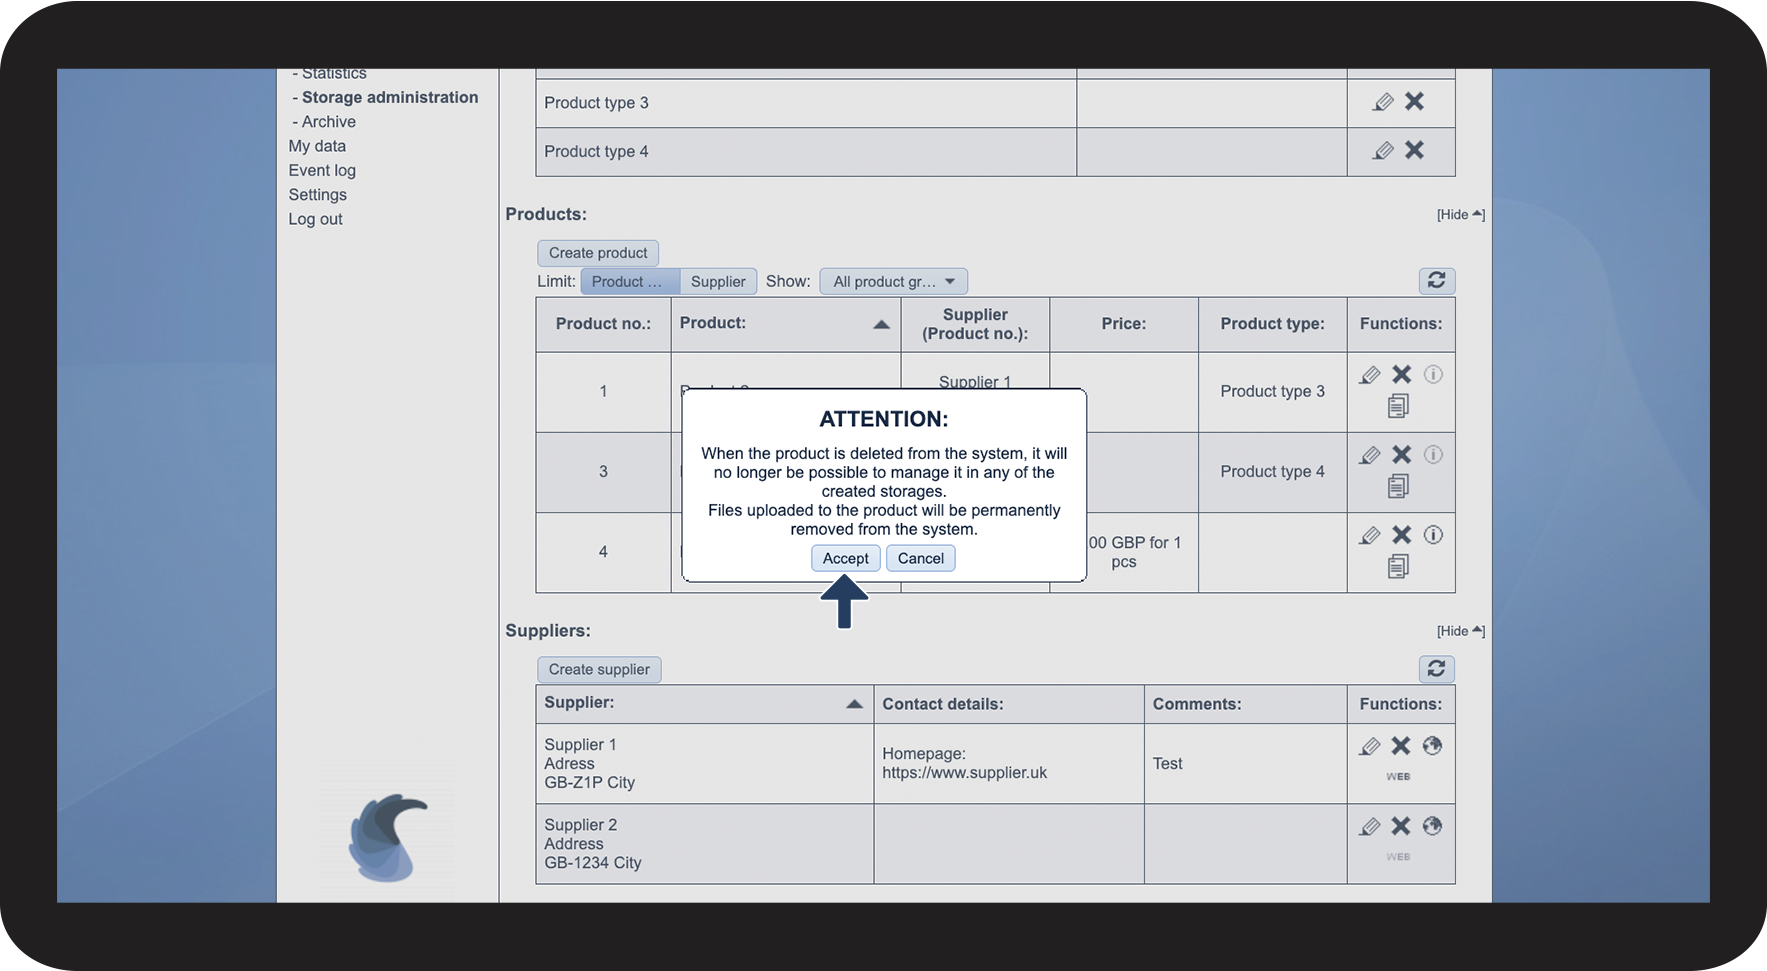
This is how you delete a product
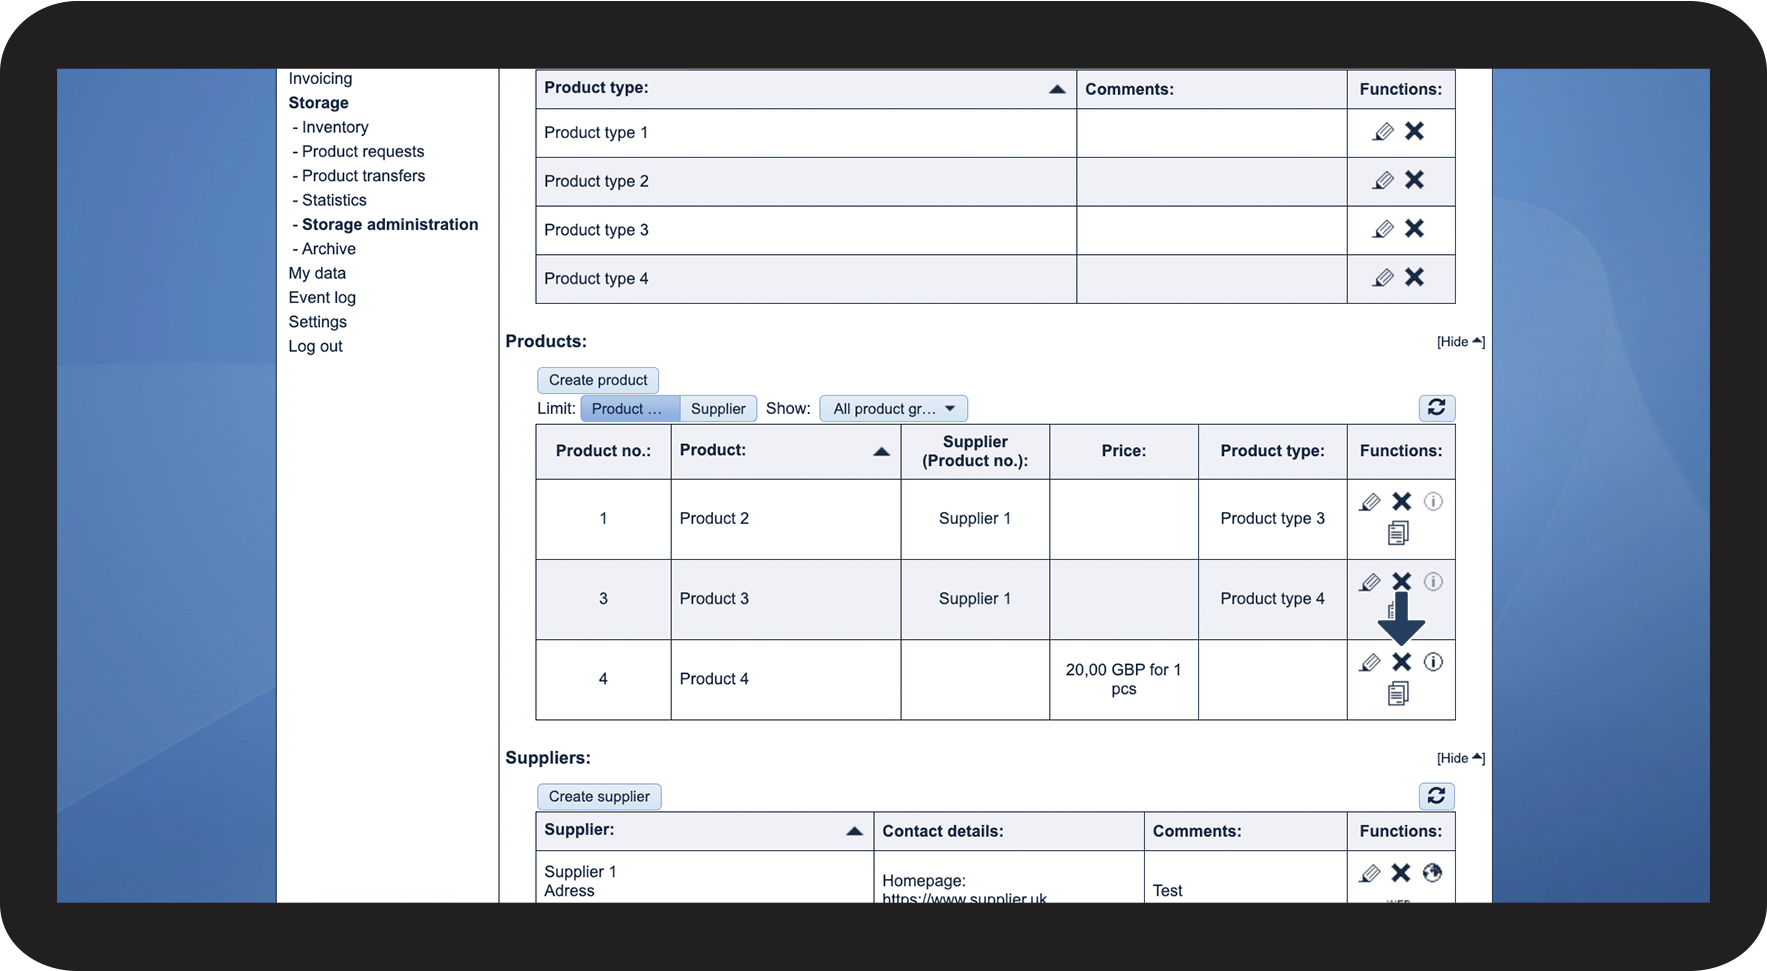
number_1.png

Click on Delete product Slet.png

3.1.png

number_2.png

Thereafter, click on Accept


Note:

If a product has been deleted, you will no longer be able to manage it in any of the storage setups. The files attached to a product will be permanently deleted.

3.2.png


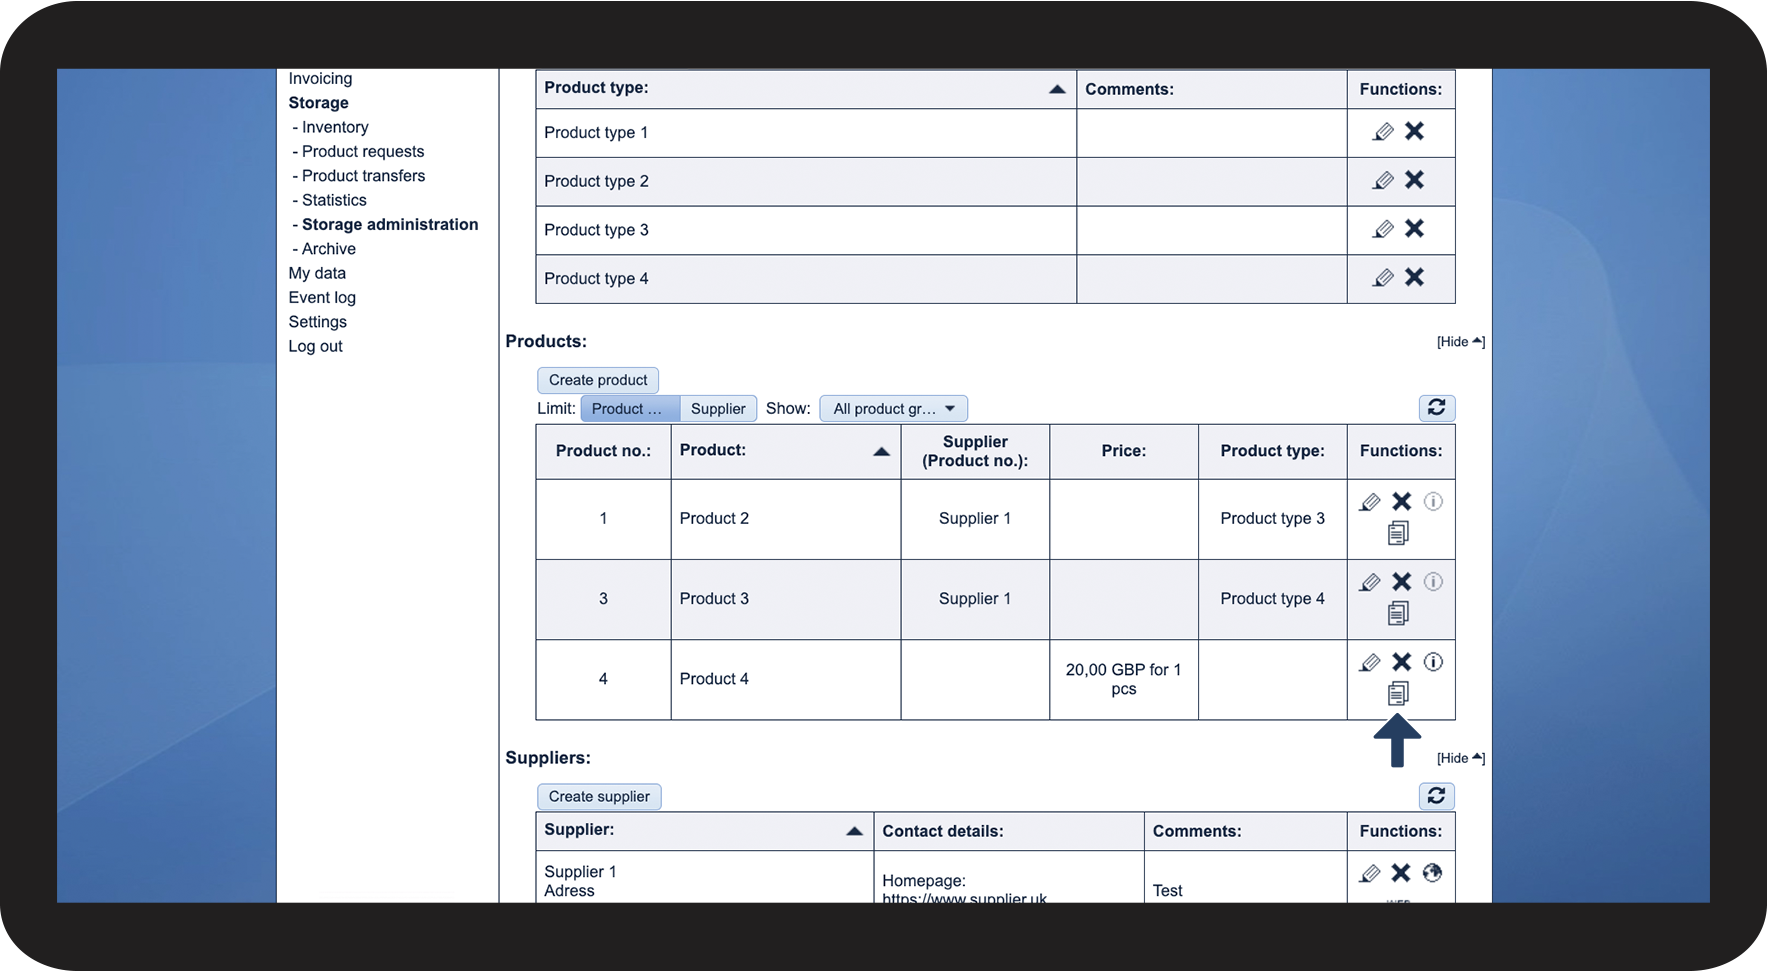
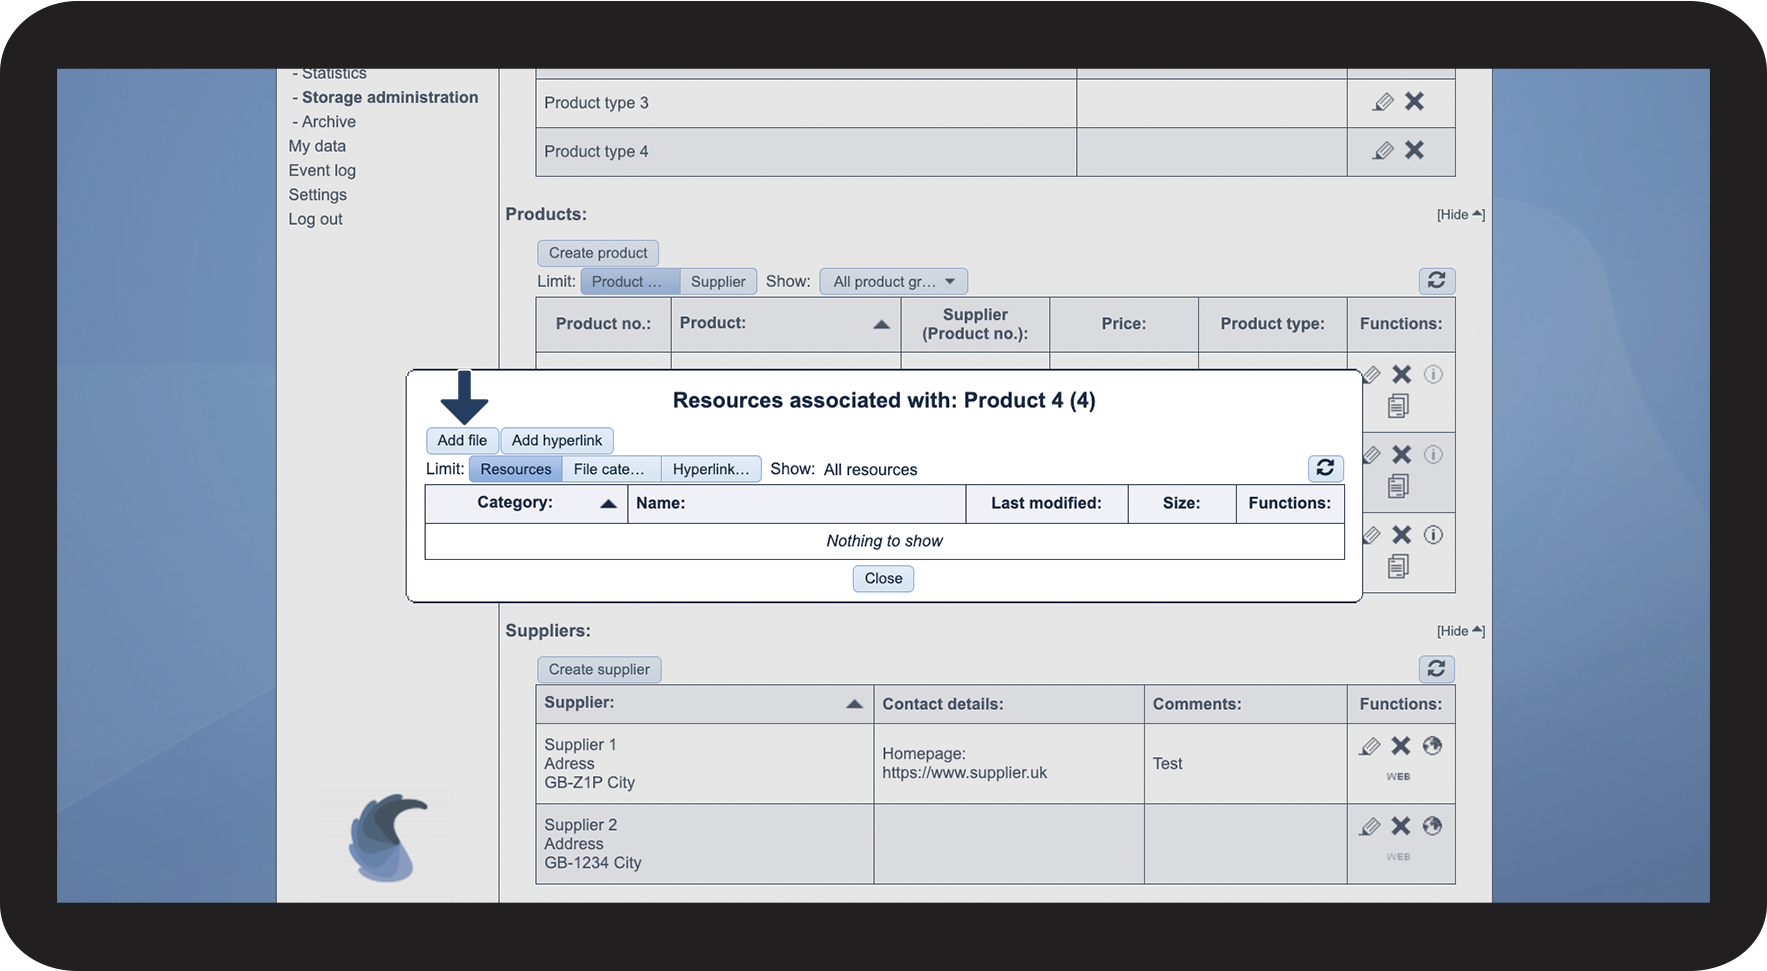
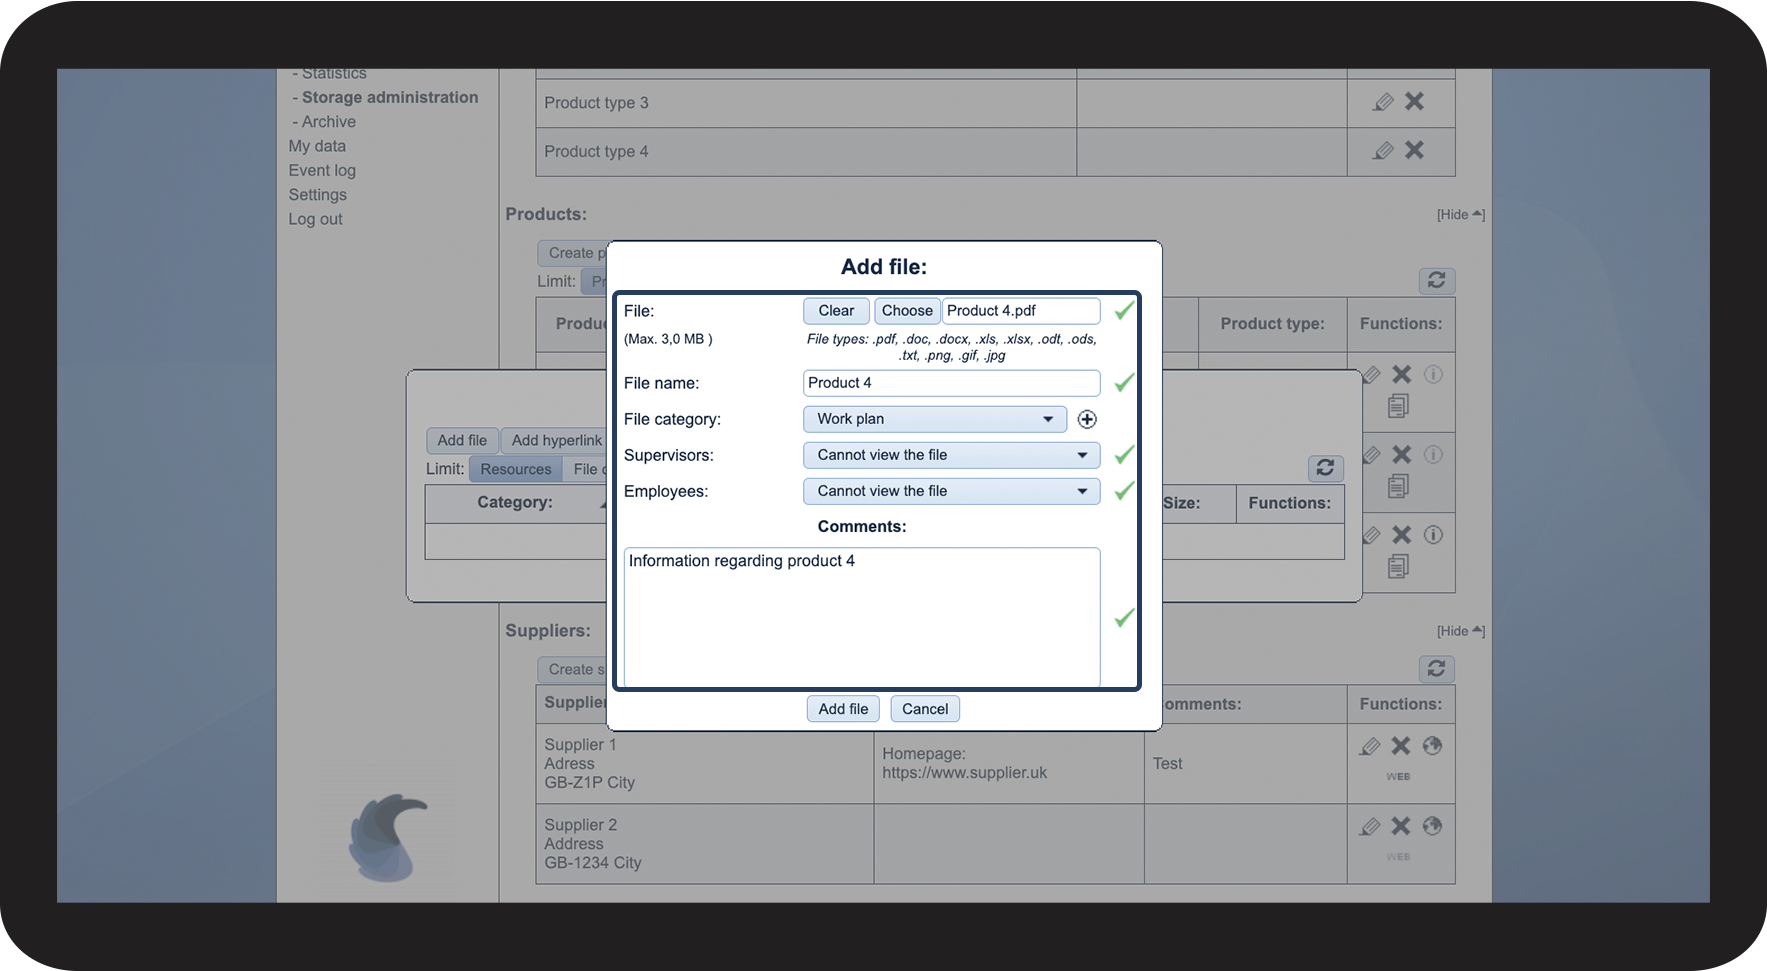
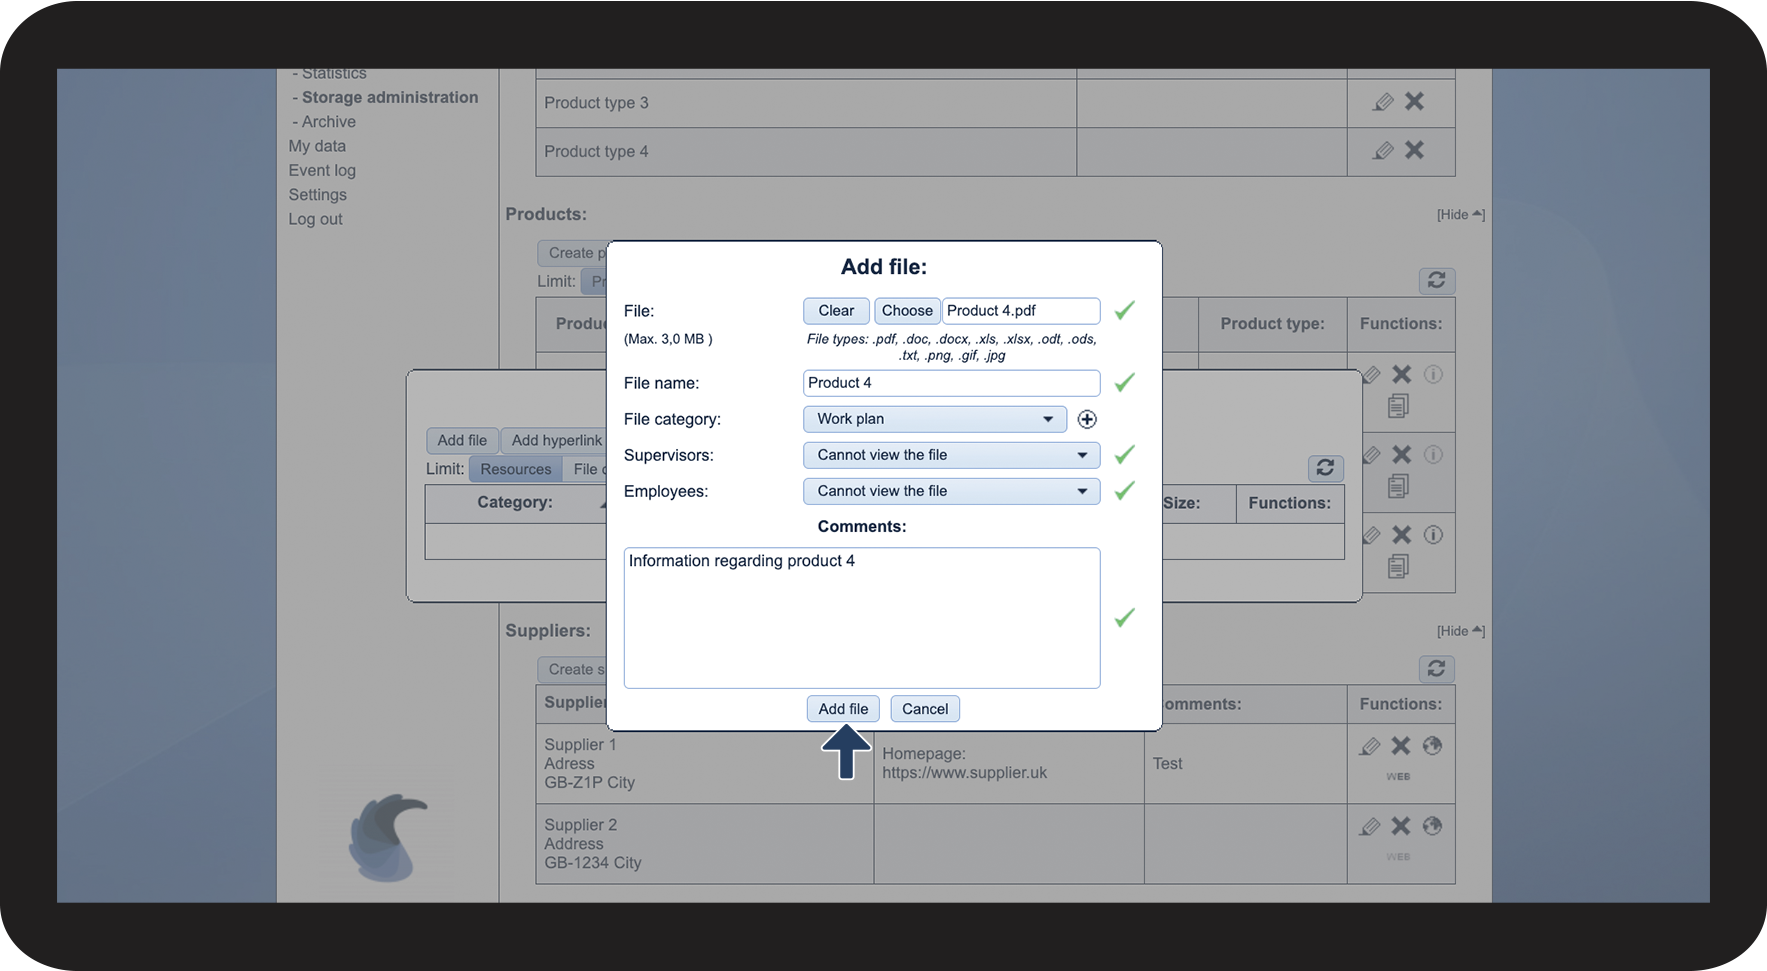
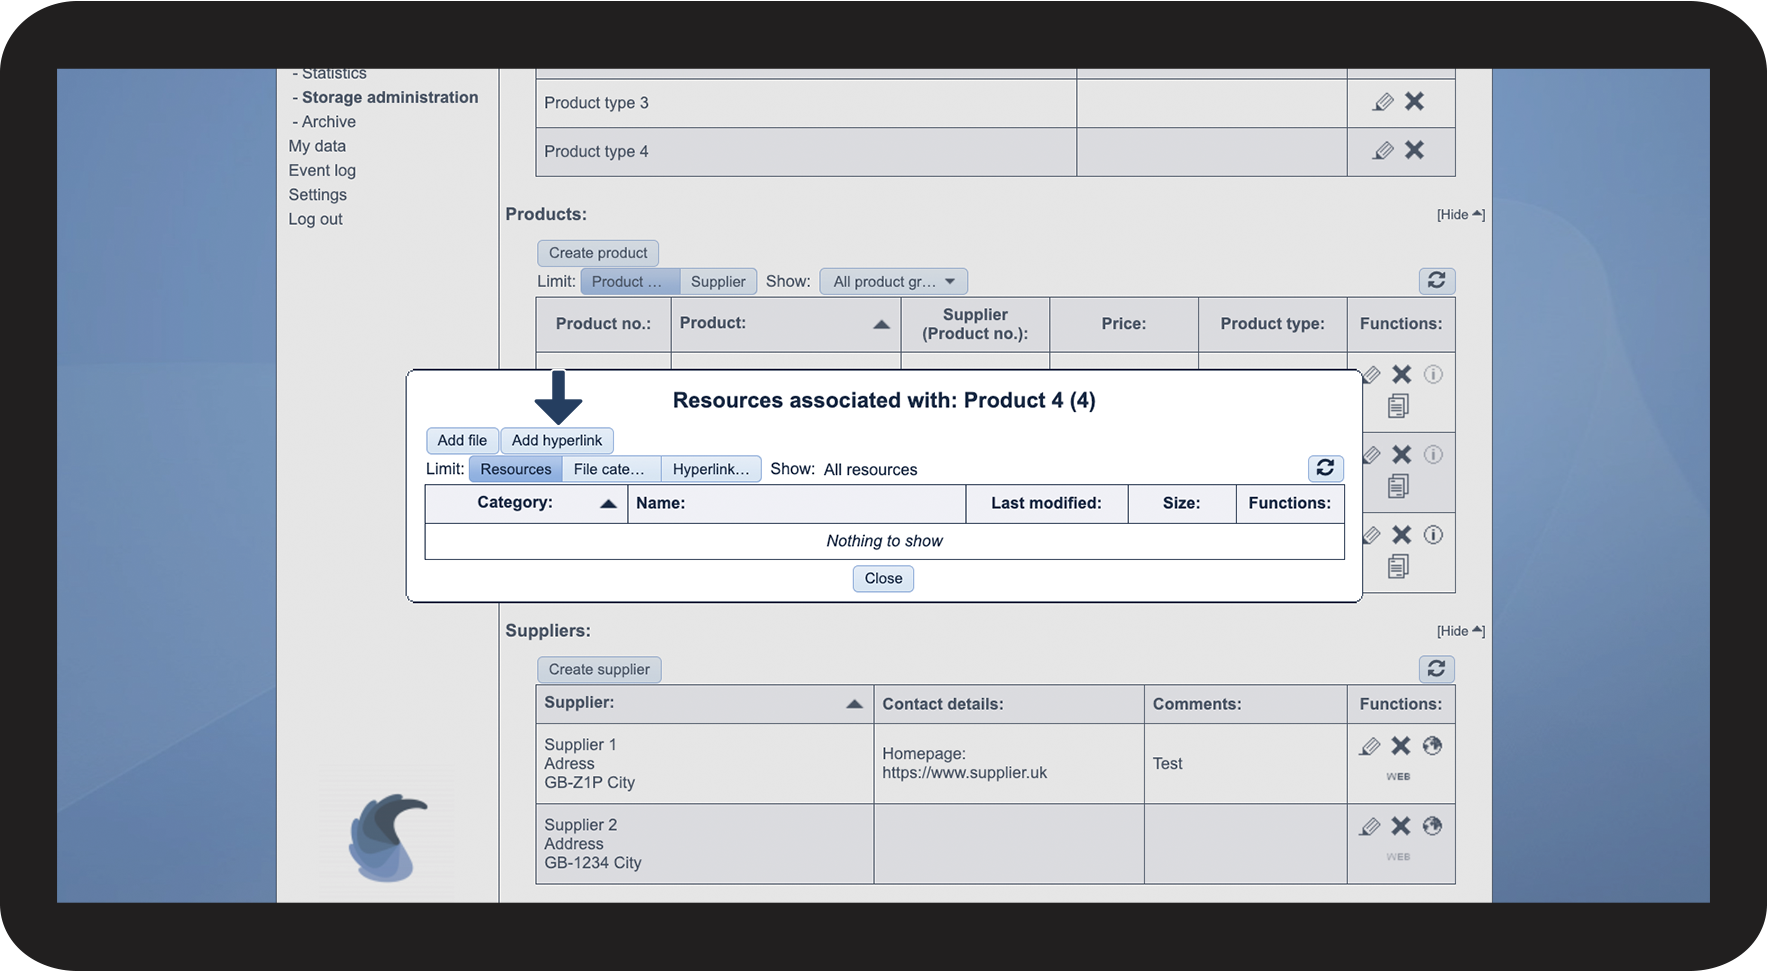
This is how you attach a file to a product

number_1.png

Click on View Resources Ressourcer.png

4.1.png

number_2.png
Click on Add file

4.2.png

number_3.png

Fill in the necessary data


Data

Required/

Not required

File

Required

File name

Required
File category
Not required
Supervisors
Not required
Employees
Not required
Comments
Not required


Note:

If you want your employees to be able to see the attached file, then you need to set the dropdown menus Supervisors and Employees to Can view the file.

Approved file types: .pdf, .doc, .docx, .xls, .xlsx, .odt, .ods, .txt, .png, .gif, .jpg

4.3.png

No-number copy.png

Thereafter, click on Add file

4.4.png


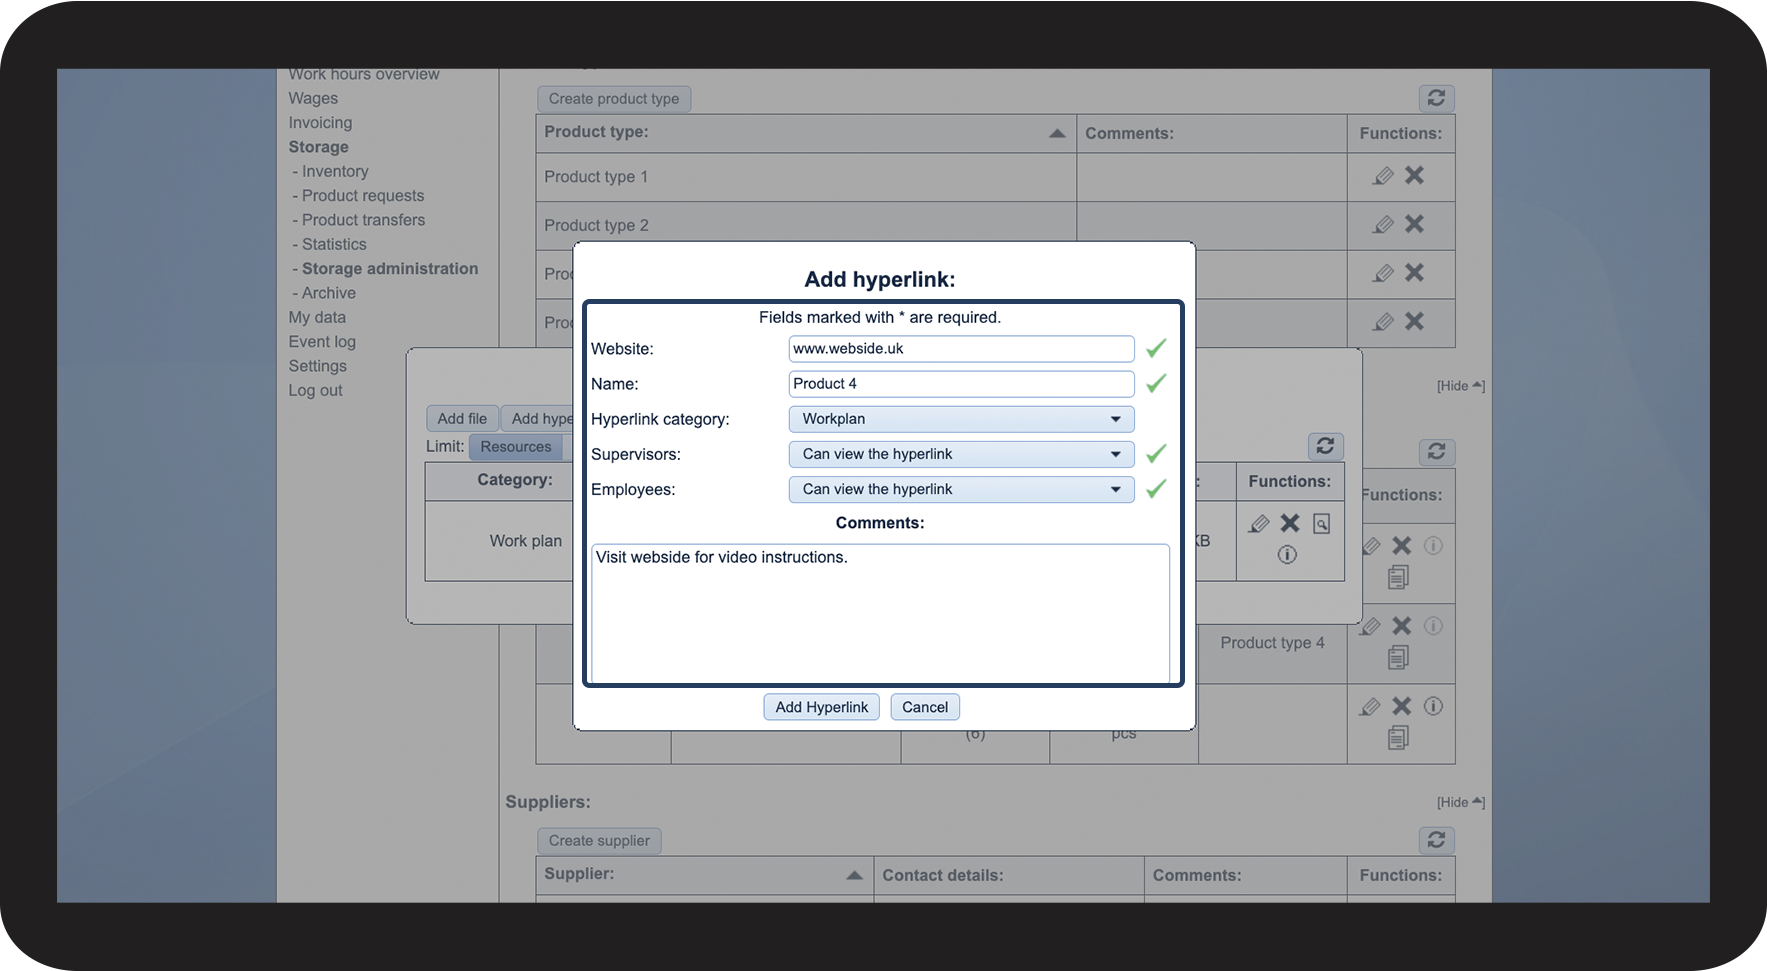
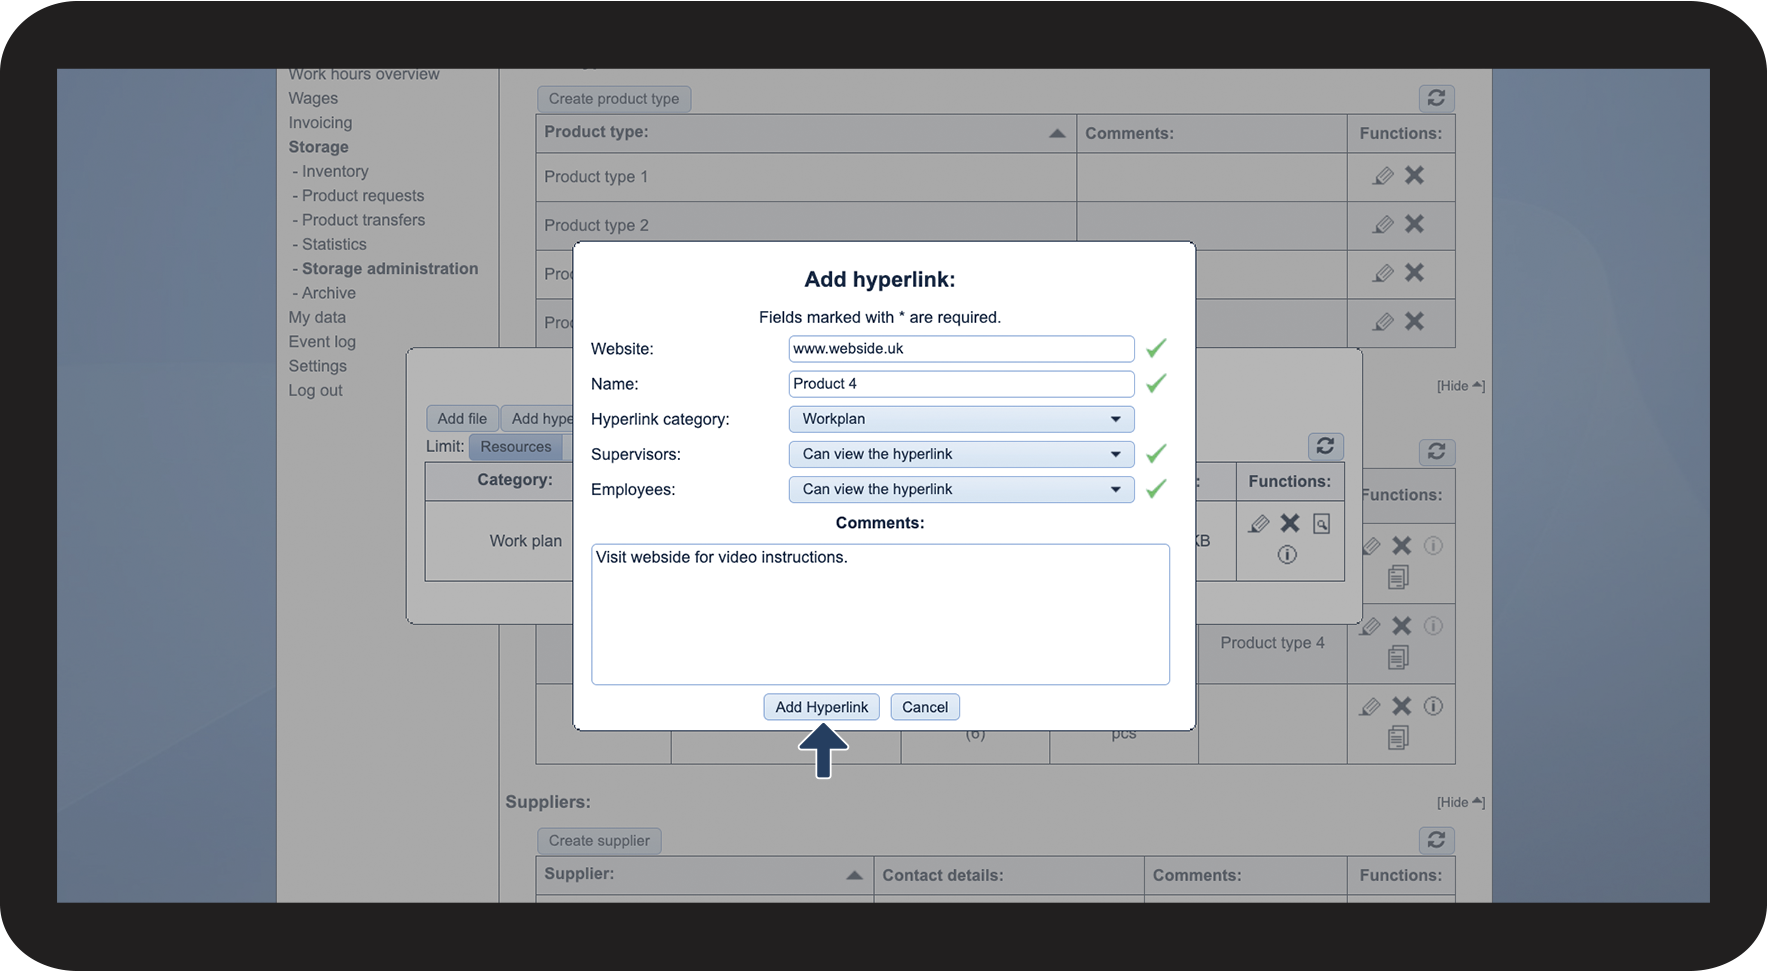
This is how you attach a hyperlink to a product

number_1.png

Click on View resources Ressourcer.png

5.1.png

number_2.png

Click on Add hyperlink

5.2.png

number_3.png
Fill in the relevant data


Data

Required/

Not required

Website

Required

Name

Required
Hyperlink category
Not required
Supervisors
Not required
Employees
Not required
Comments
Not required


Note:

If you want your employees to be able to see the hyperlink, then you need to set the dropdown menus Supervisors and Employees to Can view the file.

5.3.png

No-number copy.png

Thereafter, click on Add hyperlink

5.4.png


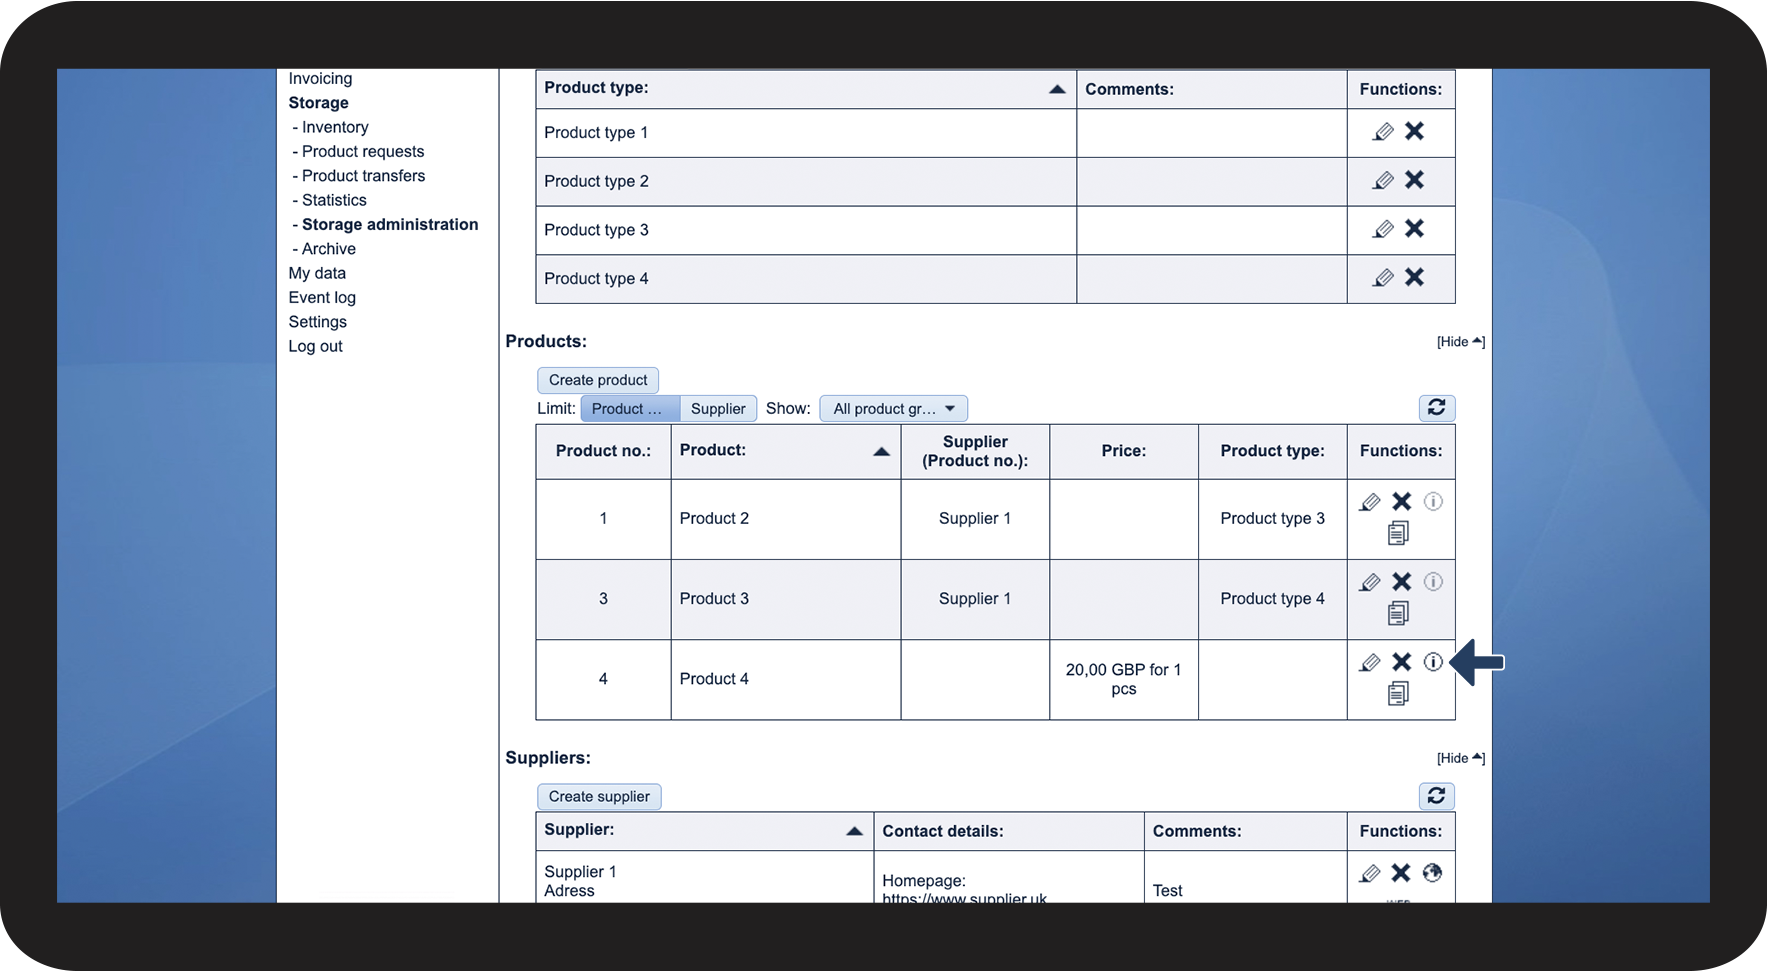
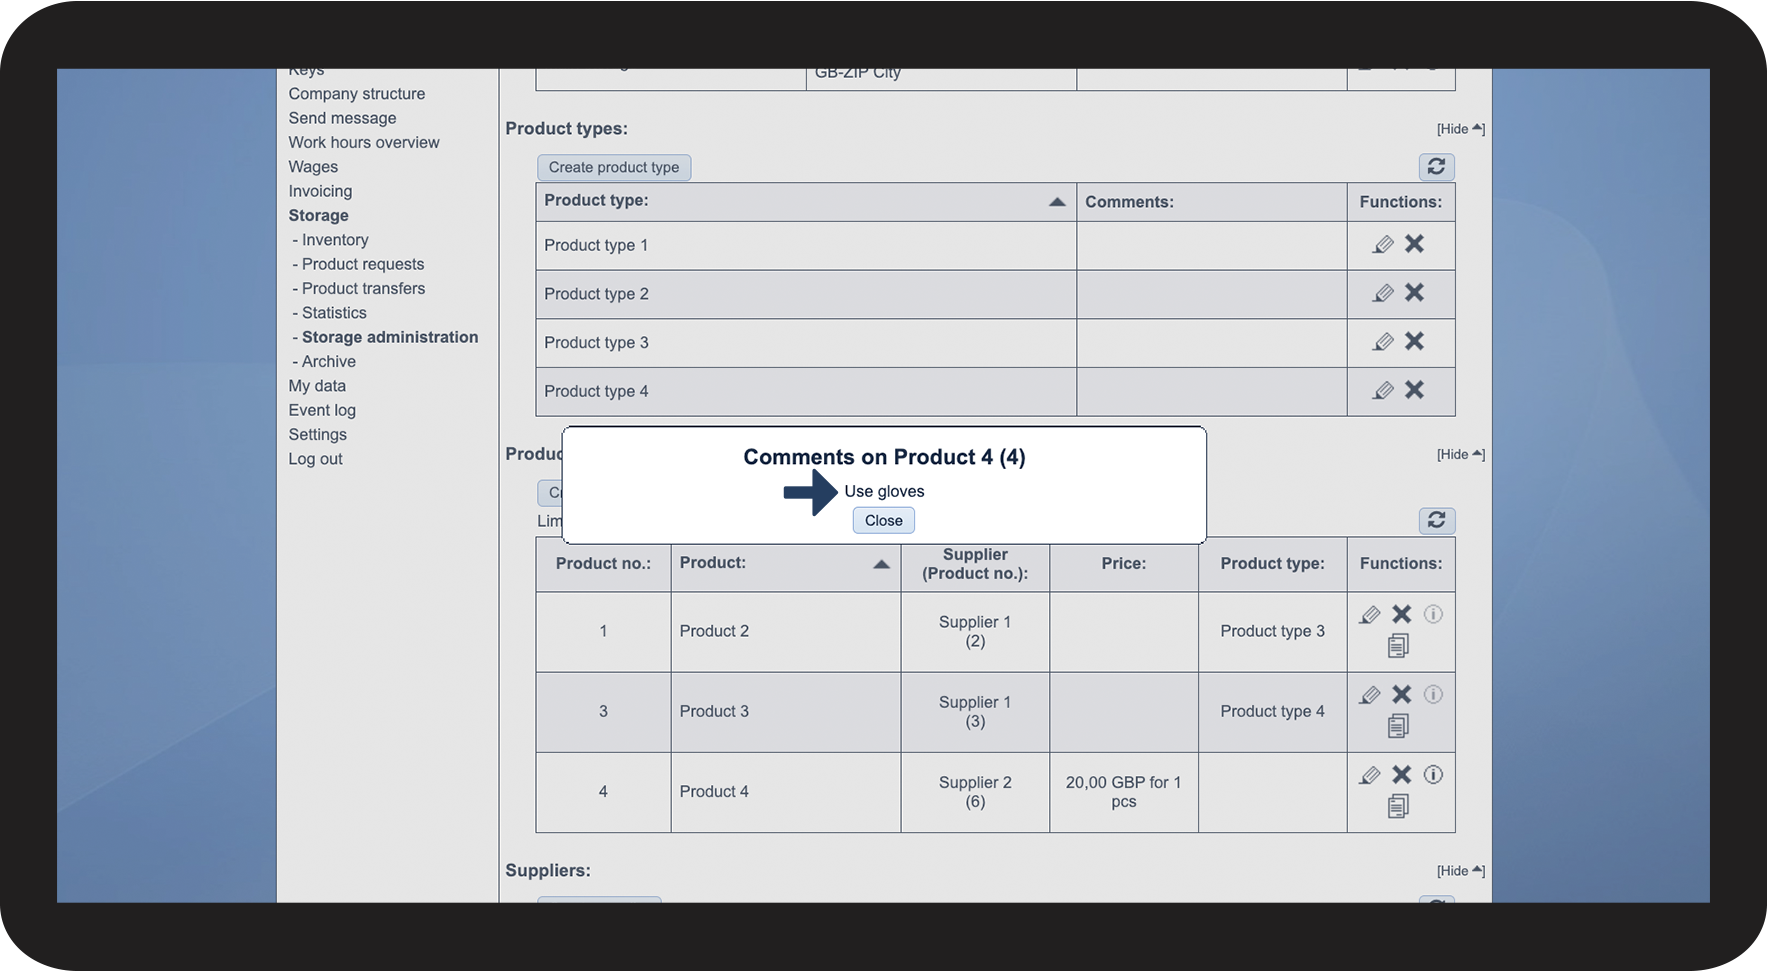
This is how you can see comments attached to a product

number_1.png

Click on View comments Info3.png

6.1.png

No-number copy.png

See the comments

6.2.png