How do I prepare my customer data to be imported into CleanManager?
If you have set up your account to import customer data with file import, this article will teach you how to prepare your customer data for import into a CleanManager format.
If you are not sure what a file import is and how it works, you can learn more in this article: How does a file import from Excel work?
In this article, you will learn about which customer data you can import and how to set up your spreadsheet and prepare it for import into CleanManager:
NOTE:
You can import customers and their company information, including the company's billing address, for which work can also be scheduled.
If the customer has multiple sub-locations attached, you cannot import these additional locations yourself during your import. They must be created manually after you have imported your customer, or you can contact support at: support@cleanmanager.uk
We will then follow up on your inquiry and assist with a full customer import including sub-locations.
- Attach a full description of the facets of your customer import in the email.
- Share your data with us in CleanManager using the file exchange:
For more information regarding this, go to: File exchange
Customer data that can be imported
In the Column name column in the below table, you can see the data you can import (e.g. Customer number).
In the Data format column, you can see which formatting you should use when inserting your customer data (e.g. Letters and numbers (min. 1 character, max. 10 characters)).
In the Example column, you can see an example of the data you can insert
(e.g. 100).
NOTE:
The Active column is based on whether the customer should be active in your synchronization. If you select no, the customer will not be imported.
If customer data is exported from the system, these columns are also included:
Preparing the file for import
You can use your own Excel files that you use to store data about your customers, or you can use our templates to set up your data before you start importing customers.
Your custom files will need to be modified to have the same column names and values in the rows as you see in the table in the section Customer data that can be imported.
The order of your columns does not affect your import, but it is important that the column names are written correctly, including capitalization, otherwise, you will get errors during your import.
Spreadsheet templates:
See where you can download our templates that you can use to set up your customer data and then save and use for your import:


Example:
Here's an example of what the files contain when you download them:

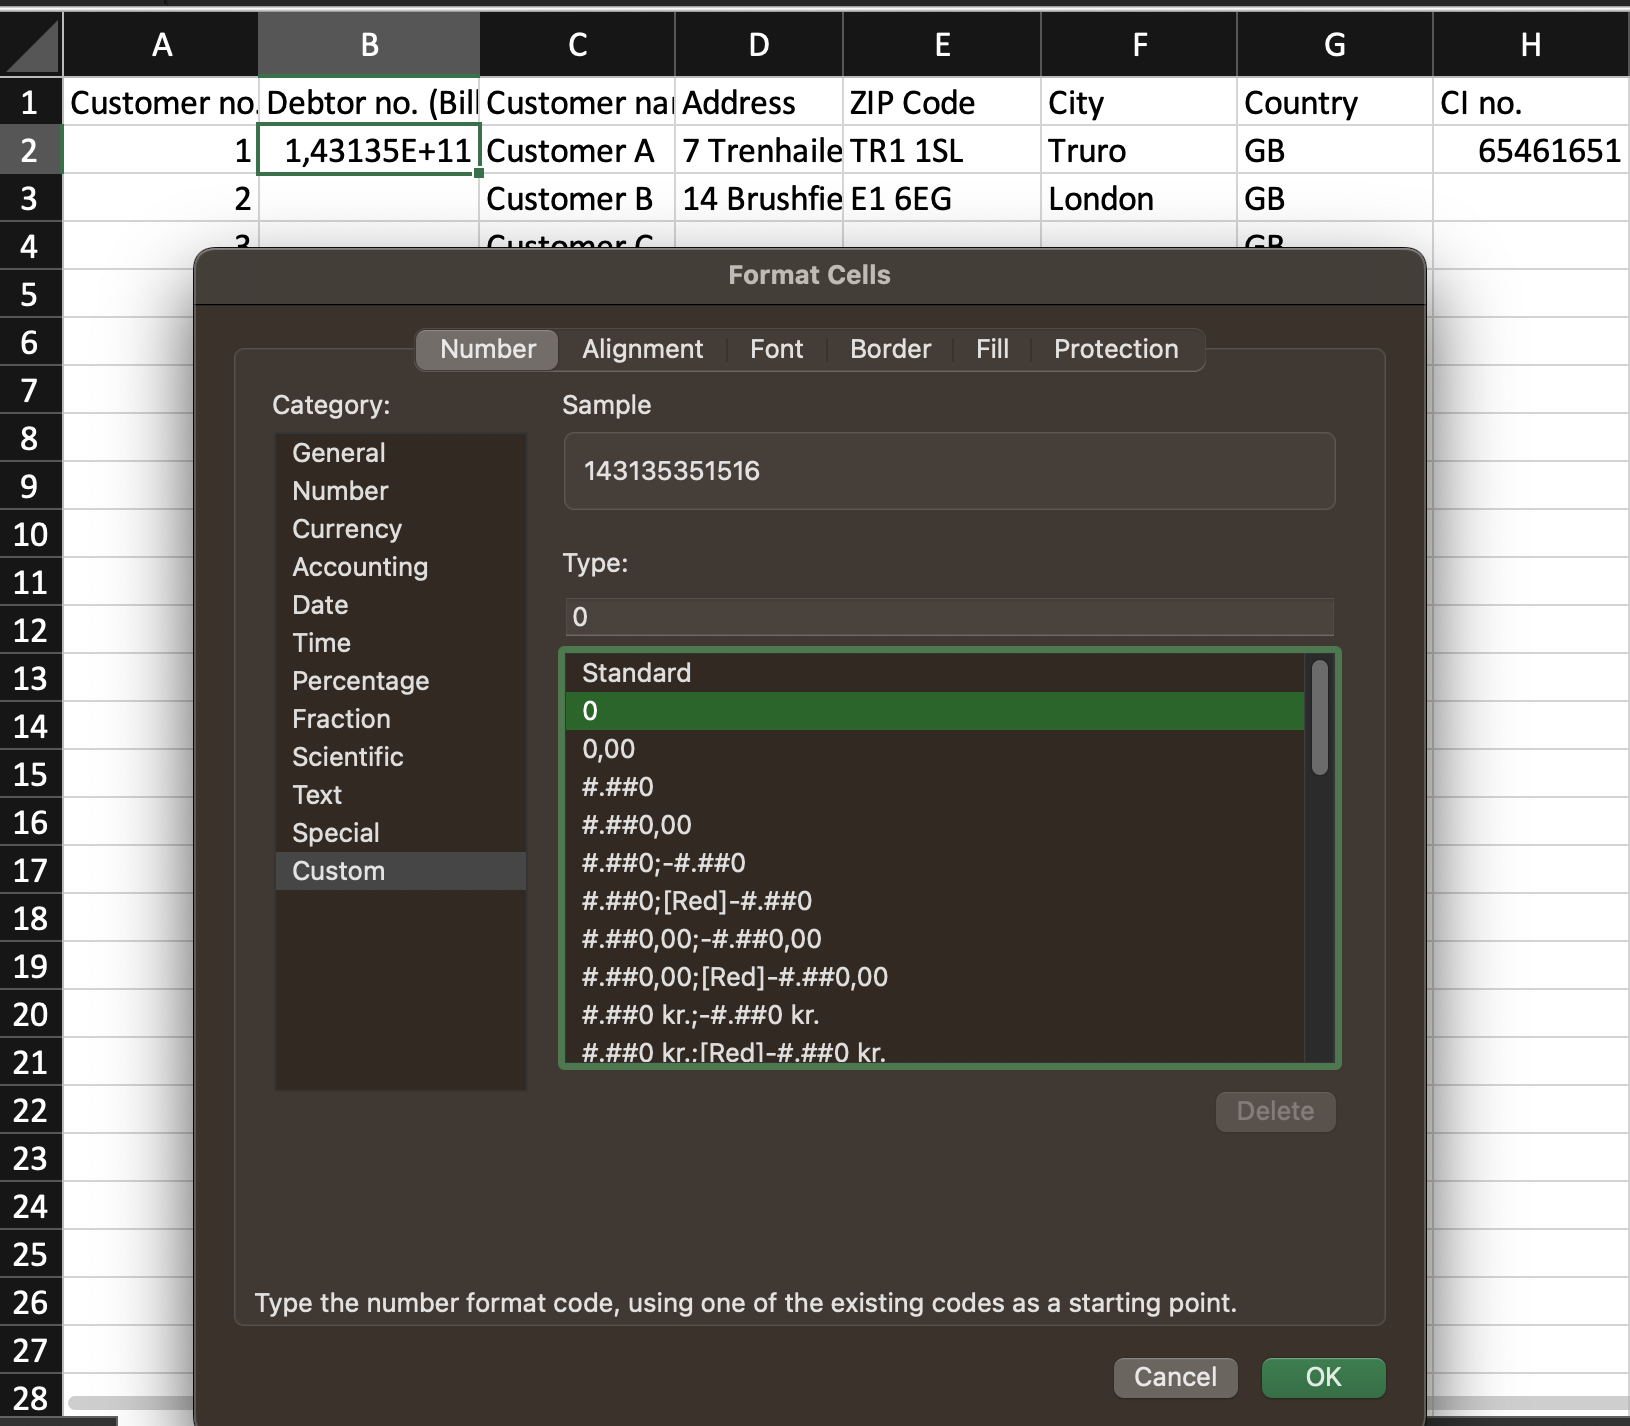
NOTE for CSV files:
Excel and other spreadsheet programs will truncate long numbers.
This means that they will be rewritten as, for example, 1.235E+09.
To change this before saving your CSV file, you need to format the cells.
Select the required cells, right-click on them, and select Format Cells.
You can then select the Custom category and set the type to include the necessary amount of 0's/numbers (in this case 13) to ensure that the numbers are transferred correctly during export.
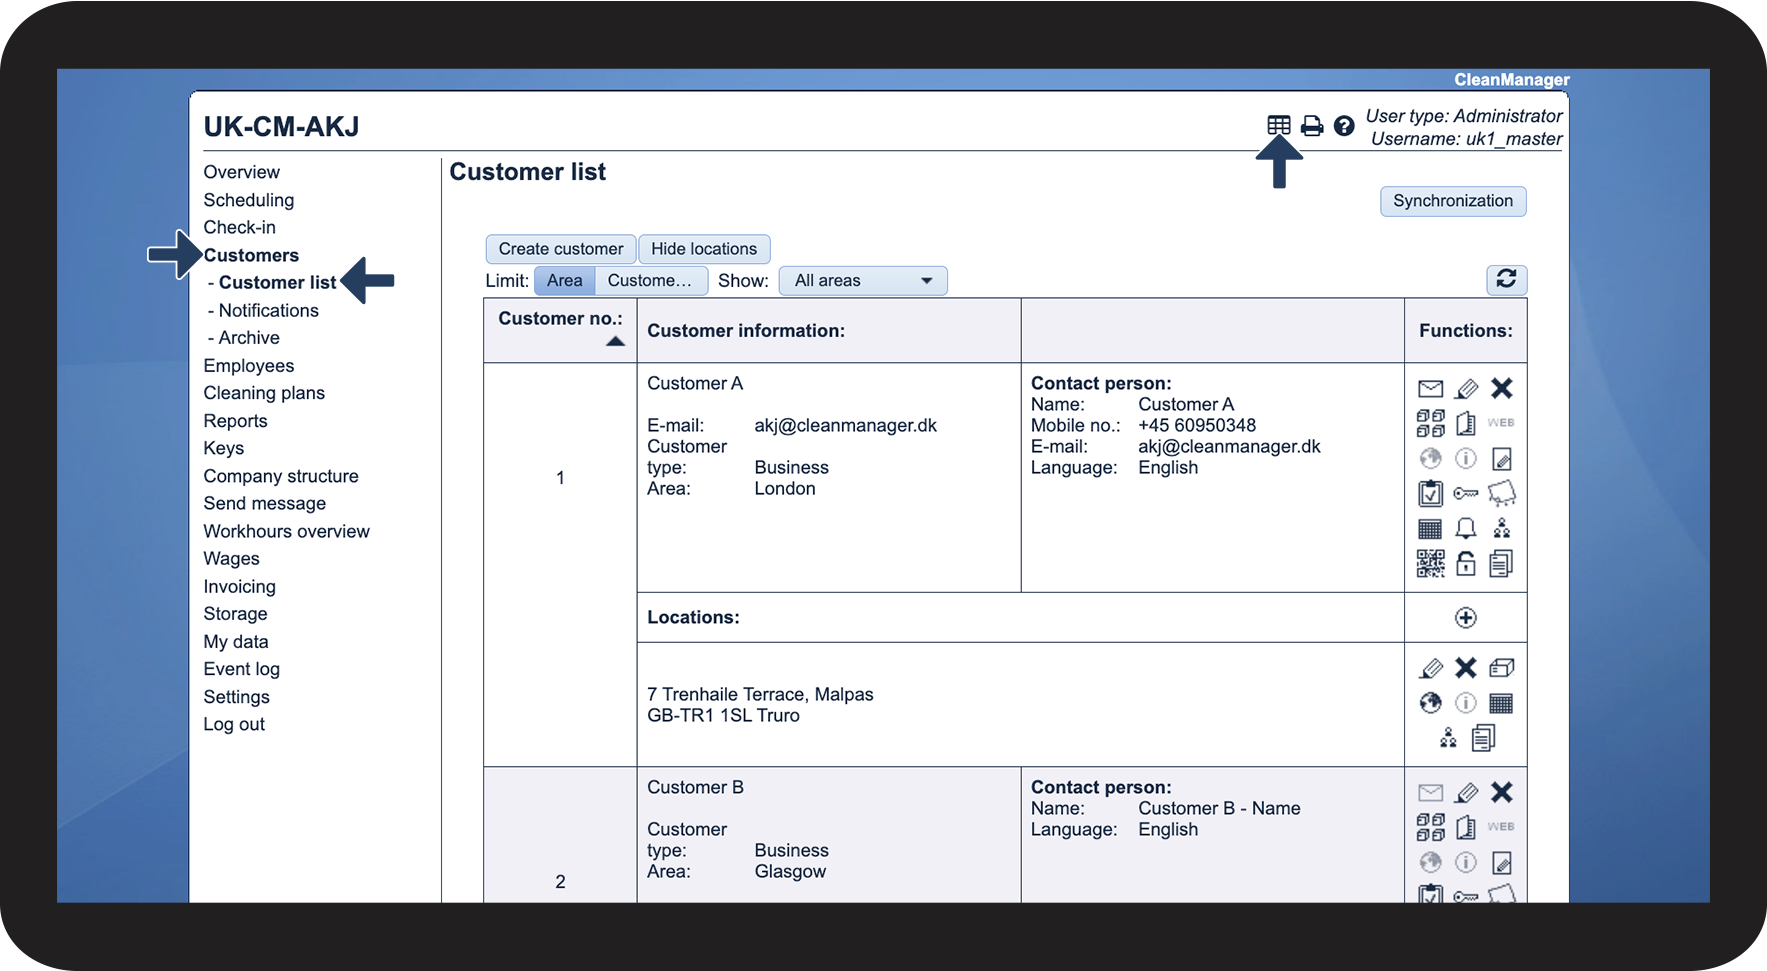
Once you have prepared your spreadsheet and exported it in xlsx or CSV format, you can begin your synchronization process.
You can now import and synchronize your customer data:

You can also read more about how synchronization works here:
