Skip to content
English
  • There are no suggestions because the search field is empty.

How do I convert tasks to absence hours?

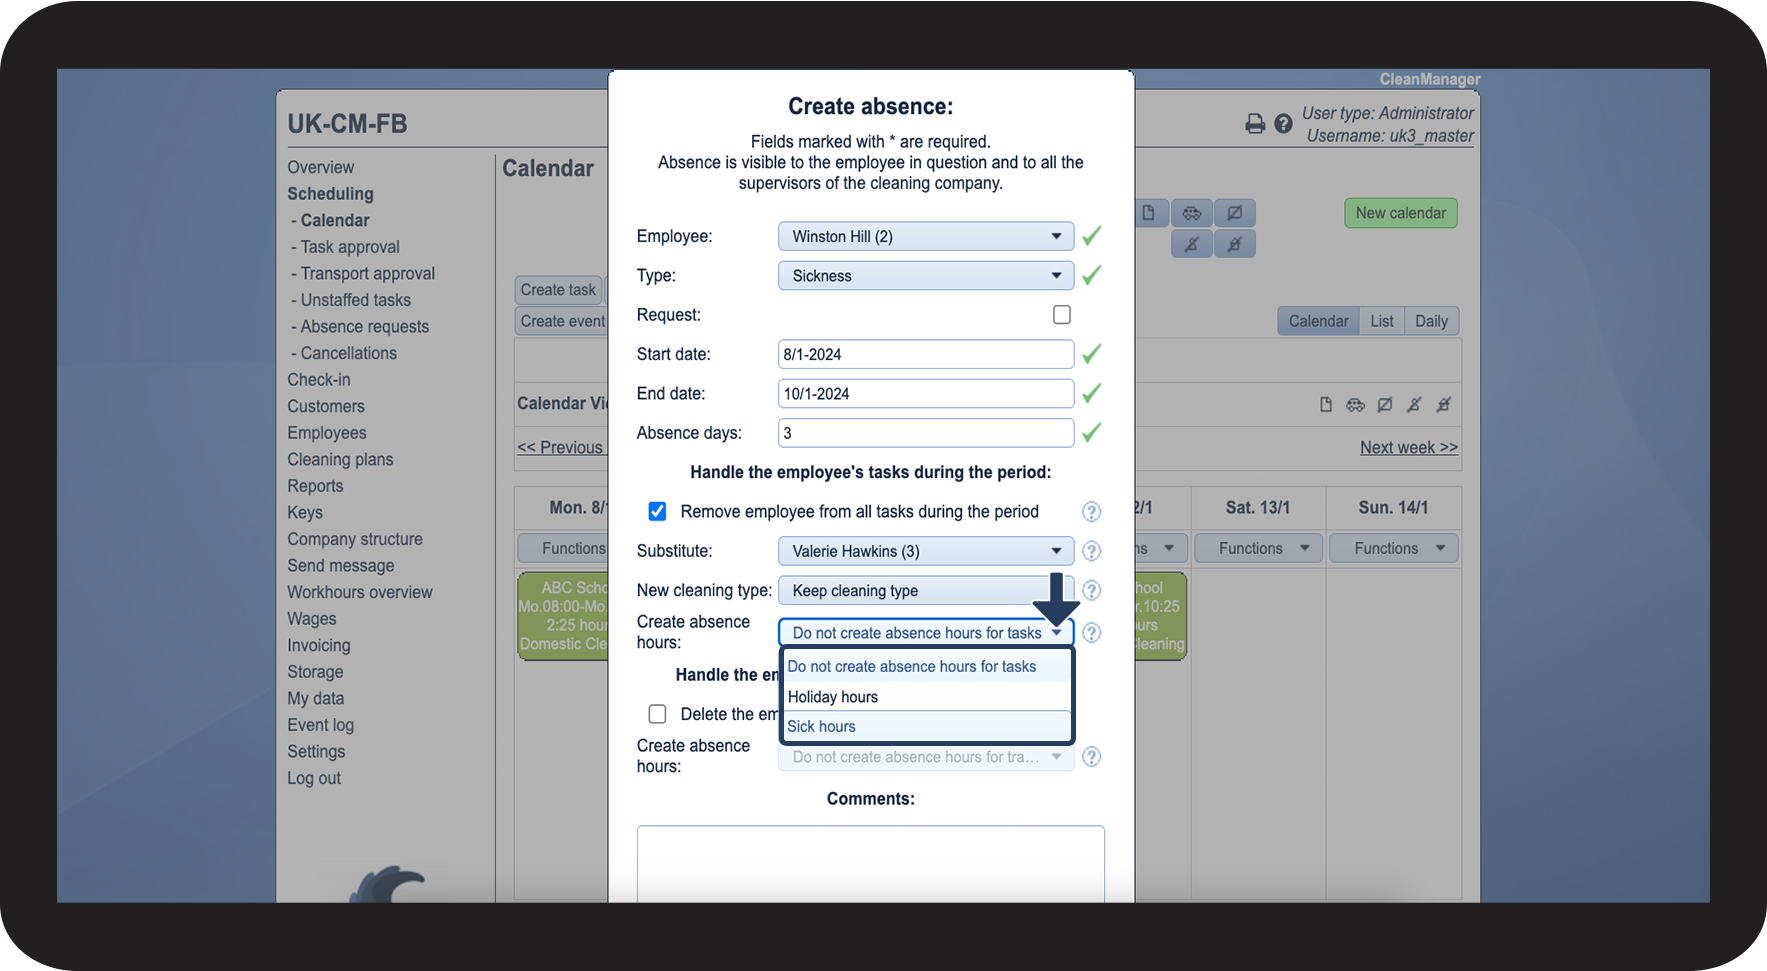
How do I convert planned working hours to absence hours?

Has your employee fallen sick? Or perhaps another employee is going on vacation, and you want to transfer the employee's tasks as quickly as possible to another employee? Then you have the option, when registering an absence in the calendar, to convert all the planned working hours to absence hours, while at the same time transferring them to another employee.


In this article, you will learn how to convert working hours to absence hours:


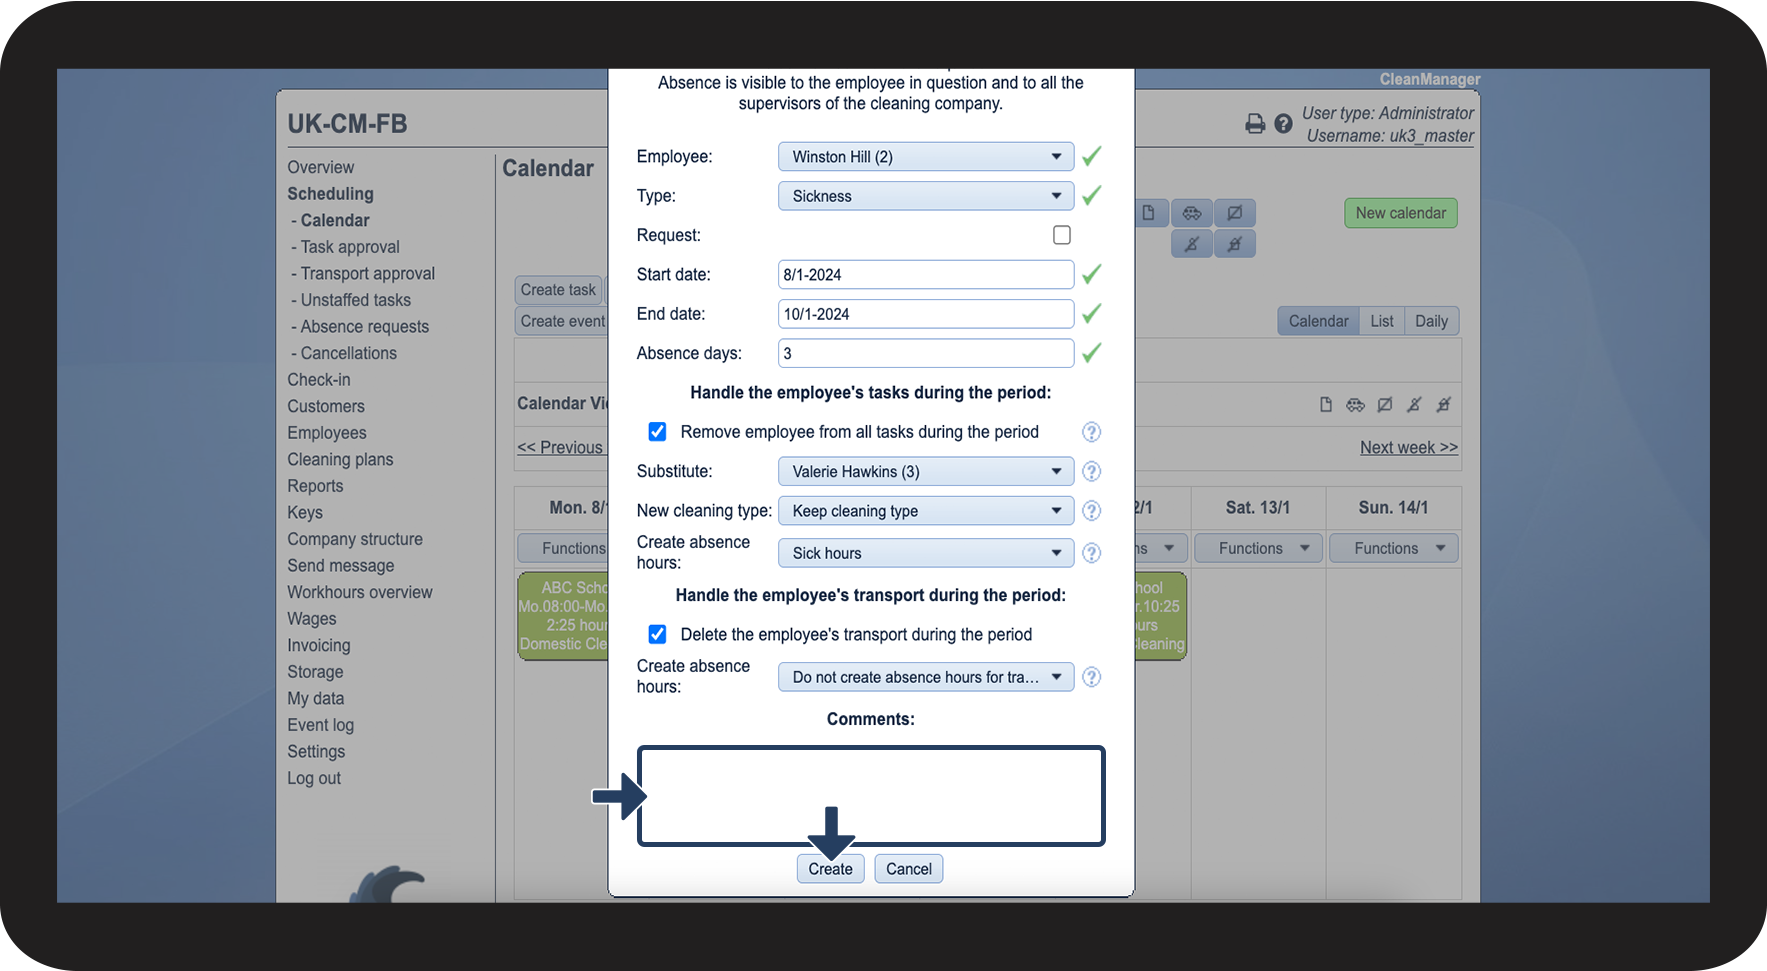
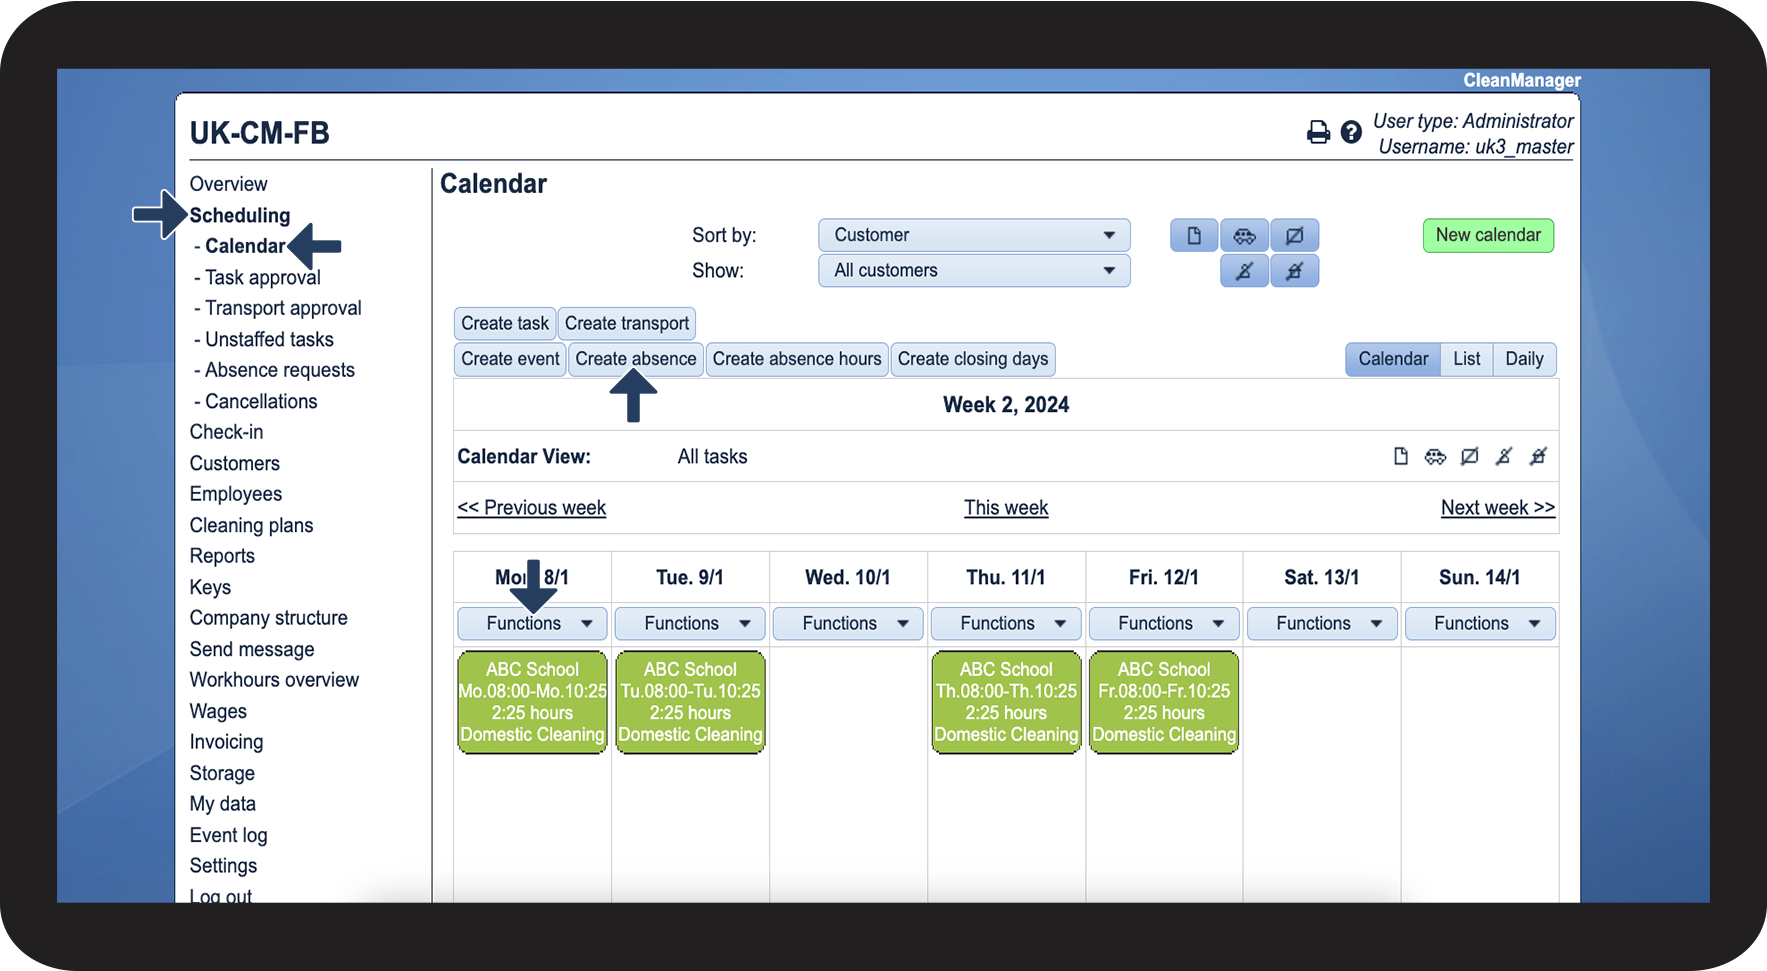
This is how you register absence in the system

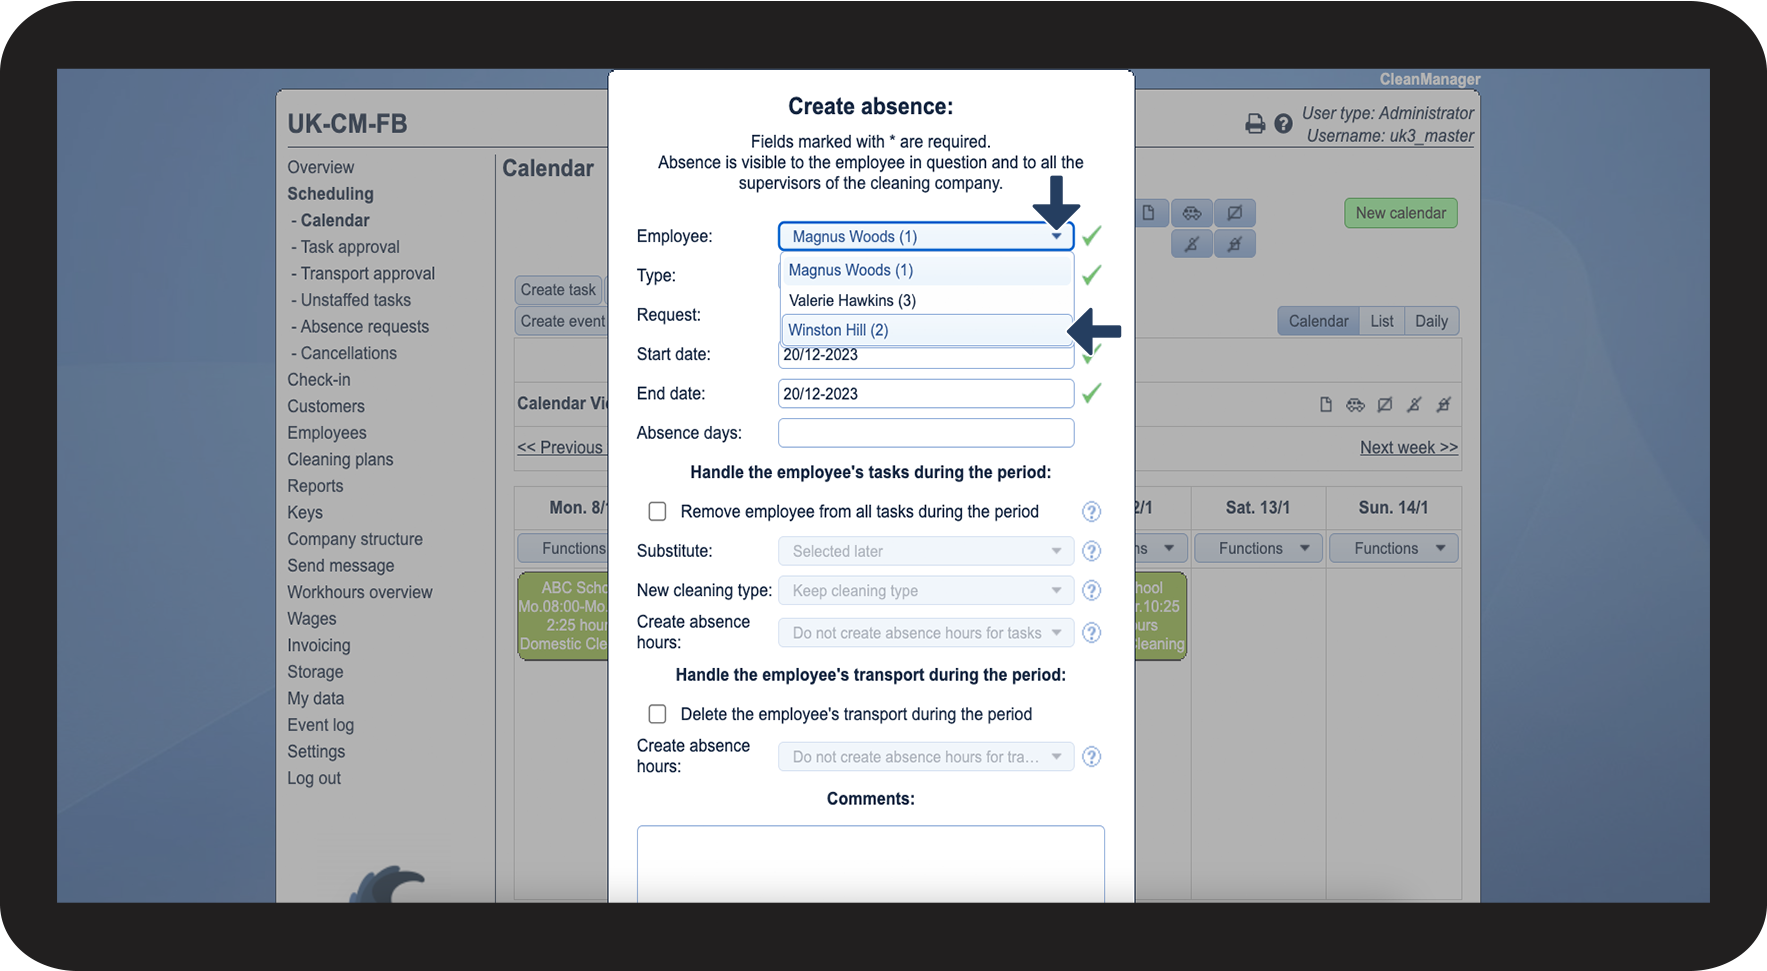
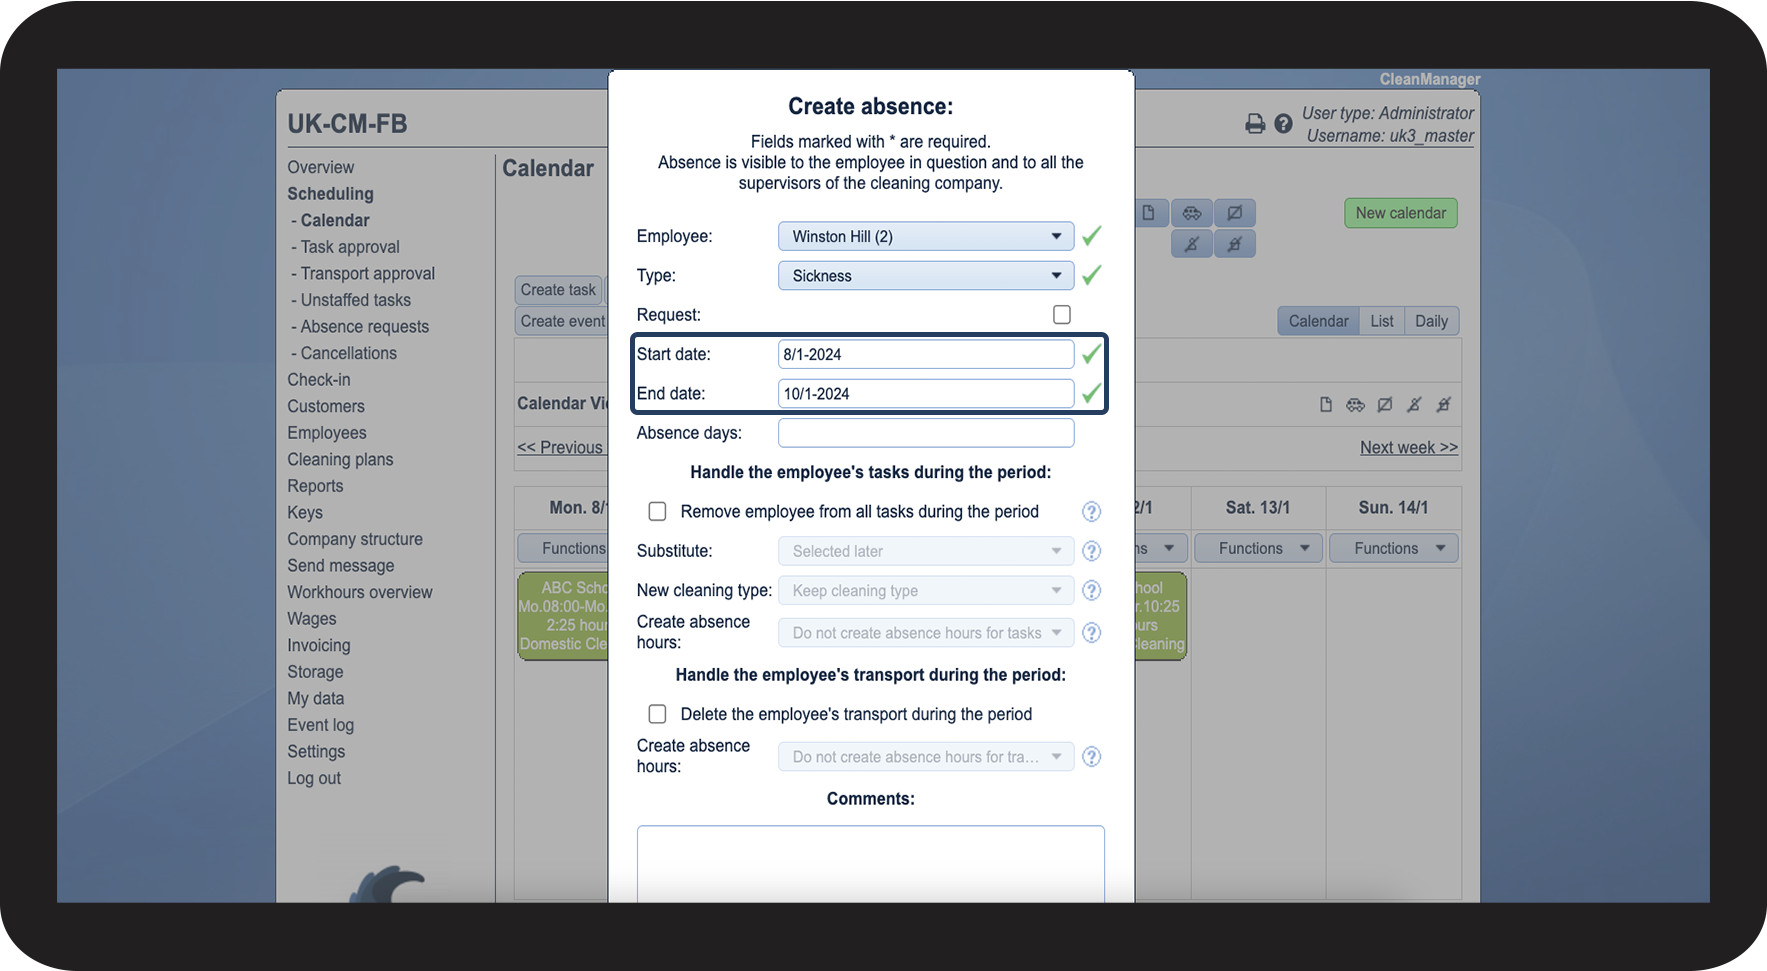
This guide will address all the steps a conversion of working hours includes. Not all steps will be relevant for all users of CleanManager.
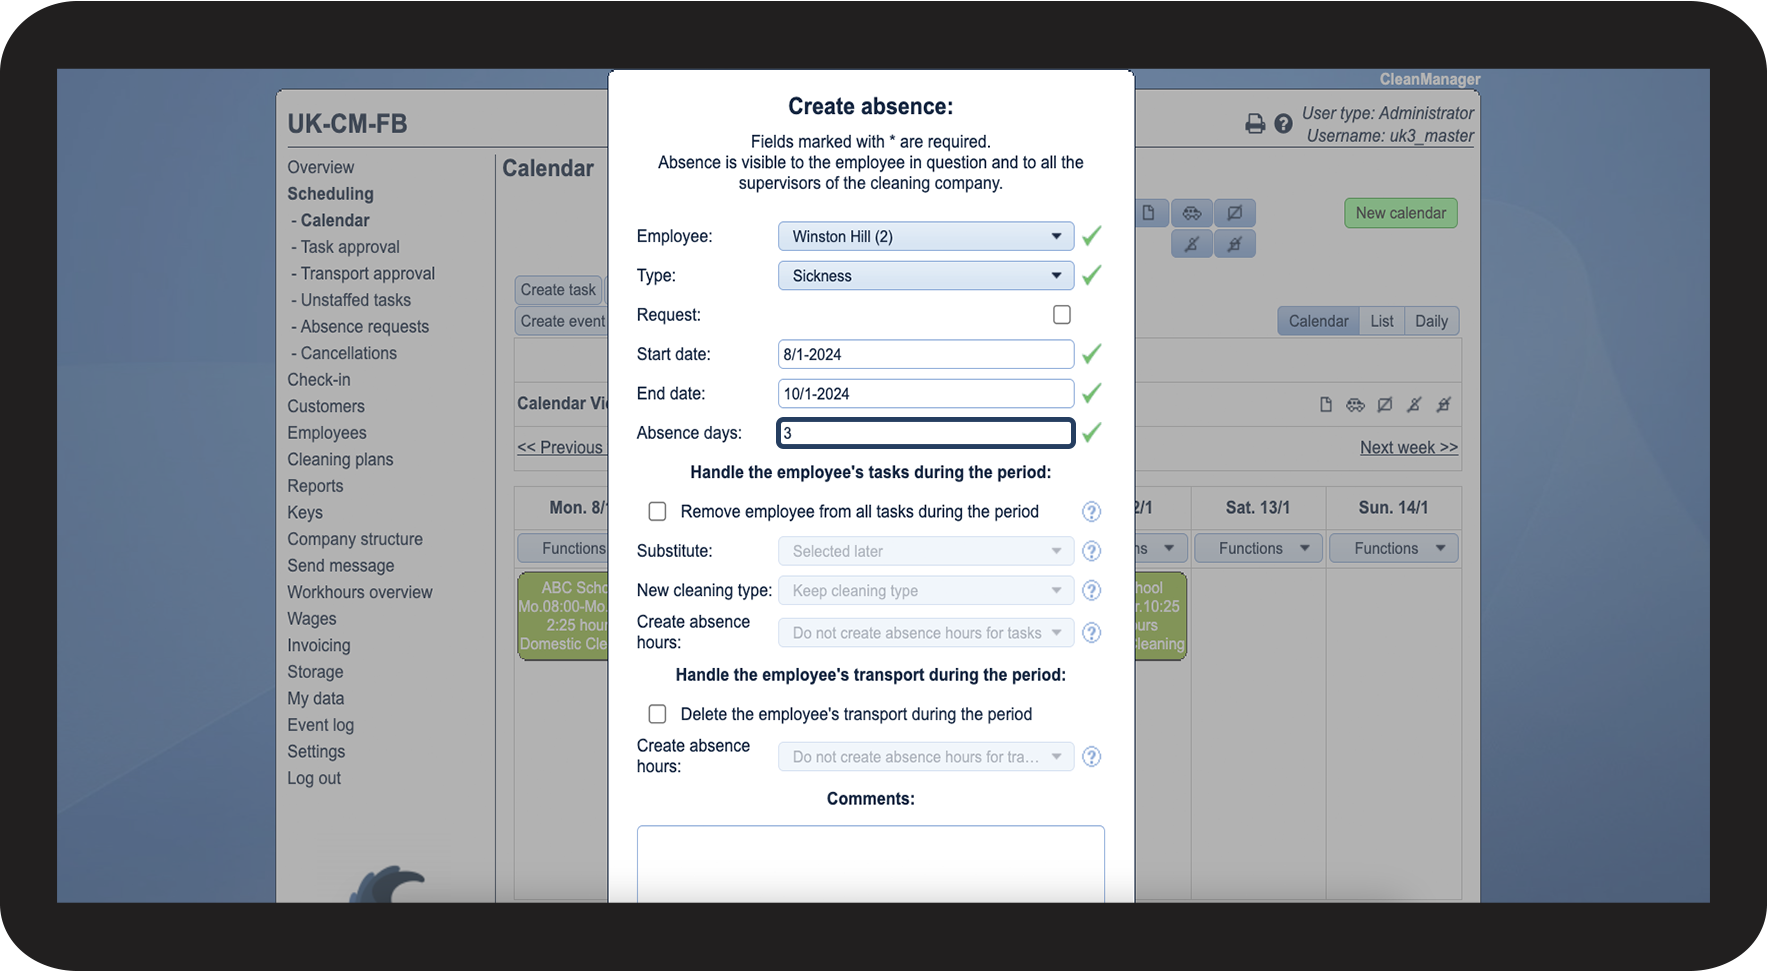
number_1.png

In the menu, go to Scheduling > Calendar and click on Create absence.

As an alternative, you can click on Functions > Create absence on the day in question.

1.1.png

number_2.png

Select the employee you want to register the absence at.

1.2.png

number_3.png

Pick the absence type. You can read more about absence types in the article: Introduction to absence types and absence hour types

1.3.png

number_4.png

Type in the start and end date of the absence.

1.4.png

number_5.png

Typing in the number of absence days, allows you to access the information in other parts of the system, most noteworthy in the Wages. There, you will be able to see how many days an employee has been absent during a selected period.


Note:

If no days are typed into the field, then the absence will still be visible in the calendar, but will not be registered elsewhere in the system.

1.5.png
number_6.png

Check off the box Remove employee from all tasks during the period to continue to the next part.

1.6.png


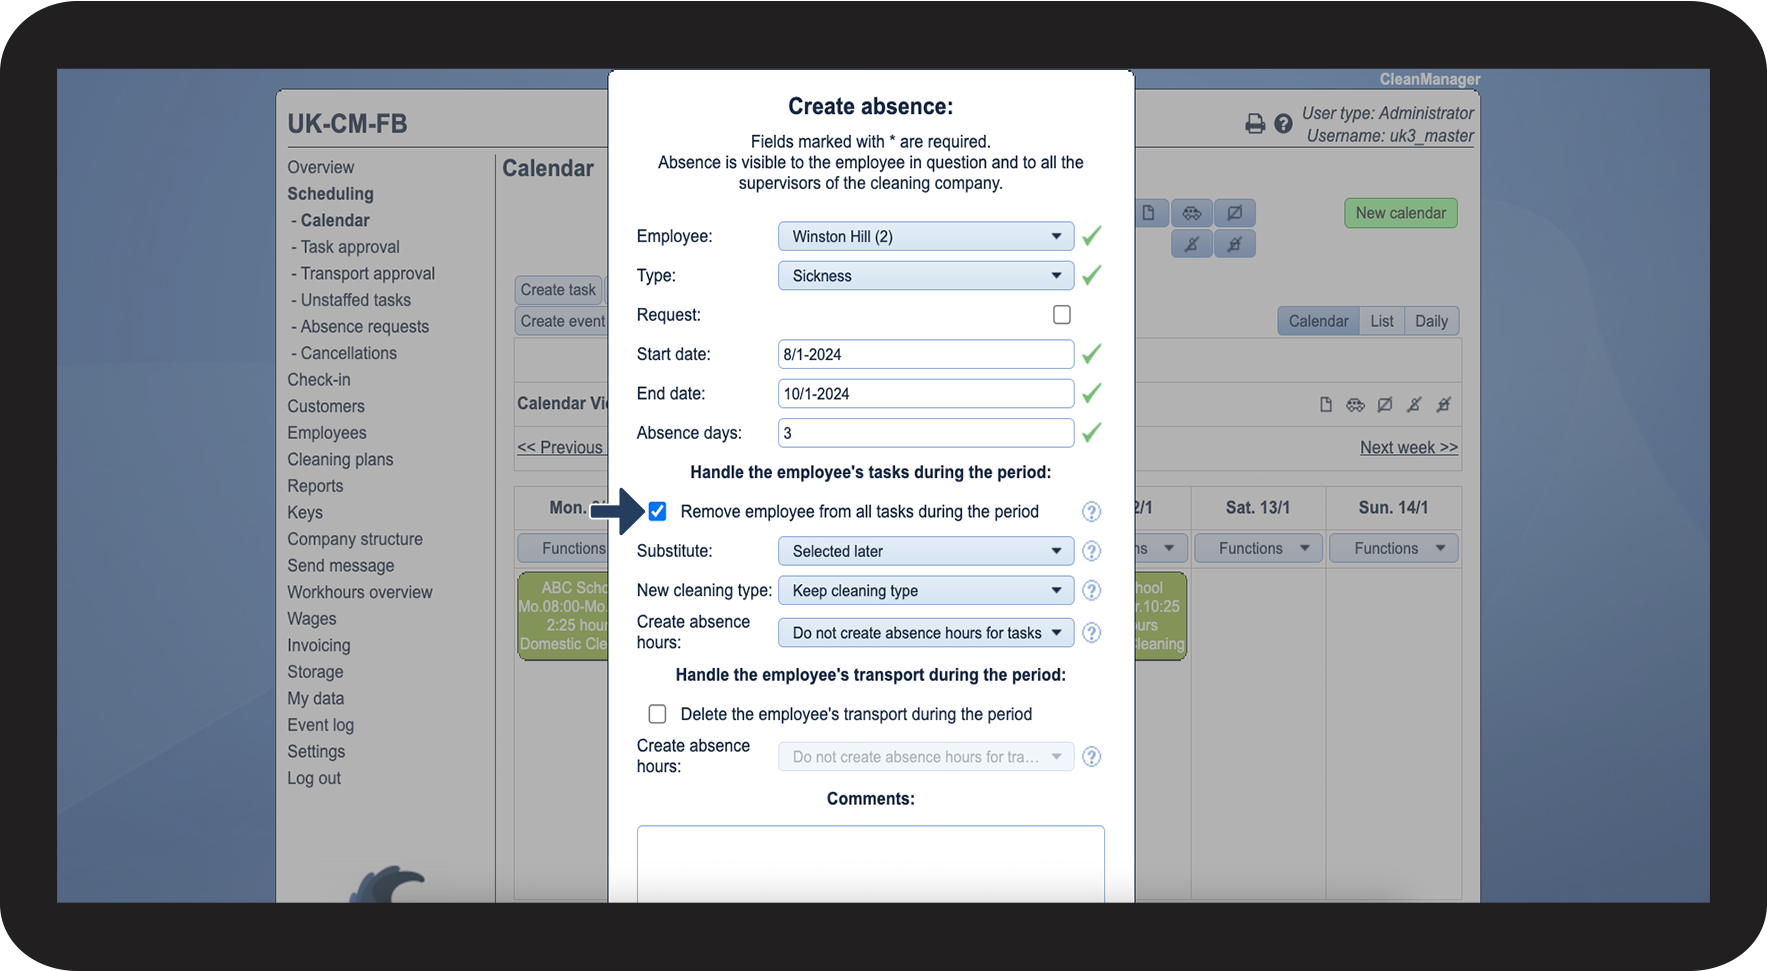
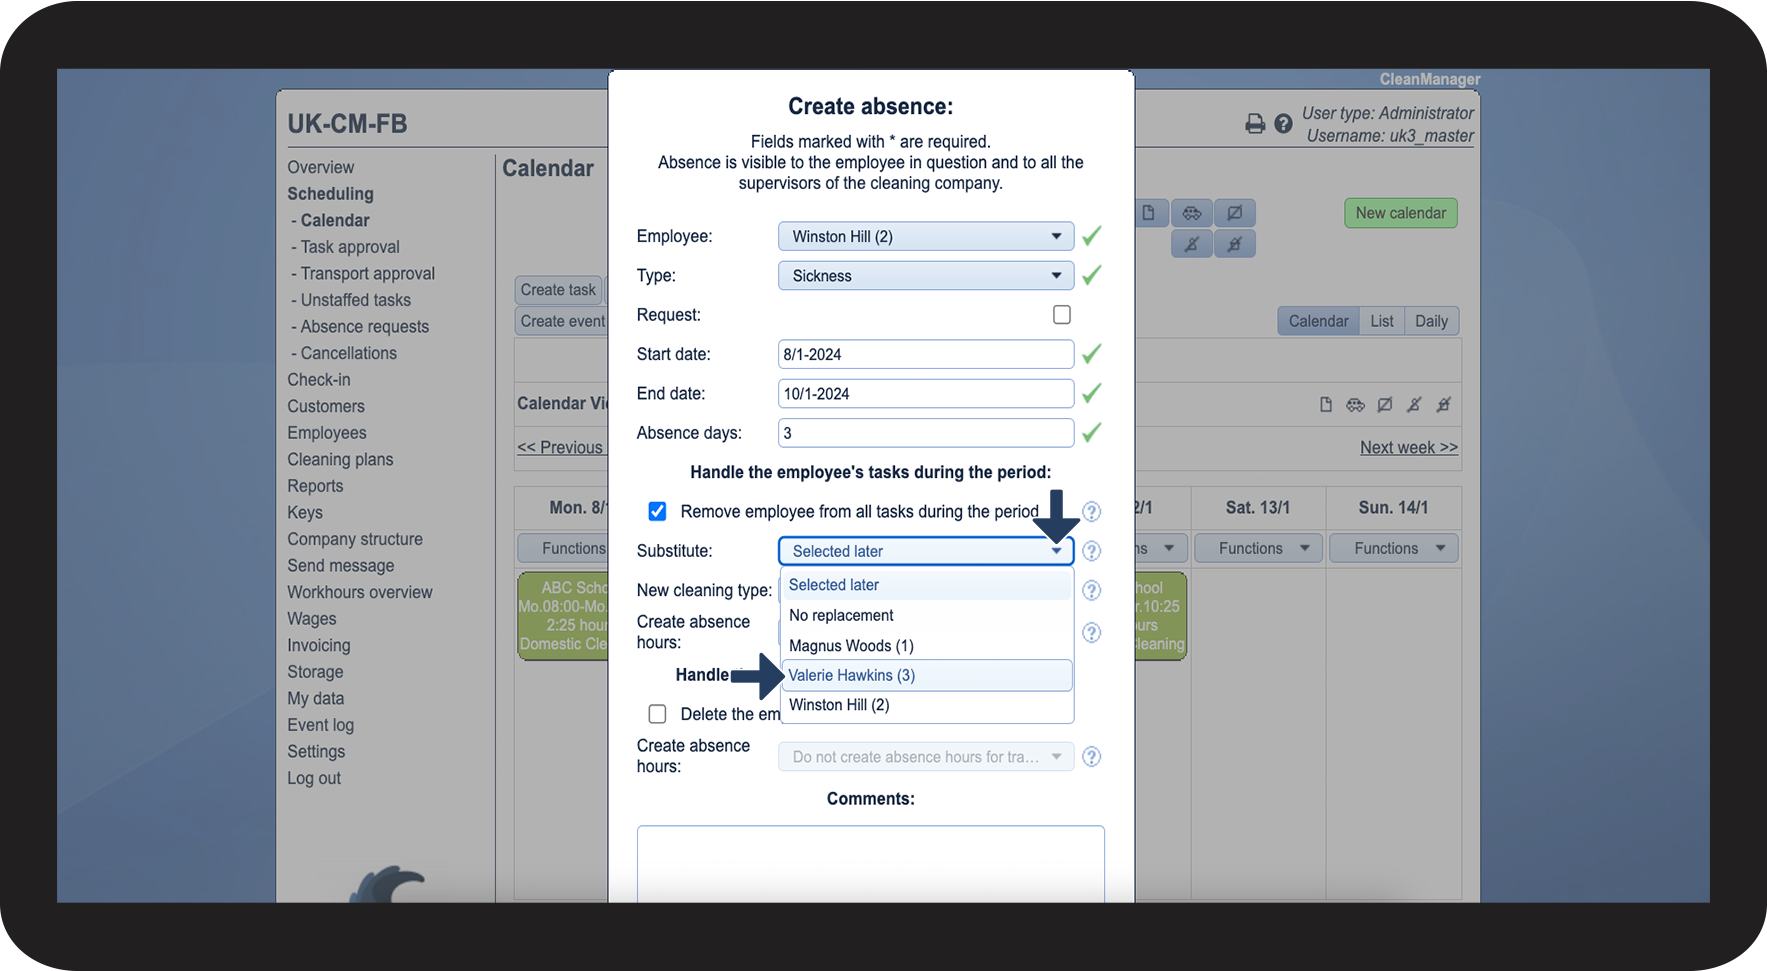
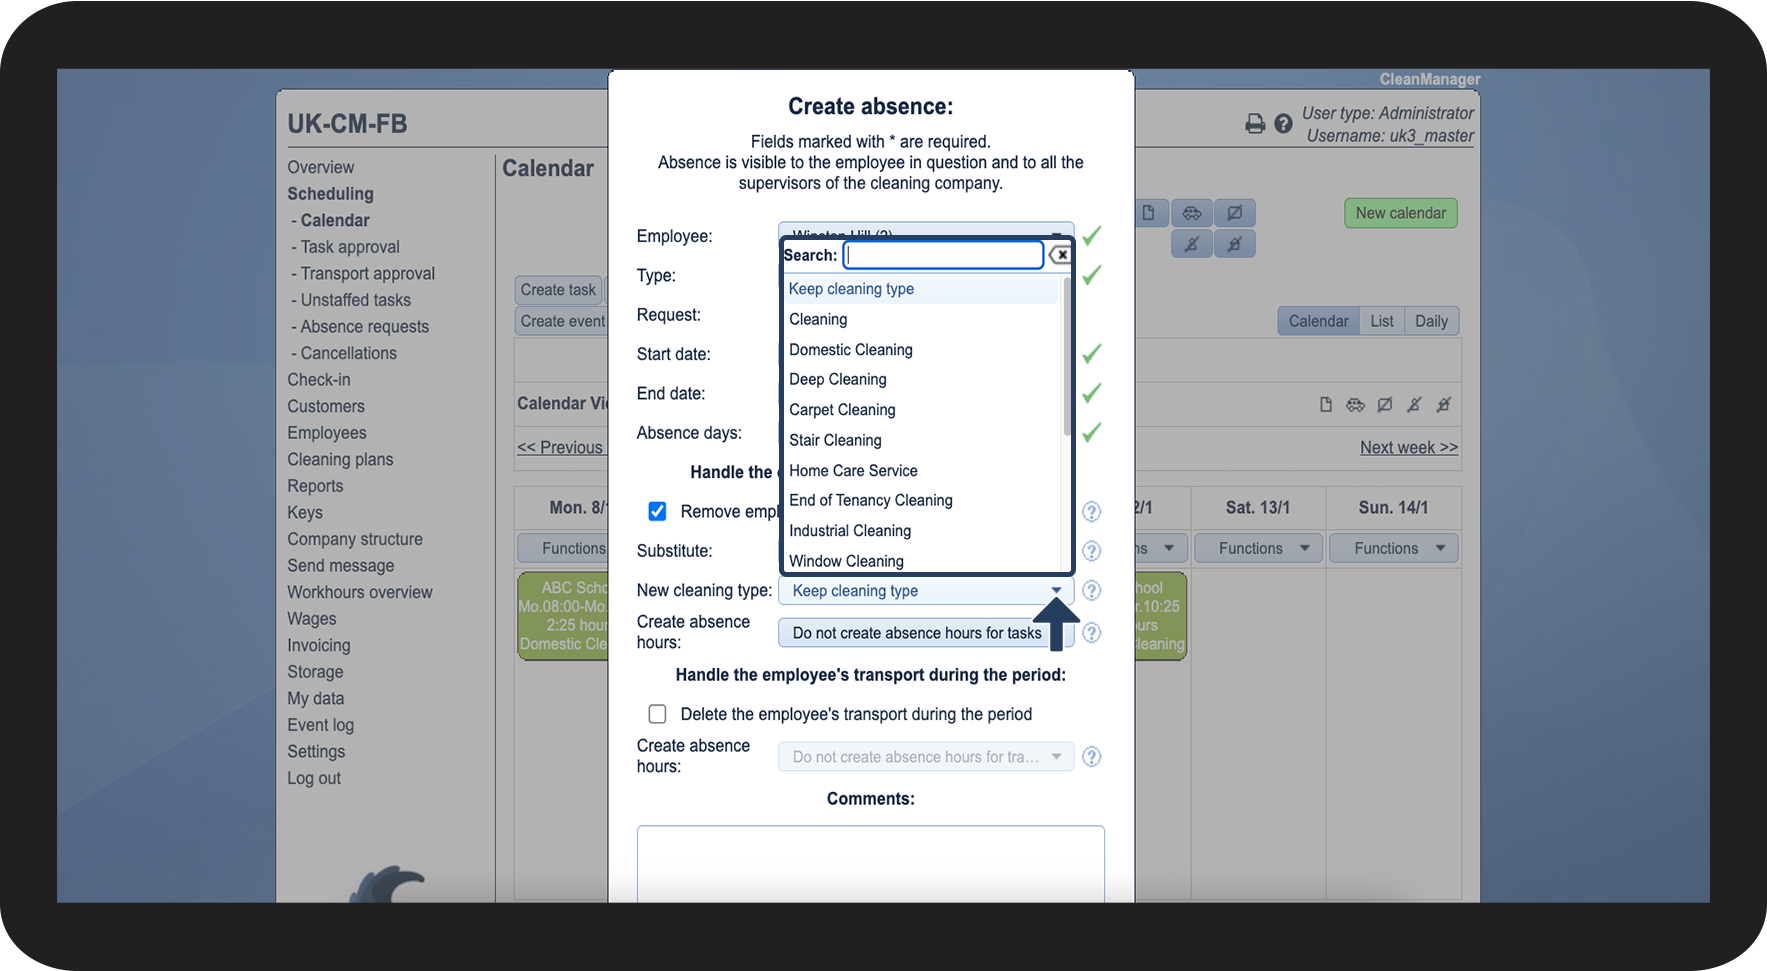
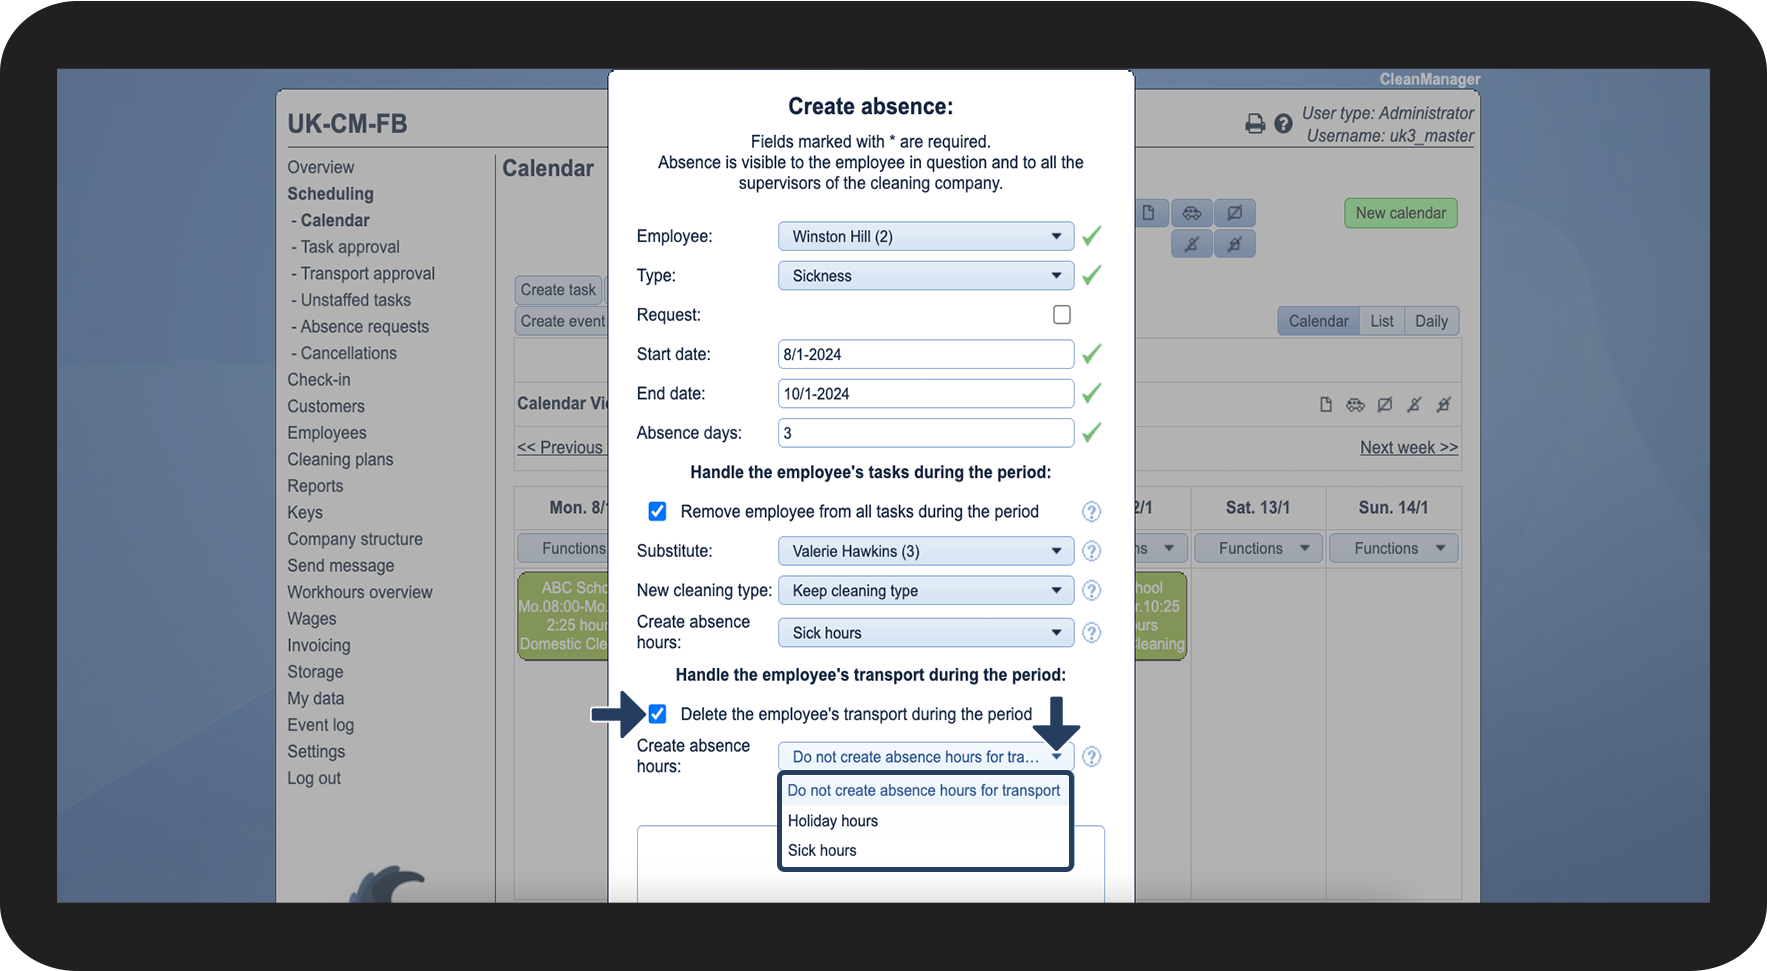
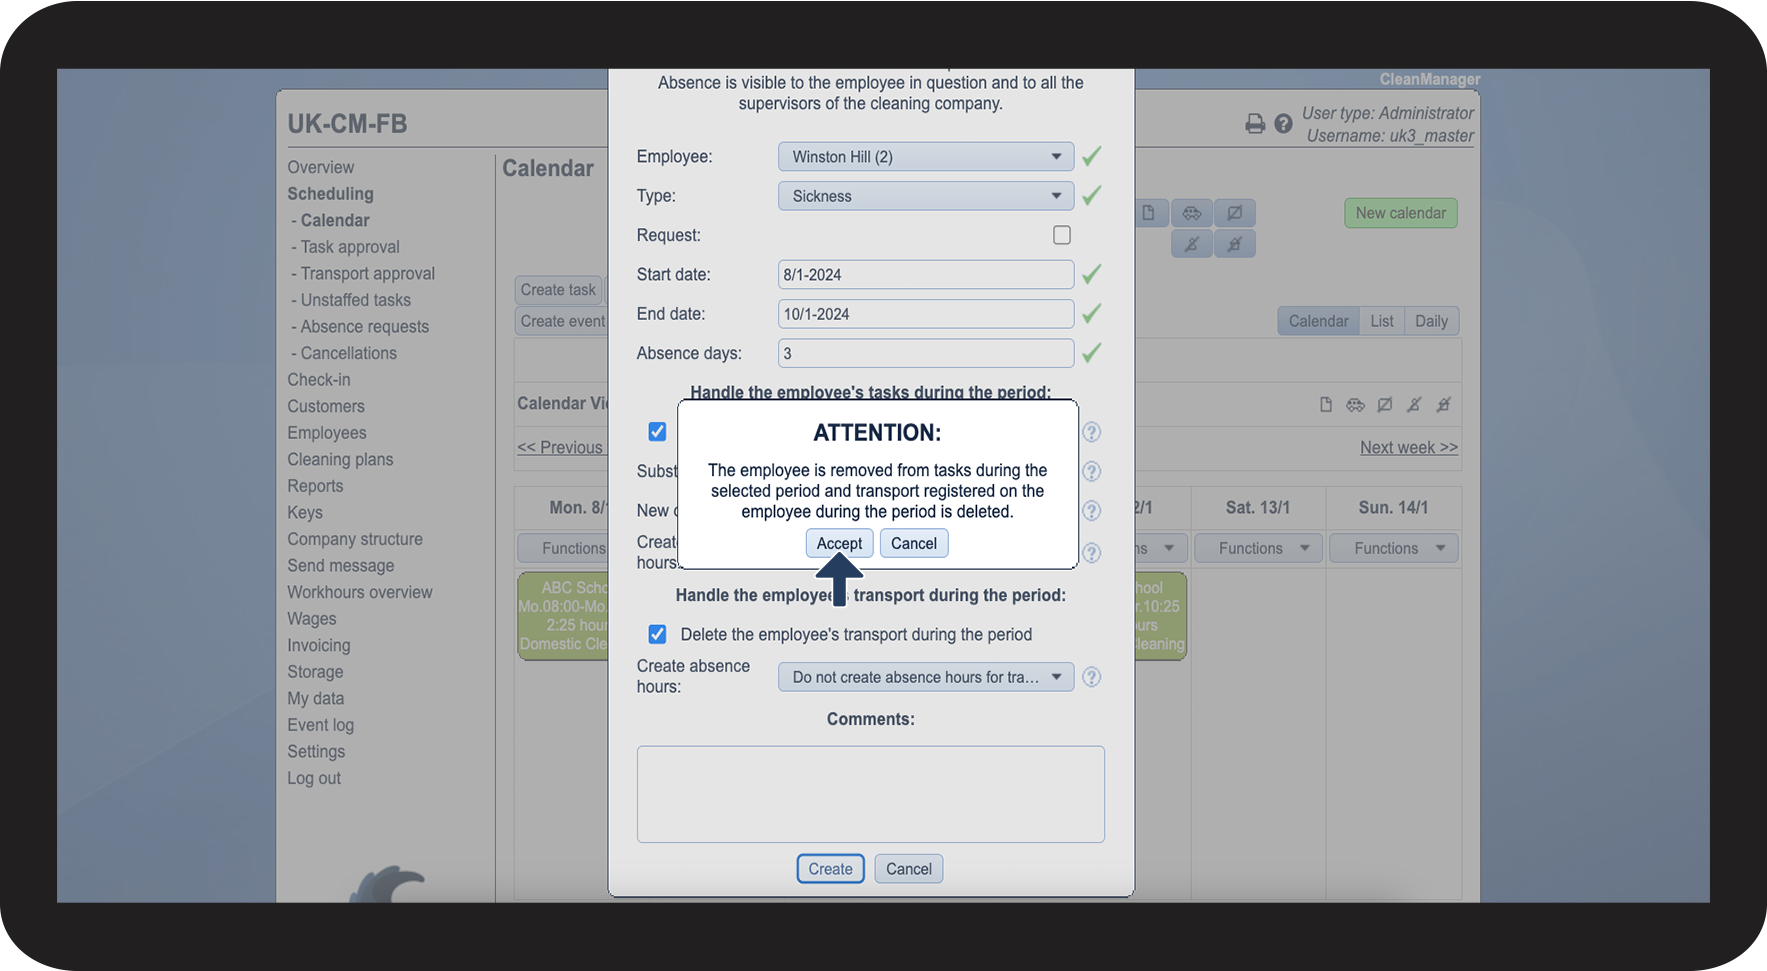
This is how you manage your employee's tasks during the absence period

In this part of the guide, we will explain your different options, when it comes to replacing tasks, as well as converting them.

number_1.png

After having followed the steps in the first part of the guide, you can now select a replacement for the tasks.

If you select Selected later or No replacement, the tasks will still appear in the calendar, as unstaffed tasks and can thereafter be assigned to other employees.

2.1.png

number_2.png

Choose whether the cleaning type should stay the same for the tasks, or if they should be replaced with another.

2.2.png

number_3.png

At Create absence hours you can decide, whether you want to create absence hours for the employee or not and if so, which ones. 

2.3.png

number_4.png

Checking off the box Remove employee from all tasks during the period, enables you to select, whether time for transportation should be converted to absence hours as well. This of course only applies to tasks, that include transport time.

2.4.png

number_5.png

If need be, you can add a comment to the absence, otherwise click on Create.

2.5.png
number_6.png

Complete the process by clicking on Accept.

2.6.png
number_7.png

See how the tasks have been converted to absence hours at the employee

2.7.png
number_8.png

See how the tasks have been transferred to the replacement

2.8.png