How do I import and synchronize employees from files and payroll systems?
When a file has been prepared with the necessary employee data, either from a spreadsheet or a payroll system, it can be uploaded to CleanManager.
NOTE:
If you have not prepared your data, you can read more about how to prepare your employee data for import in this article: Set up employee data for file import
You can now begin to import your employees in a synchronized process:
-
Start the synchronization of an employee
-
Import employee data (only for file imports)
-
Setup of an employee/partner
-
Setup of all employees/partners
-
Choose a partner for an employee
-
Synchronization conflicts/correction of employee data
-
Deactivation of synchronization for employees
Start the synchronization of an employee
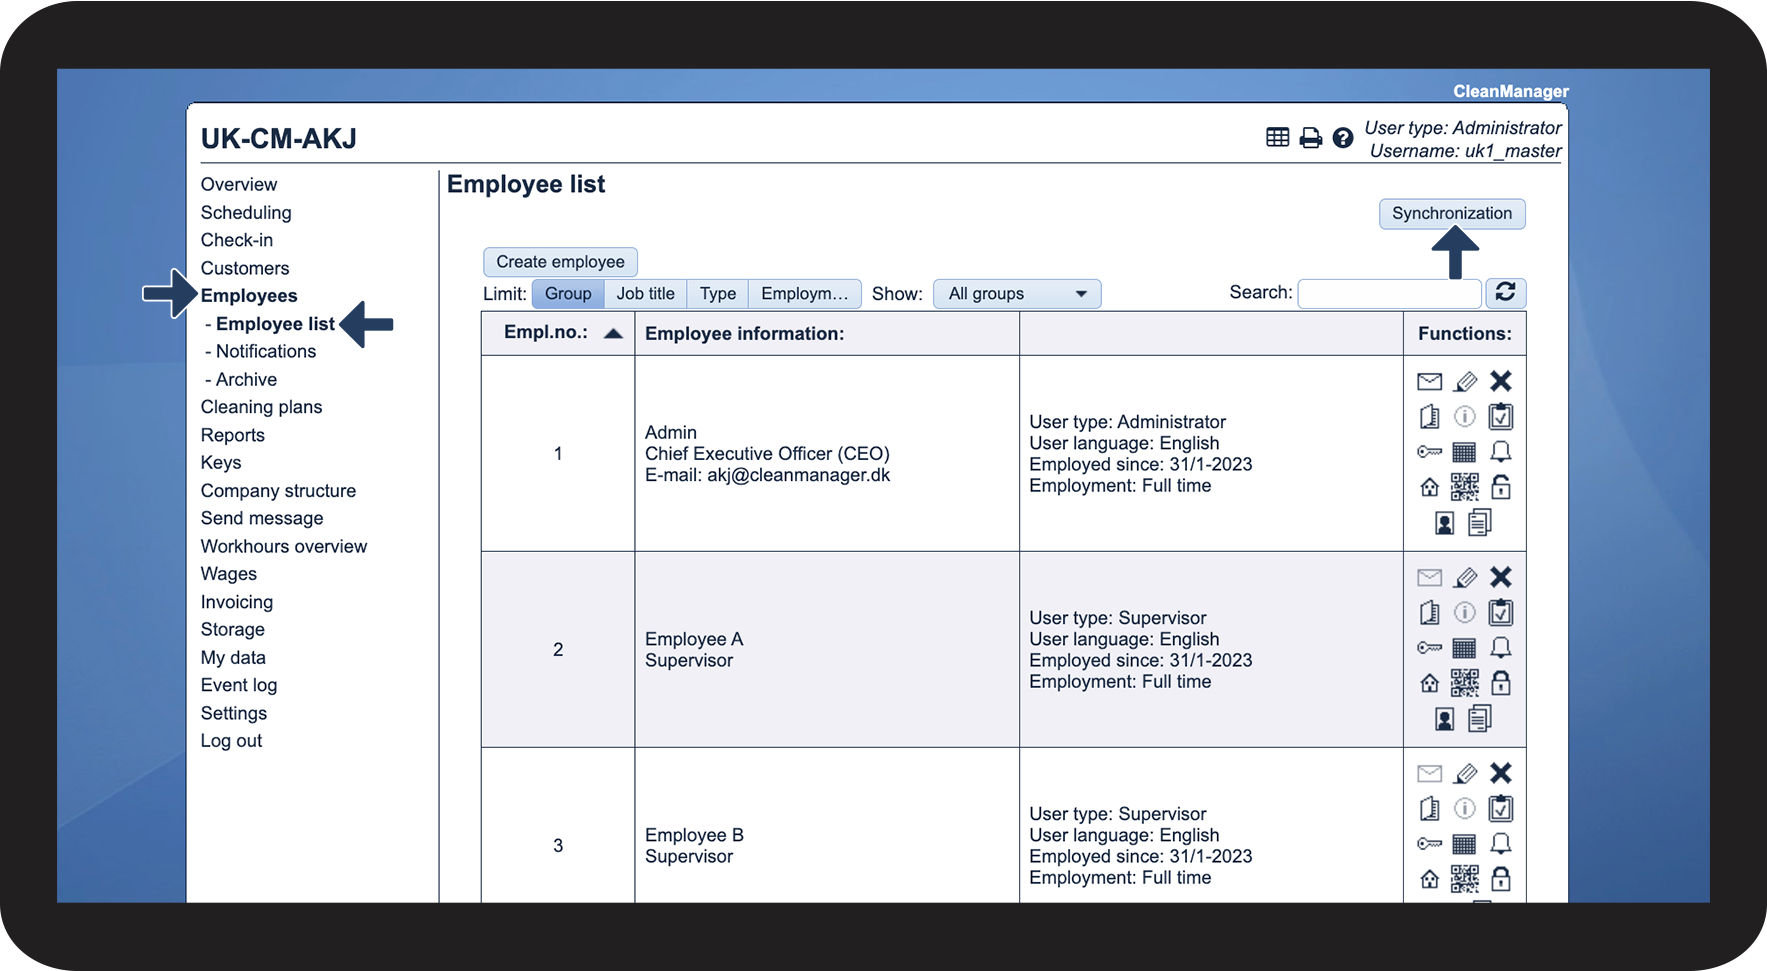
Note:
Is the option to click on Synchronization not available?
If so, you have yet to establish your employee synchronization.
For more information about this, go to the article: Set up employee data for file import
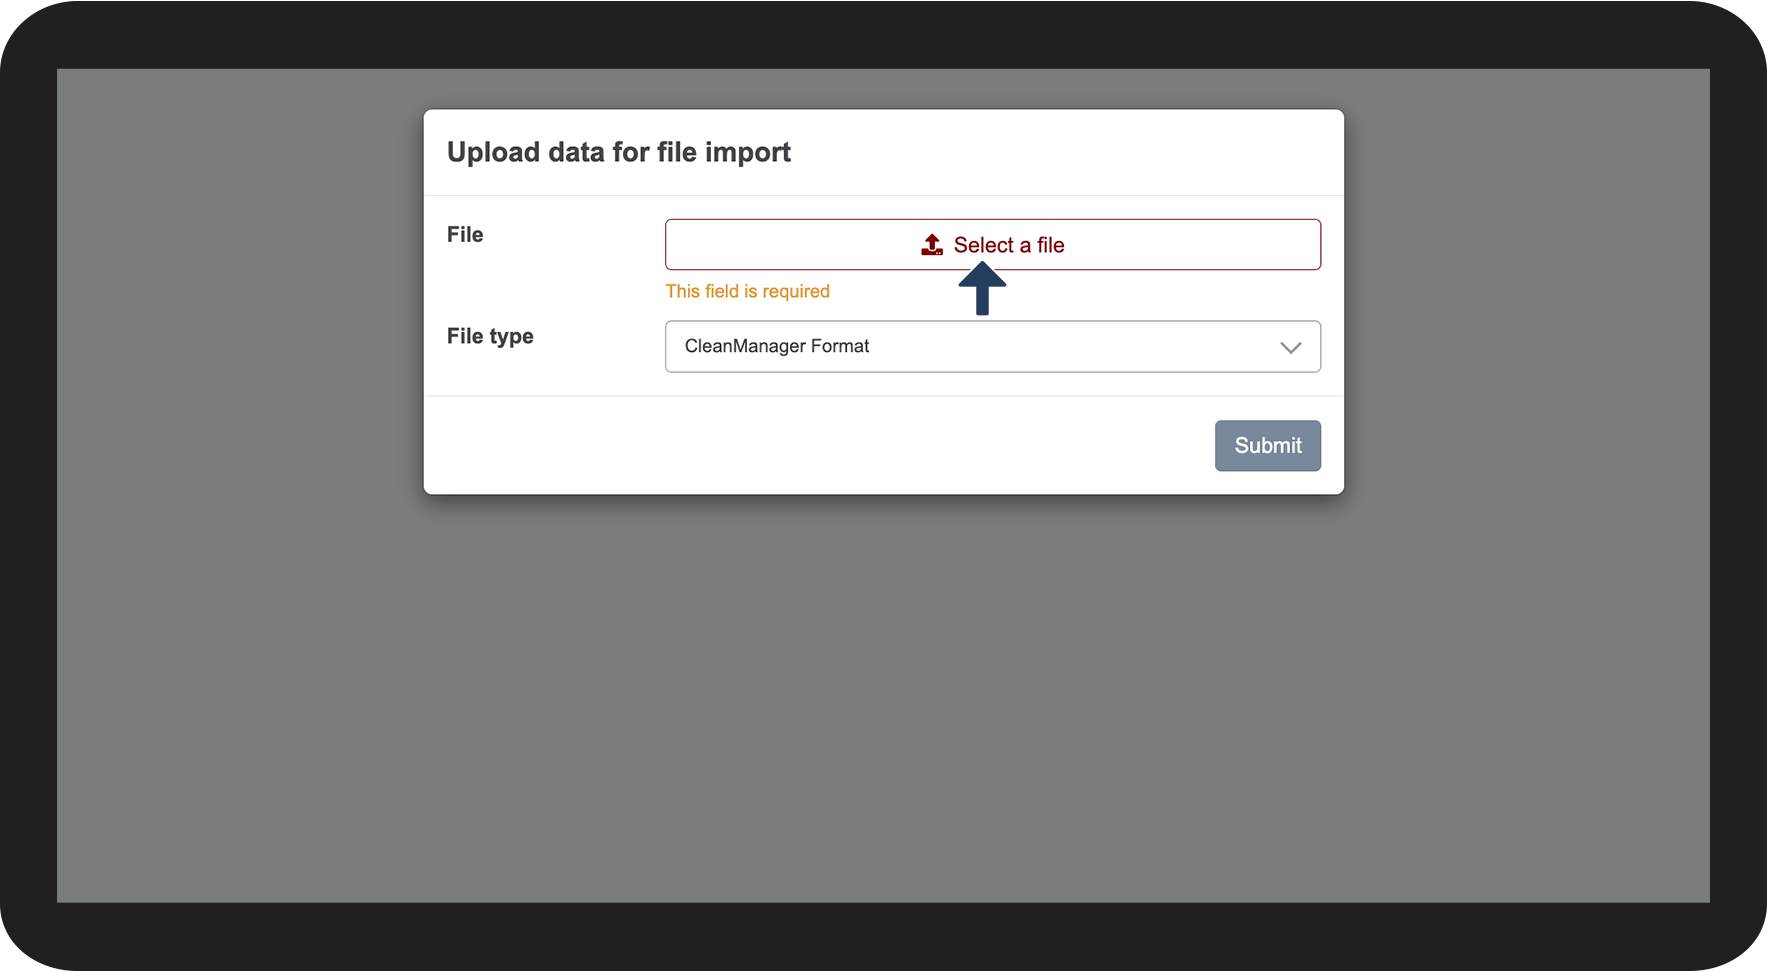
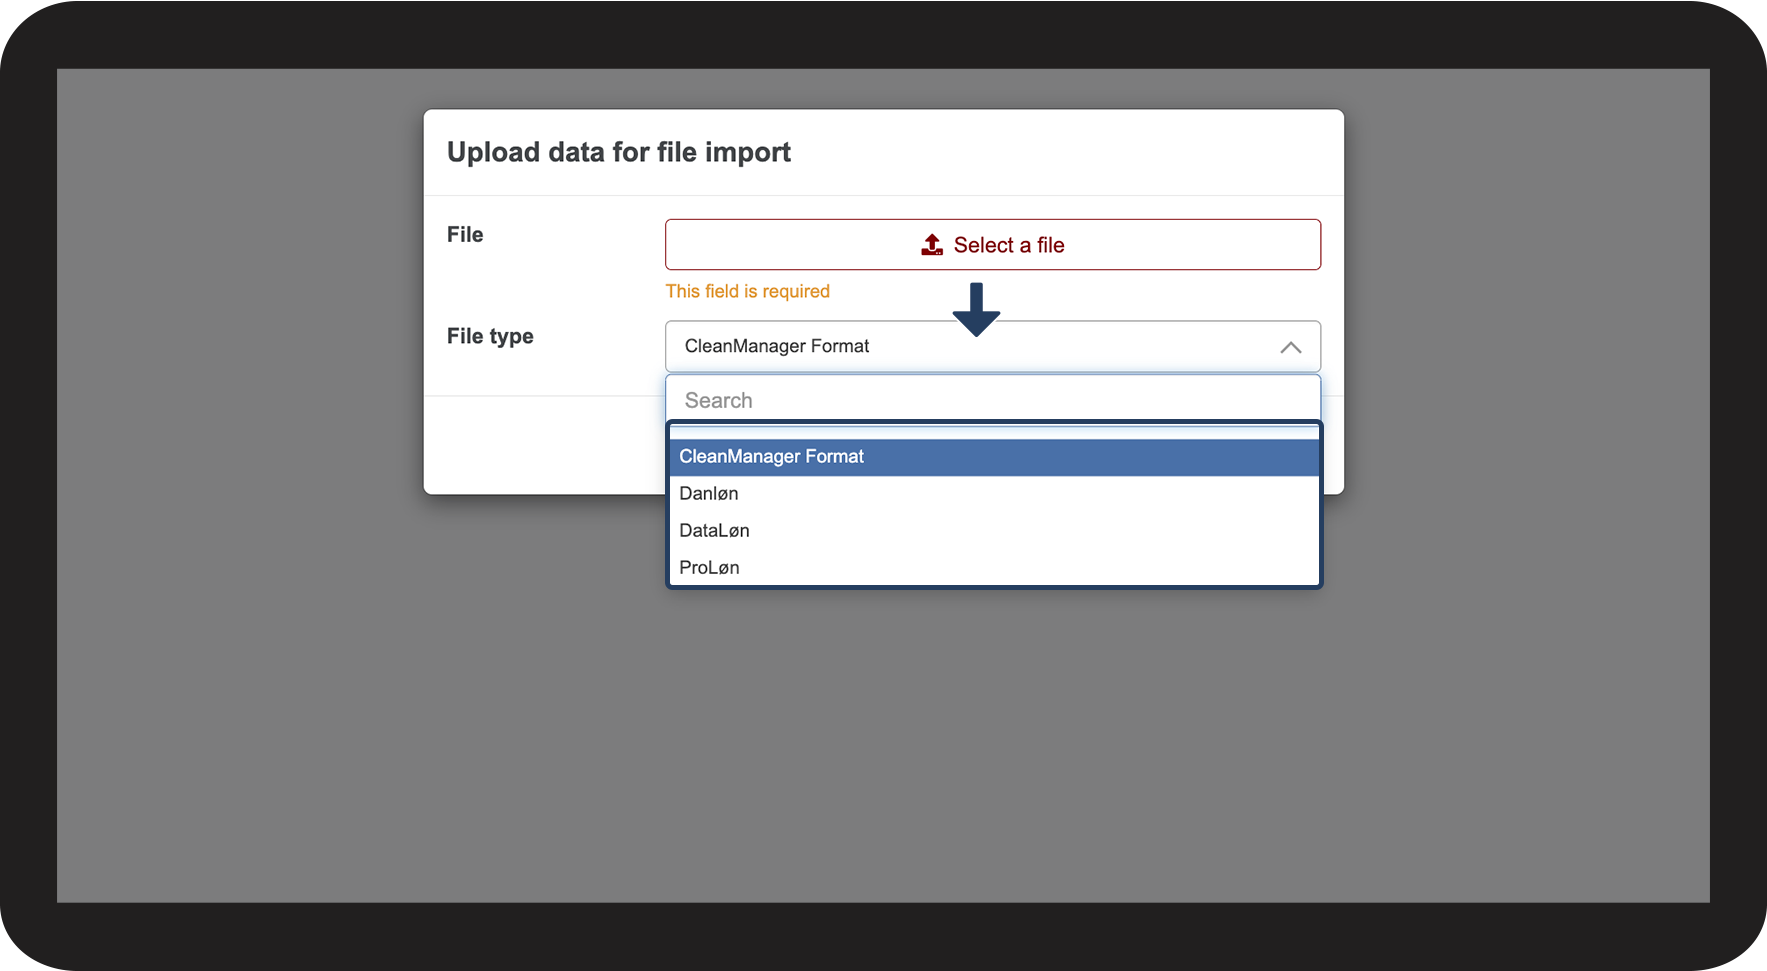
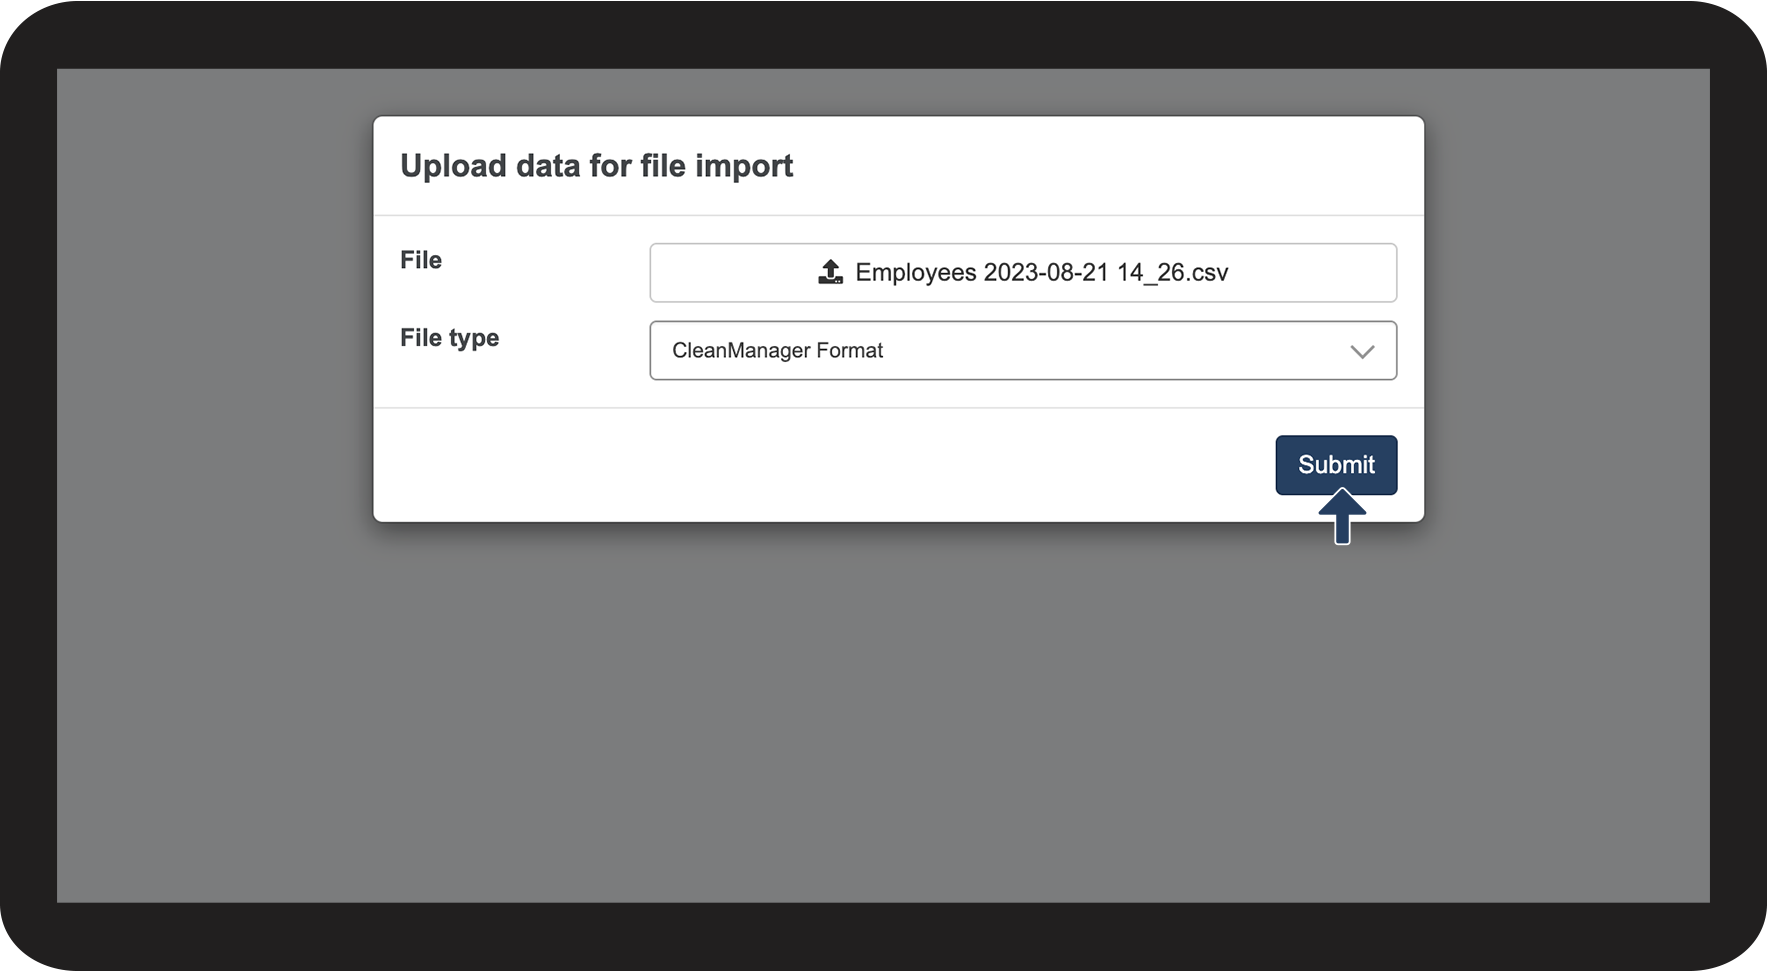
Import employee data (only for file import)
If you need to synchronize your employees with a file import, you must first select a file and a file type from the payroll system you need to synchronize from.
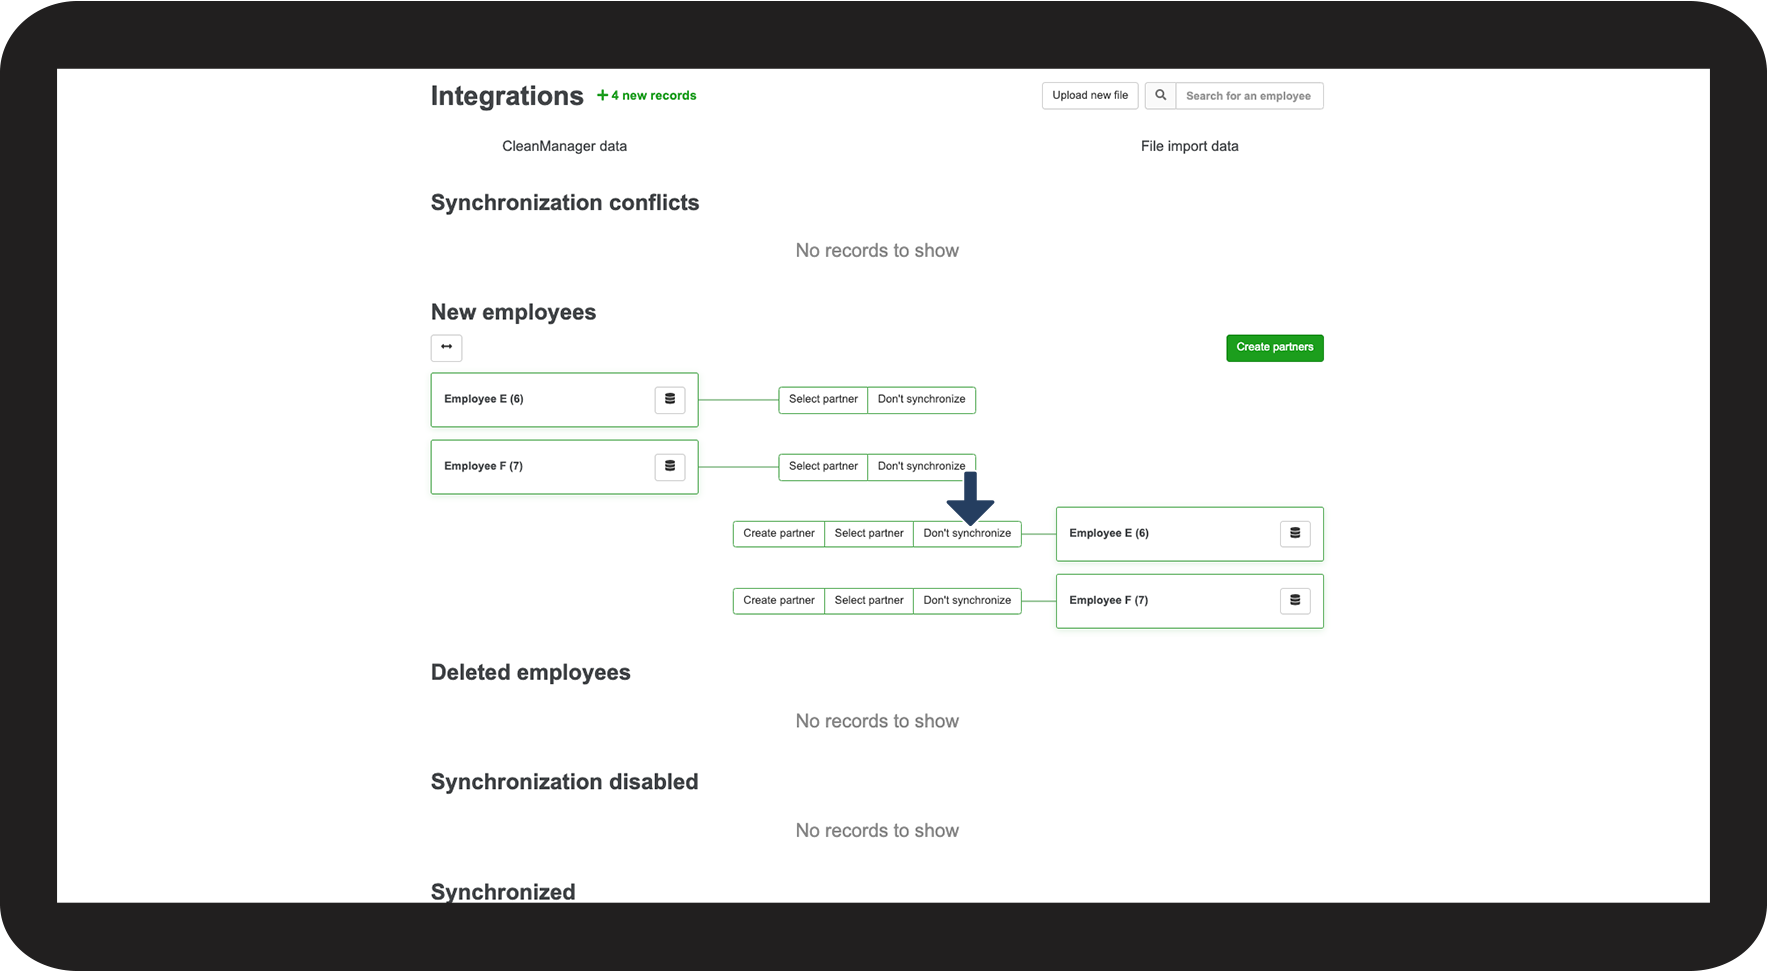
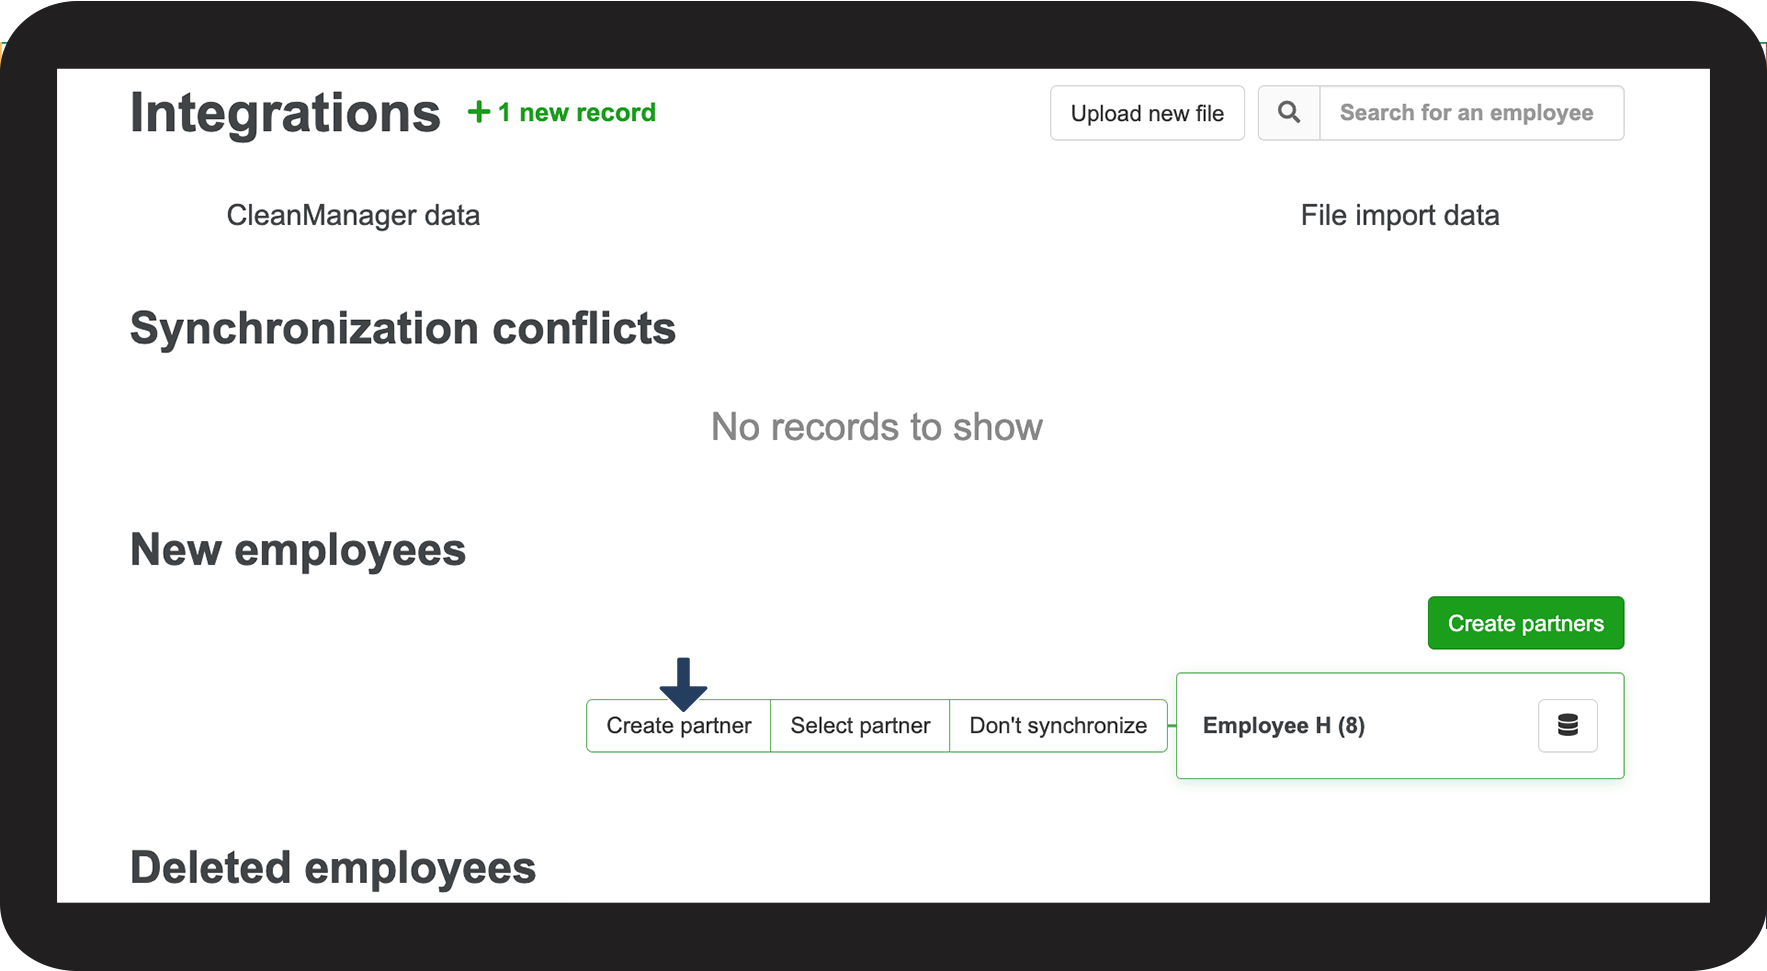
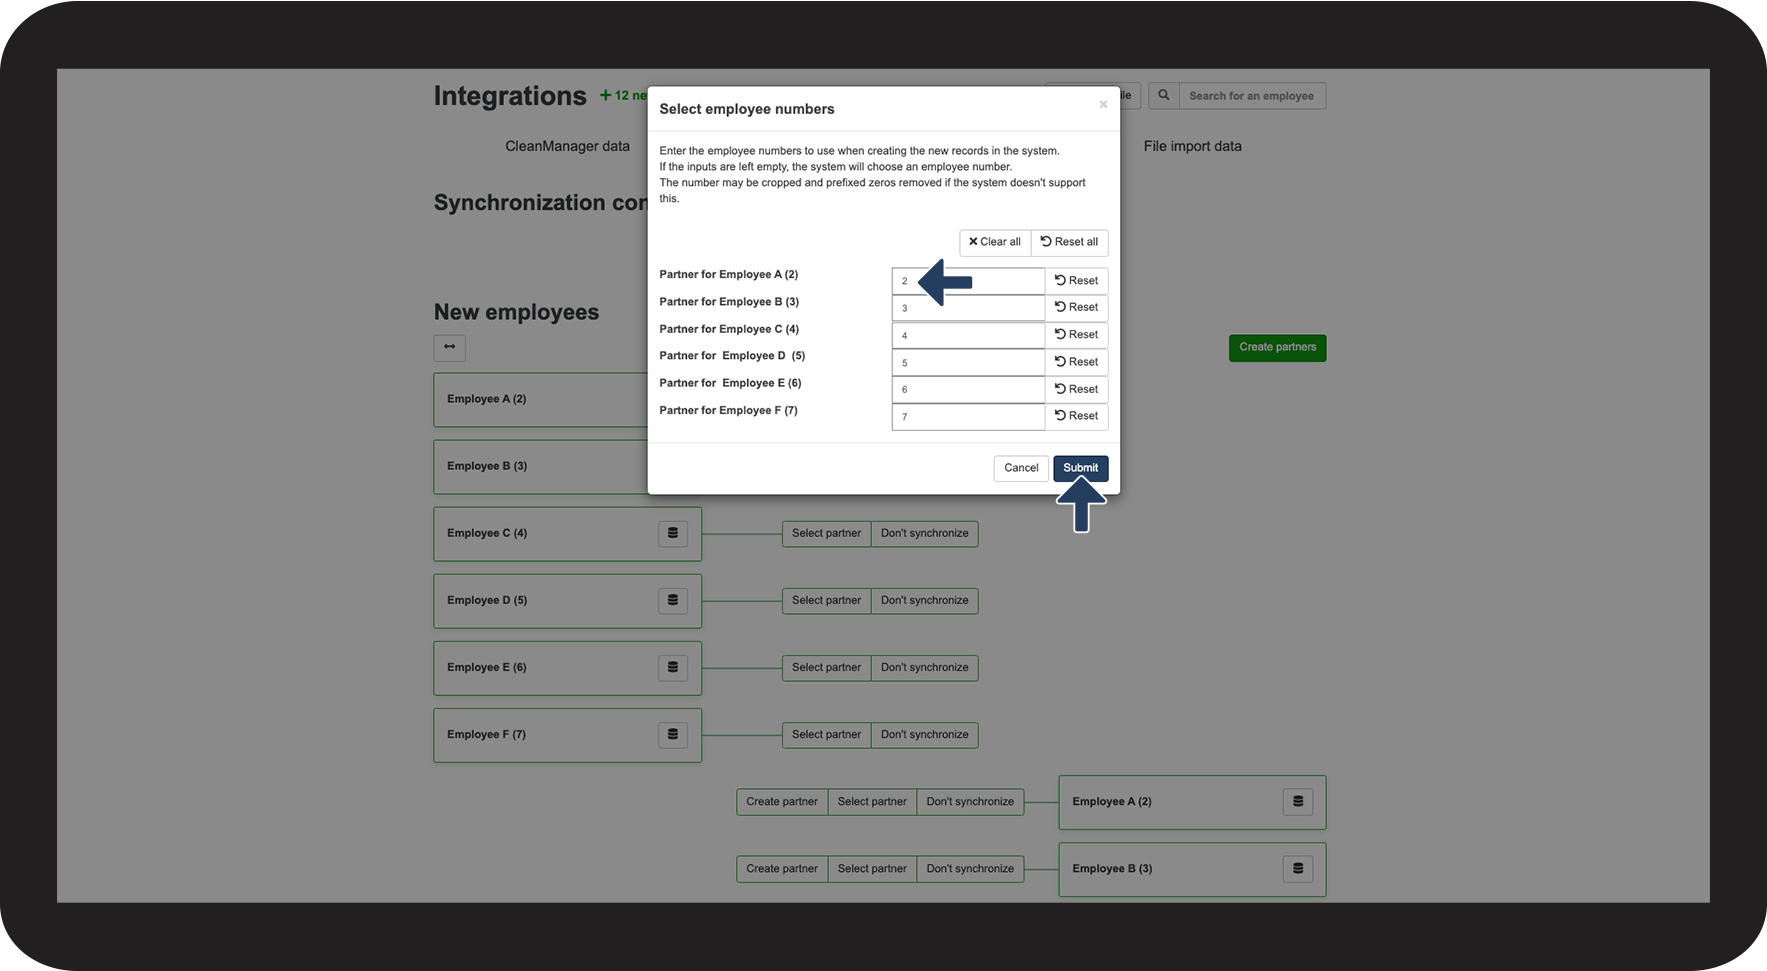
Setup of an employee/partner
If an employee only exists in the imported file, you can set up a partner in CleanManager. The employee's data will then be imported.
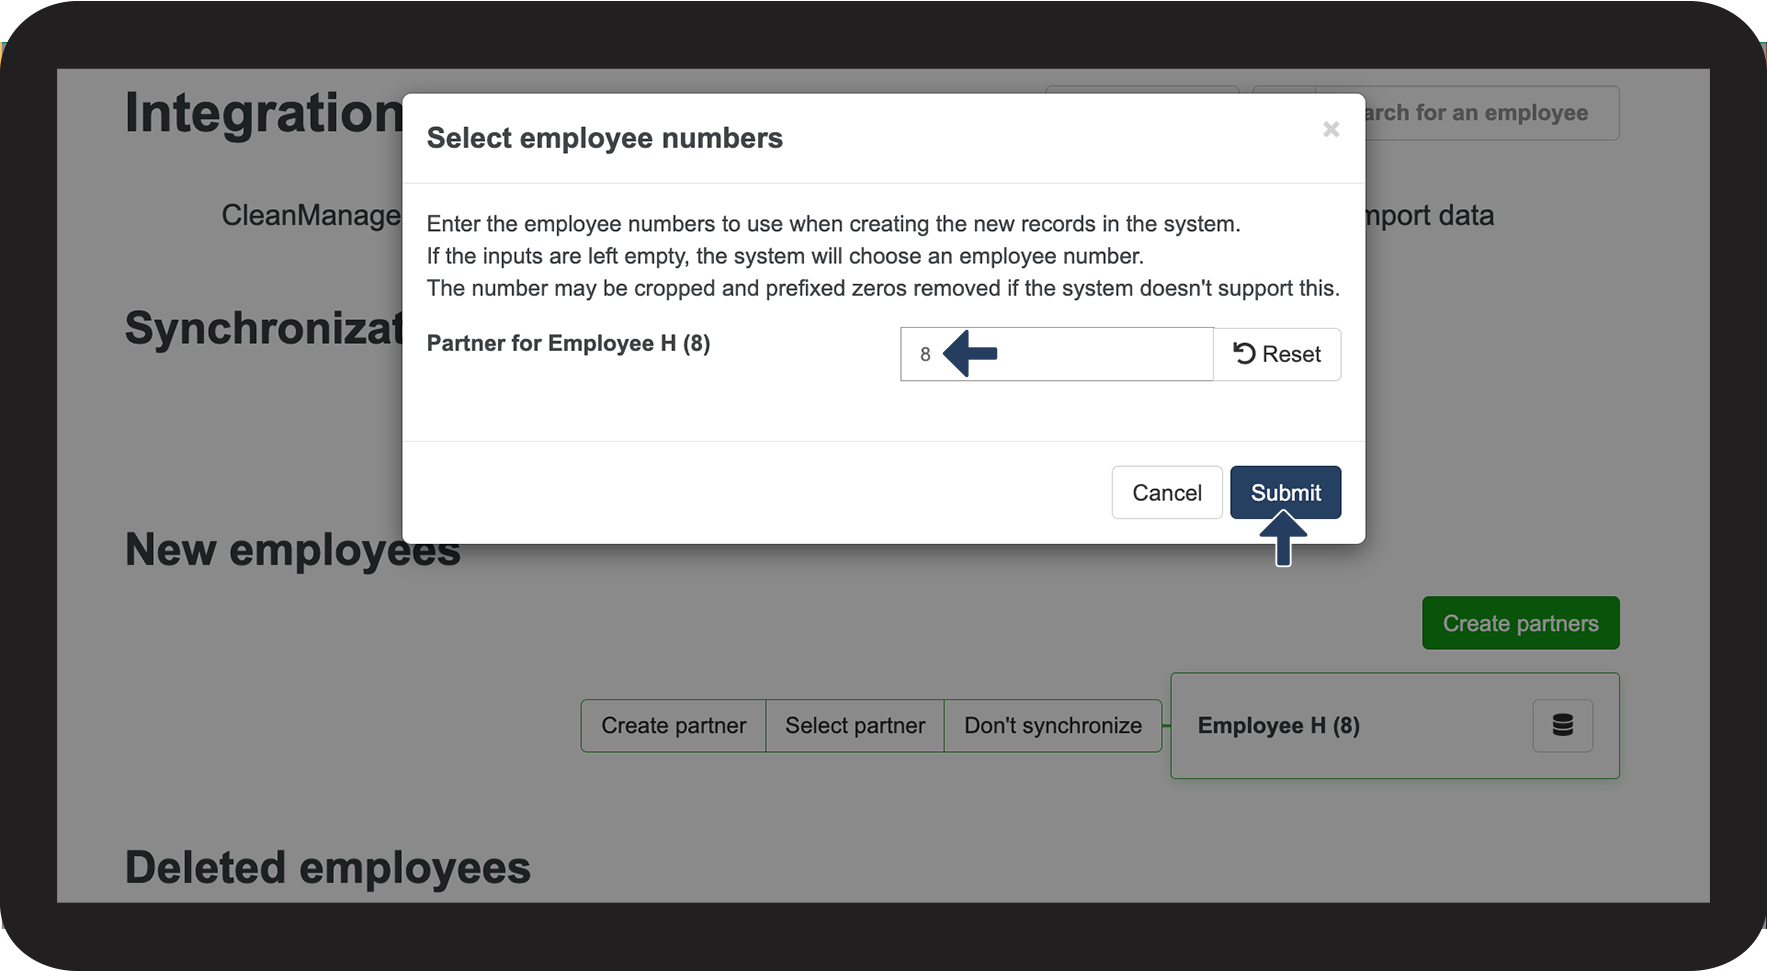
NOTE:
In most cases, you would keep the same employee number as in the system the data is imported from.
NOTE:
If you cannot see the newly imported employee, then update/refresh the page in your employee list to see your new employee data.
If conflicts arise, go to this section:
Synchronization conflicts /correction of employee data
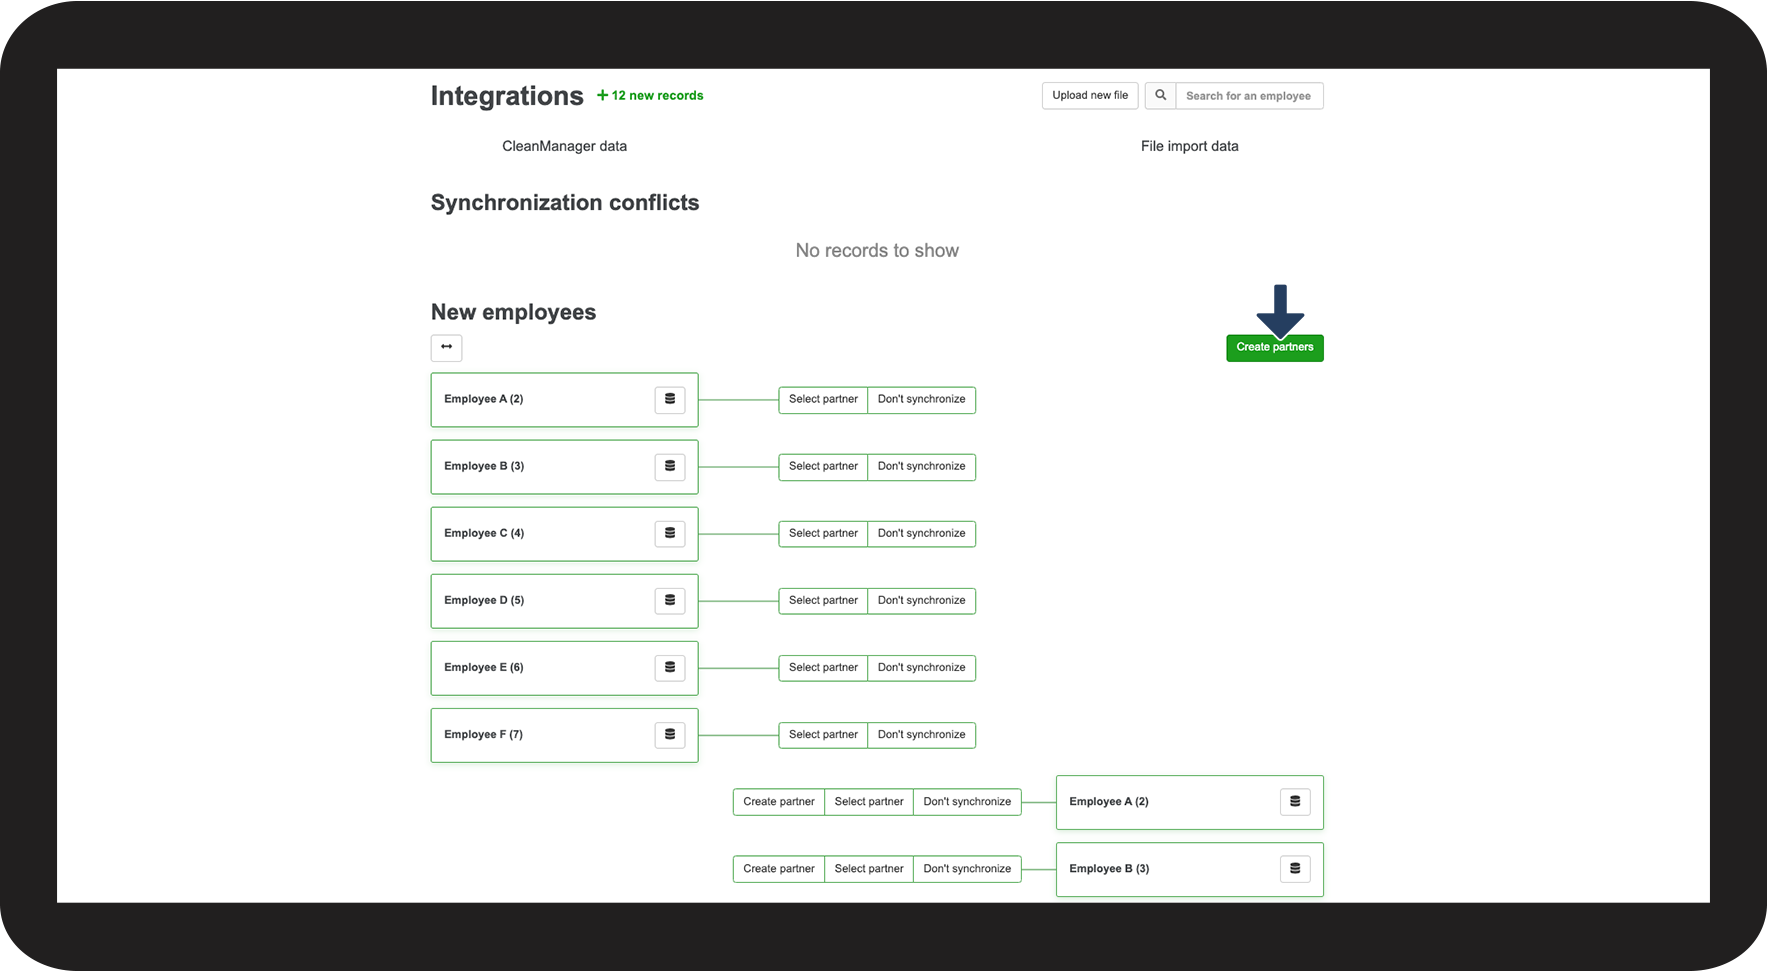
Setup of all employees/partners
When you start using CleanManager, you can import all your employees at once from the same file.
NOTE:
If you cannot see the newly imported employee, then update/refresh the page in your employee list to see your new employee data.
If conflicts arise, go to this section:
Synchronization conflicts /correction of employee data
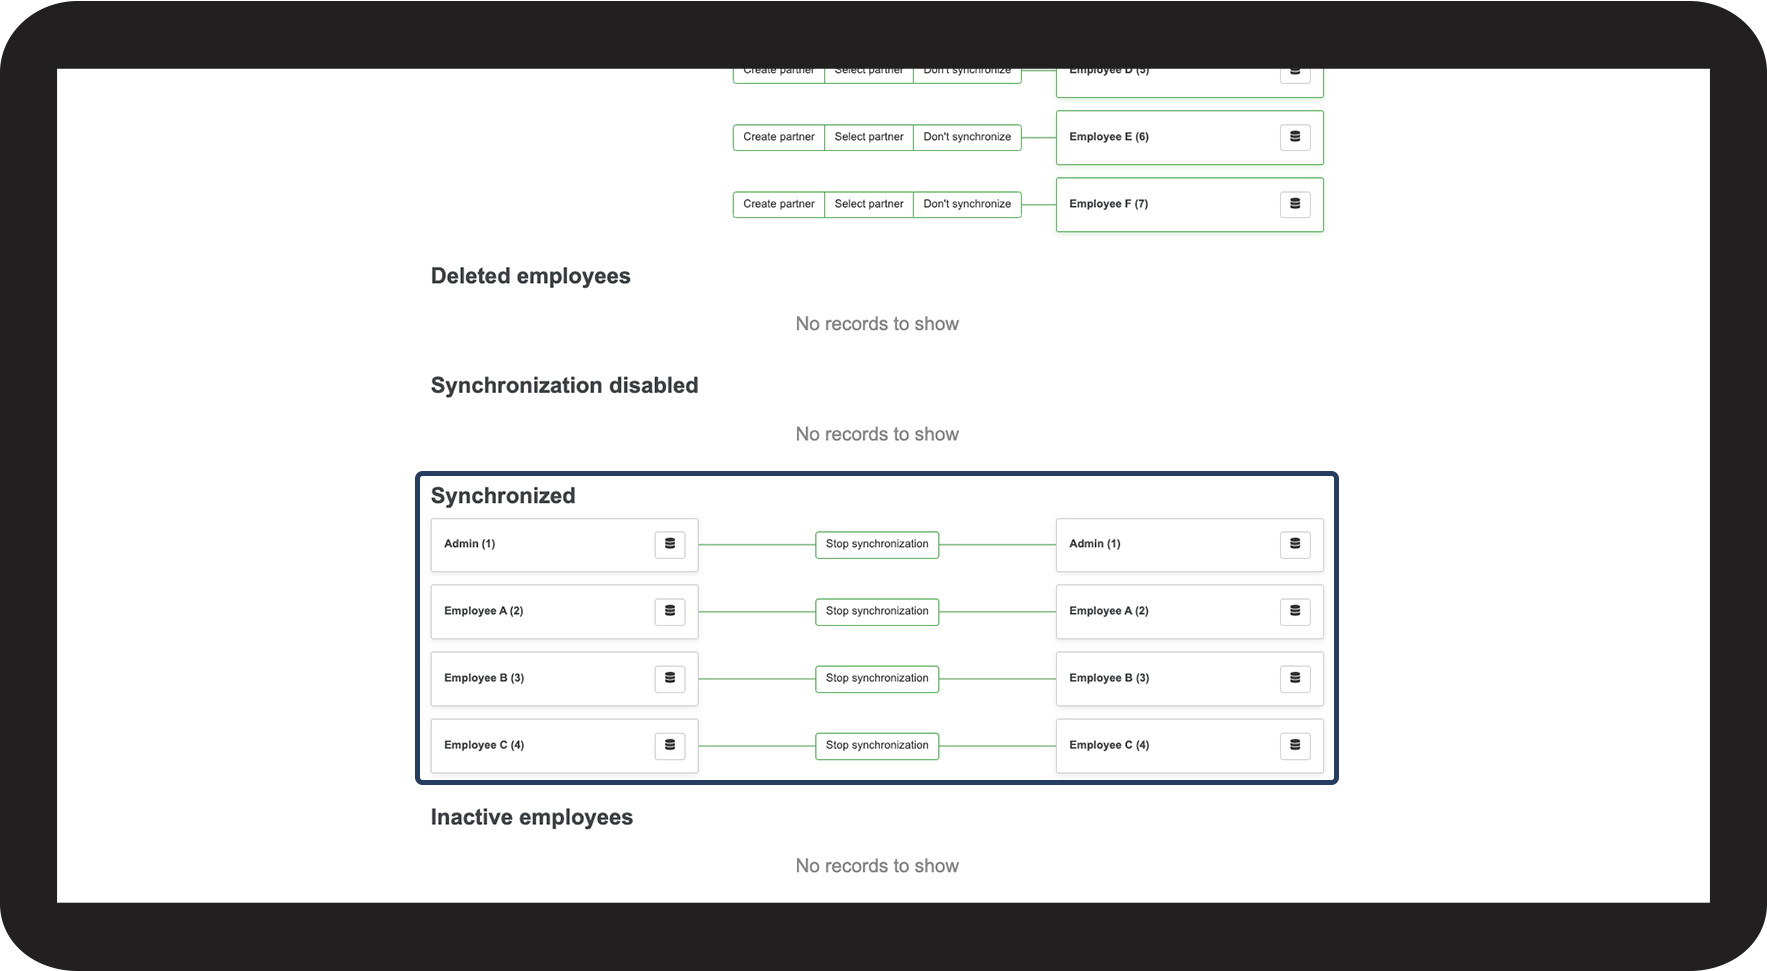
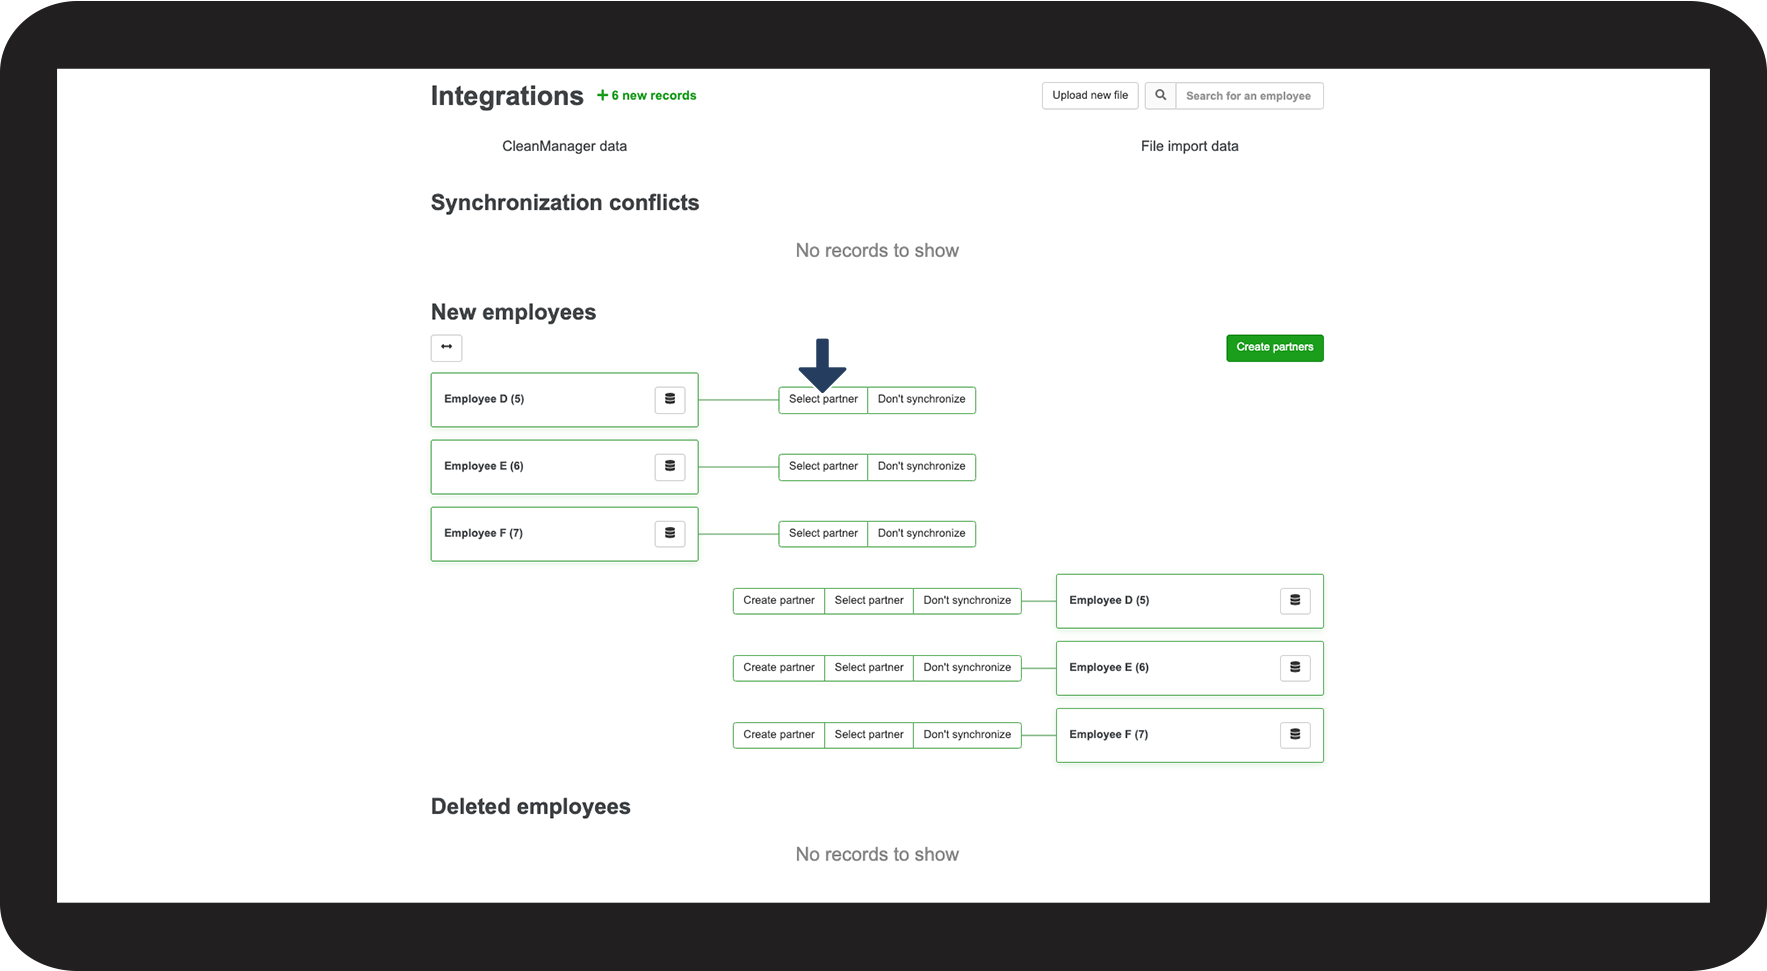
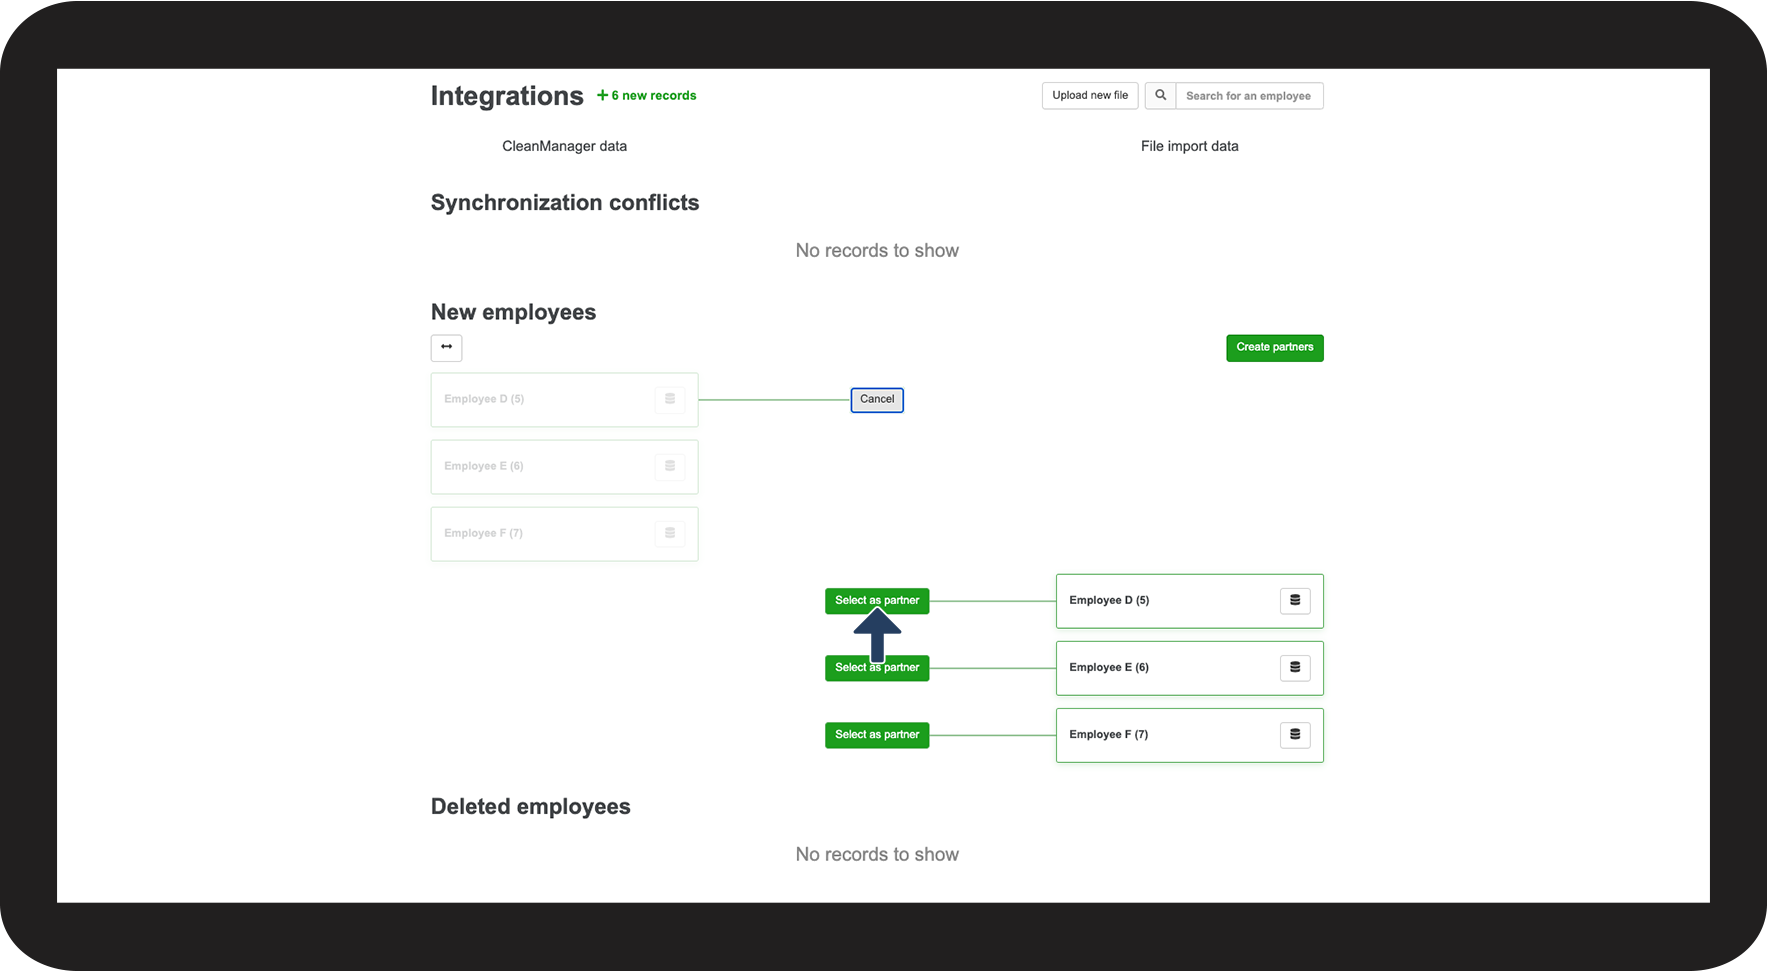
Choose a partner for an employee
If an employee exists in both CleanManager and the imported file, you can pair them up as partners.

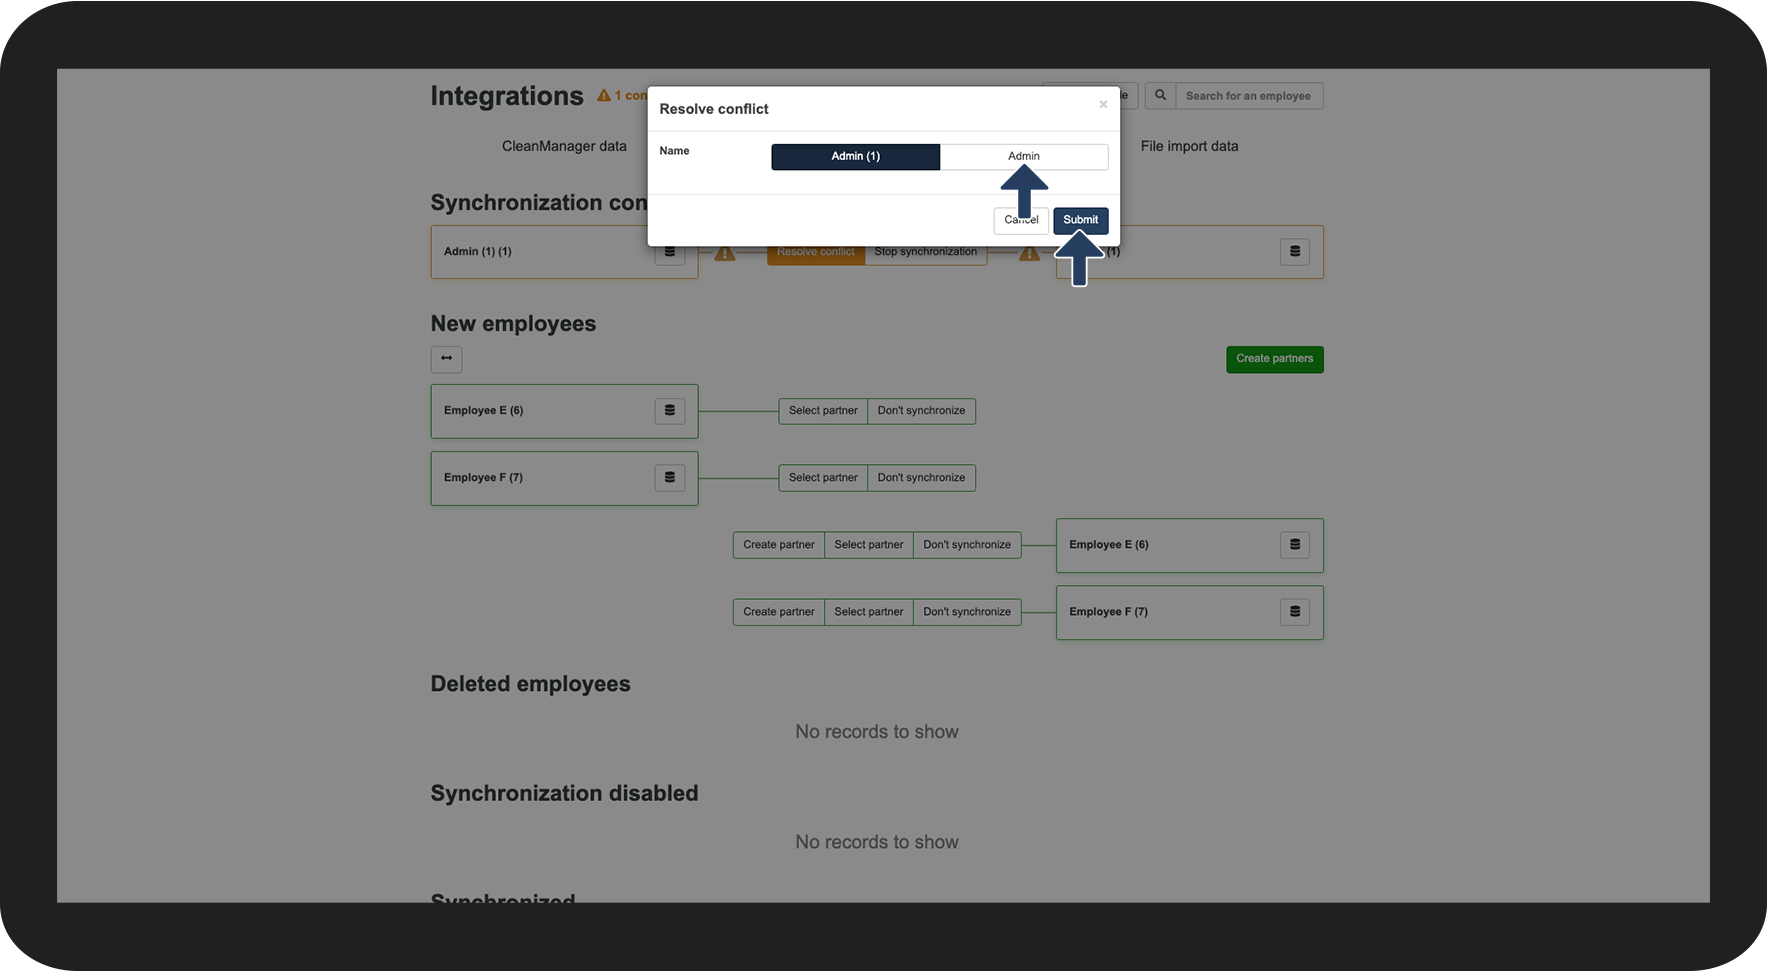
Synchronization conflicts /correction of employee data
A conflict can arise when employees are partnered up if their data does not match. This conflict must be addressed in order to save the right data. In some cases, the conflicts must be resolved immediately, but they can also arise occasionally if data has been changed in either of the systems.

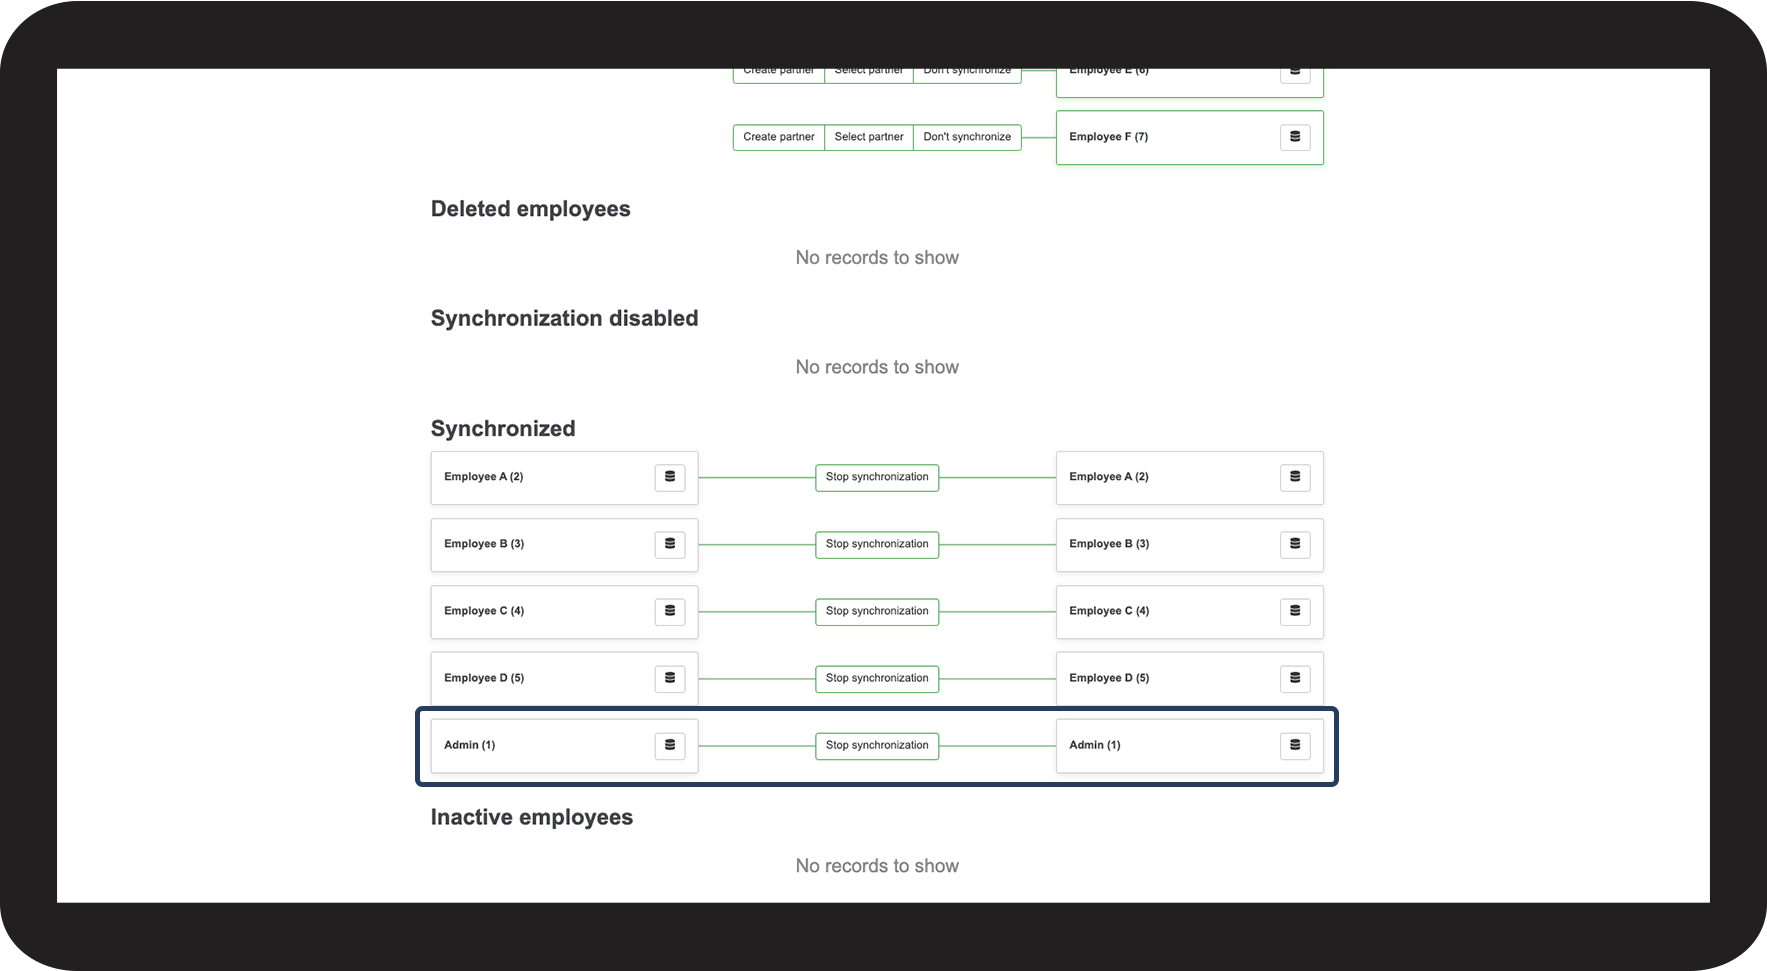
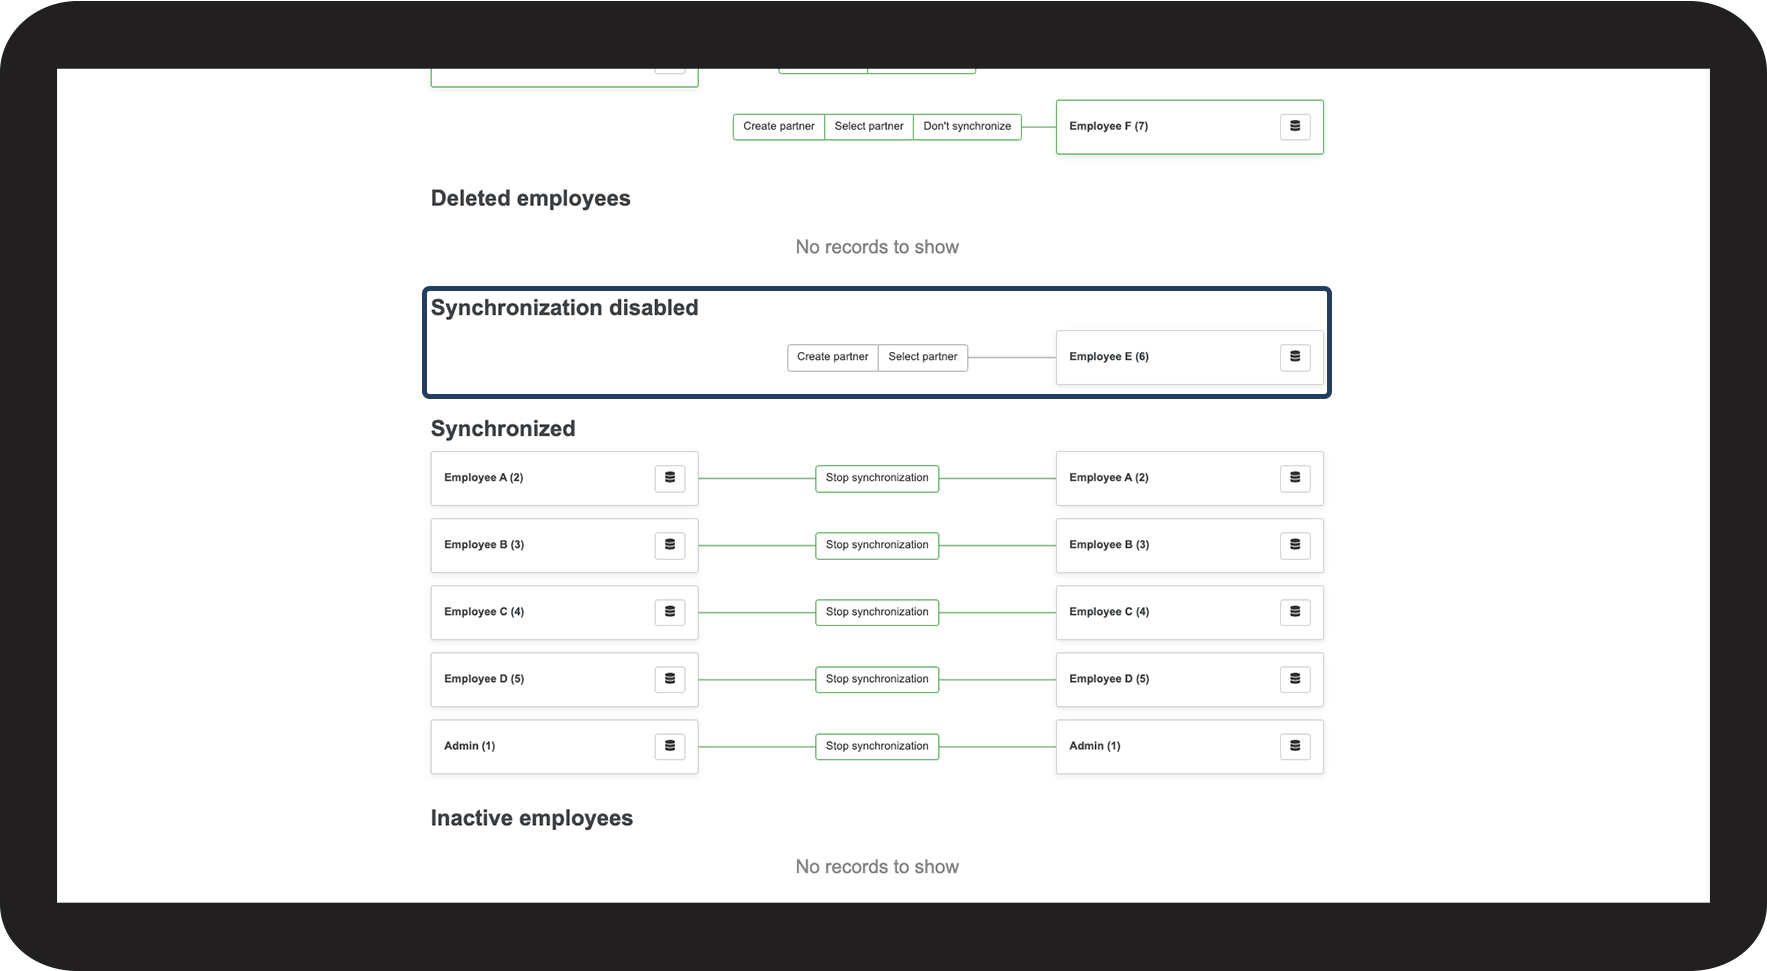
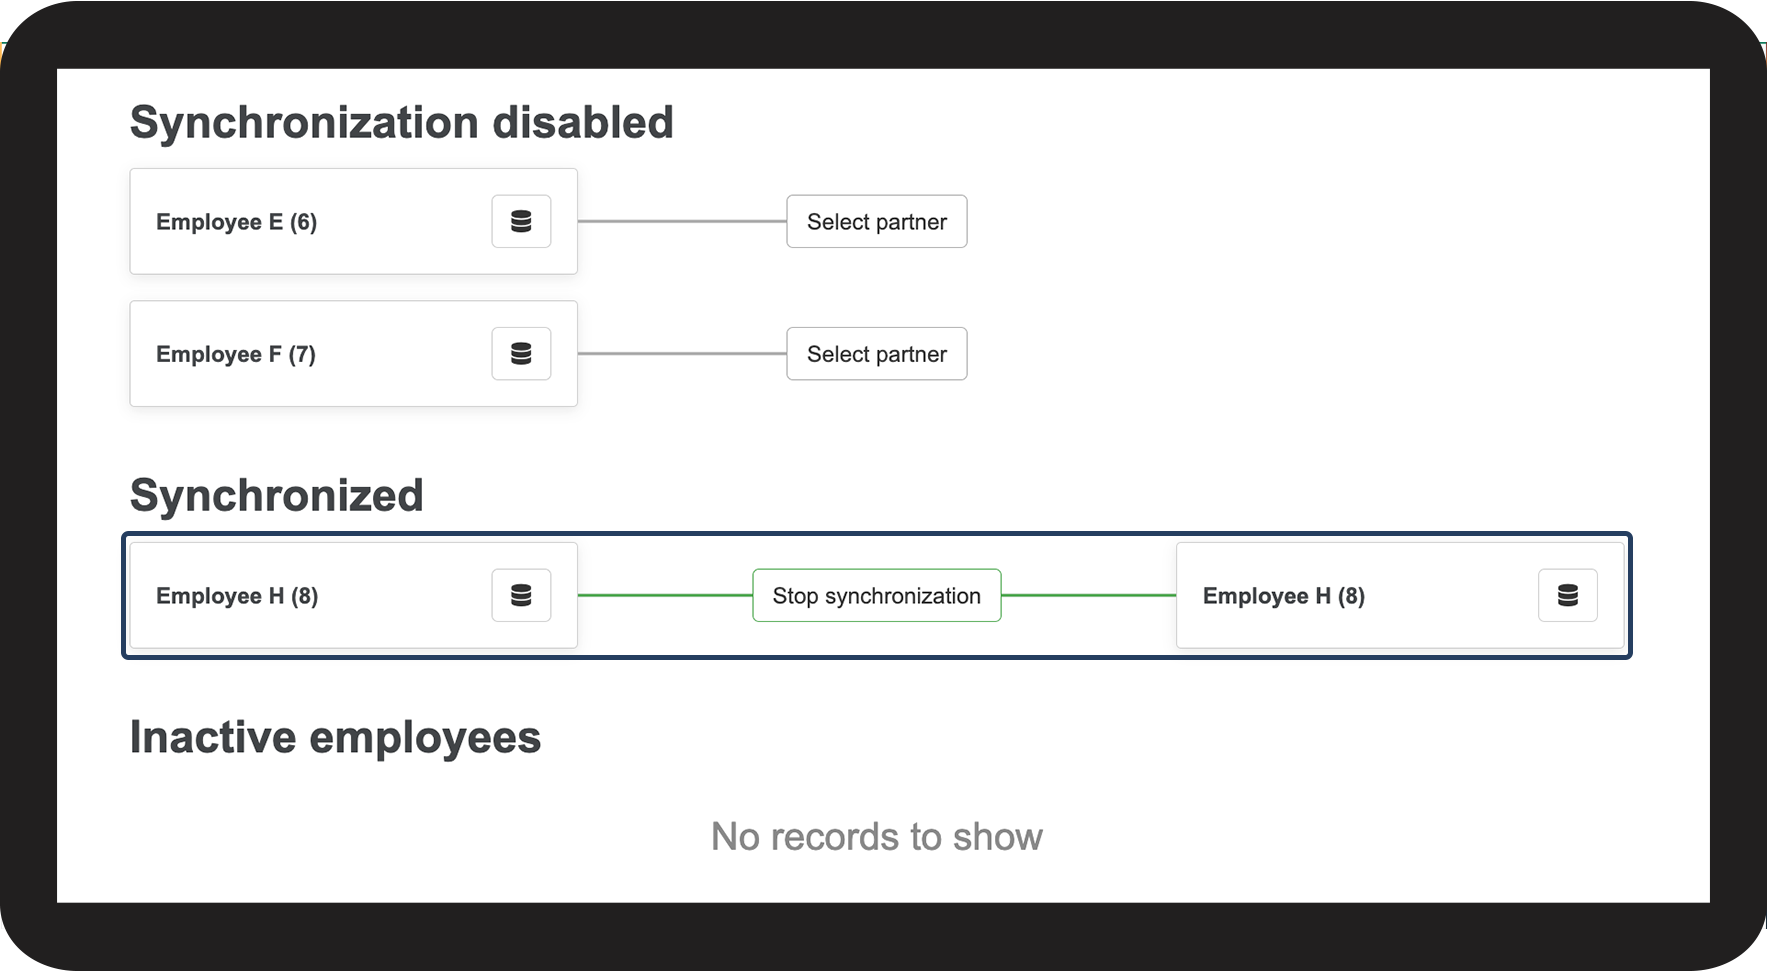
Deactivation of synchronization for an employee
If an employee is supposed to only exist e.g. in your payroll system, or you do not want to import the employee, you are able to exclude those employees from synchronization.