Skip to content
English
  • There are no suggestions because the search field is empty.

Editing absence hour types

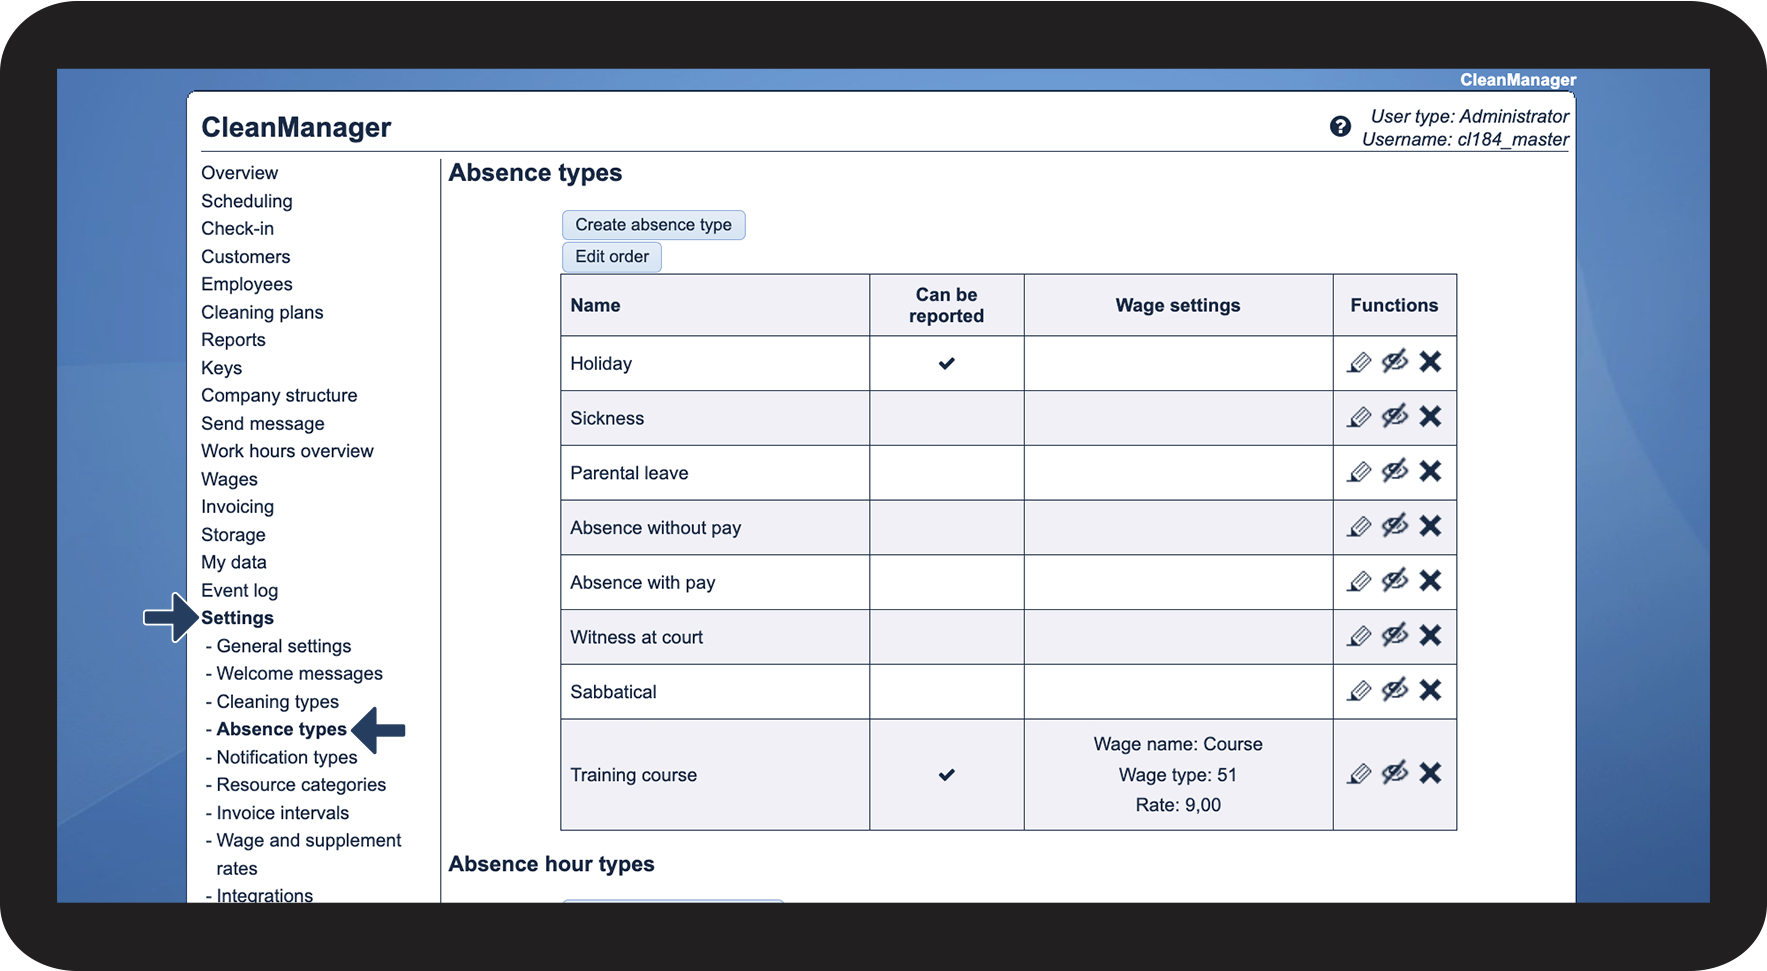
How do I edit absence hour types?

As the administrator, you can always edit your absence hour types if they no longer reflect your wage settings, or if a spelling mistake or rate needs to be corrected.

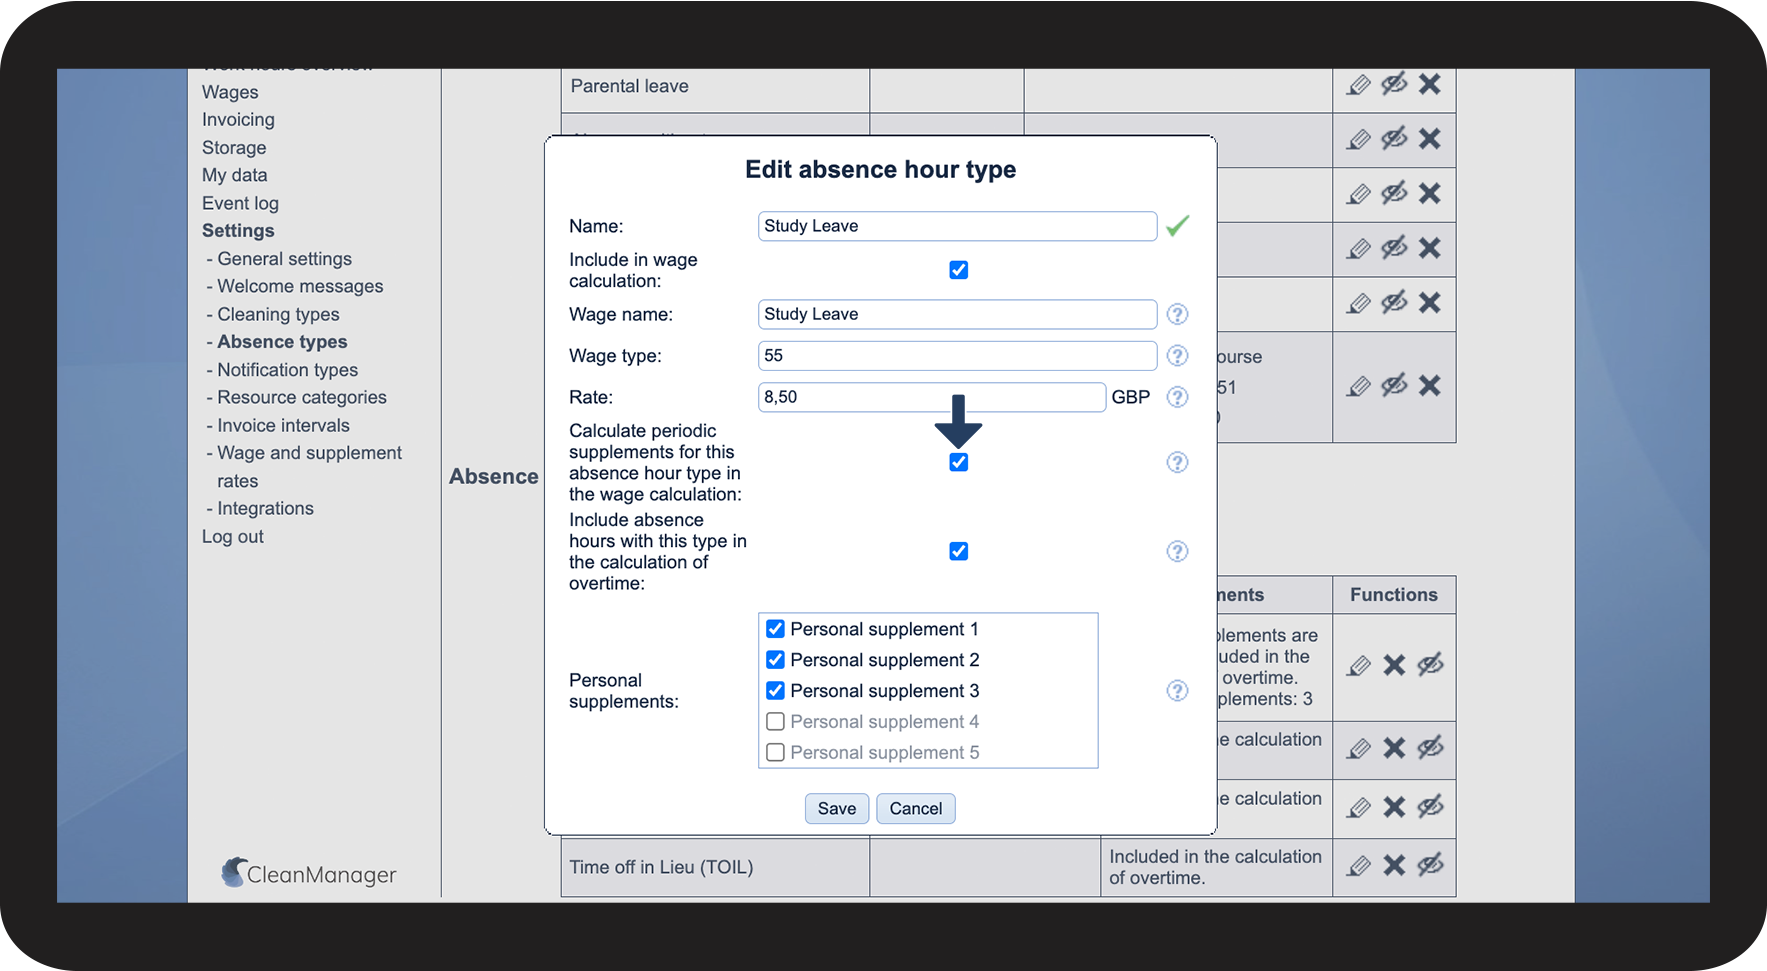
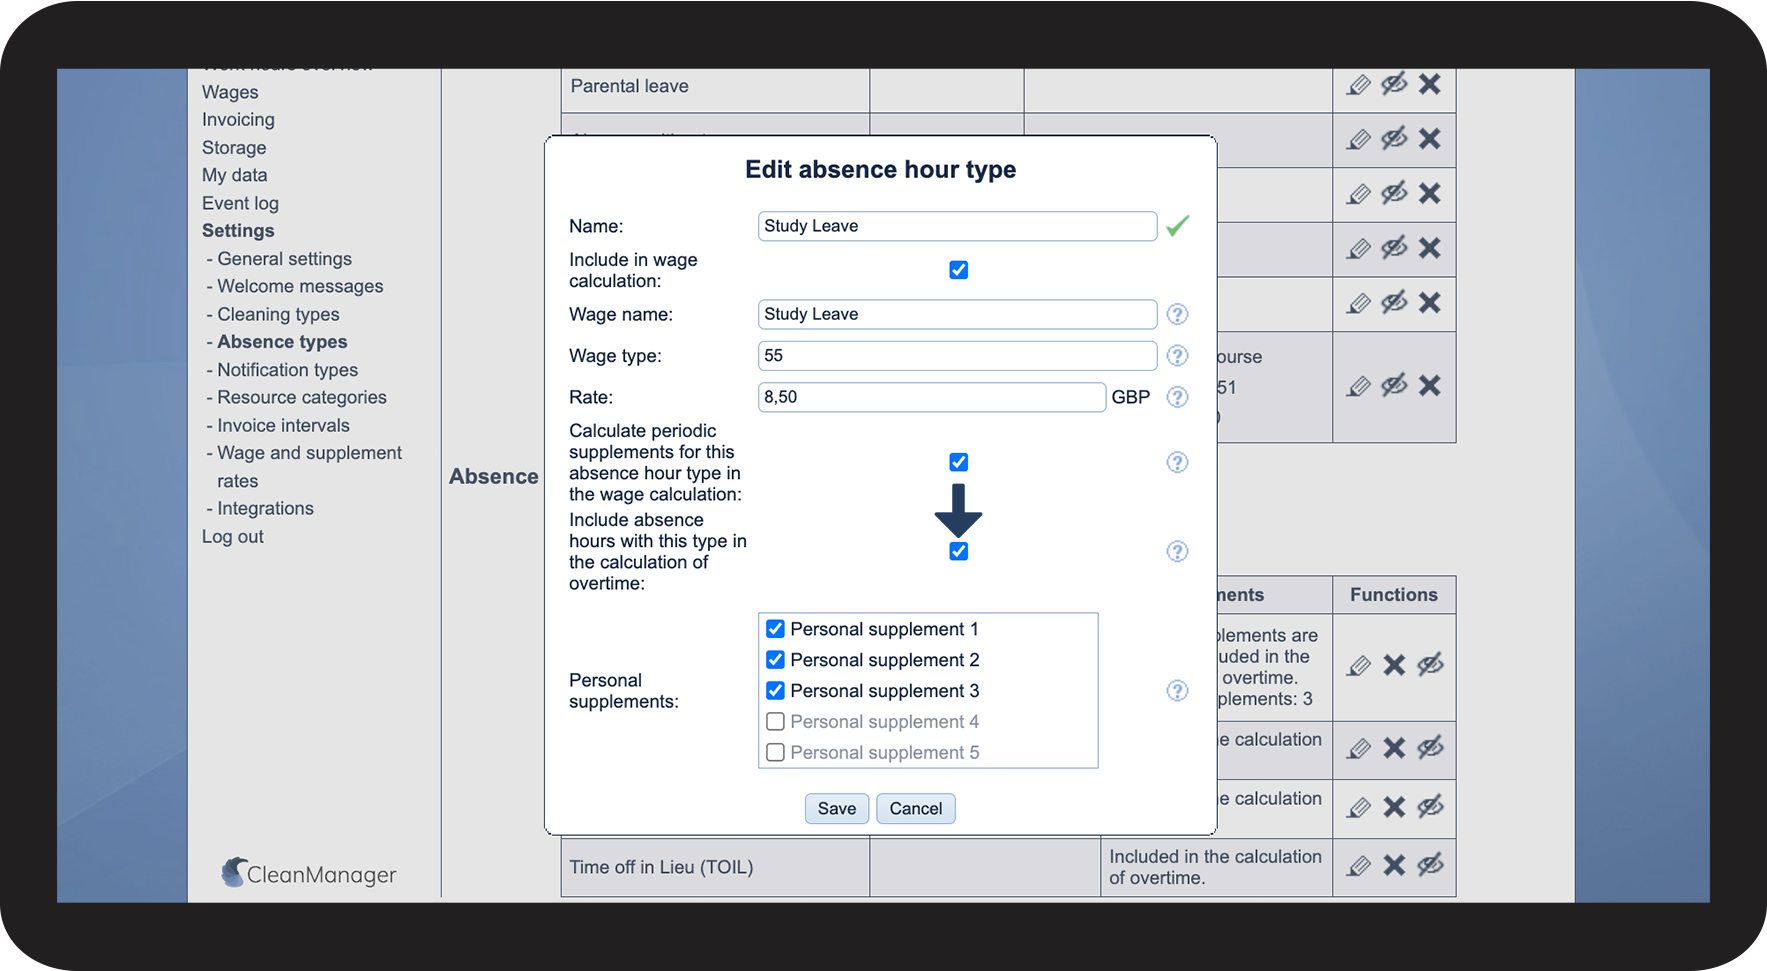
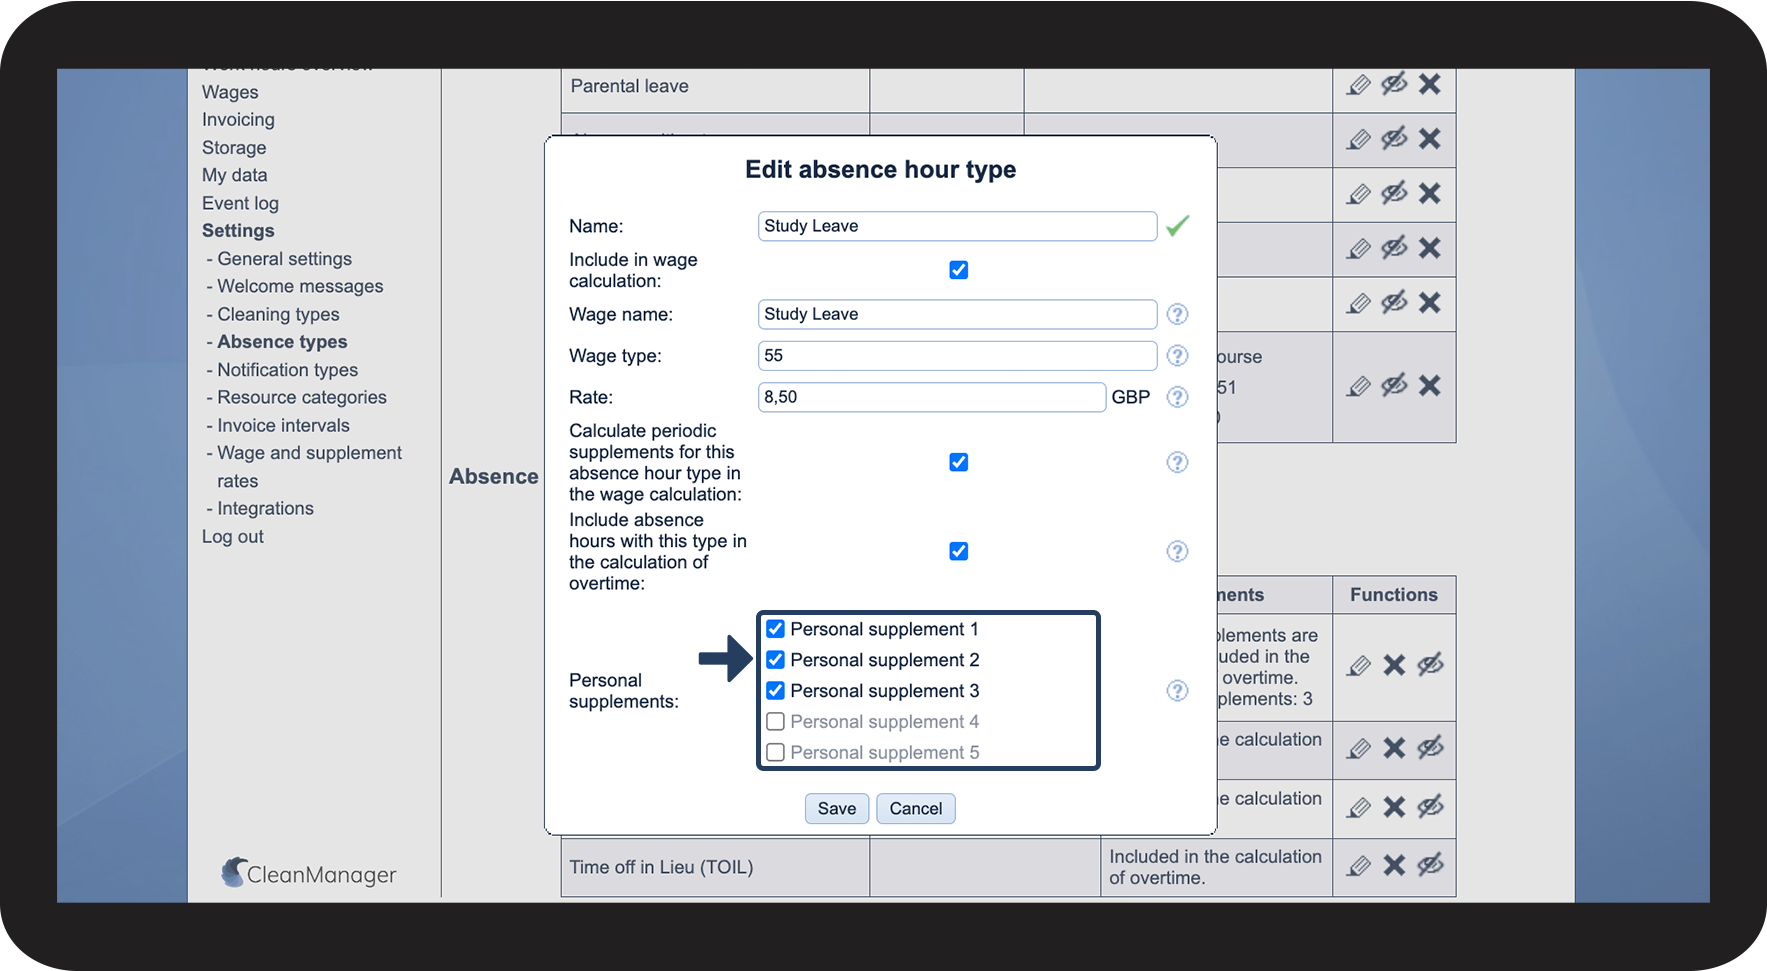
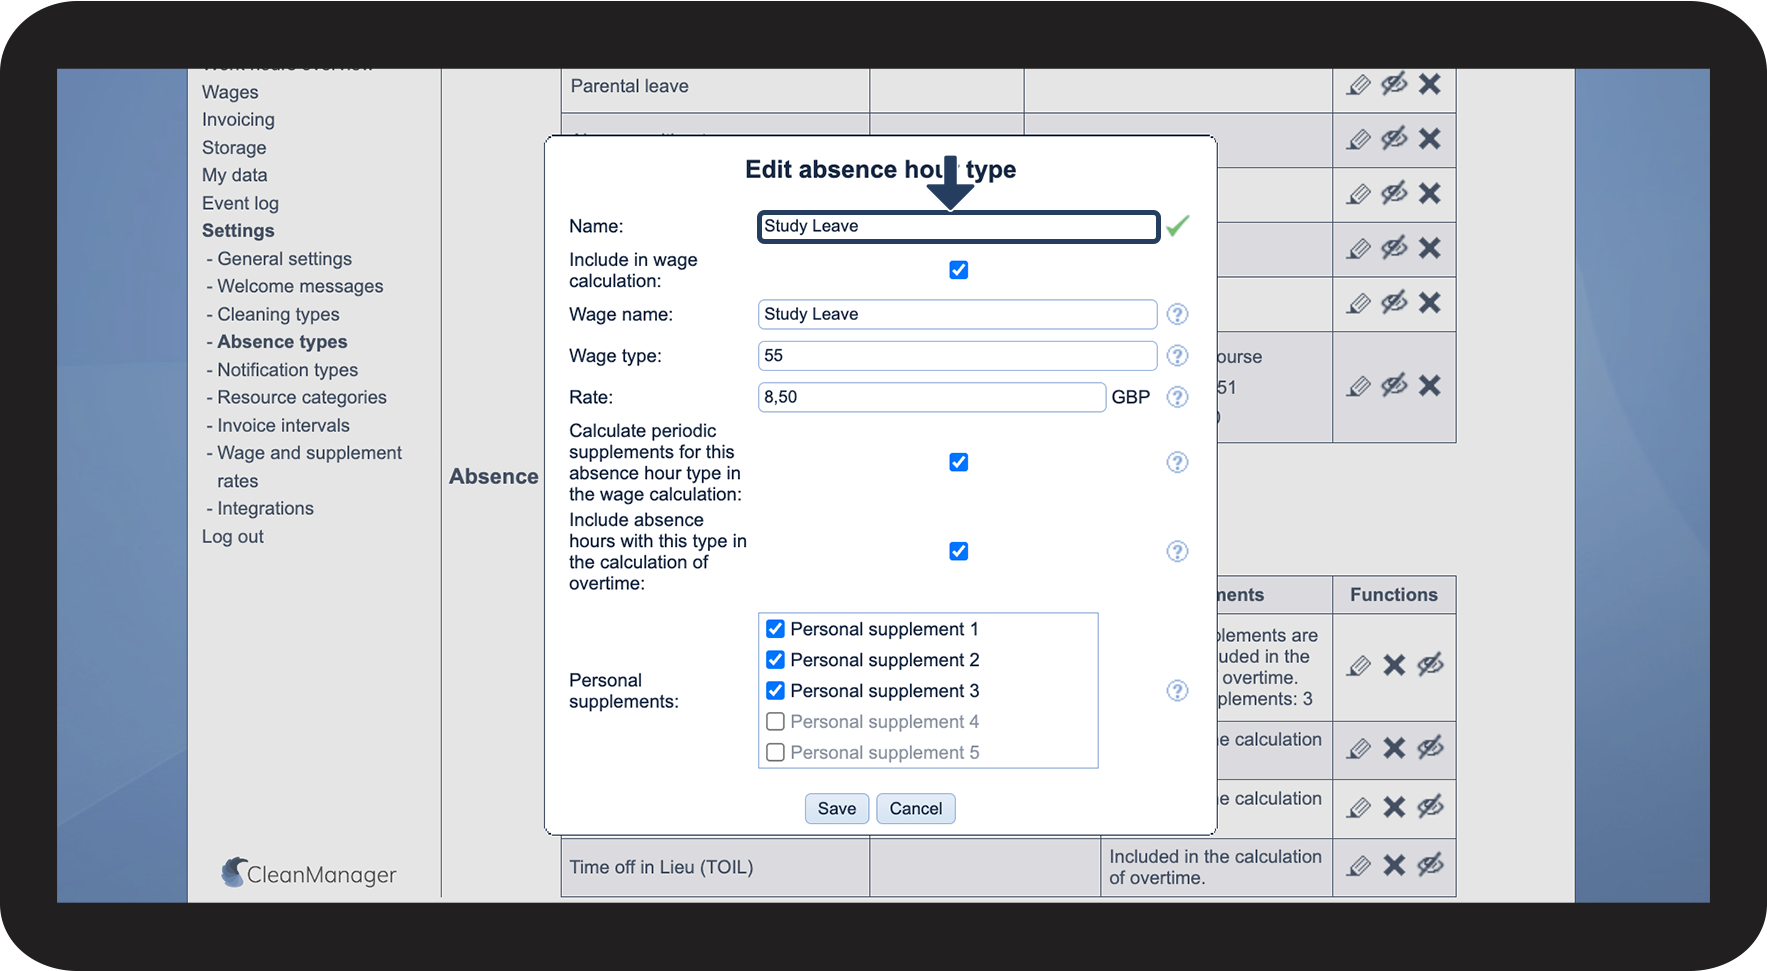
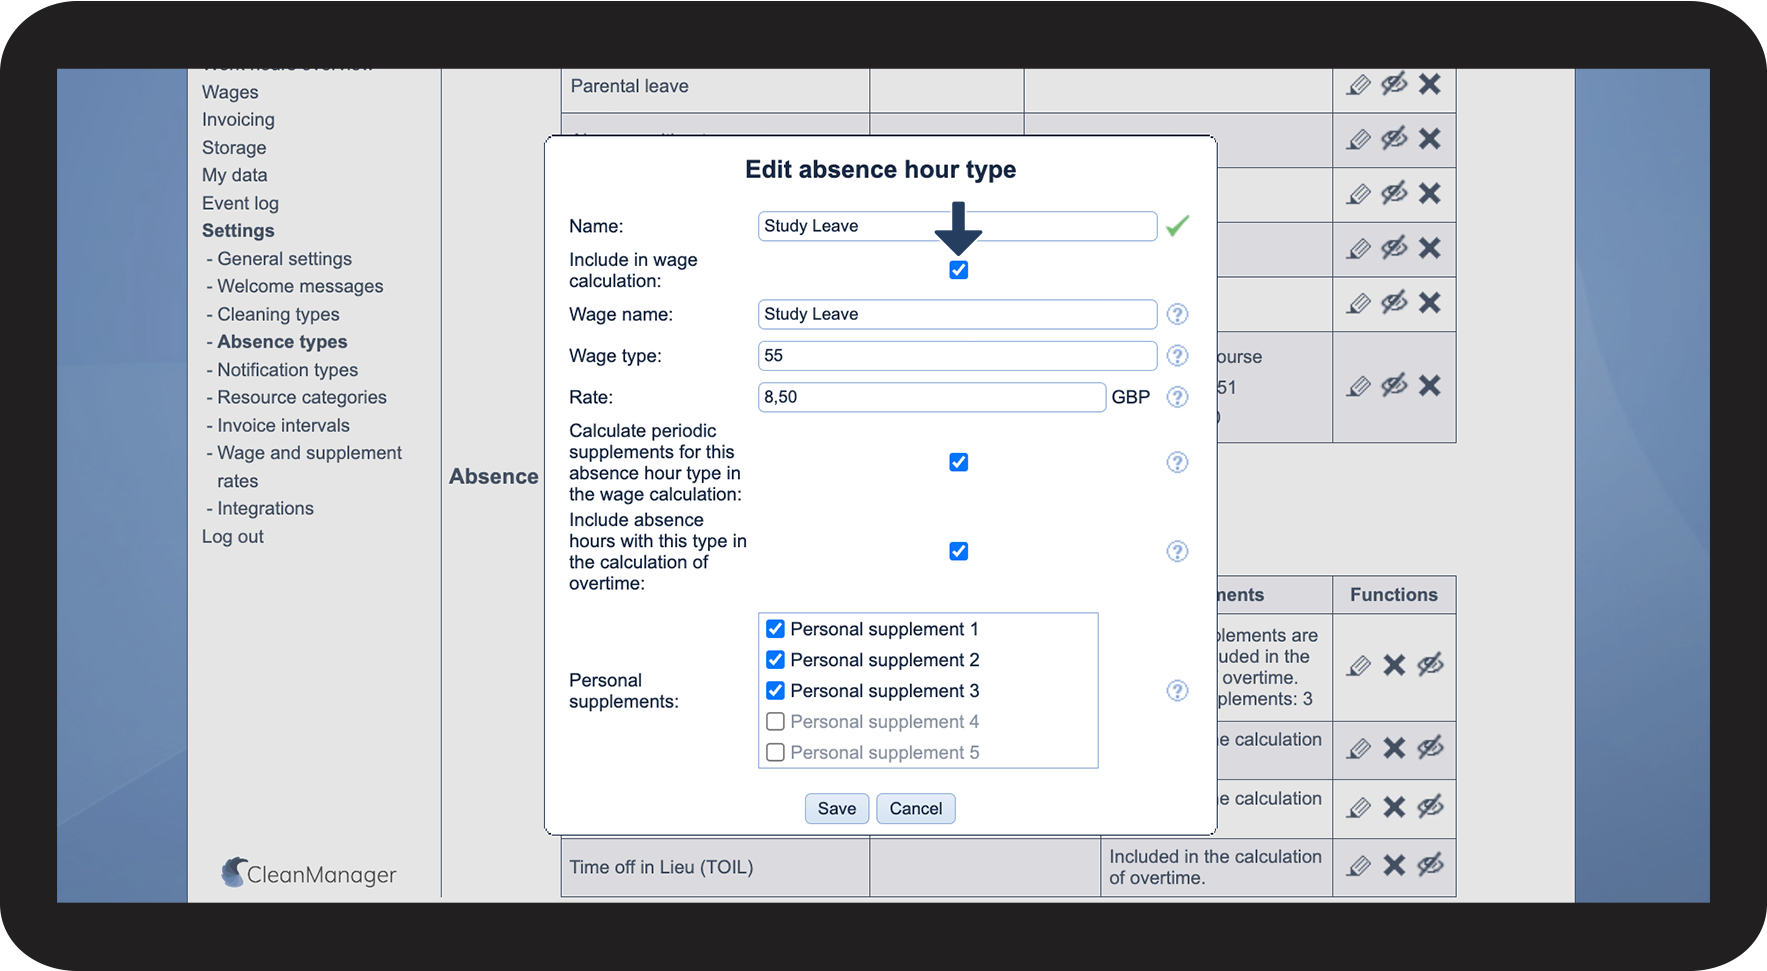
When editing, you can determine if the absence hour type should be included in the wage calculation or not, as well as whether periodical and personal supplements should be triggered by registered absence hours of this type.

INFO:

Absence hour types can be edited after you have created them.

If the absence hour type has not been used to register absence hours in the calendar, you can also delete it again.

We recommend that you create and customize your absence hour types so that they fit your needs in terms of registering absence hours and exporting data for your payroll system.


In this article, you will learn how to edit absence hour types:


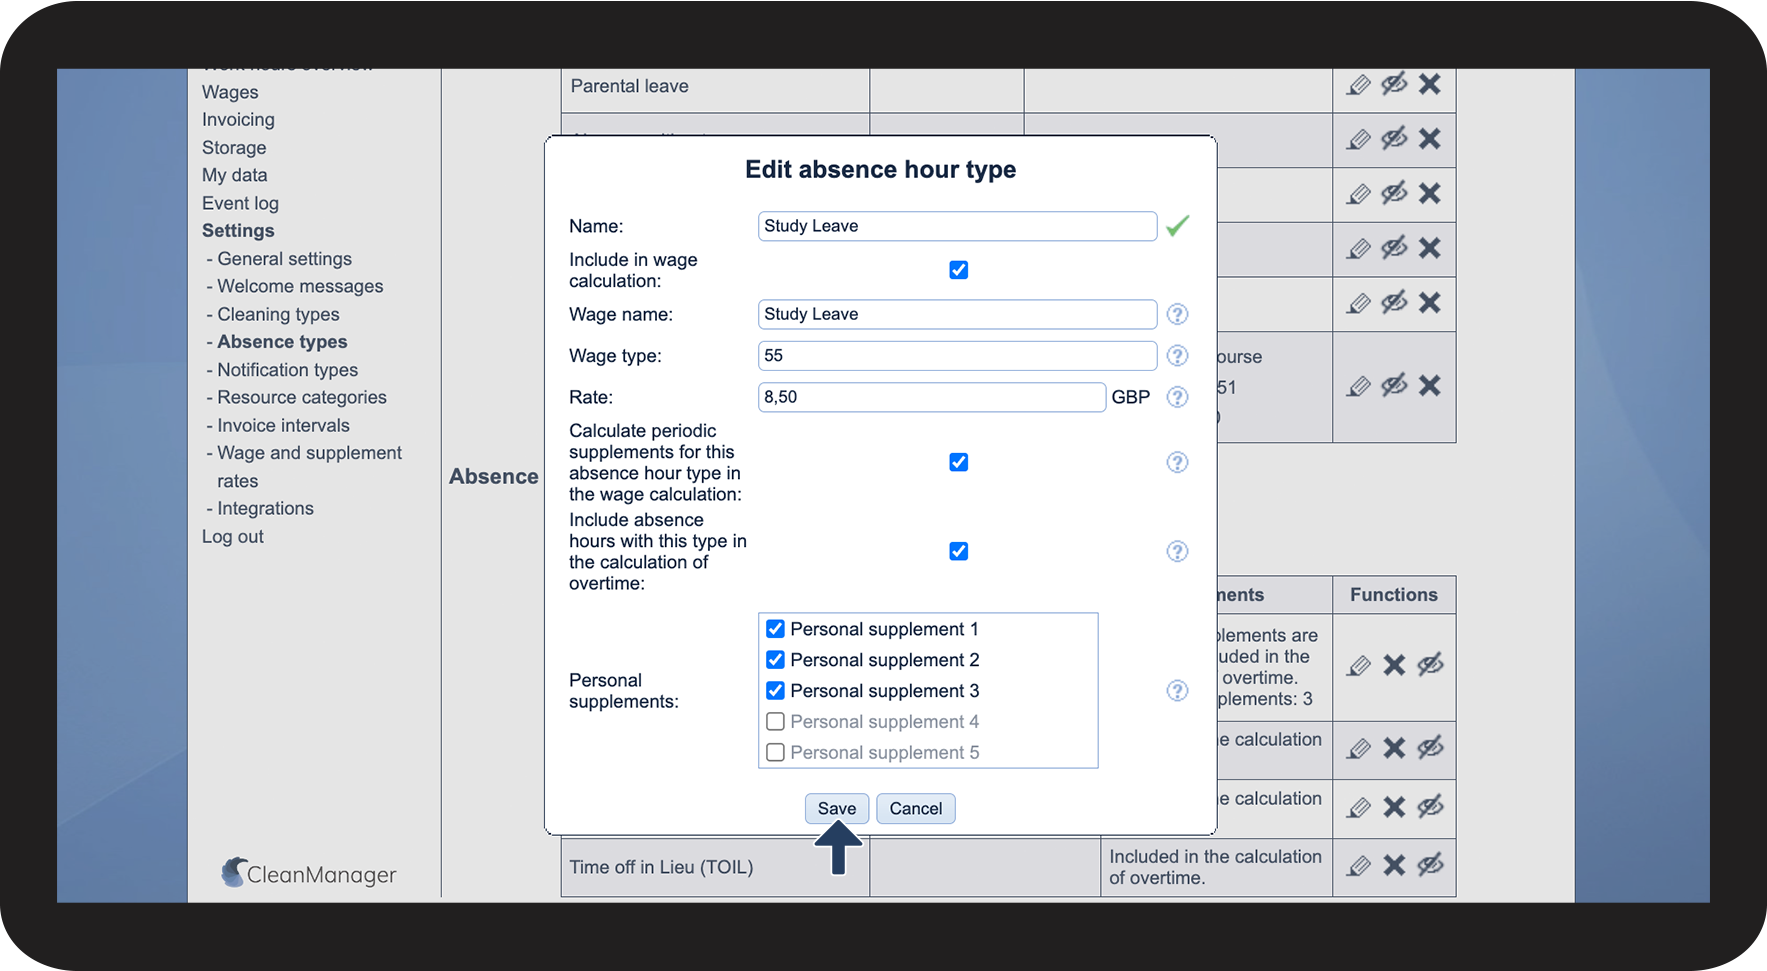
This is how you edit an absence hour type

number_1.png

In the menu, go to Settings > Absence types

1.png
number_2.png

In the section Absence hour types, click on Edit absence hour type edit.png next to the absence hour type you want to edit
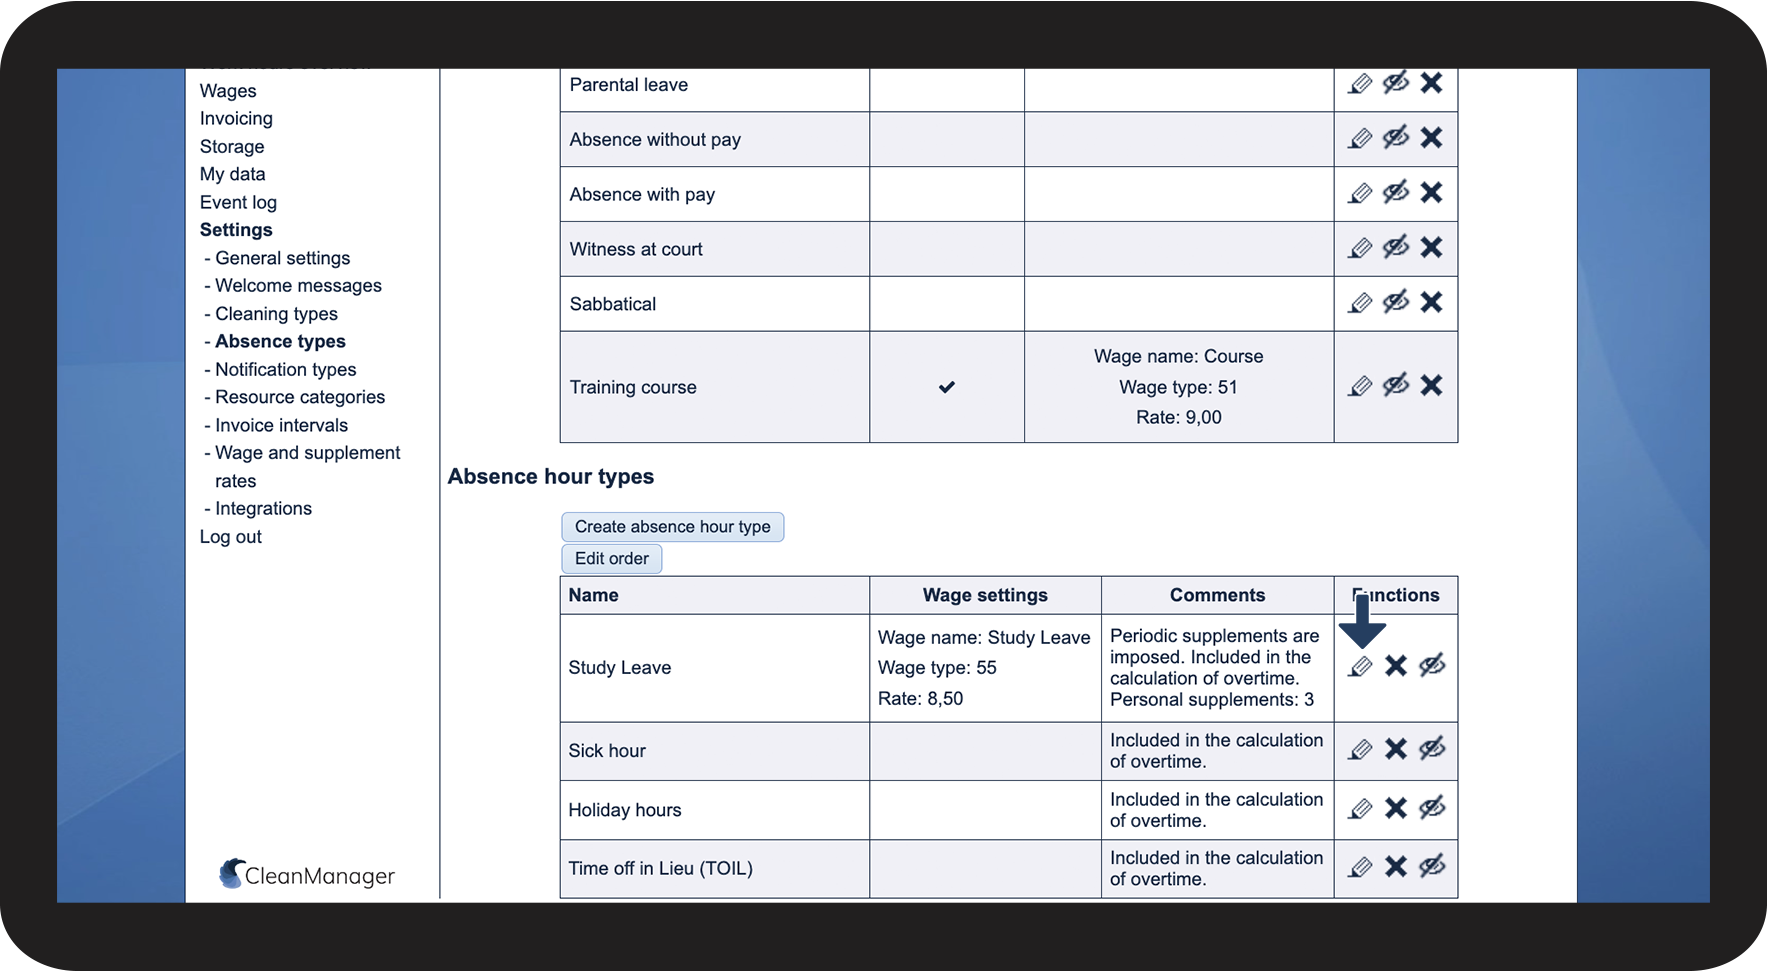
2.png

number_3.png

Edit the name of the absence hour type

3.png

number_4.png

Tick off the box Include in wage calculation if you want to include and export the registered absence hours of this type in your wage export

 
If this feature is already enabled, click on it again to deactivate it. By doing this, this absence hour type will no longer be included in your wage export


NOTE:

In order to follow step 4–8, the add-on module Wage Calculation must be activated in your account. You can read more about activating add-on modules in the following article: Add-on modules

If the add-on module Wage Calculation is not active in your account, proceed to step 9.

4.png

number_5.png
Adjust the following information:


NOTE:

The following fields are not mandatory to fill out. If you enter something in the fields, it will overwrite the corresponding information entered for your absence hour rate in your wage profile when exporting your absence from the menu item Wages. If you want to define your absence hour rates through your wage profiles, you can skip this step.

You can learn more about adding absence hour rates to your wage profiles here: Adding rates for absence hours to the wage profiles

 
  1. Name: The name you want to use for the absence hour type in your wage export
  2. Wage type: Enter the corresponding wage type from your payroll system. This ensures alignment between CleanManager and your existing payroll setup. (Note: The example provided is for illustrative purposes only)
  3. Rate: Type in the correct rate, i.e. the hourly compensation for this absence hour
5.png
number_6.png
Tick off the box Calculate periodic supplements for this absence hour type in the wage calculation if you want registered absence hours of this type to trigger periodic supplements. For more information, you can read this article: Periodic supplements
 
If this feature is already enabled, click on it again to deactivate it. By doing this, periodic supplements will not be triggered for absence hours of this type
6.png
number_7.png
Tick off the box Include absence hours with this type in the calculation of overtime if you want registered absence hours of this type to be included in the calculation of overtime. For more information, you can read this article: Overtime profiles
 
If this feature is already enabled, click on it again to deactivate it. By doing this, absence hours of this type will not be included in the calculation of overtime
7.png
number_8.png
Tick off the personal supplements that should be triggered by registered absence hours of this type. For more information, you can read this article: Personal supplements
8.png
number_9.png
When all adjustments have been made, click on Save
9.png