Skip to content
English
  • There are no suggestions because the search field is empty.

Creating locations

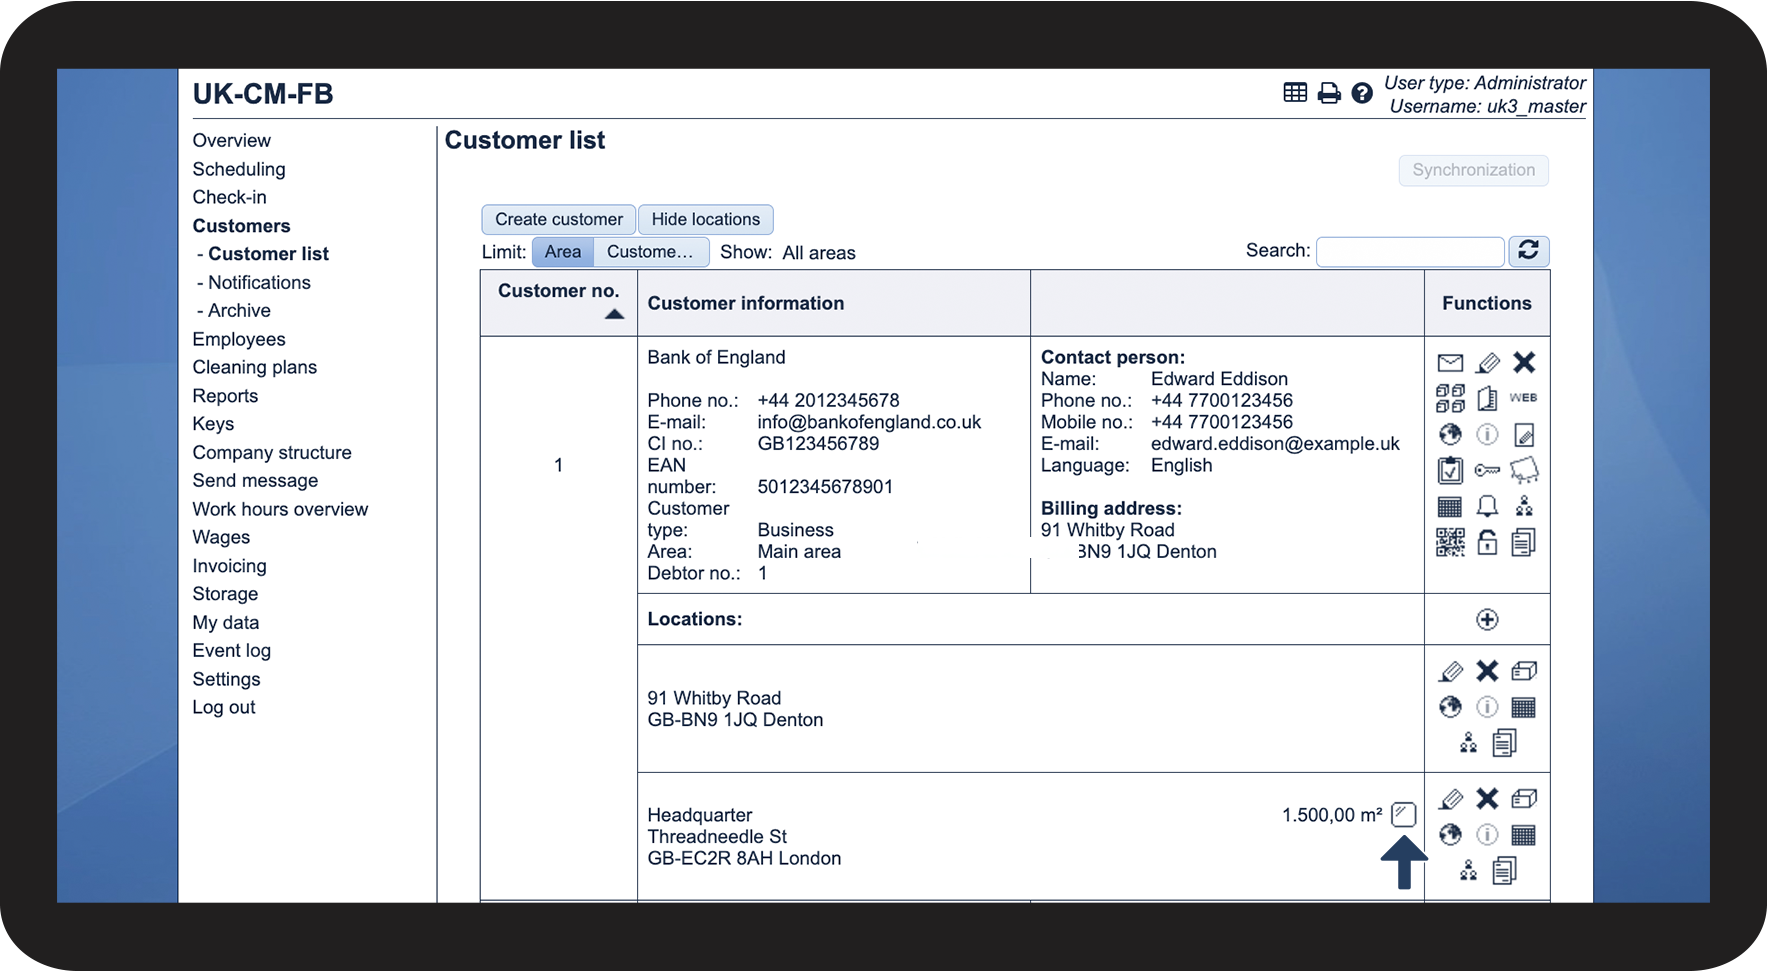
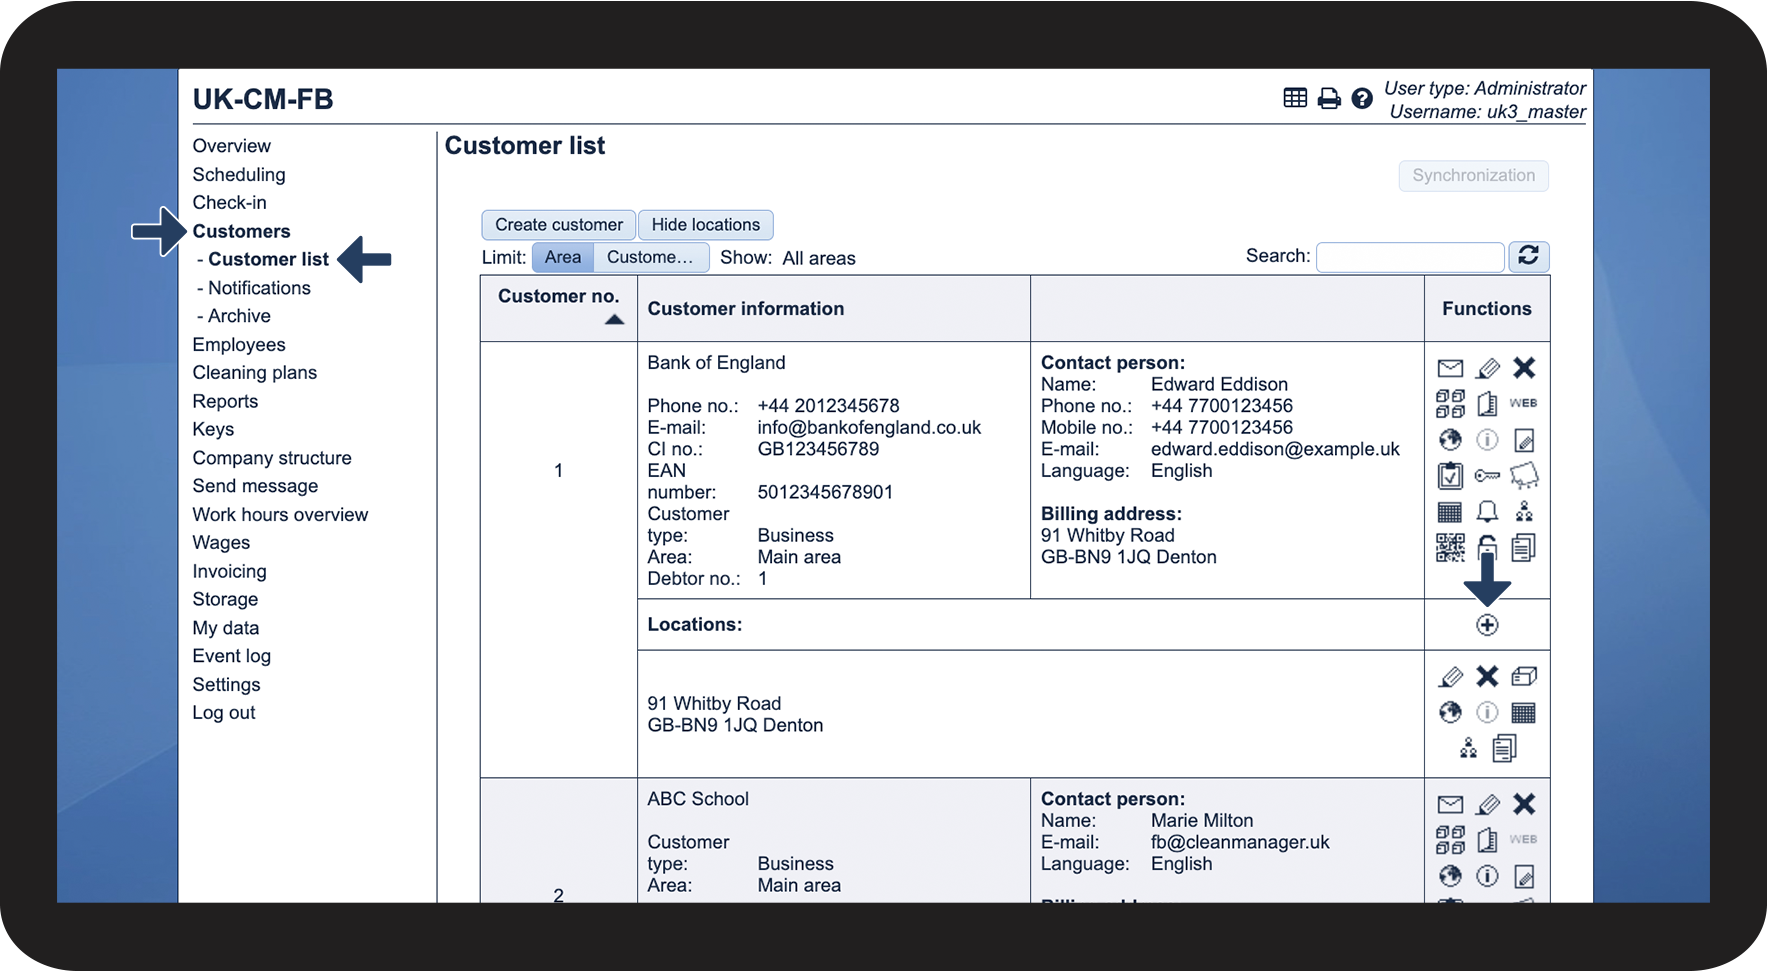
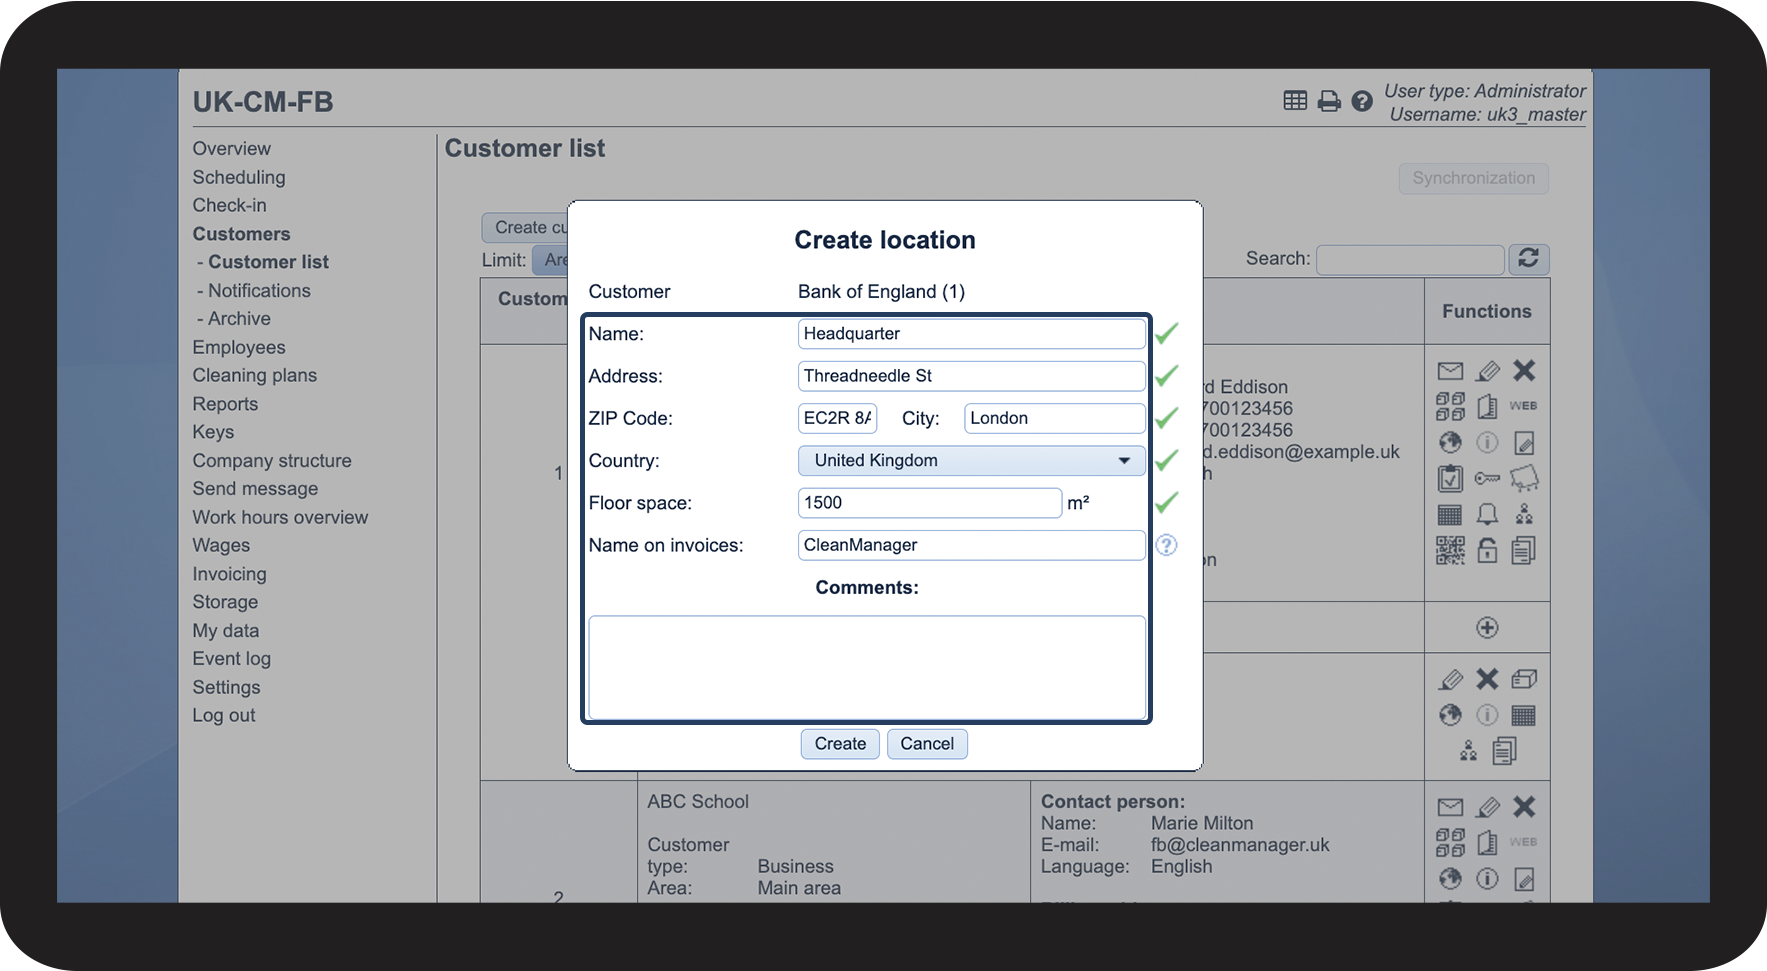
How do I create locations for a customer?

Do you need to plan tasks on several locations for a customer?

The administrator and/or supervisors can create multiple locations for the same customer. This can be useful if, for example, the billing address is different from the locations where you go to clean. 

NOTE:

Supervisors can only create locations for customers within their area. For more information regarding this, go to Company structure.


In this article, you will learn how to create locations and how to use the different functions


This is how you create a location

number_1.png

In the menu, go to Customers > Customer list


Find the relevant customer and click on Create location tilføj.png

1.png


number_2.png

Fill out the desired fields


Field
Description
Customer

This field will be filled out with the customer's name

Name

The name of the location. This does not necessarily have to be the address but can also be a description of whom, or what, is located at the address.

Address

Here, you write the address of the location. If this field has been filled out, the navigation function in the app will become available. You can read more about that here: Information about workplaces.

ZIP Code

Here, you fill in the postcode of the location.

City

Fill in the city of the location.

Country

Select the country of the location.

Floor space
Here, you can enter the size of the area that needs cleaning.
Name on invoices

Enter a value in this field to overwrite the name of the location on the invoice. If empty, the name of the location will be shown on the invoice. The field is only visible to the administrator and supervisors.

Comments

Here, you can add a comment, should that be necessary.


Click on Create to finish the process

2.png


This is the meaning of the functions

number_1.png

When a location has been created, you will have access to different features in the Functions column. See the table below for an overview of these:

Name
Description

Edit location rediger.png

If you want to edit the information of a location, you can click on this icon rediger.png

Delete location Slet.png

By clicking on Slet.png, the location will be permanently deleted from the system. When the location is deleted, it will no longer be possible to plan tasks on that location.

All future tasks for the location will be removed, while previous tasks remain in the system.

Files linked to the location are permanently removed from the system.

Order products for locationBestil produkter til lokation.png

Click here to order products to a location through the web system. You can read more about that here: How do I order and transfer products through the web system?

View address on map Se adresse på kort.png

If the address and postcode have been filled out, you can see the location on a map by clicking on this icon.

View comments Info2.png

If you have entered a comment for the location, you can view the comment by clicking on this icon. If no comment has been entered, the icon will not be clickable.

Show cleaning in calendar Vis  rengøring i kalender.png

This function is a shortcut to the location's calendar. When clicking on the icon, the location's calendar will be opened in the classic calendar.

Show assigned employees Vis tildelte medarbejdere.png

When clicking on this icon, you can see which supervisors and employees are connected to the location. 

You can read more about that here: How can I see which employees are connected to a customer?

View resources Ressourcer.png

Click here to upload files or hyperlinks to the location, or view already uploaded resources.

You can read more about that here: Attaching files and hyperlinks to a customer 

3.png


This is how you can see if an NFC tag has been added to a location

number_1.png

In your customer list, you can easily see if an NFC tag has been added to a location or not, as a symbol will appear for locations with NFC tags


NFC tag registered at the location NFC-tag registreret på lokationen.png


NOTE:

The add-on module App with Time Tracking must be activated in your account in order to set up NFC tags. You can read more about how to activate add-on modules in the following article: Add-on modules

4.png