Creating a task in the classic calendar
How do I create a task?
When no tasks are created in CleanManager, employees lack the necessary information to do their job. Tasks form the foundation of a structured workday and accurate planning. They define what needs to be done, when, and where.
The absence of scheduled tasks not only disrupts daily routines, but also has serious consequences for administrative efficiency. Without registered tasks, accurate time tracking is not possible, which negatively affects both payroll and invoicing. In practical terms, this means:
No time registration = No basis for wages
No task = No basis for invoicing your clients
Scheduling tasks in the calendar is therefore a prerequisite for both operational efficiency and correct financial management. This article explains how to create tasks in the CleanManager web system.
In this article, you will learn how to schedule tasks in the calendar:
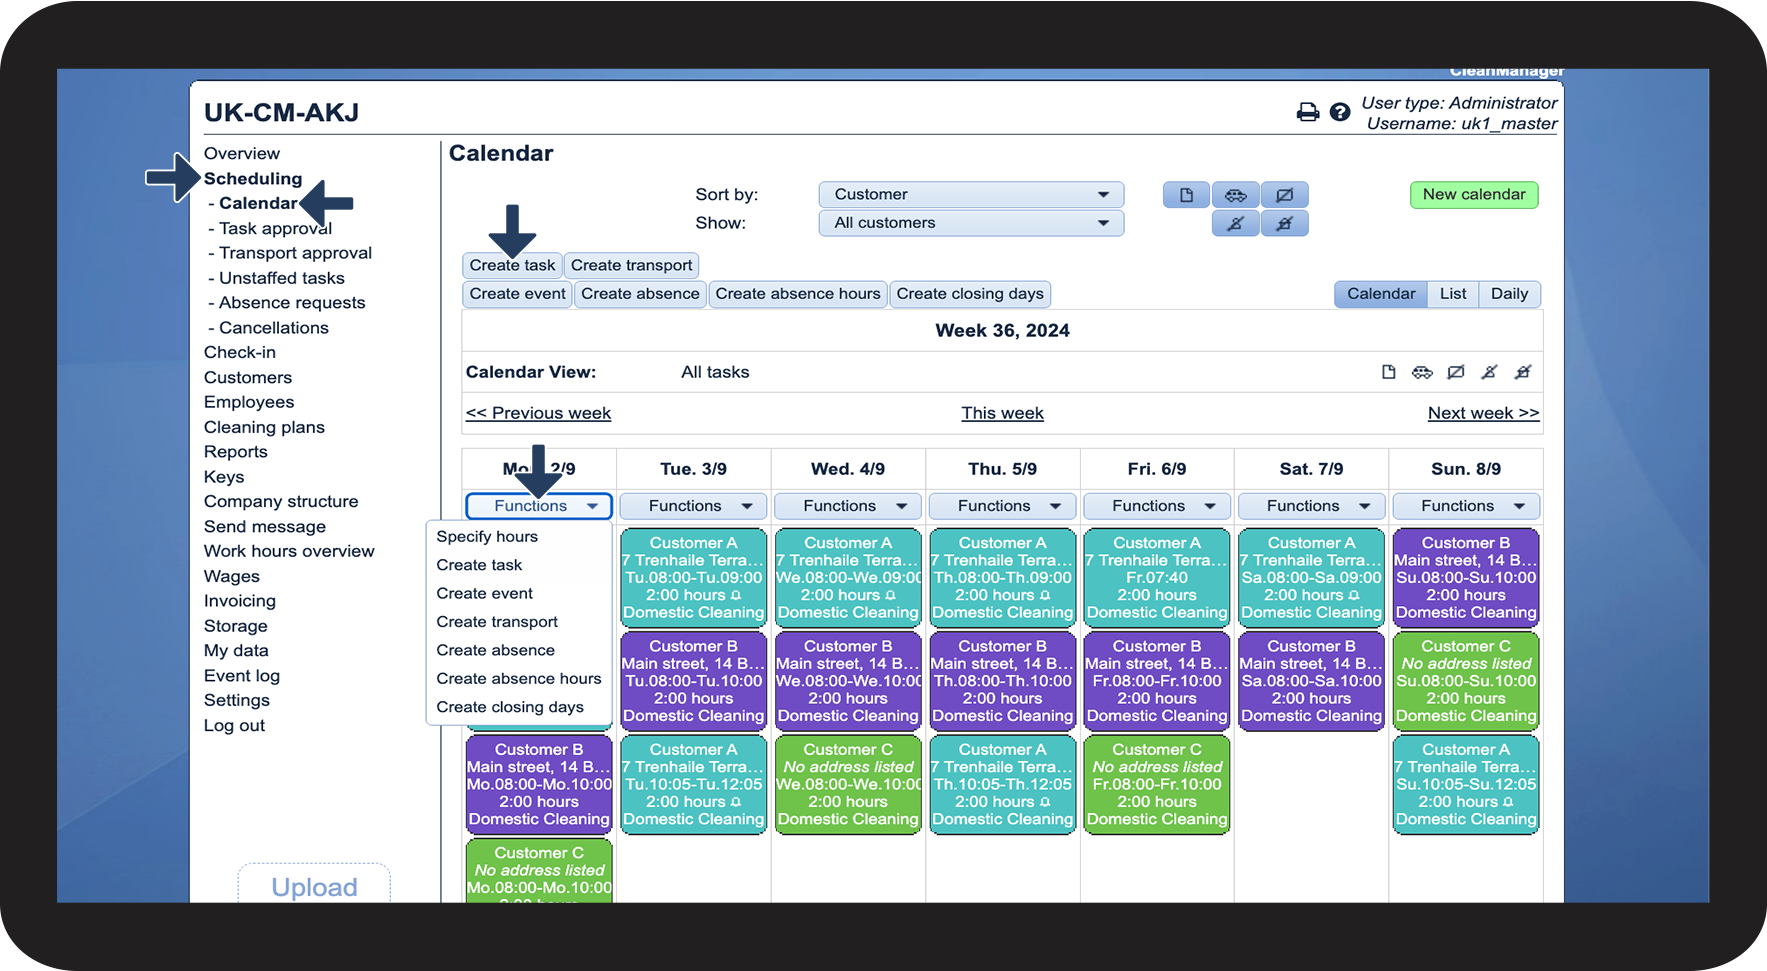
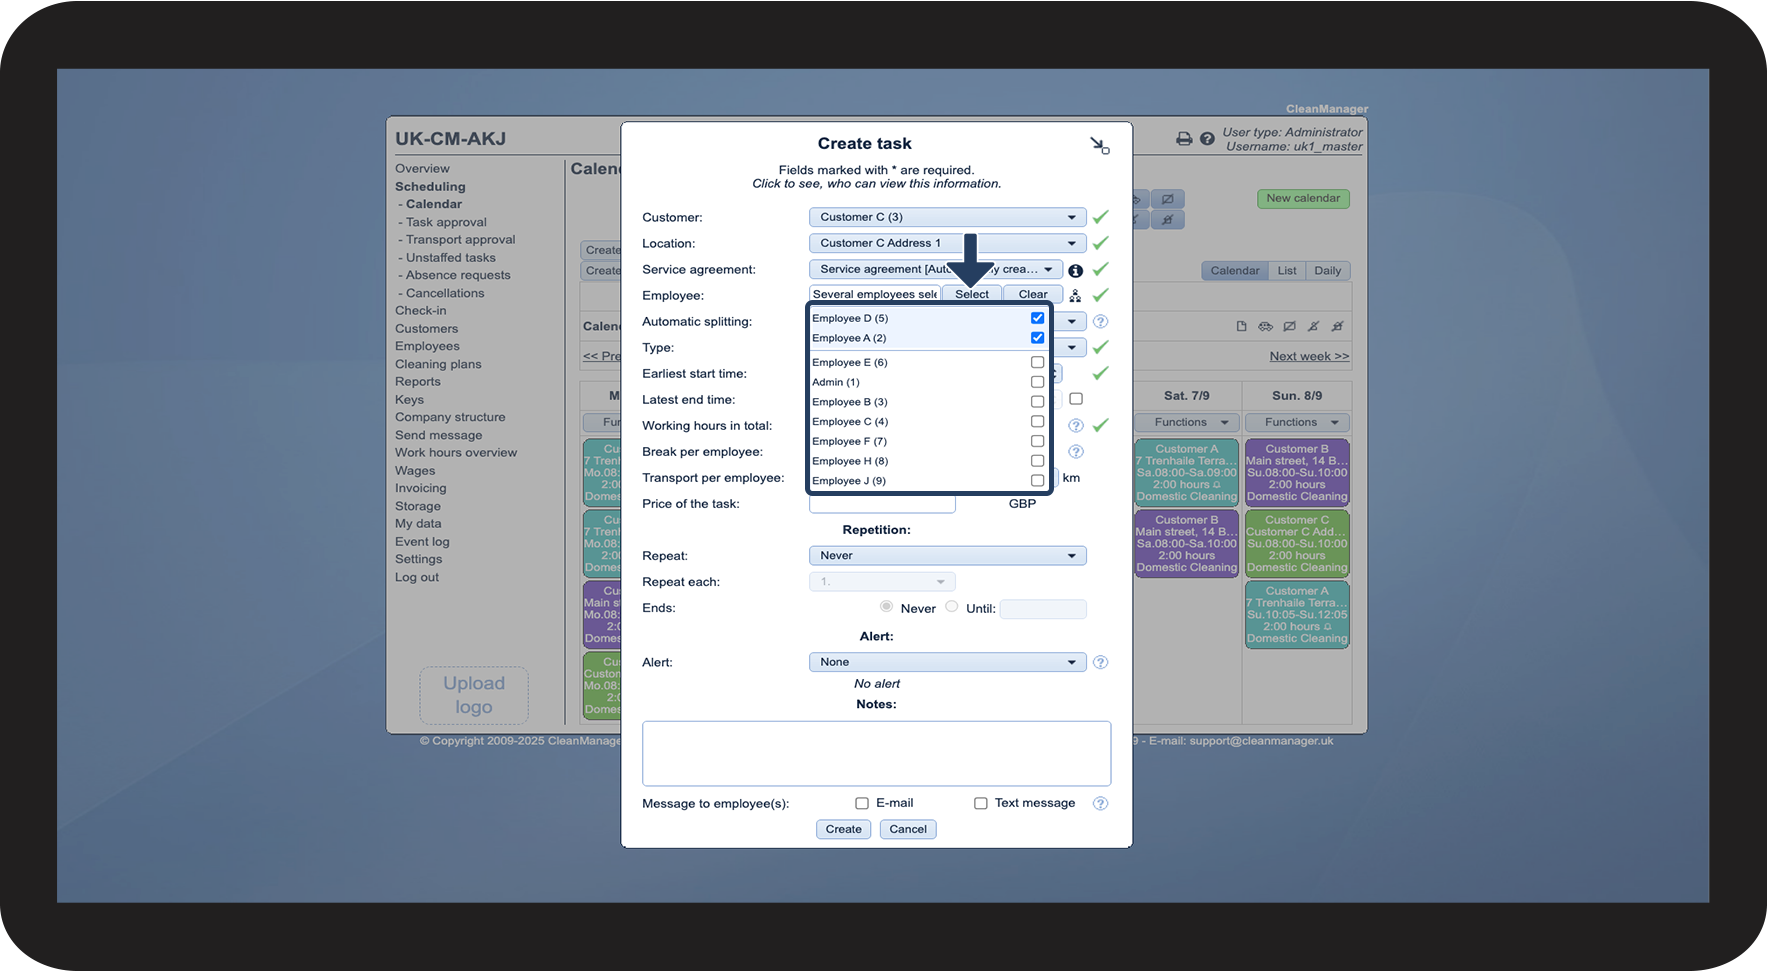
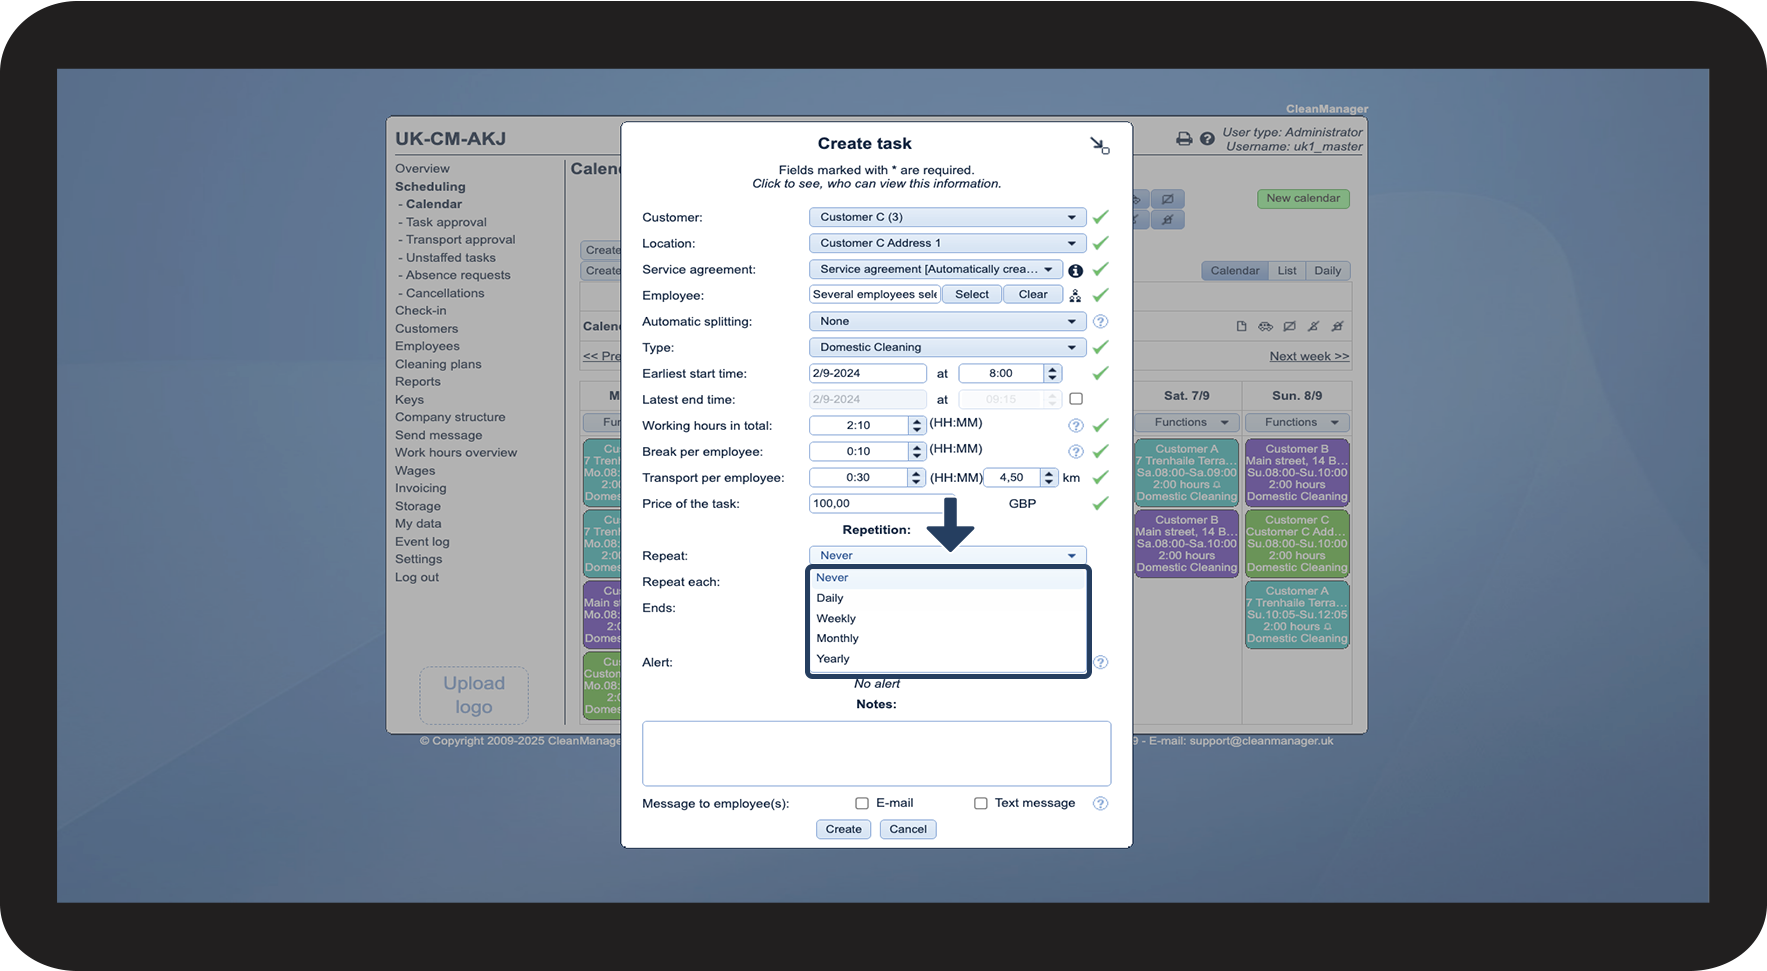
How to create a task
In the menu, go to Scheduling > Calendar
Then, click on Create task
Alternatively, you can click on Functions > Create task on a specific day.
You can select from the customers already created in your customer list.
For more information on how to create a customer, see the following user guide: Creating a customer.
NOTE:
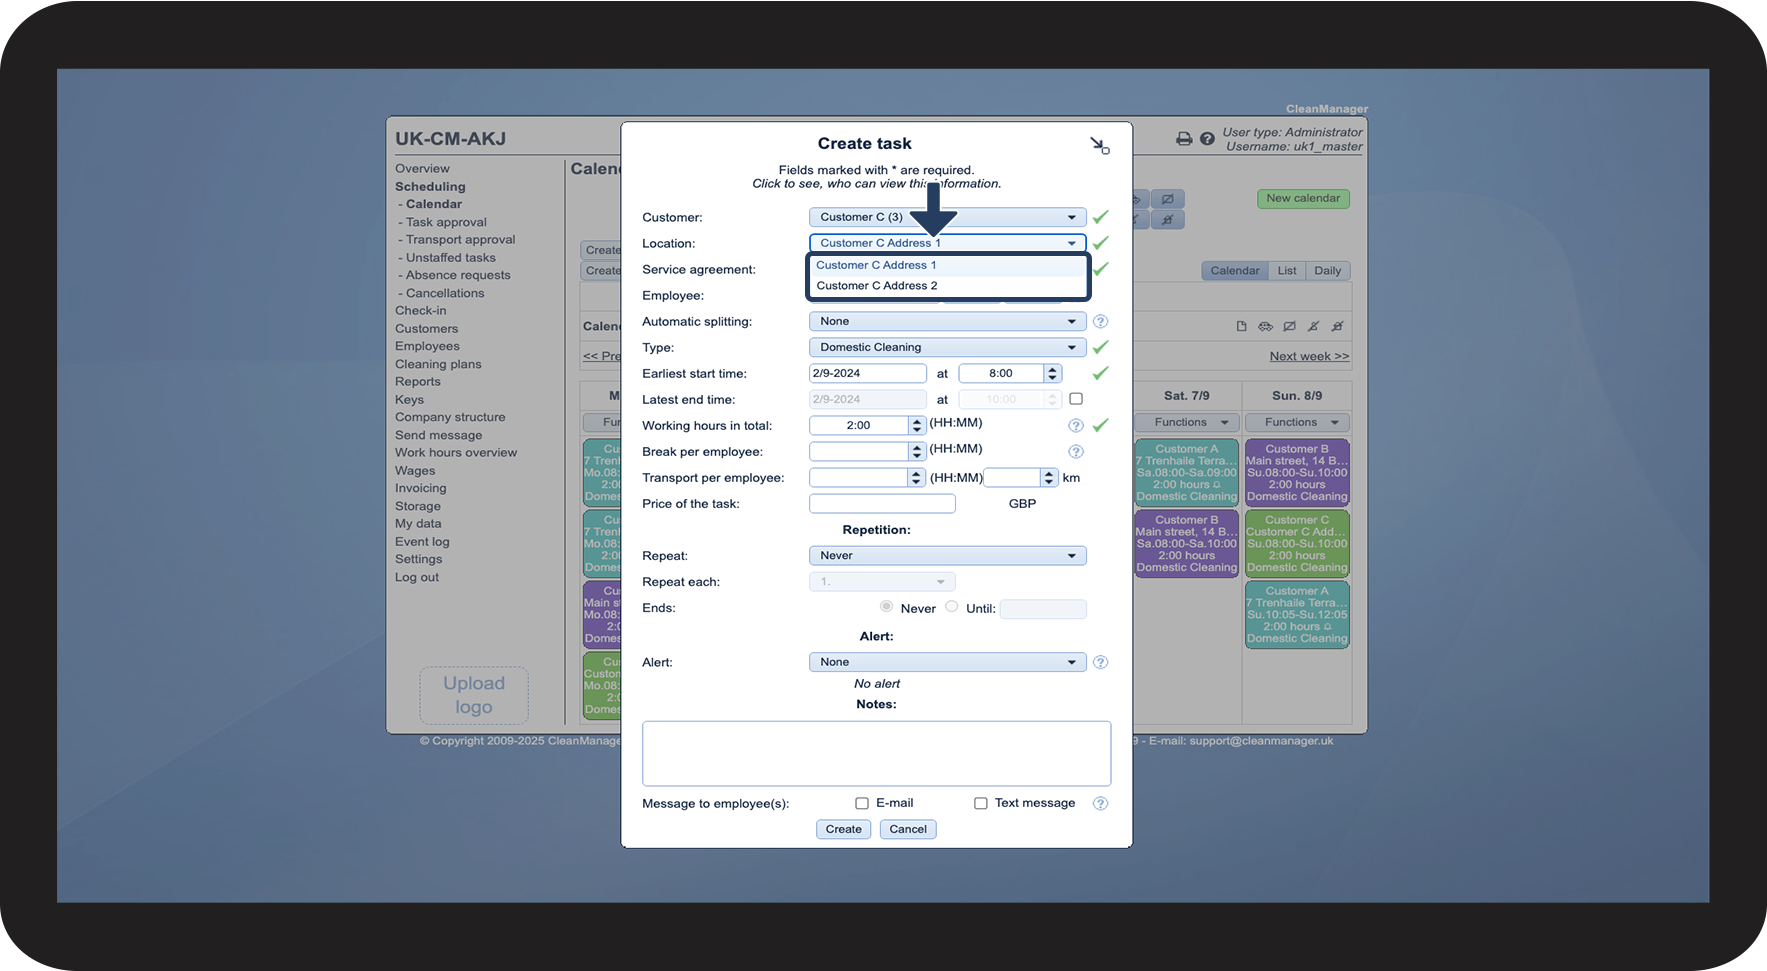
Supervisors can only select customers within their customer areas. For more information regarding this, go to Company Structure.
You can select from the locations that have been added to the customer.
For more information on how to create a location, see the following user guide: Creating locations.
You can select from the existing service agreements that have been created for the customer.
Click on the information icon
to see how the selected service agreement is set up.
NOTE:
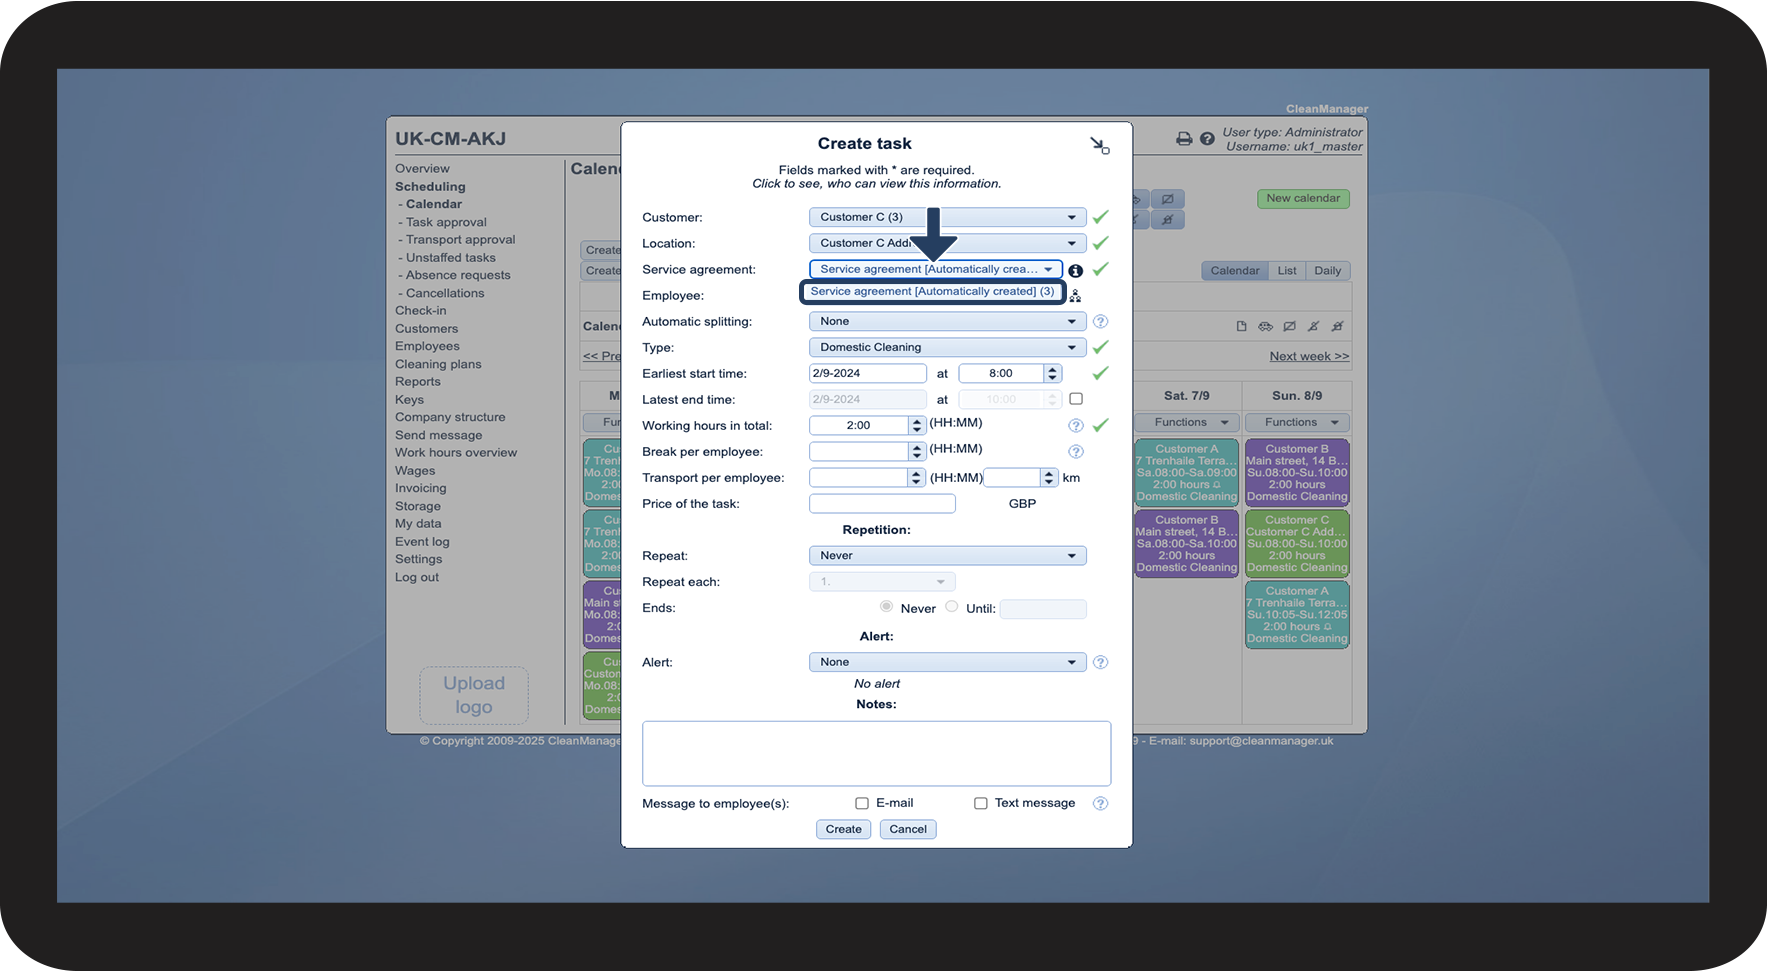
The Service agreement field is only visible if the add-on module Invoice Calculation is active on your account. Read more about how to activate add-on modules here: Add-on modules.
Select the employee(s) the task should be assigned to. Click on Clear to reset the list.
You can also click on Show associated employees
to see which employees have previously been with the customer.
For more information on how to create an employee, see the following user guide: Creating an employee.
Choose from the following options:
- None - The first employee to check in registers time for all employees assigned to the task.
- Split task at first check-in - The task is automatically split at first check-in and the remaining employees have the option to check in separately. Please note that this generates one task per employee.
- Remove remaining employees at first check-in - At check-in, all employees are removed from the task except the employee doing the check-in.
NOTE:
The Automatic splitting field is only visible if the add-on module App with Time Tracking is active on your account. Read more about how to activate add-on modules here: Add-on modules.
If you select the option to split task at first check-in, please note that this may affect your invoicing if you use task-based pricing.
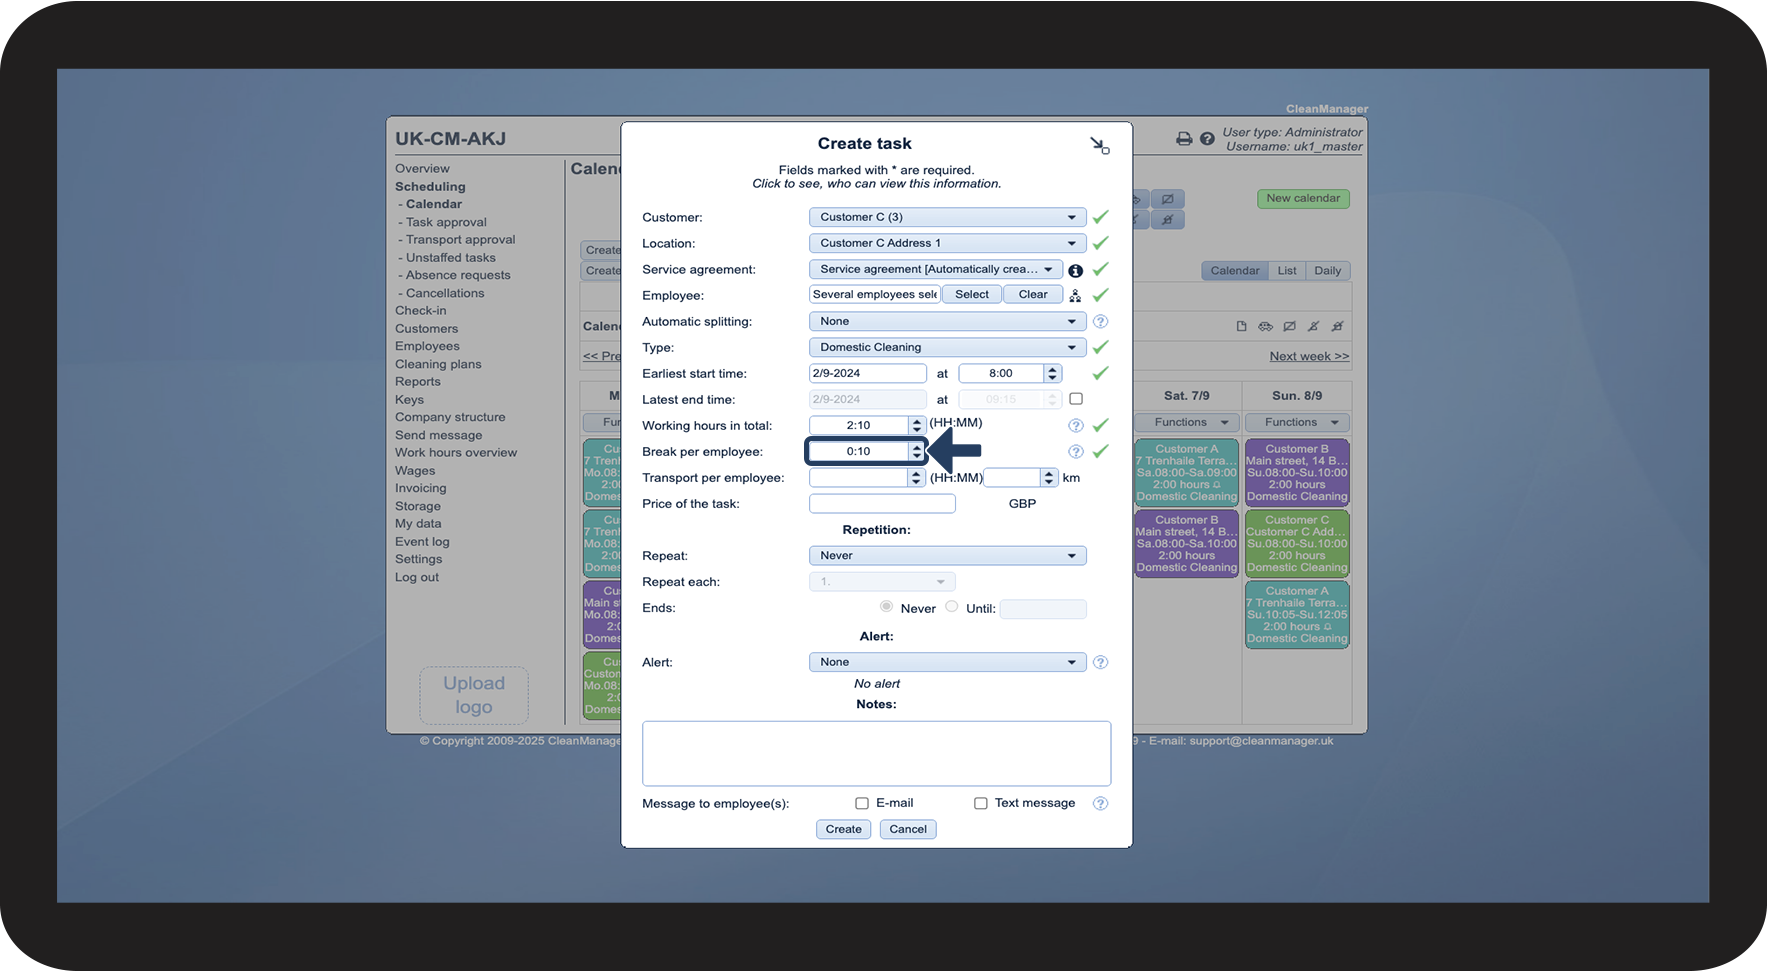
You can select from a list of existing cleaning types.
For more information on how to create a cleaning type, see the following user guide: Creating cleaning types.
Set the earliest start time for the task - that is, when your employees are allowed to start the job.
The end time can either be generated automatically based on total working hours, or set manually by ticking the box next to Latest end time to open up the field.
For more information on how to set a preset start and end time on tasks, see the following user guide: Manage times.
Set the Working hours in total
You need to fill in Working hours in total with the total amount of time all employees should spend on the task.
- Is the task assigned to two employees who are scheduled to work 1 hour each? Then the Working hours in total should be set to 2 hours.
- Do you have three employees who each have to work for 30 minutes? Then the Working hours in total should be set to 1:30 (0:30 x 3).
Think of it like this:
- Number of employees x Time per employee = Working hours in total.
Remember: Multiply the time if there are more people assigned to the task.
The Break per employee field is used to specify how long a break each employee should have during the task. Please note that this break is added to the total working time. However, it is not included in the time you enter in the field Working hours in total.
An example could be:
- If you have set Working hours in total to 1:00, and you enter a break of 0:15, the employee's total time spent will be 1:15. Only the Working hours in total of the 1:00 hour will be eligible for payroll.
NOTE:
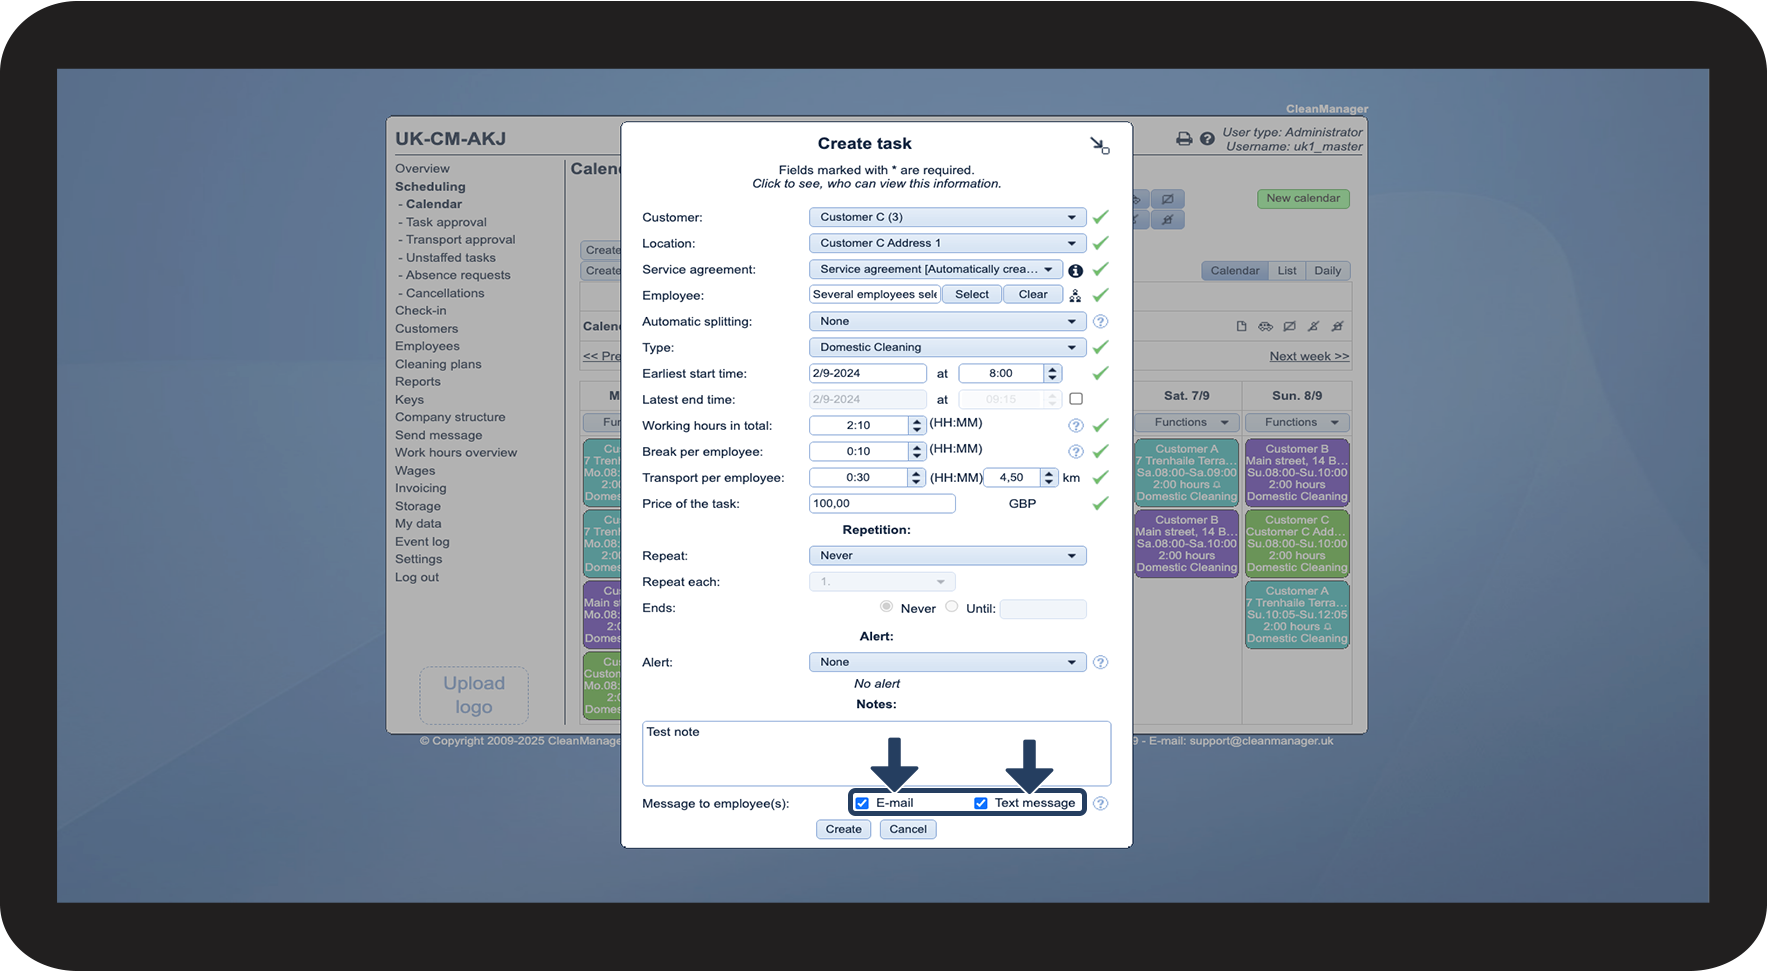
If you fill in the field Break per employee in the web system, the field will be locked for the employee in the app. This means that the employee will not be able to register the length of the break when ending the task. The setting Employees can specify break duration in the app must be enabled in order for employees to be able to register their own breaks.
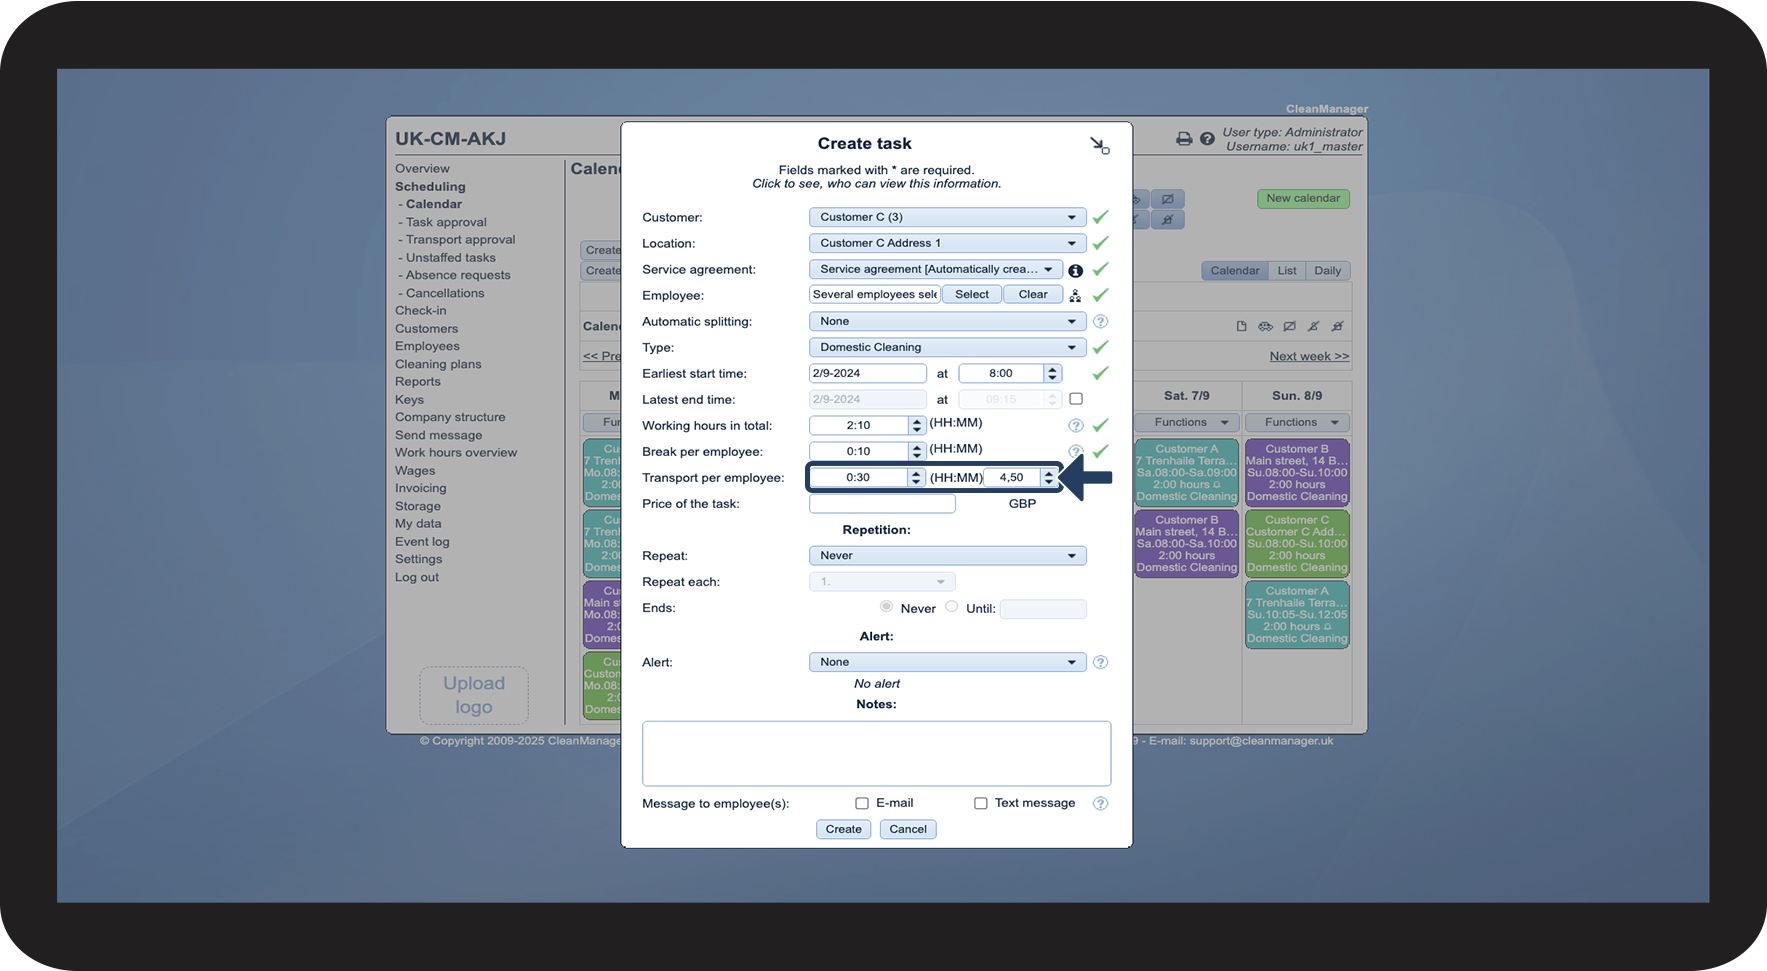
Set the Transport per employee
The Transport per employee field is used to log the mileage and/or duration of driving associated with the task - for example, from their home to the customer's address or between locations. If left blank, the employee will be able to log their transportation in the app when they check in and out of a task. This requires the employee to have access to CleanManager.
- The registered mileage can be used as a basis for mileage reimbursement during payroll.
- This ensures correct and documented reimbursement for transport expenses.
NOTE:
The Transport per employee field is only visible if the setting Register transport on the individual tasks in the calendar is enabled. Read more about the setting in the following user guide: Transport.
The setting Employees can register transport through the app must also be enabled, if the employee is allowed to log their own transportation in the app.
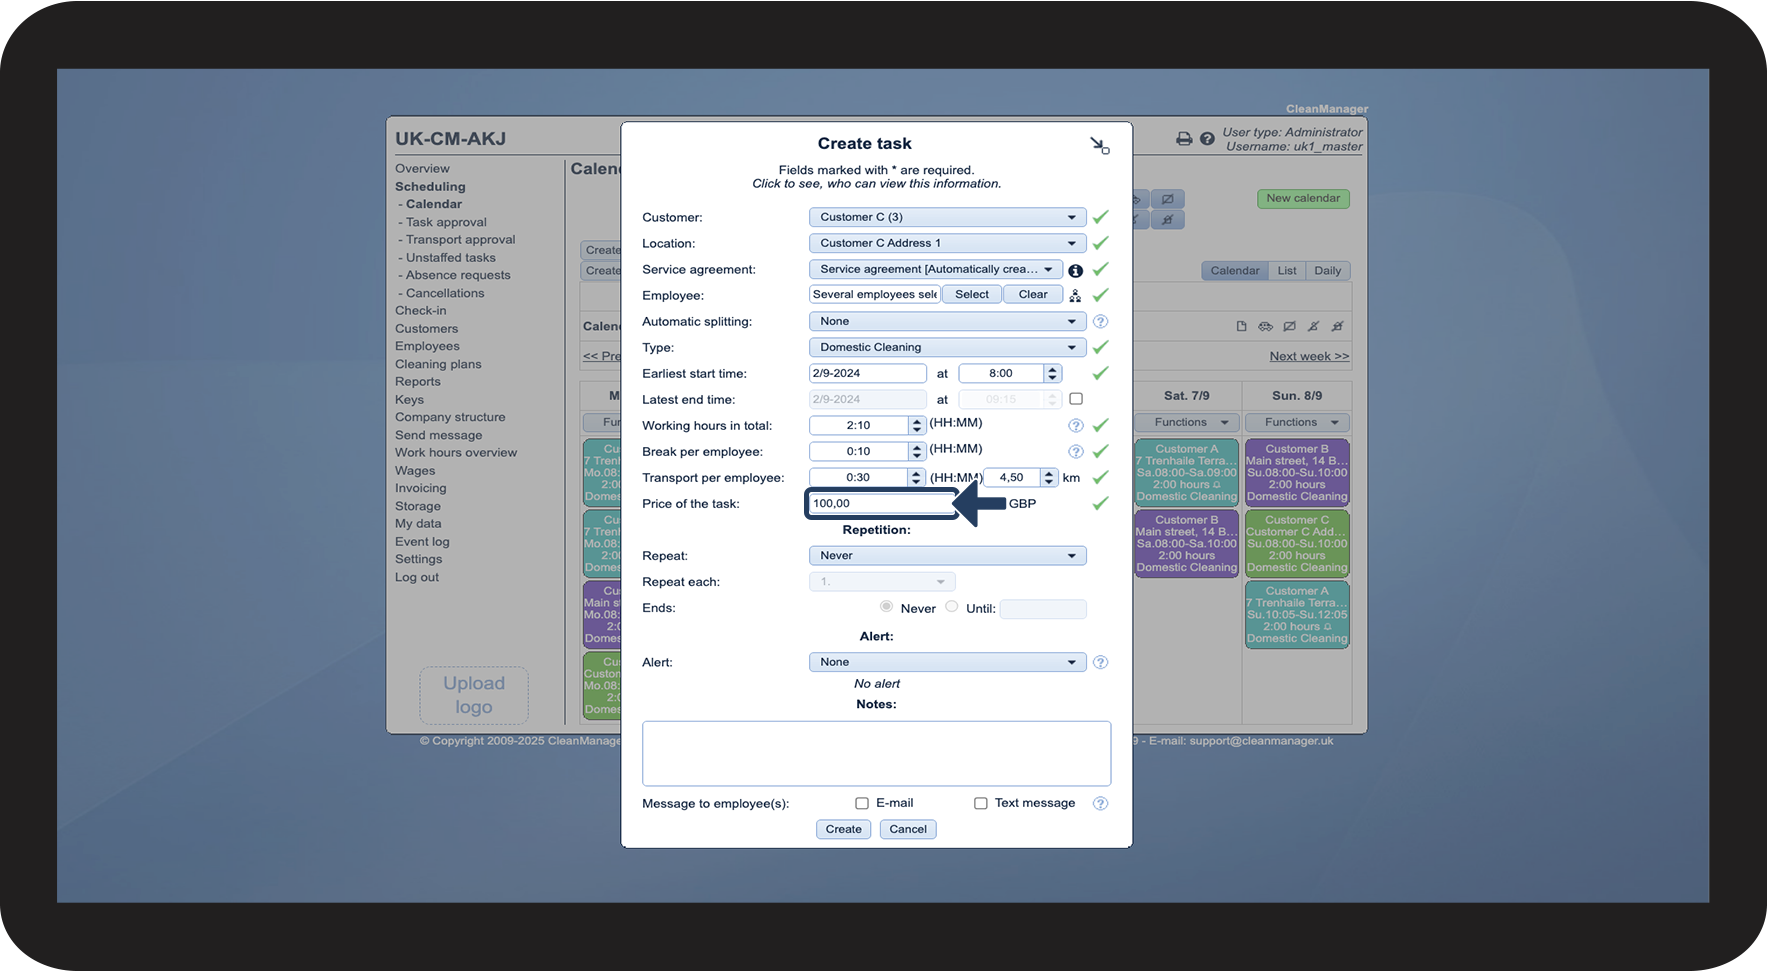
Fill in the Price of the task
Here, you can enter a price for this specific task. Please note that this is a task-based price, not an hourly rate. This field is optional.
NOTE:
If a price is entered in this field, it will overwrite the price from the service agreement. This is only relevant if the add-on module Invoice Calculation is active on your account.
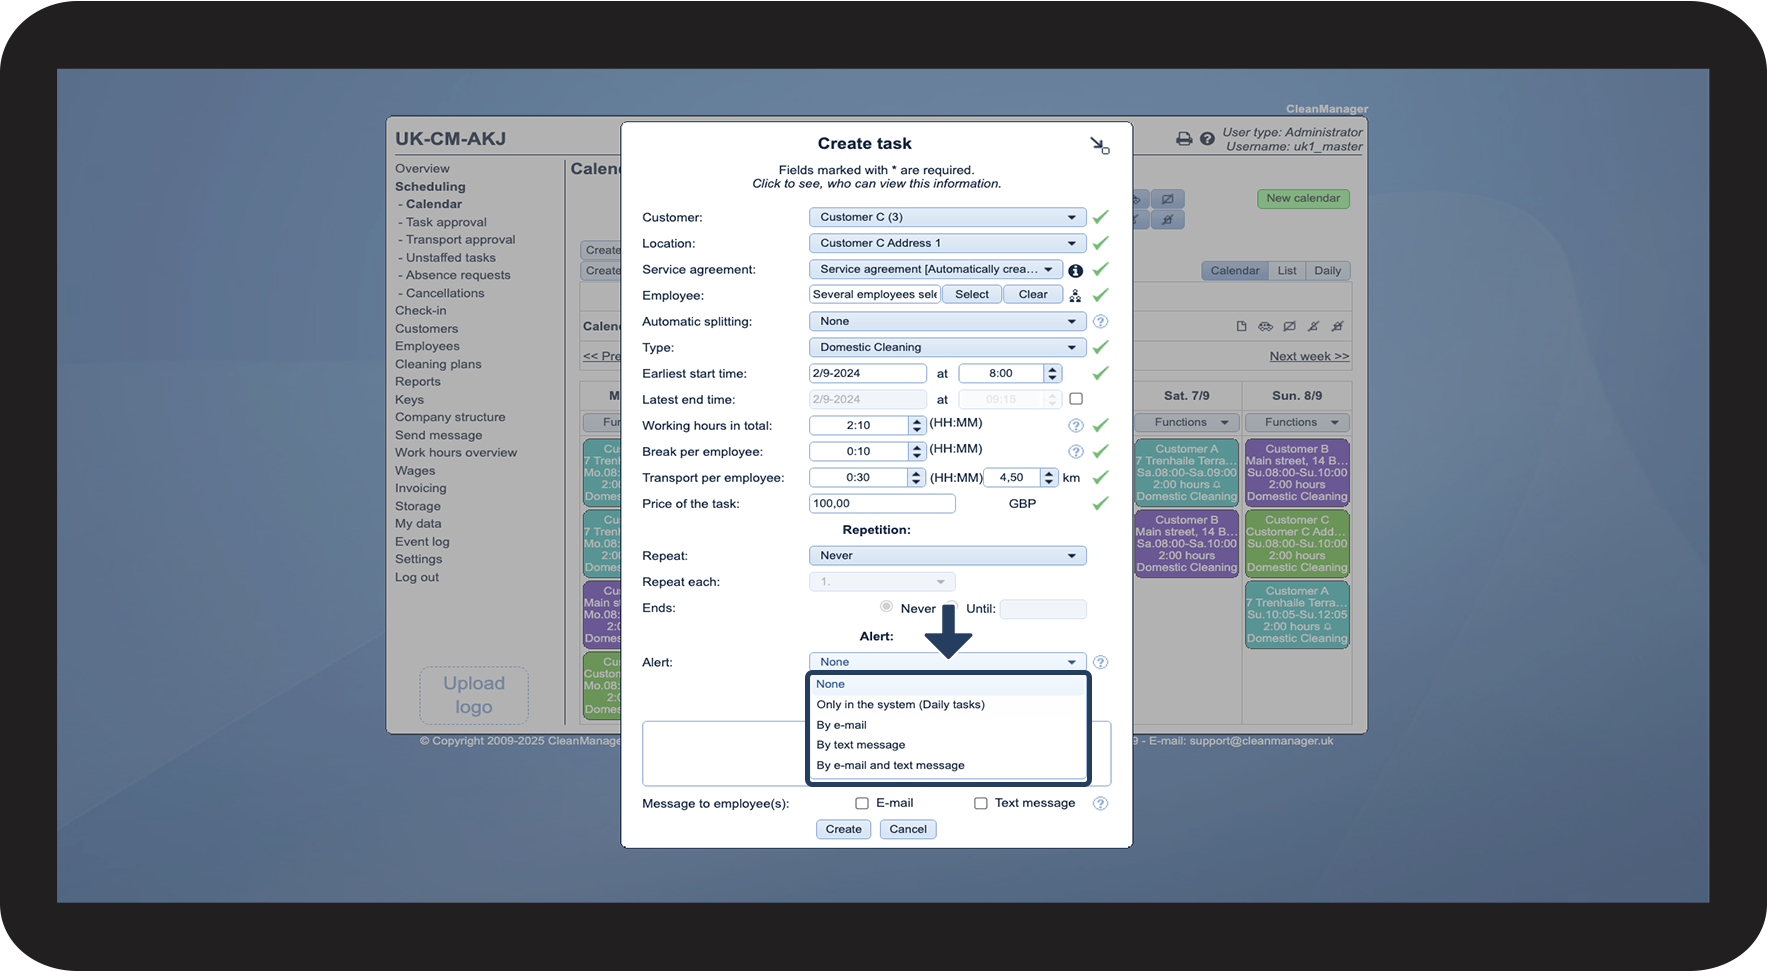
When you create a task, you can set a recurrence pattern so that it is automatically created at scheduled intervals. In CleanManager, you can choose between four main types of recurrence patterns:
- Daily - the task is repeated every day or a fixed number of days apart.
- Weekly - the task is repeated on one or more fixed days of the week, e.g. every Monday and Thursday.
- Monthly - the task is repeated once a month, e.g. on the 1st or last working day.
- Yearly - perfect for low-frequency tasks, e.g. annual deep cleaning.
Select Never if you do not want the task to be repeated.
You can set up an alert for a task that will be triggered if employees do not check in or check out as planned.
You can receive the alert by one of the following methods:
- Only in the system (Daily tasks).
- By e-mail.
- By text message.
- By e-mail and text message.
Read more about the settings for alerts in the following user guide: Alarm settings.
NOTE:
The Alert field is only visible if the add-on module App with Time Tracking is active on your account.
If you want to receive a text message, the add-on module Text Messaging must be active on your account.
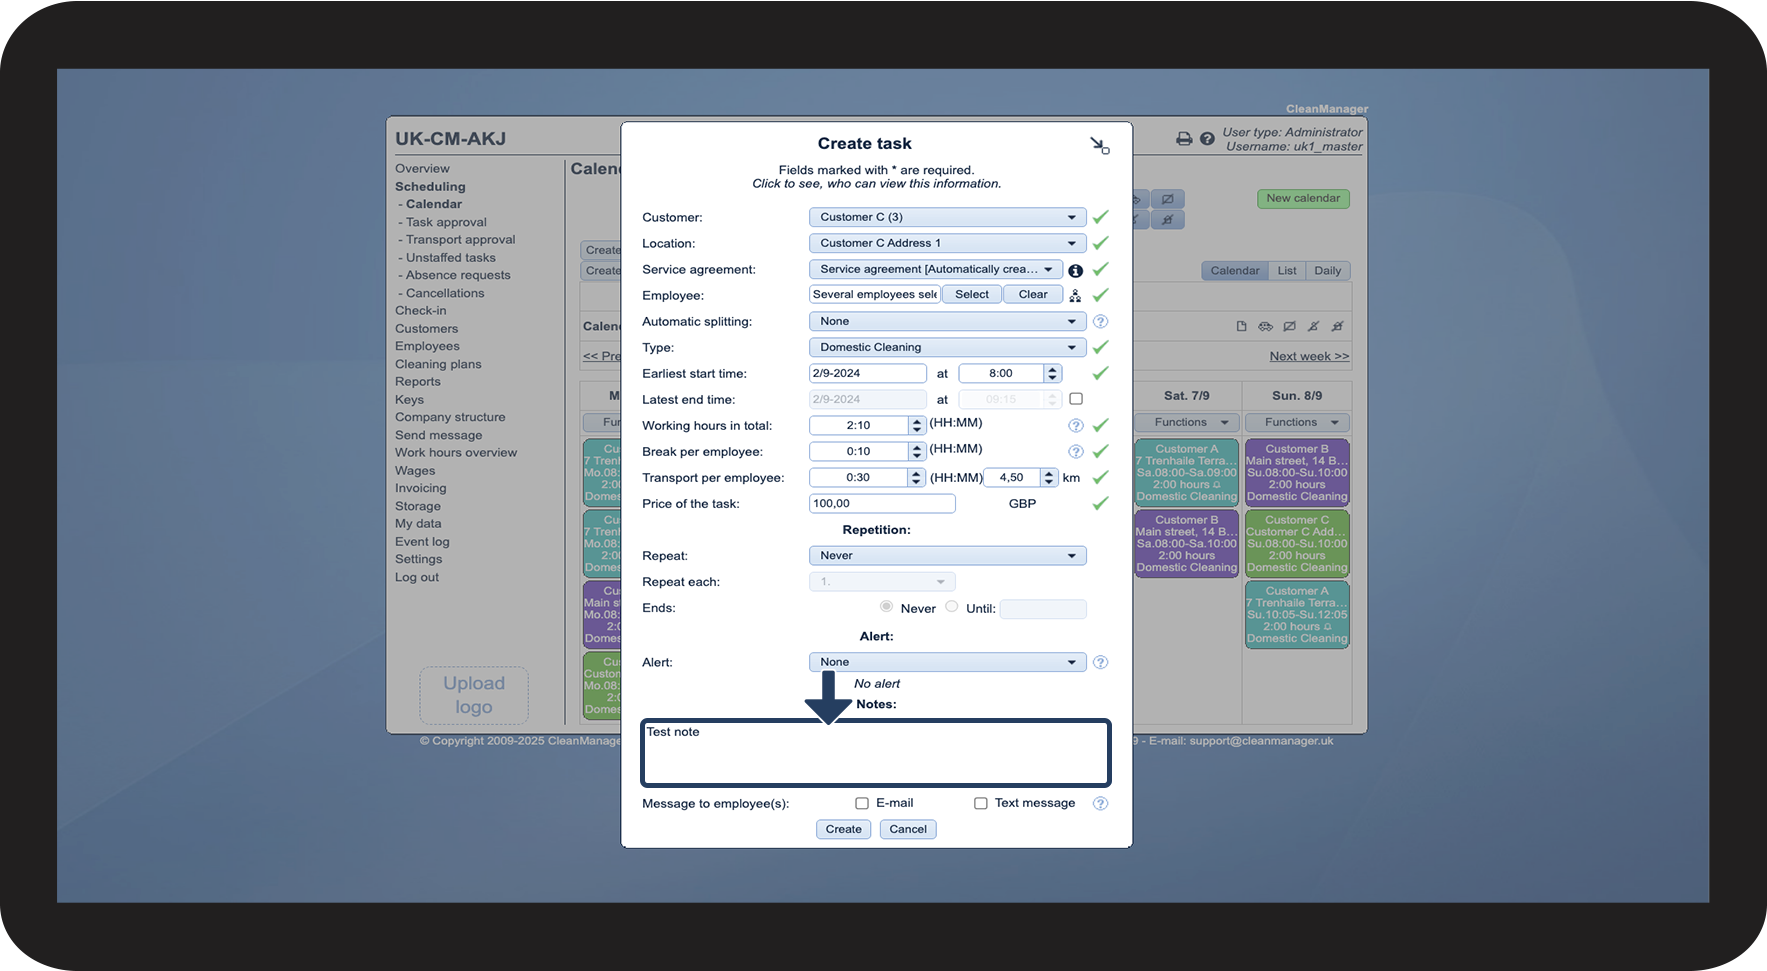
If needed, a more detailed description of the task or other relevant information for employees can be entered here.
It is also possible to make the note visible to customers with access. For more information on this option, see the following user guide: Display notes on tasks in the calendar for customers with login.
NOTE:
The add-on module Text Messaging must be active on your account to send text messages.
An employee can only receive e-mails and/or text messages if the fields Work phone (SMS) and E-mail have been filled out in the Employee list.