How do I create and set up customers?
In order to create and assign tasks to your employees at specific customer locations, you must first create the customer in the system.
Customers can be added to the customer list by the administrator or a supervisor. Not all fields for information are obligatory, and the administrator and/or supervisor can determine how much information needs to be filled out.
This article will also explain how the various information can affect the customer in other parts of the system, such as choice of colour for tasks in the calendar.
In this article, you will learn how to create and set up customers:
- How do I create a customer?
- How does the customer type affect the customer?
- How does the customer area affect the customer?
- How can I change the colour for the customer in the calendar?
- Who is the contact person?
- How do I grant the customer contact access to CleanManager?
- Which user types can see what information regarding the customer?
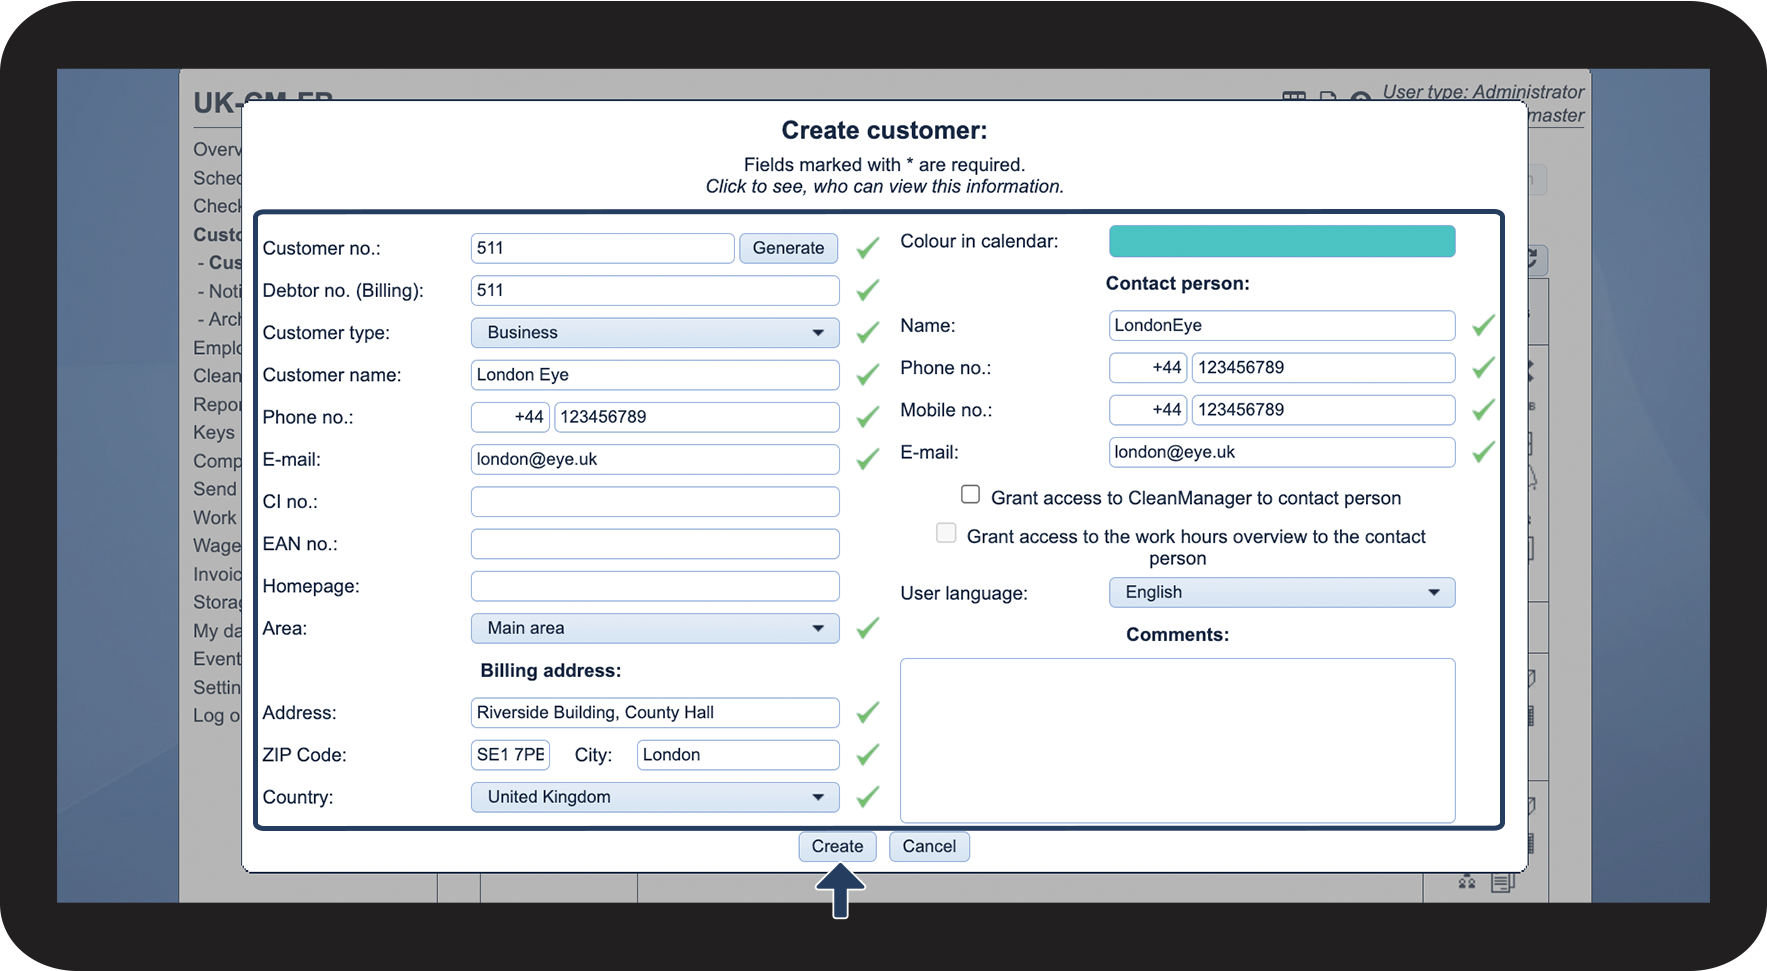
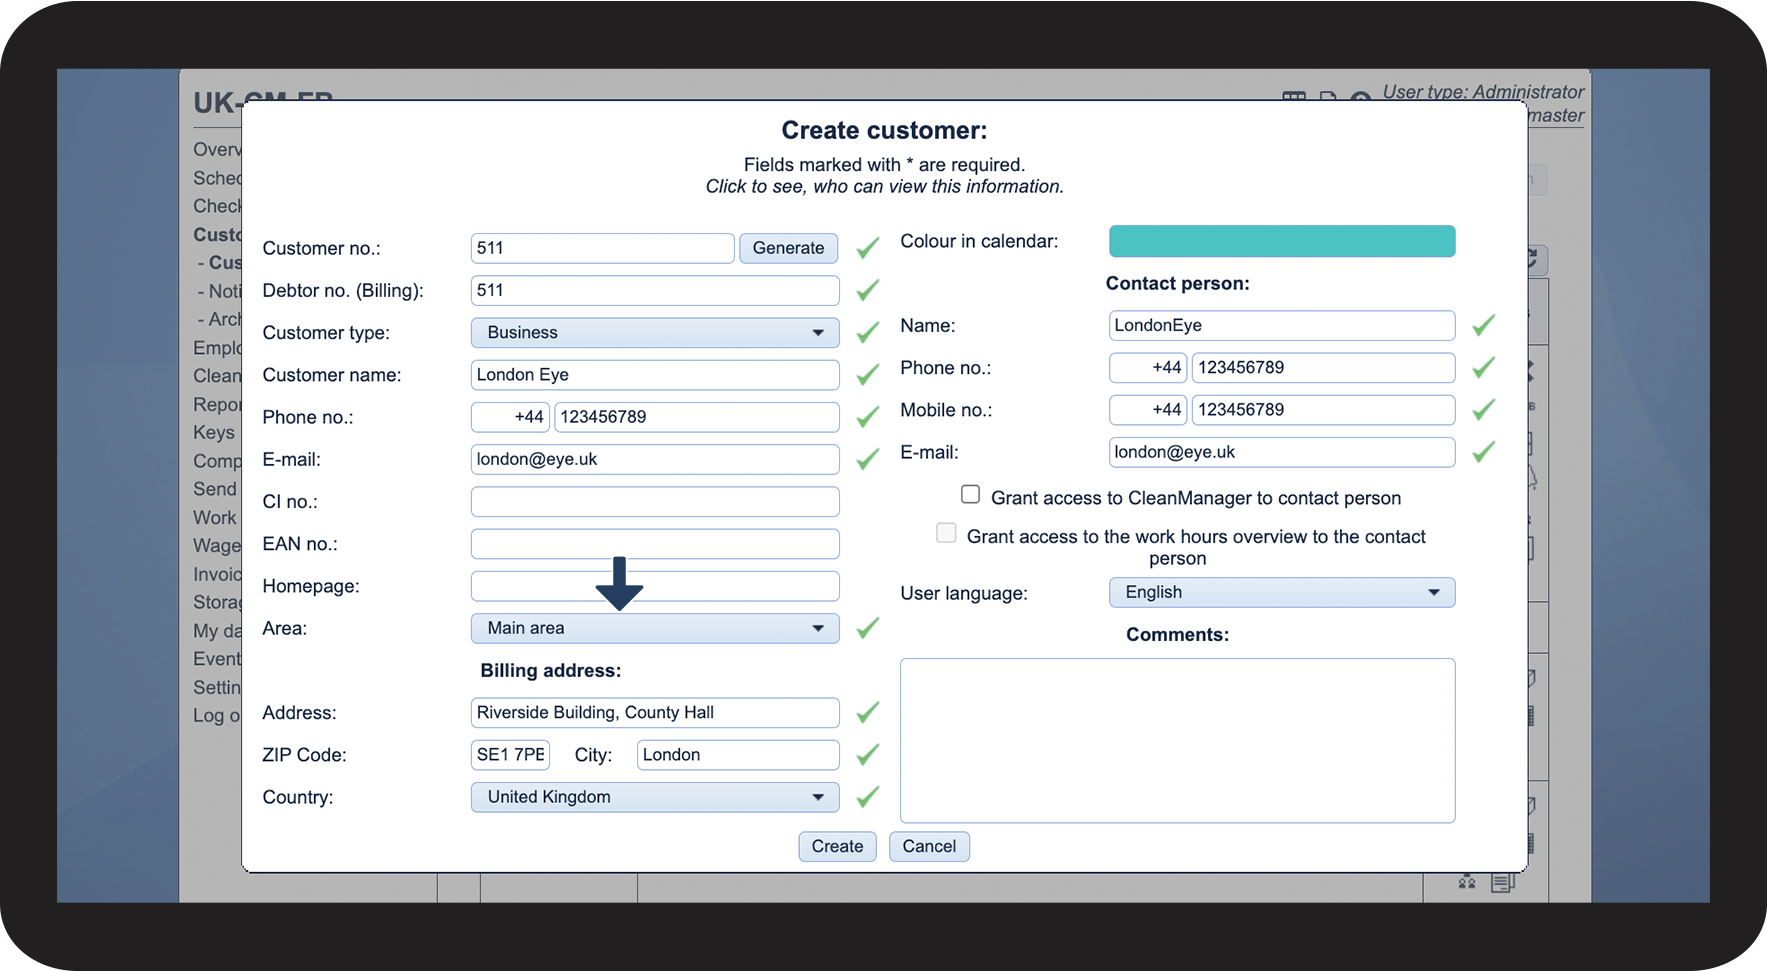
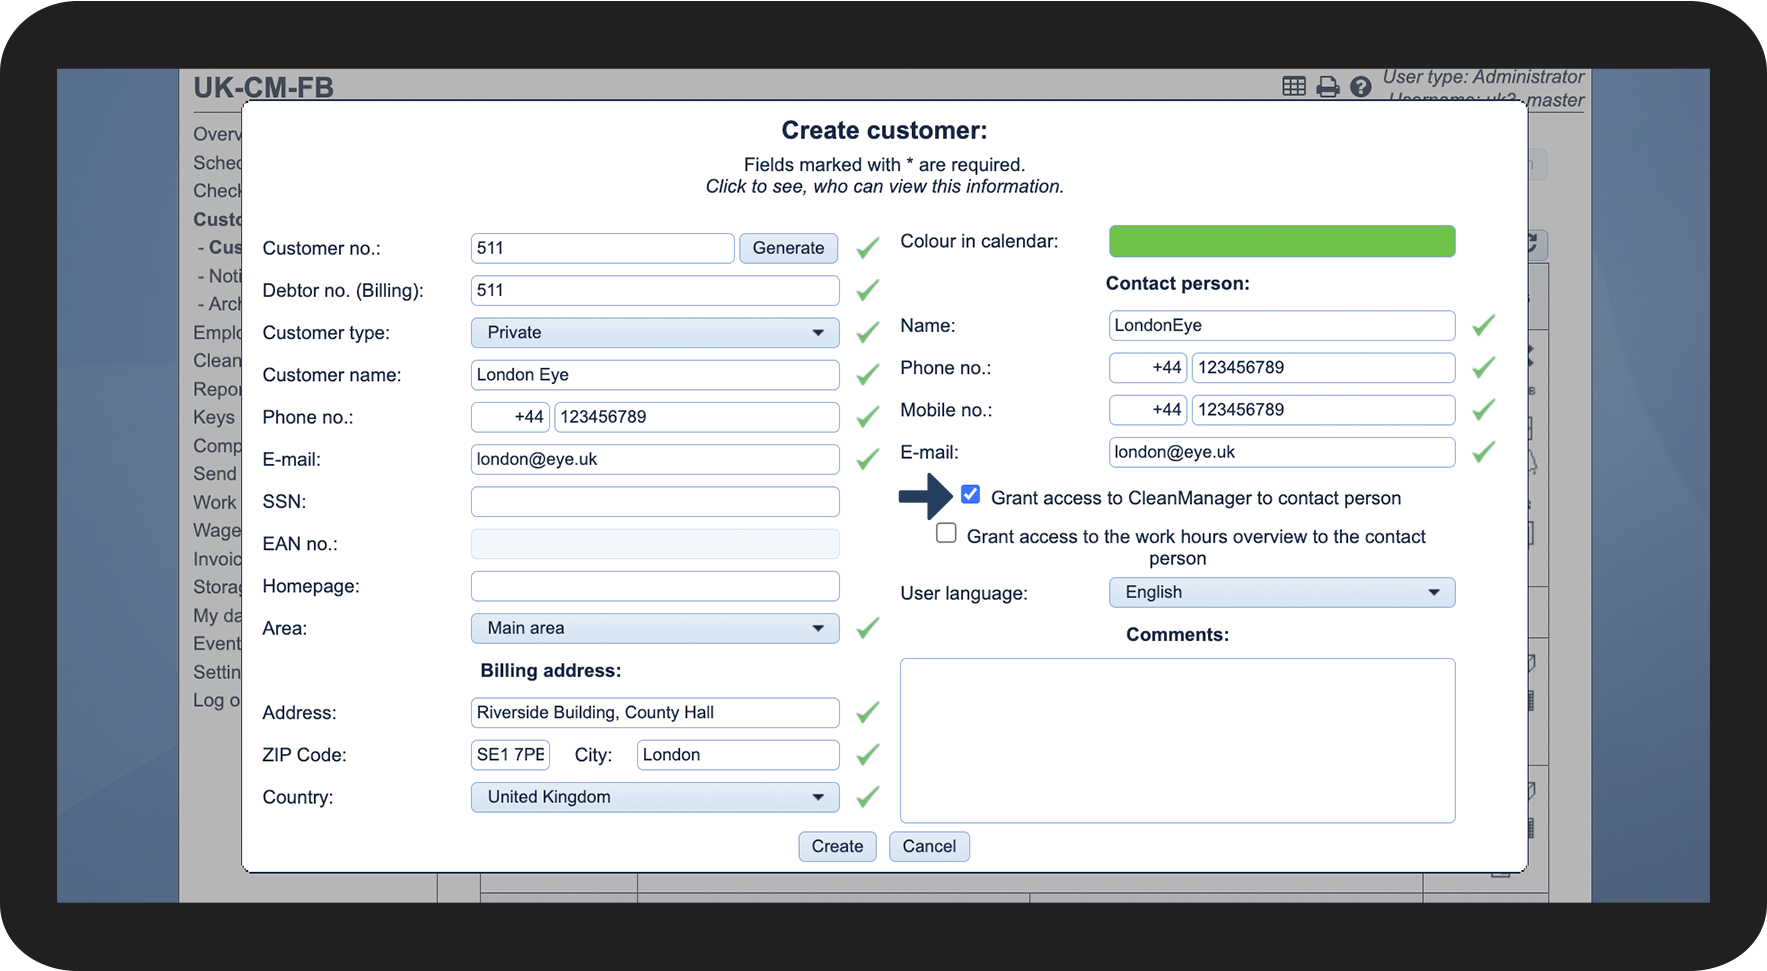
This is how you create a customer

NOTE:
Mandatory fields are marked by yellow followed by a *
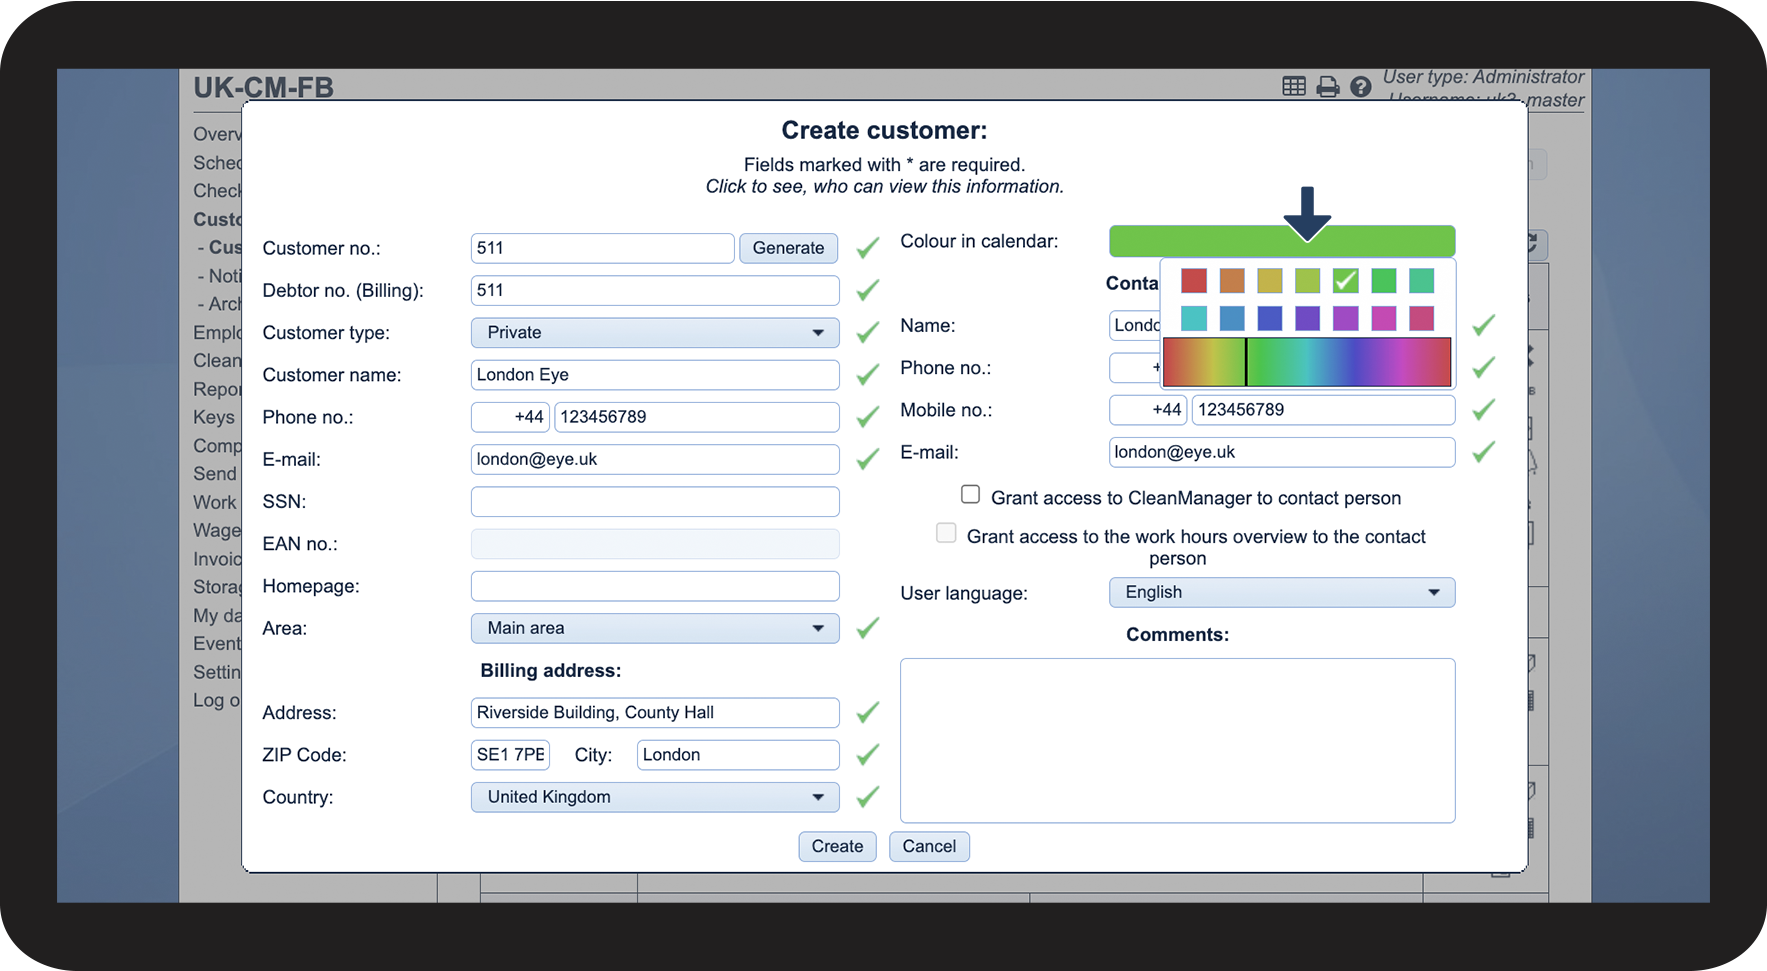
This is how the customer type affects the customer
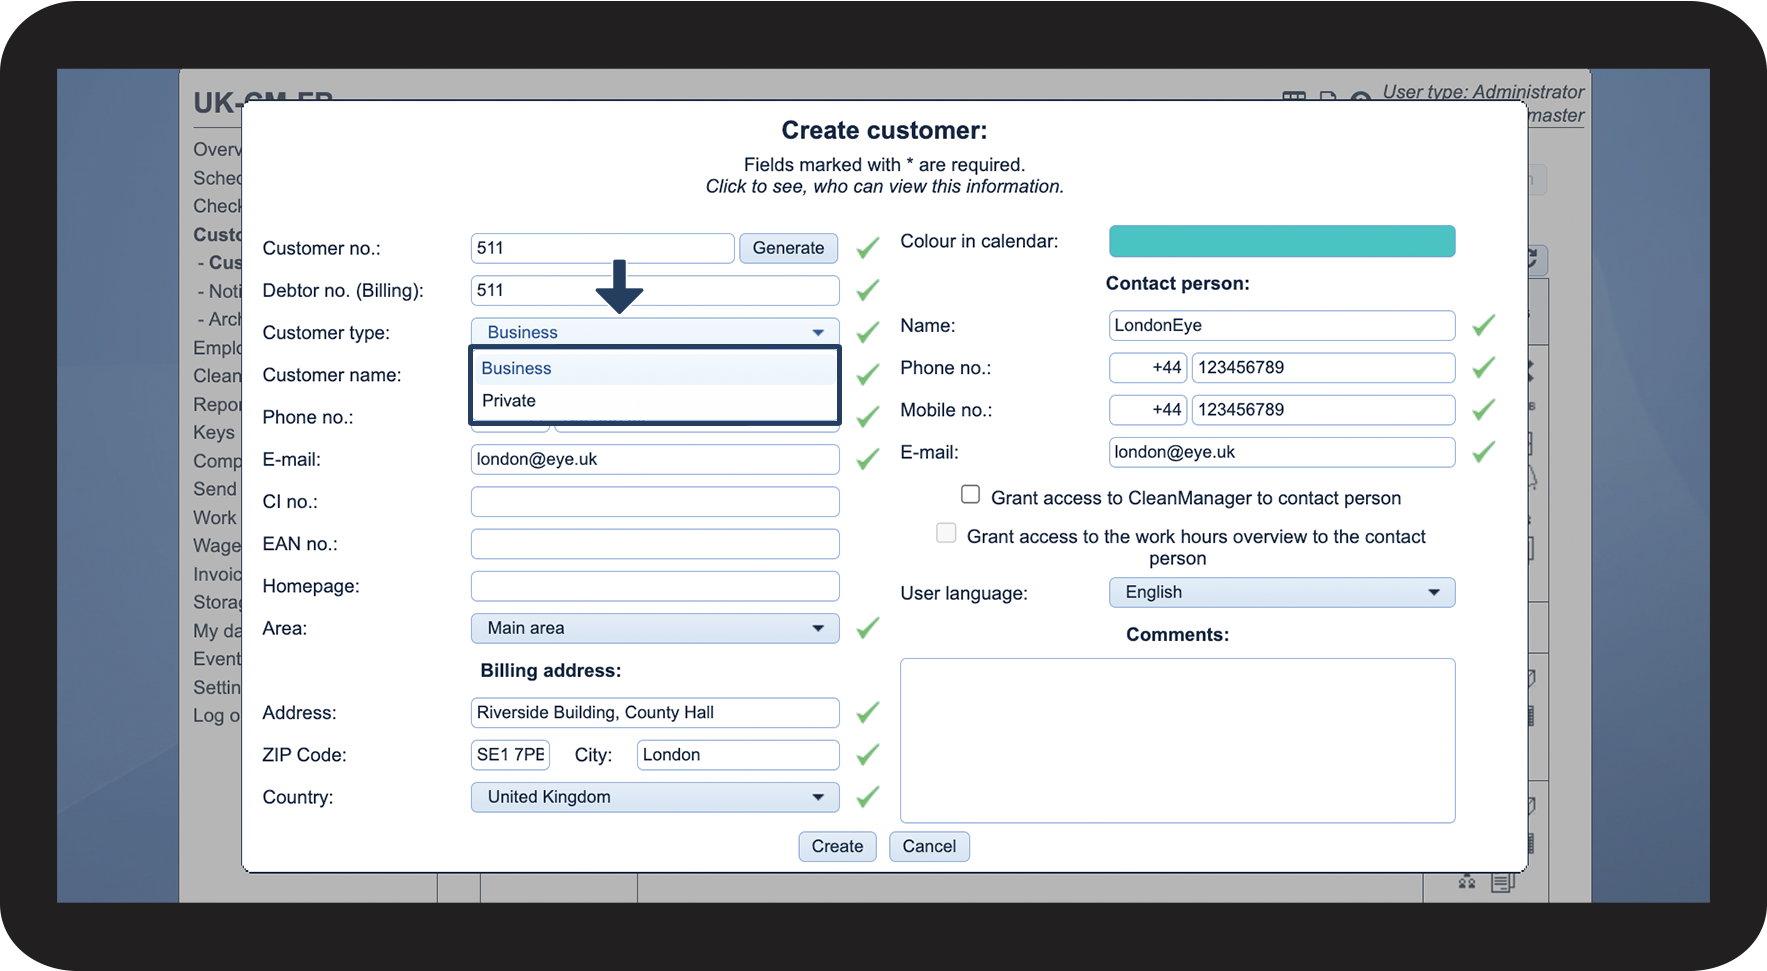
NOTE:
The field for EAN no. is locked when selecting the customer type private.

This is how the customer area affects the customer
NOTE:
Supervisors are only able to assign customers to their own areas. For more information regarding this, go to Company Structure.
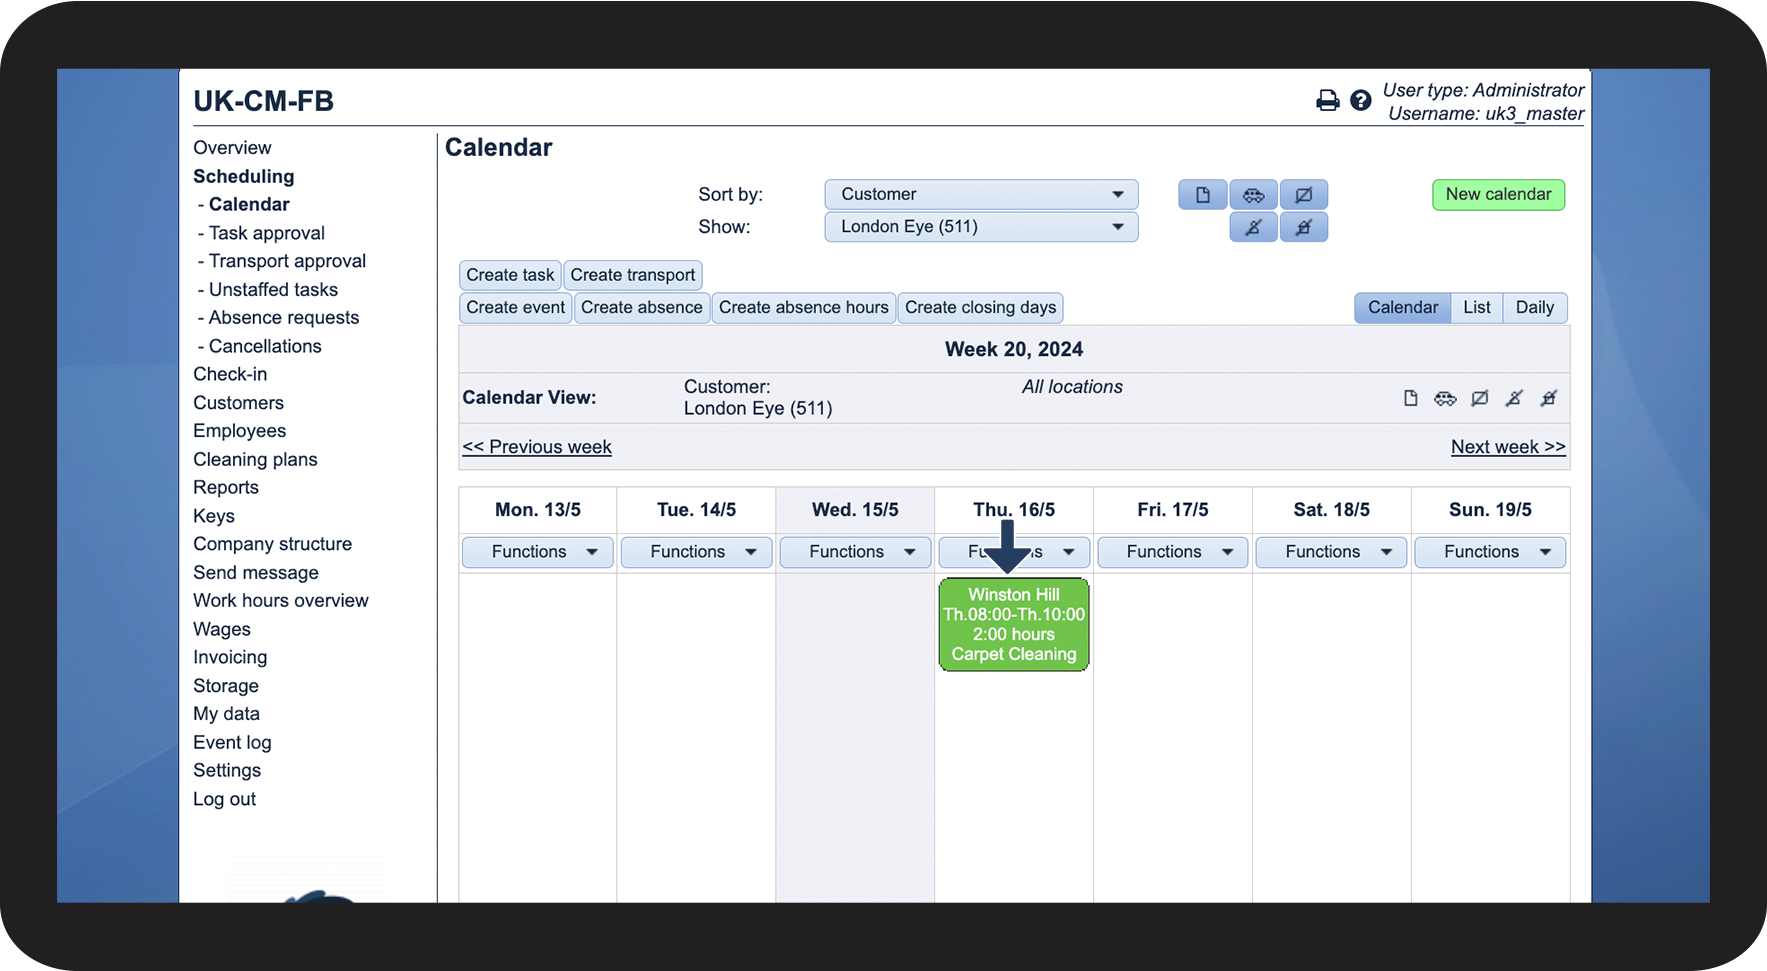
This is how you can change the colour for the customer in the calendar

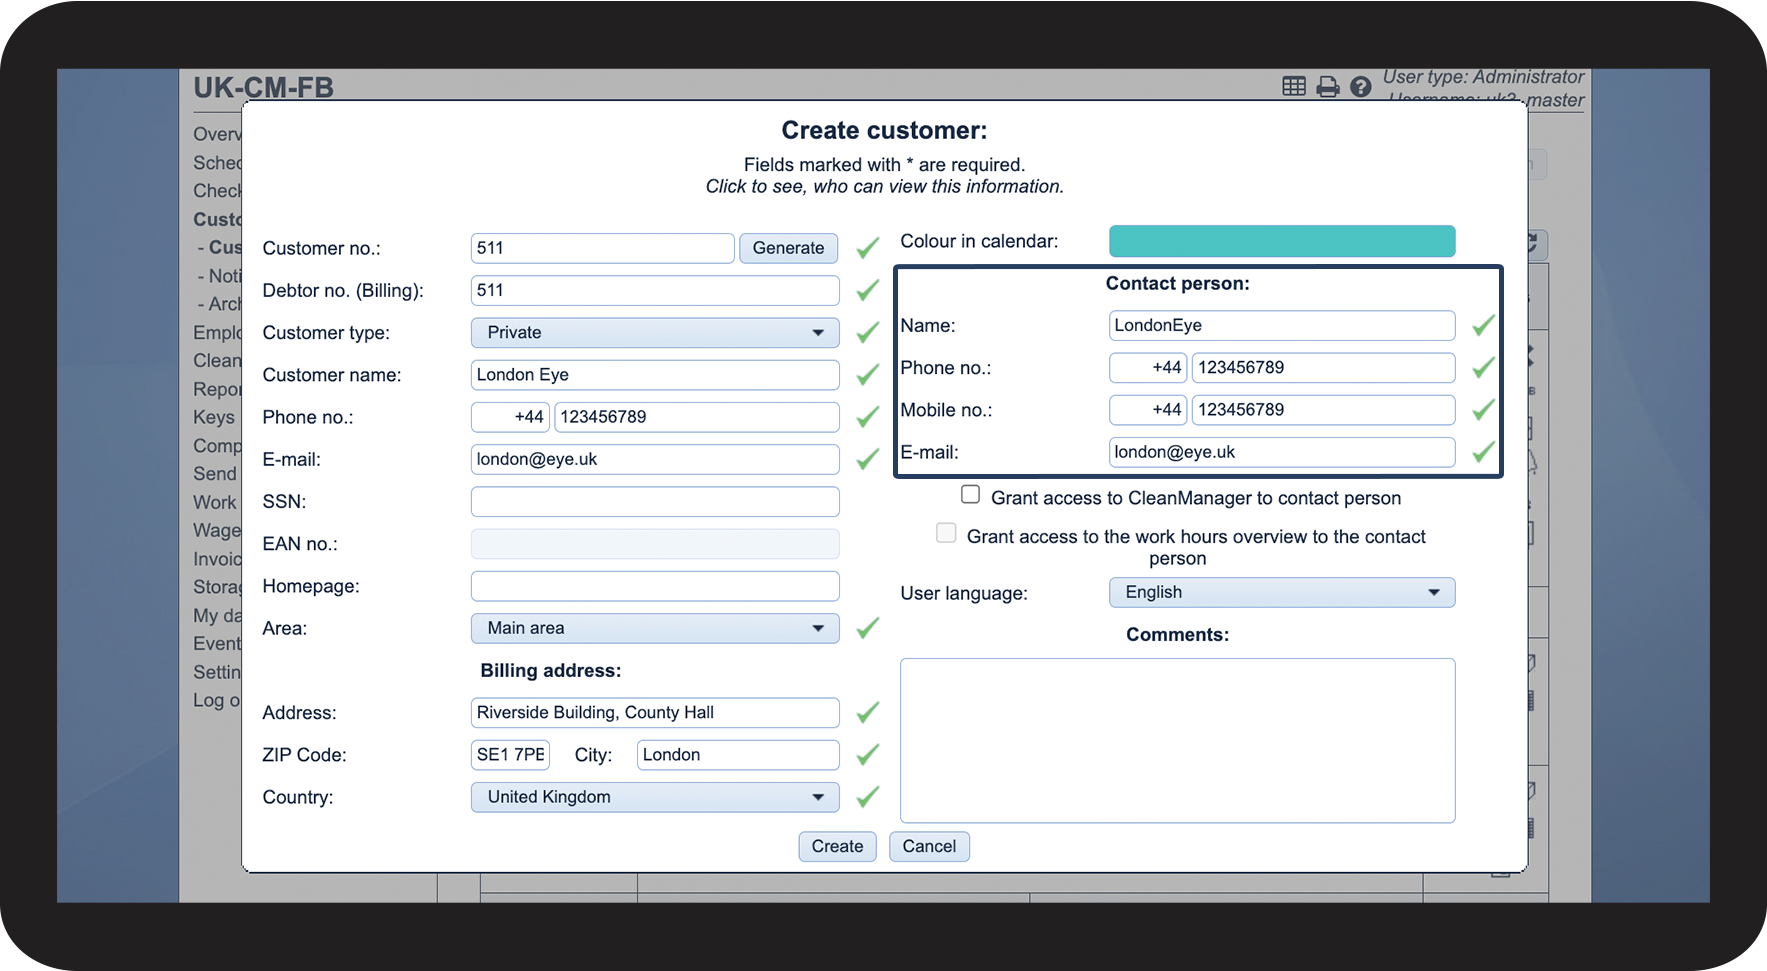
This is the contact person
INFO:
Messages from the system to the customer will be sent using either the mobile number or the e-mail address.
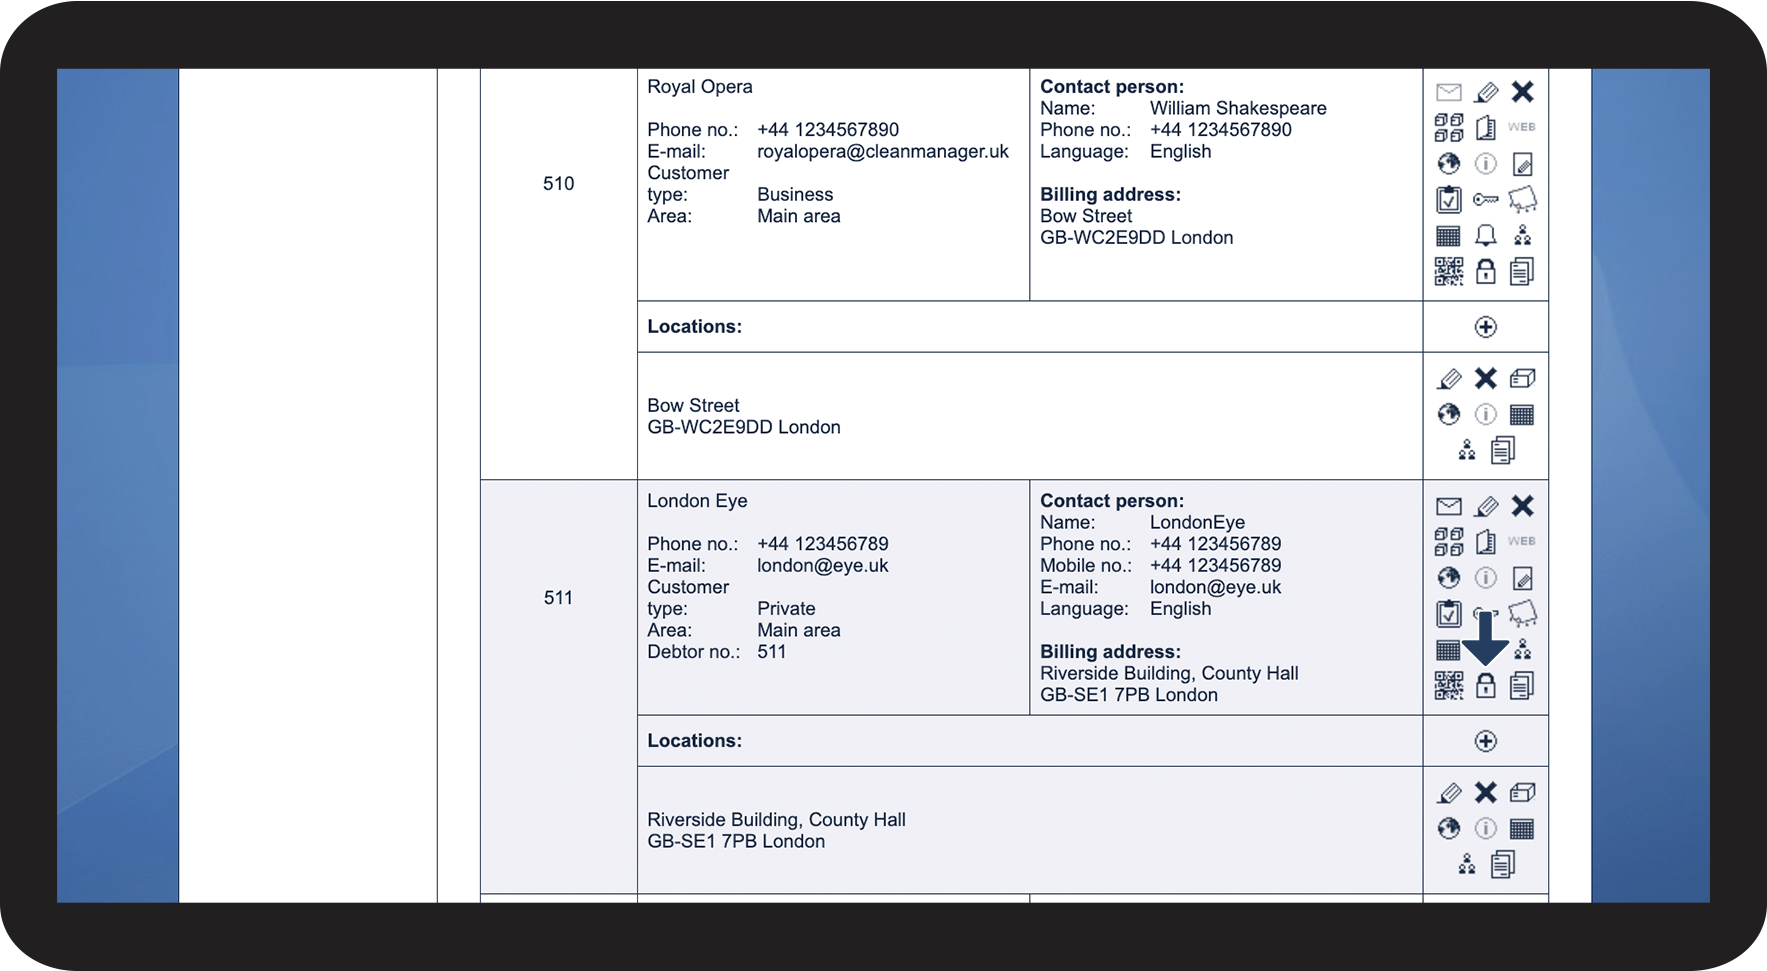
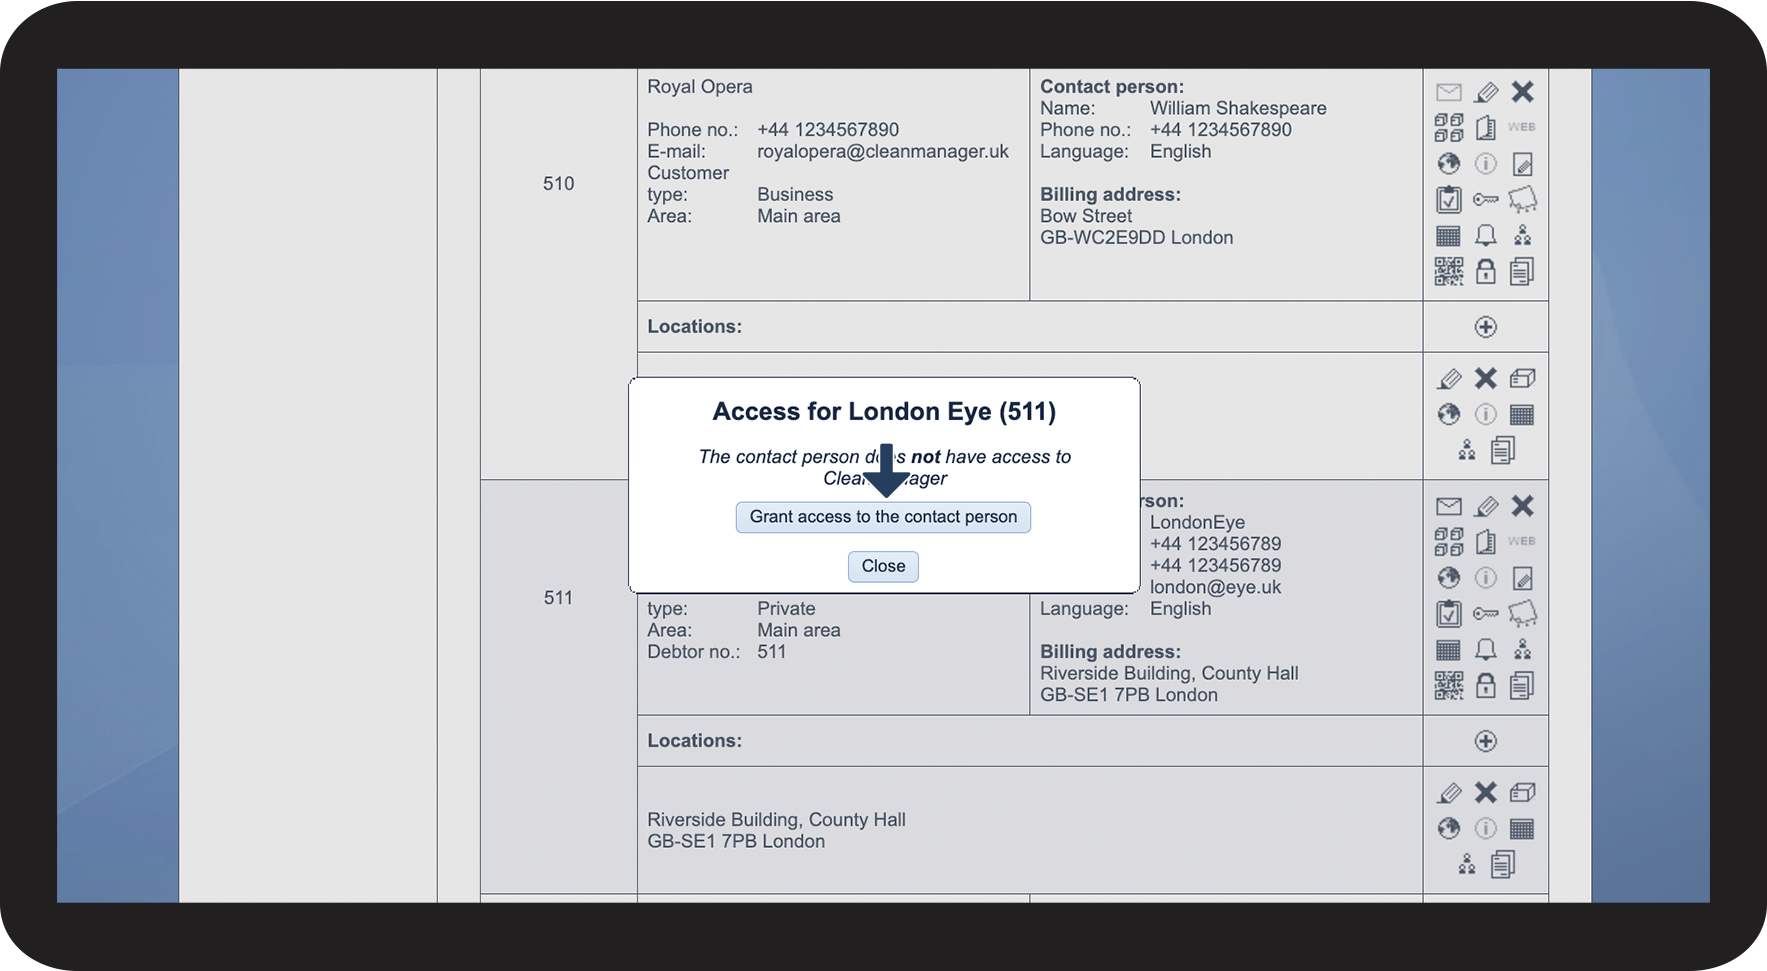
This is how you grant the customer's contact person access to CleanManager
NOTE:
Supervisors can only grant access to customer contacts within their own customer area.
INFO:
Do you want the customer's contact person to have access to the Work hours overview as well? If so, tick off the box Grant access to the work hours overview to the contact person. Read more about it here: How can I grant the customer contact access to the work hours overview?


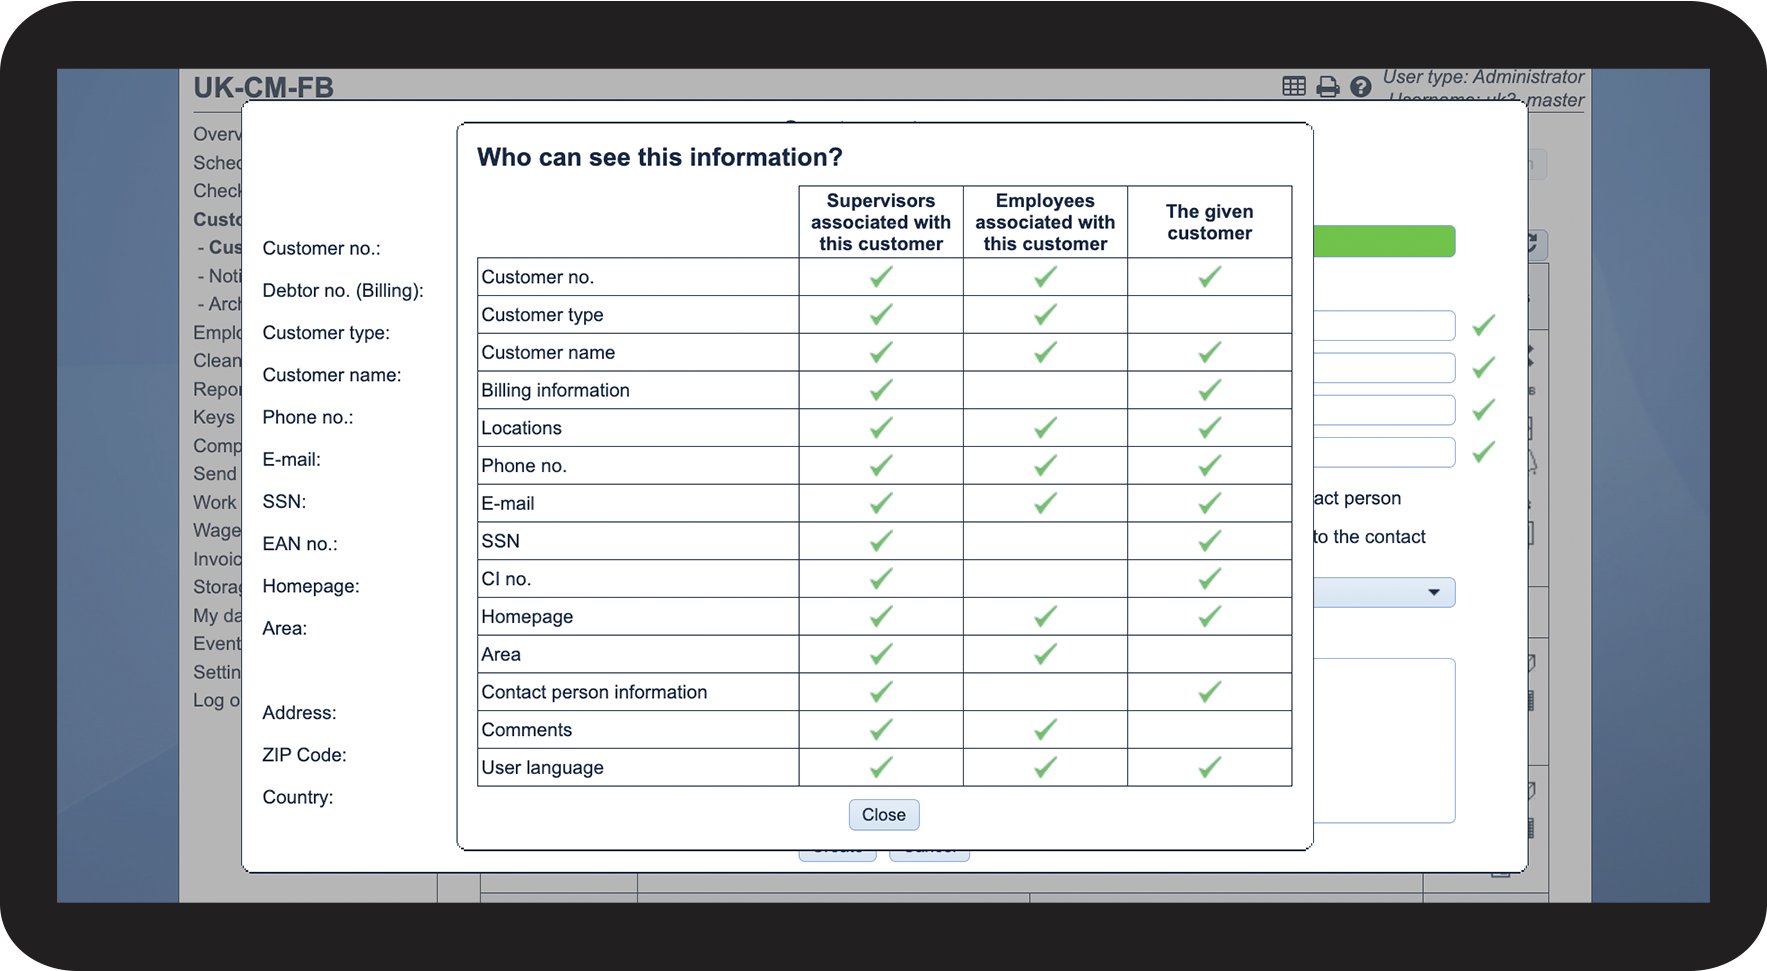
This is how you can see what information the different user types have access to
 and thereafter on Click to see who can view this information.
NOTE:
Supervisors can only view information about customers within their assigned areas.