How do I attach and see resources for a customer?
In CleanManager, you can attach files and/or hyperlinks to individual customers, and these are called resources. Resources can be added, edited and deleted by the administrator and supervisors.
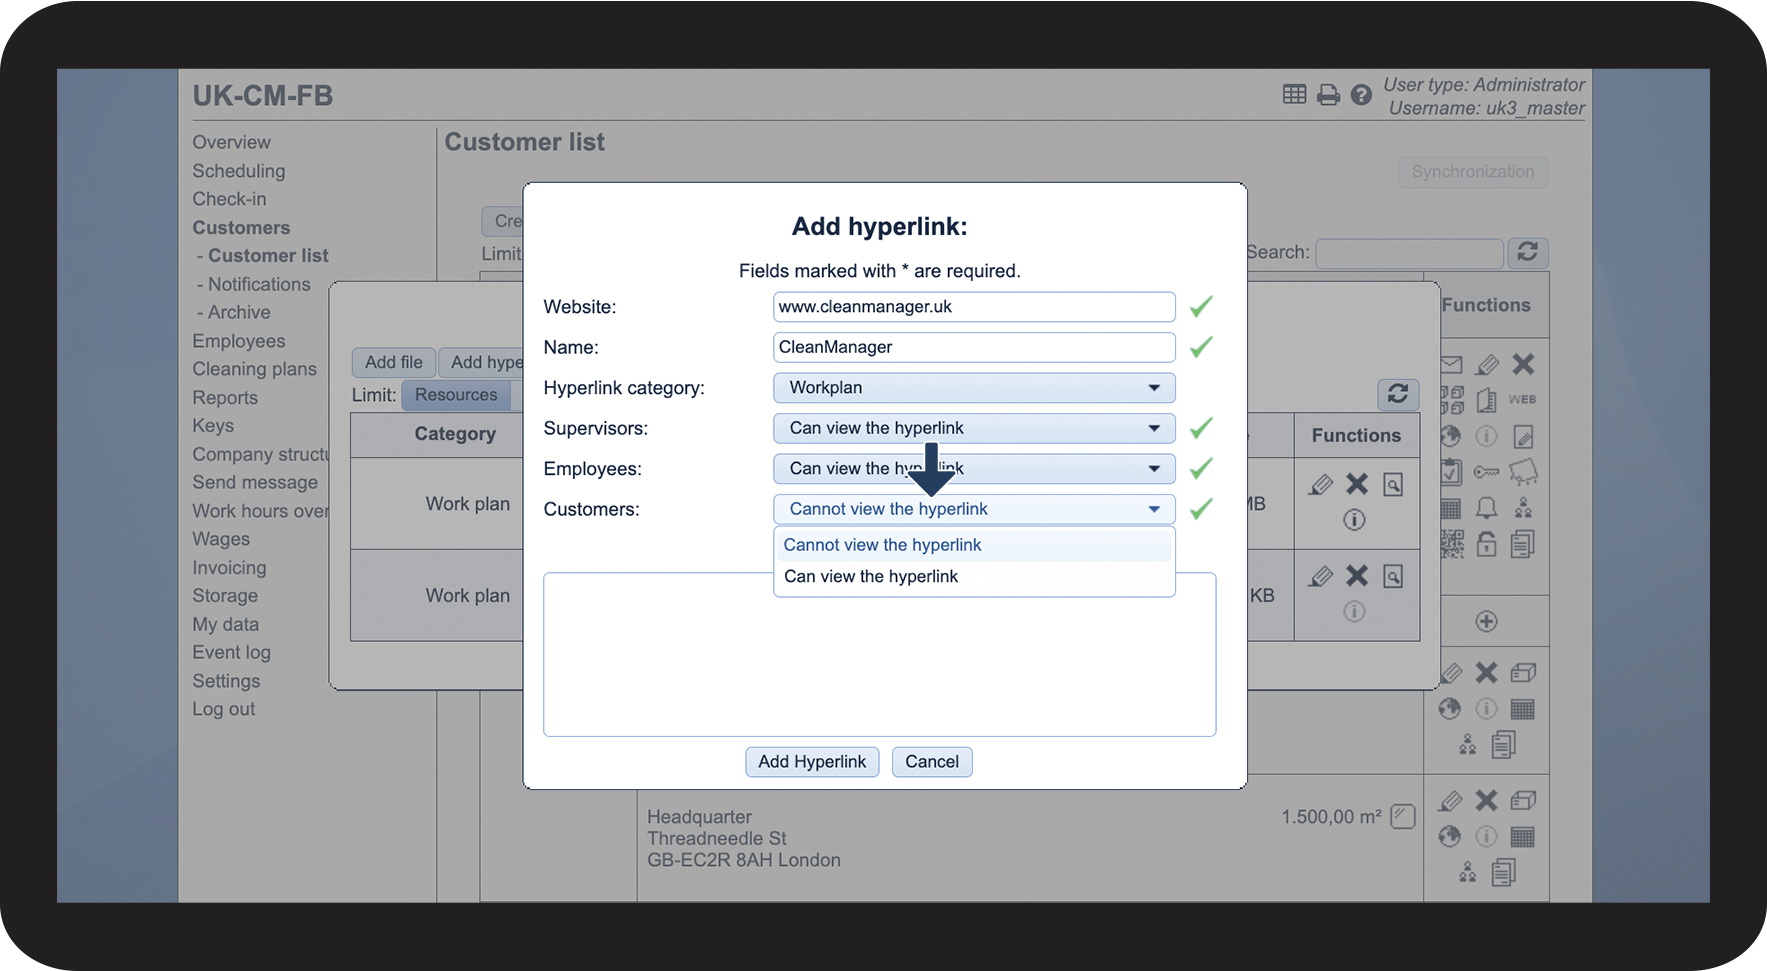
When adding a resource, you can among other things decide whether an employee should have access to the information or not.
NOTE:
Supervisors can only add, edit, and delete resources for customers within the supervisor's assigned customer areas. For more information regarding this, go to Company Structure.
In this article, you will learn how to add, edit and delete resources for a customer:
- How do I add a file to a customer?
- How do I add hyperlinks to a customer?
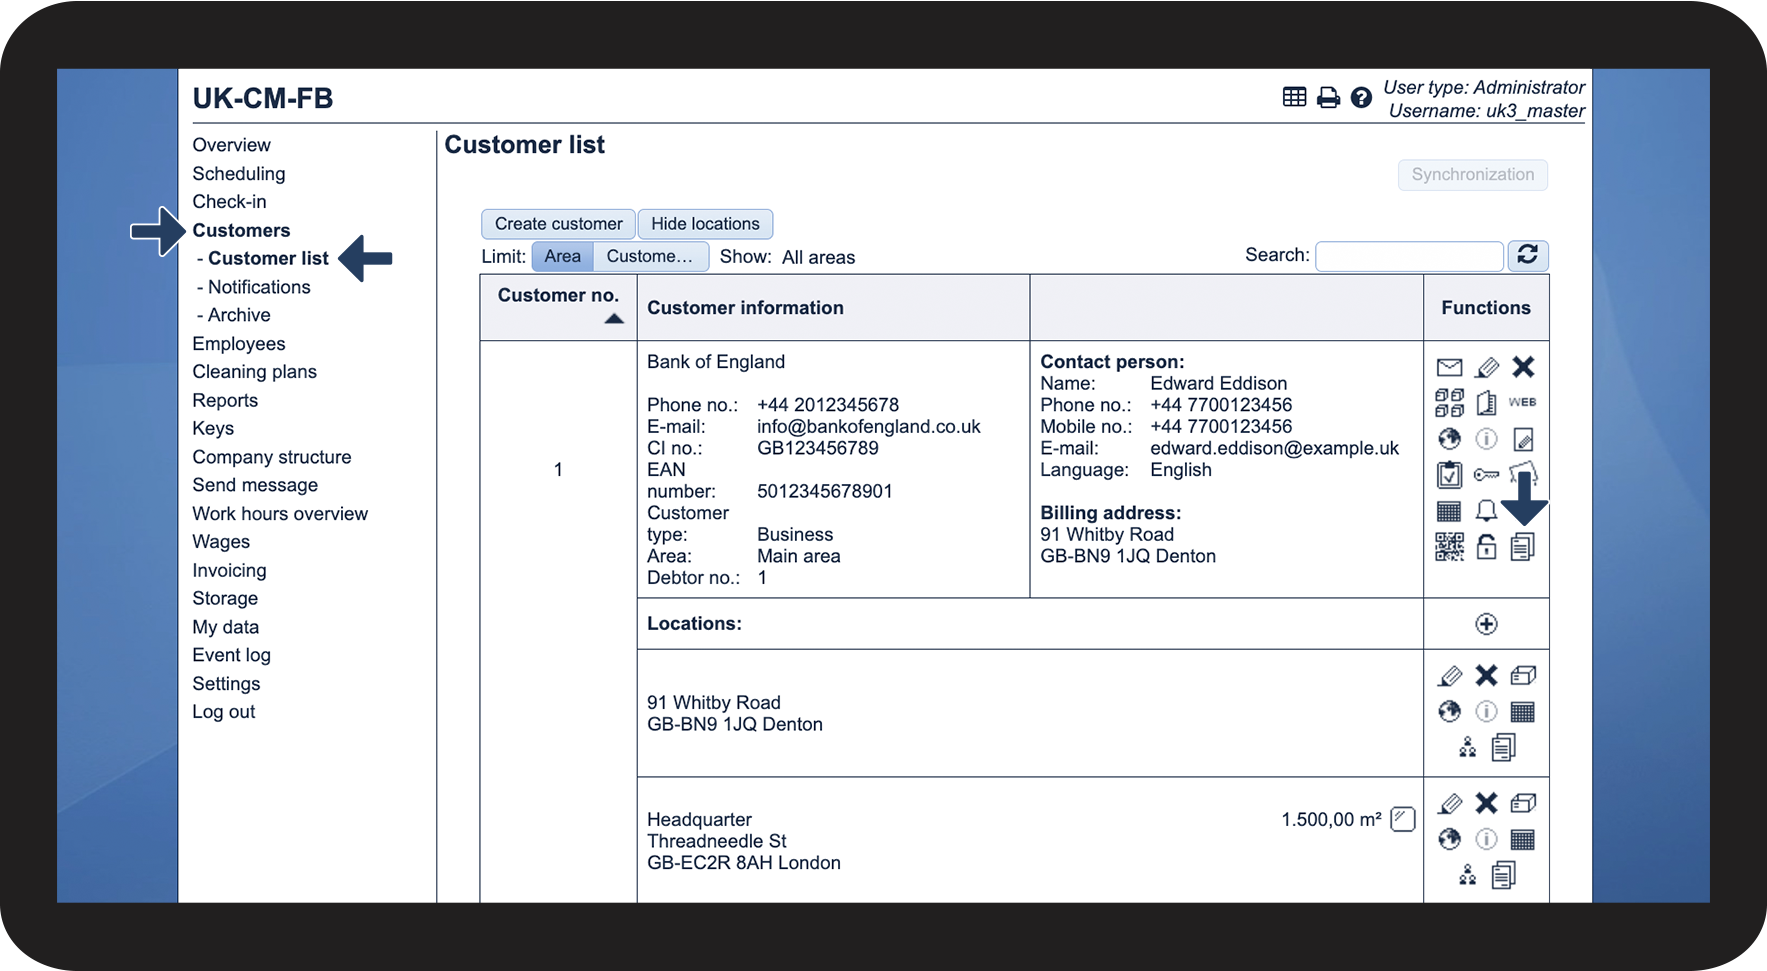
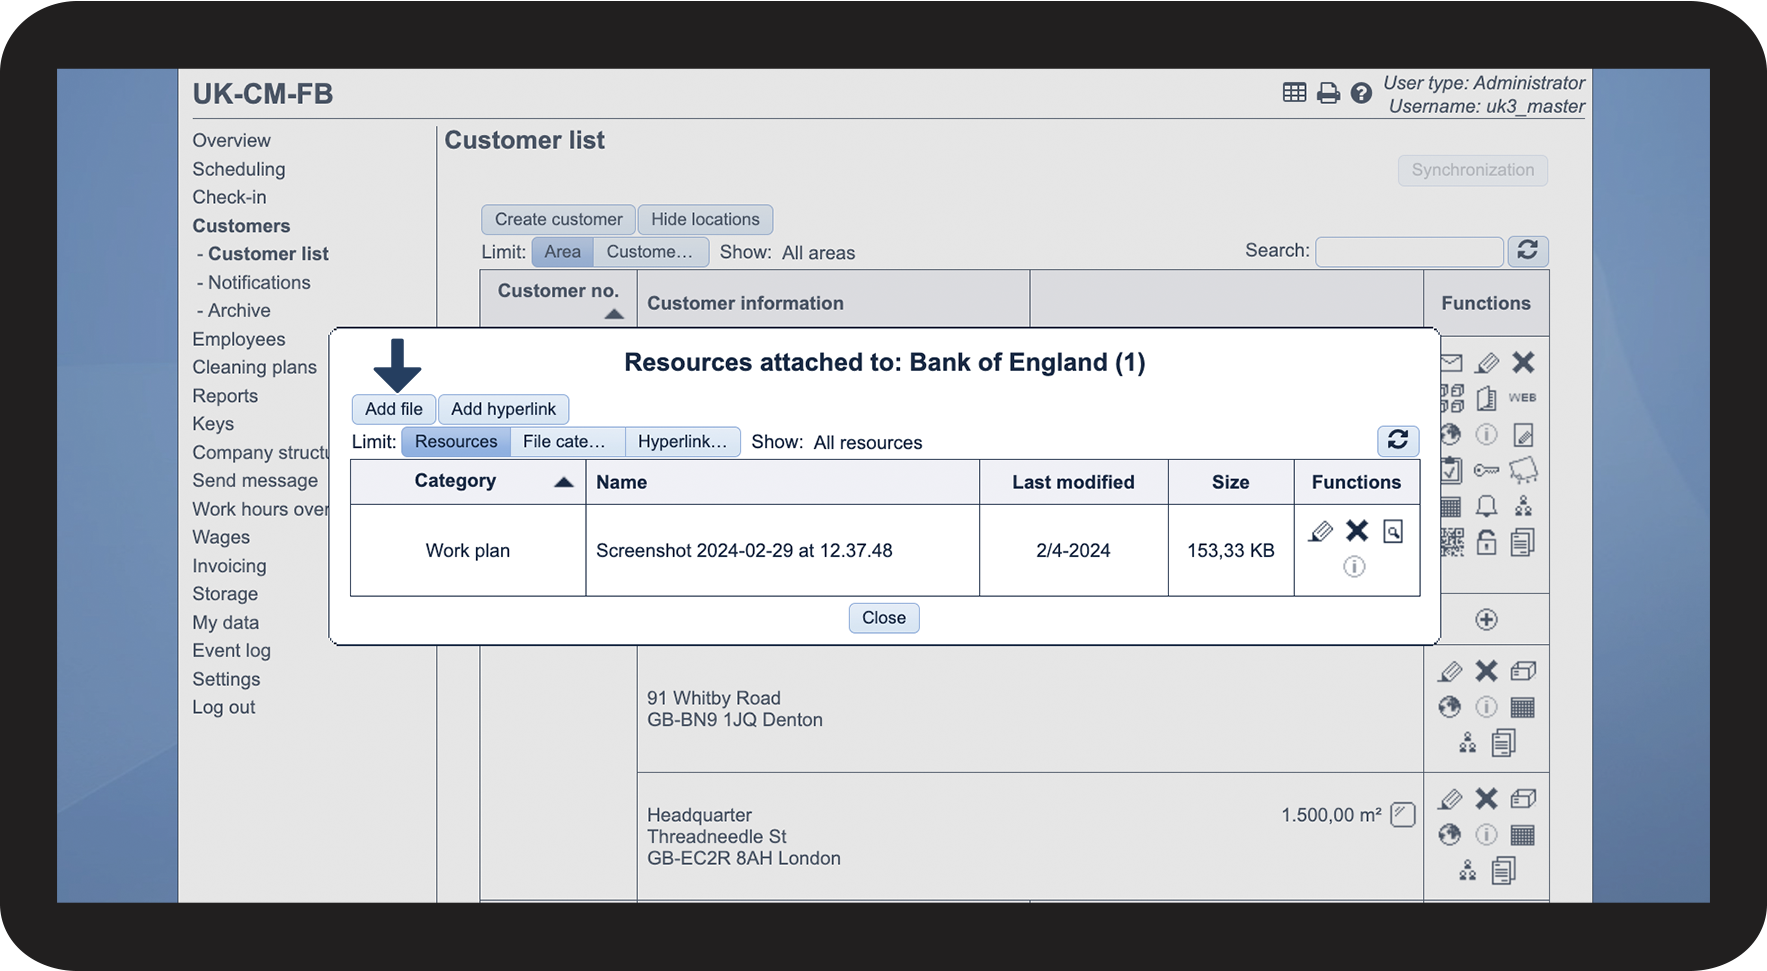
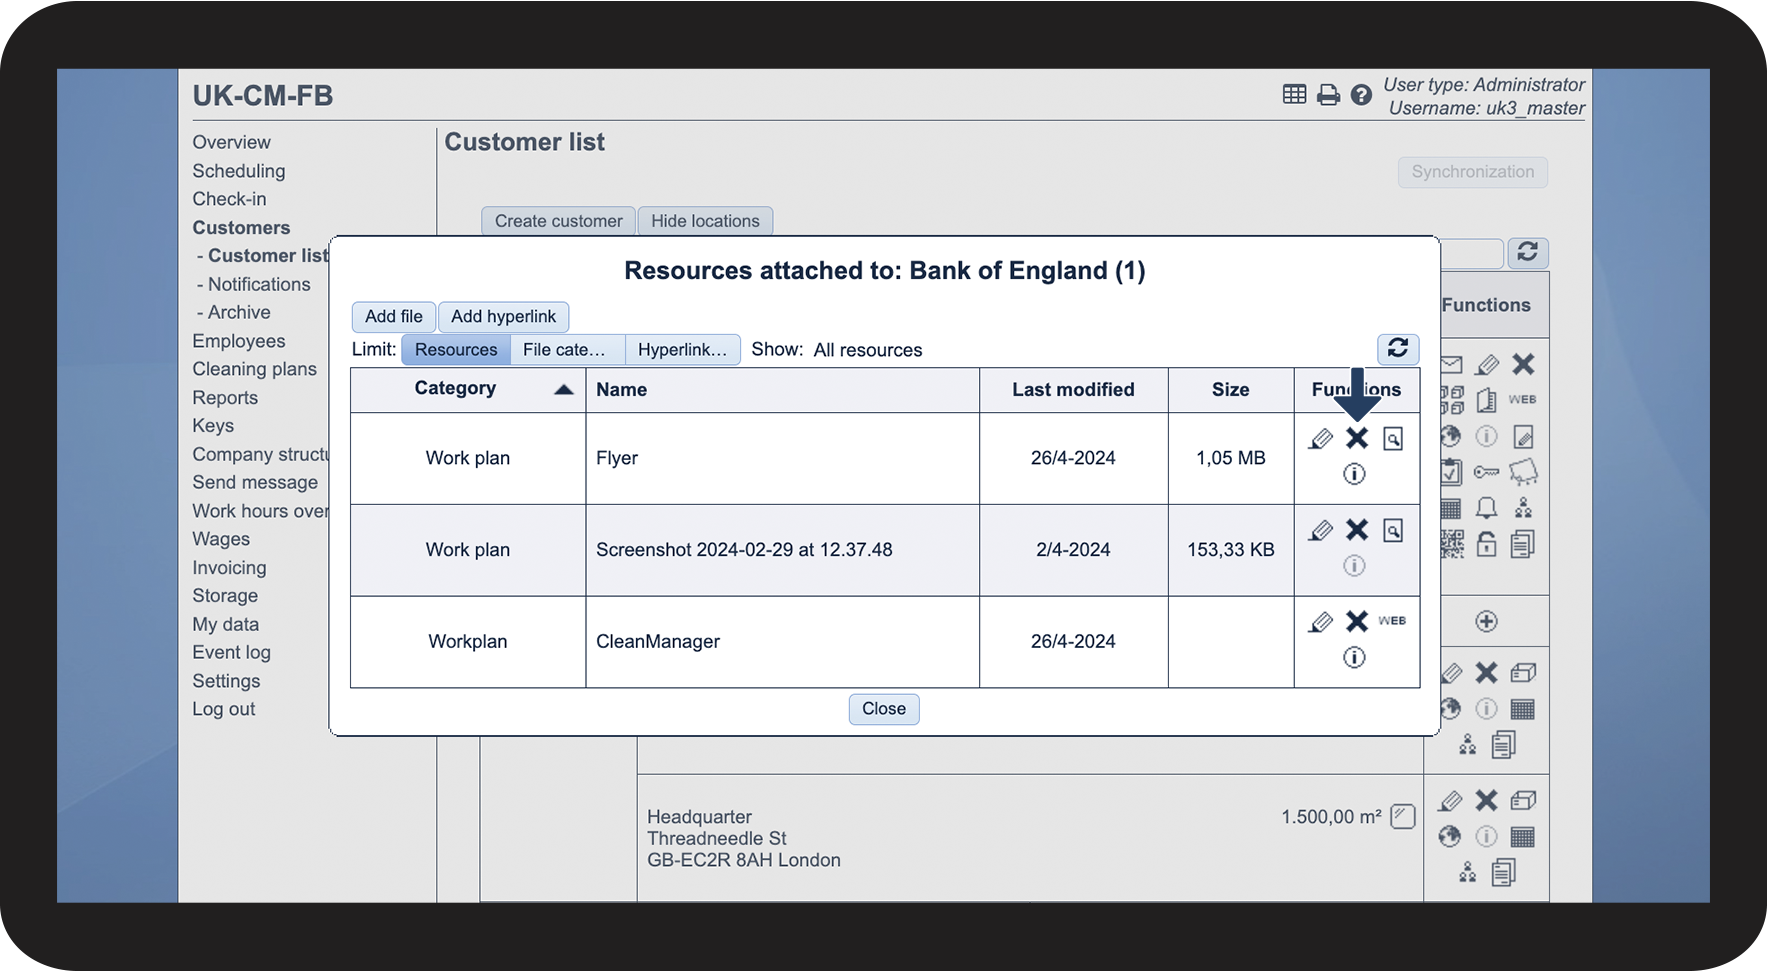
- How can I see which attachments have been uploaded to a customer?
- How do I edit resources?
- How do I delete resources?
- How do I specify which resources an employee is allowed to see?
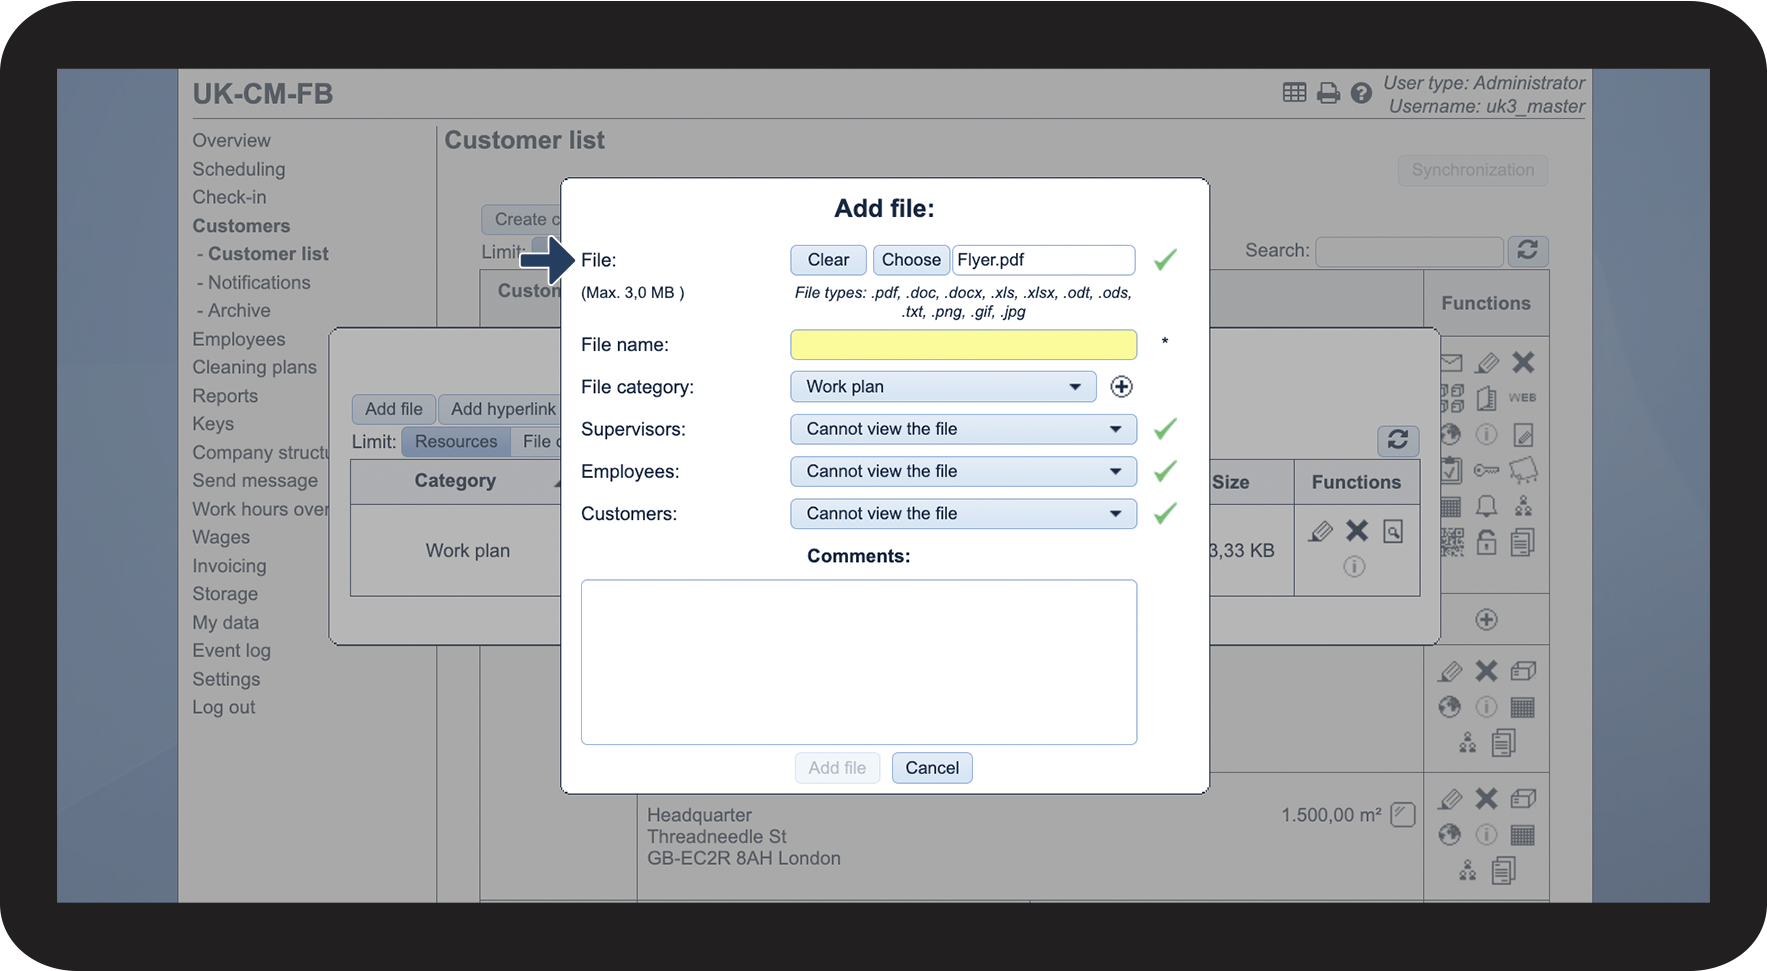
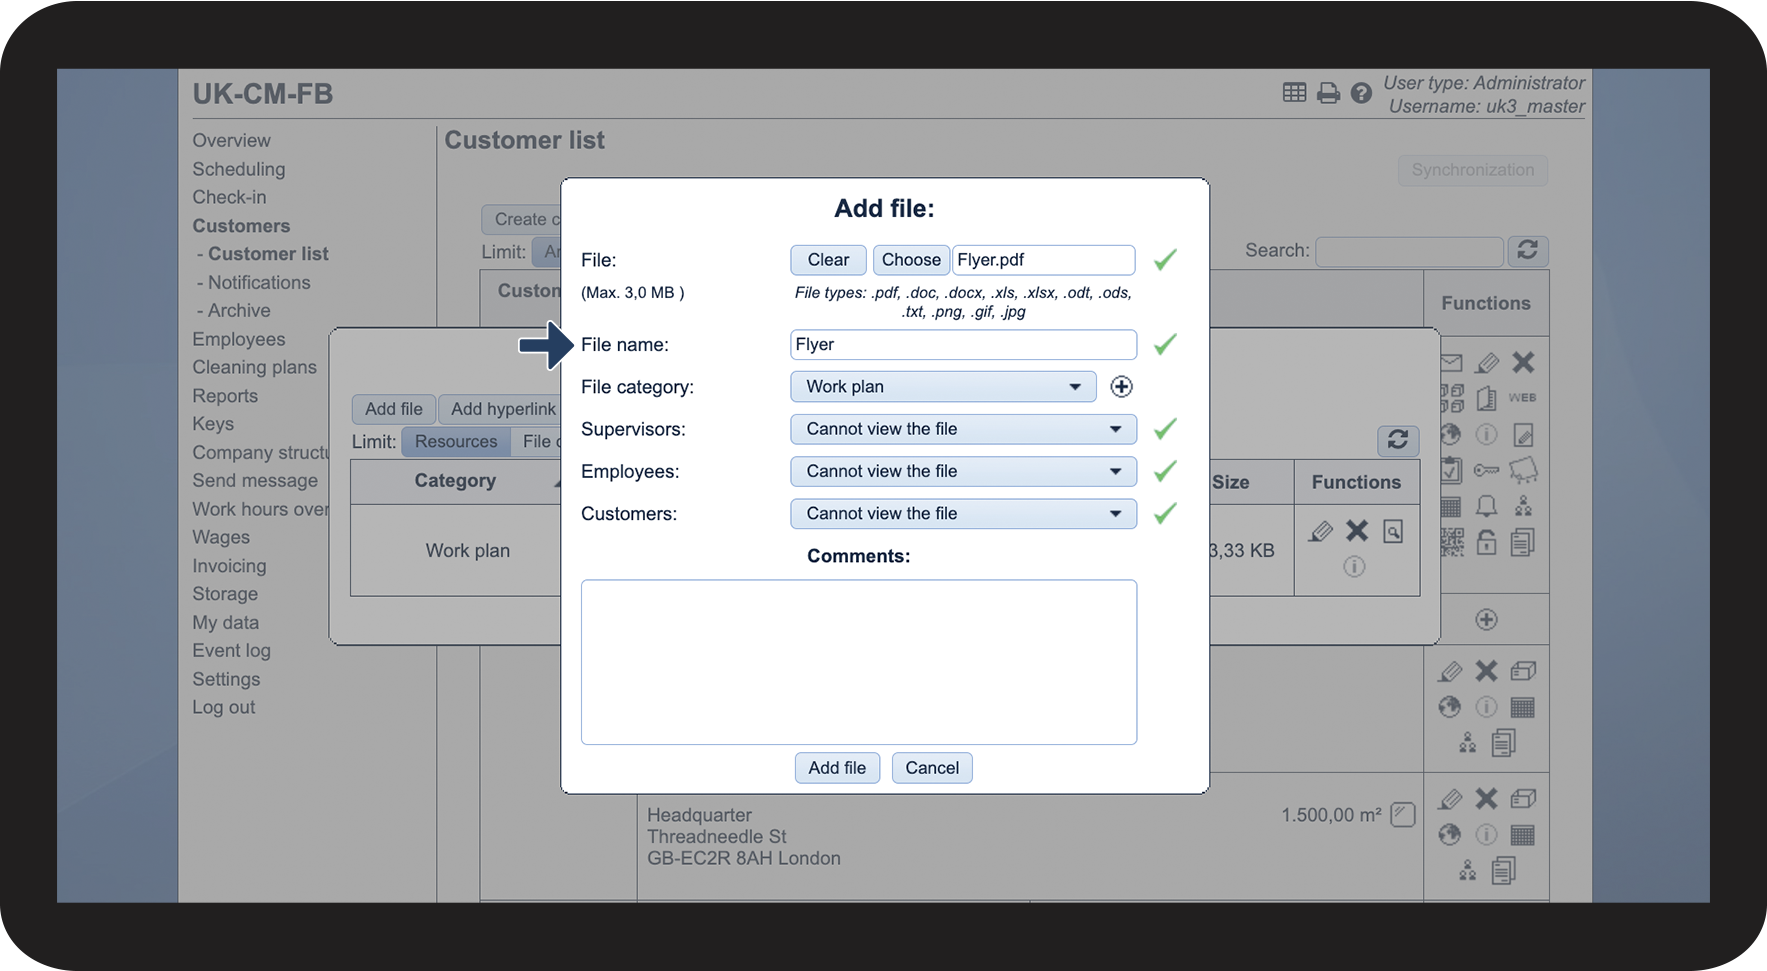
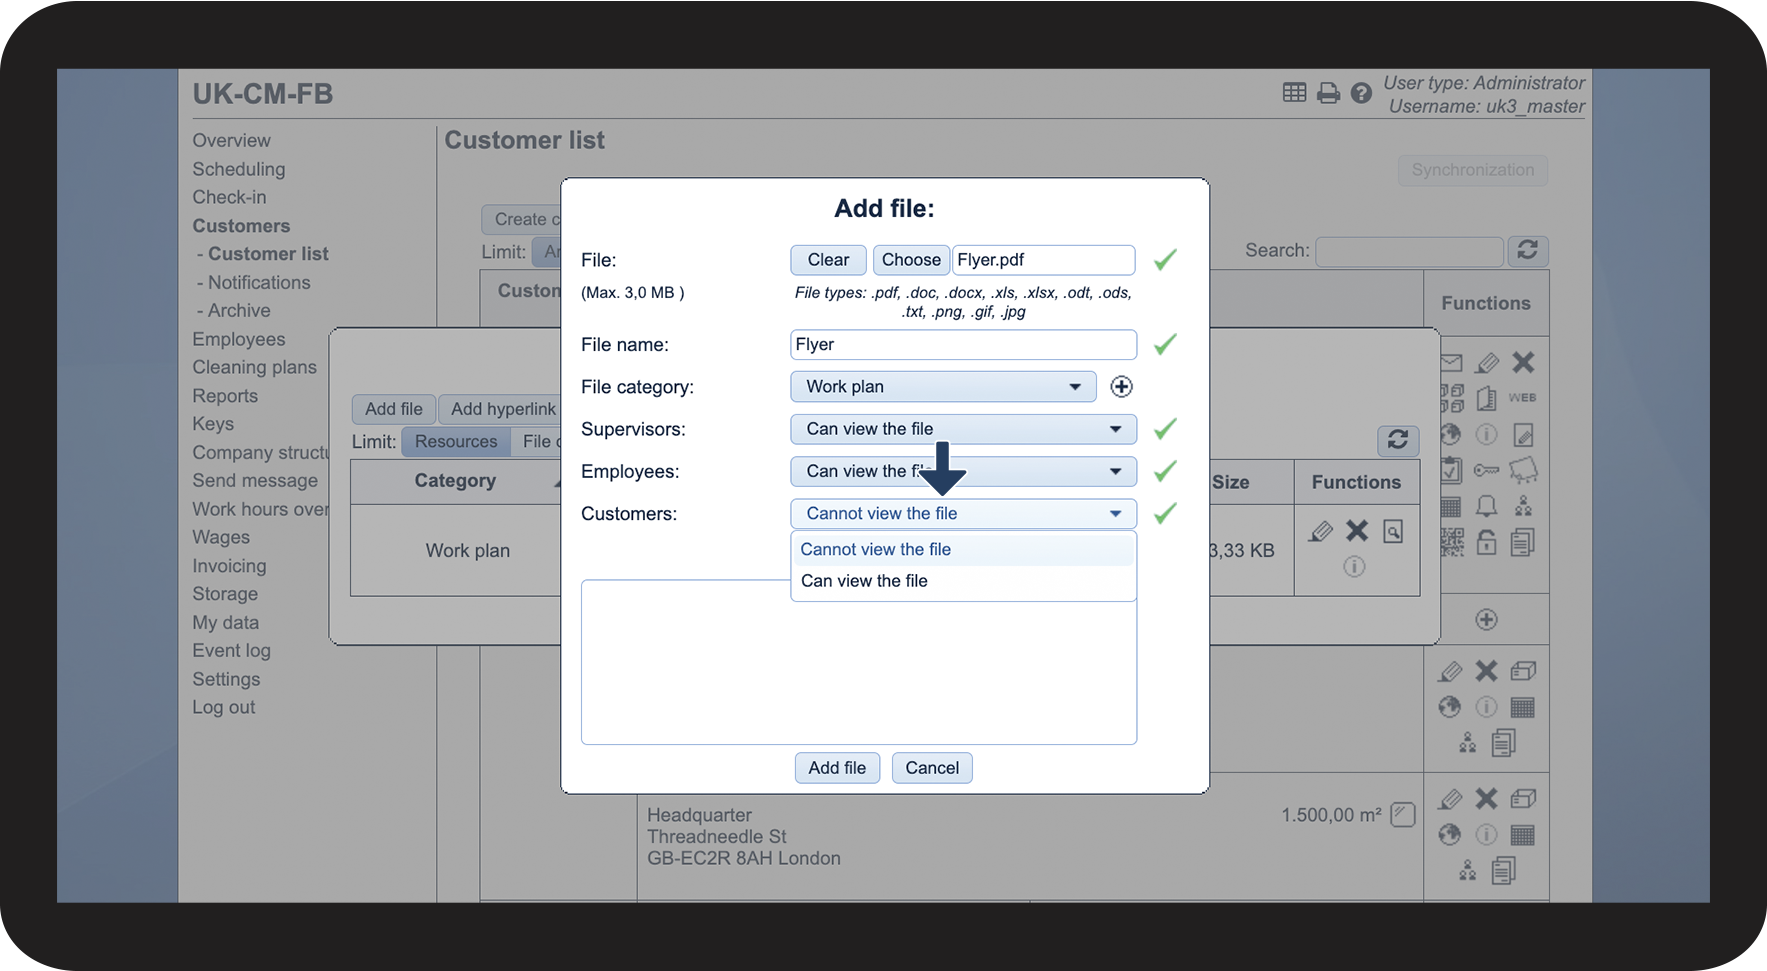
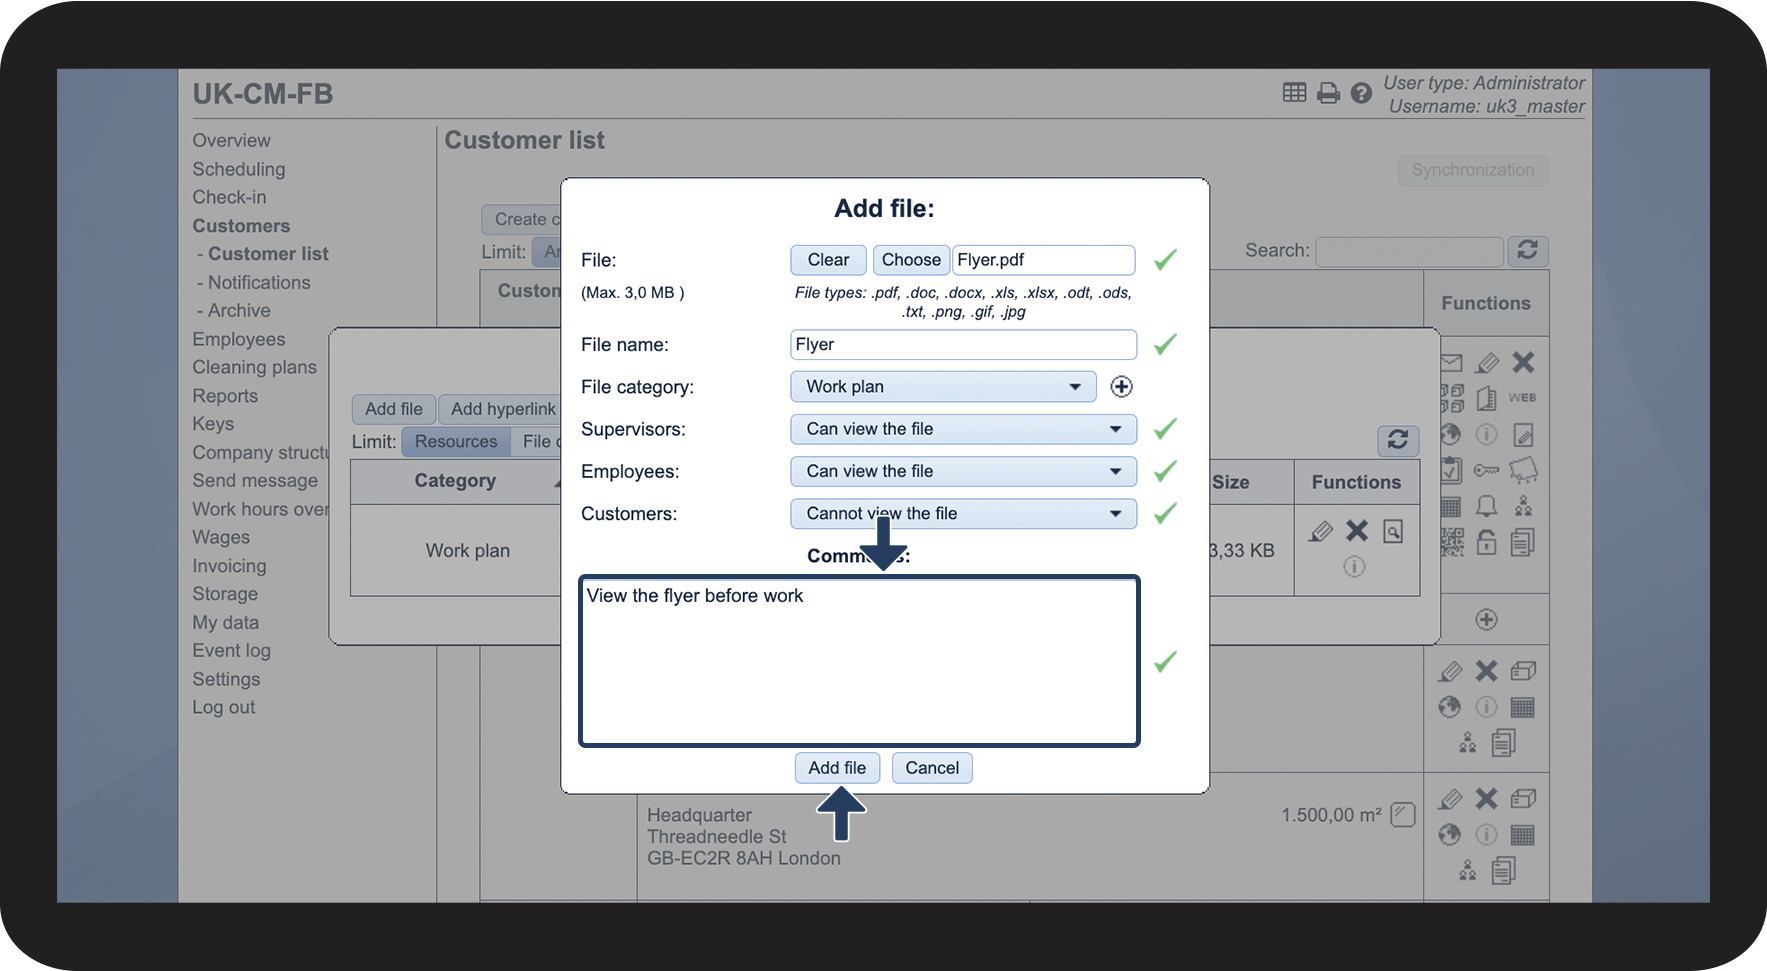
This is how you add a file to a customer

NOTE:
Approved file types: .pdf, .doc, .docx, .xls, .xlsx, .odt, .ods, .txt, .png, .gif, .jpg
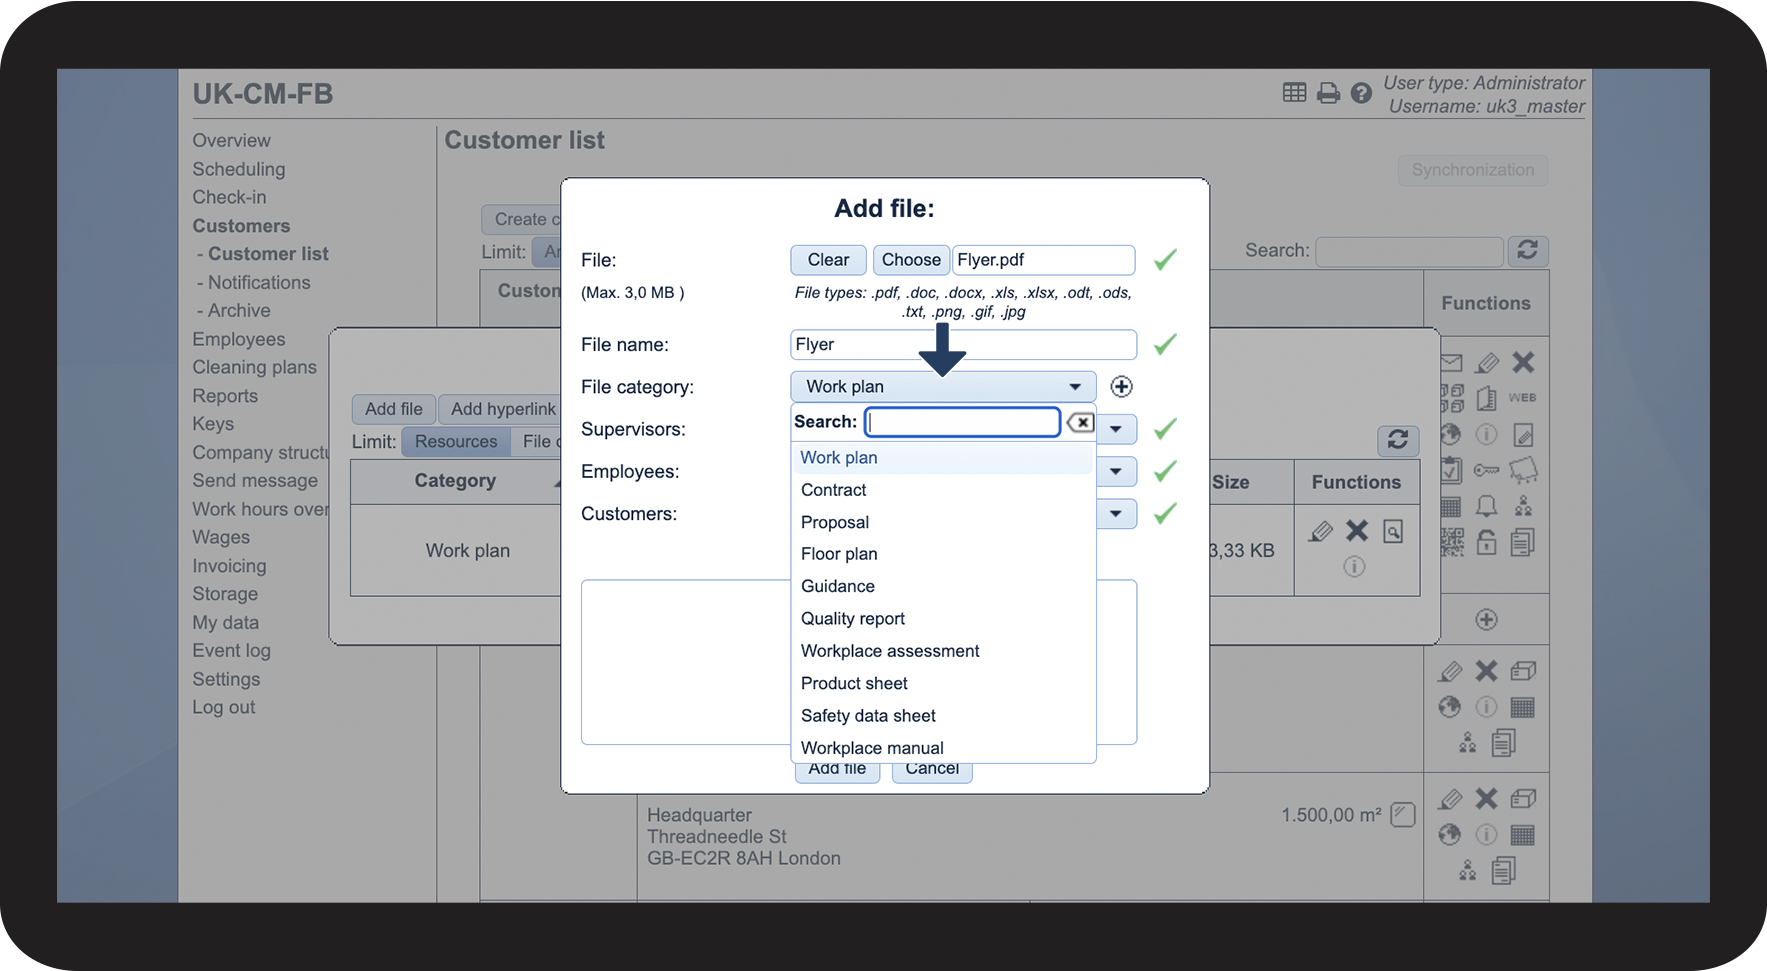
 next to the field, or by going to Settings > Resource categories. You can read more about that in the following article:
 NOTE:
Supervisors can create new file categories when they add or edit resources. However, only the administrator can create, edit and delete file categories by going to Settings > Resource categories

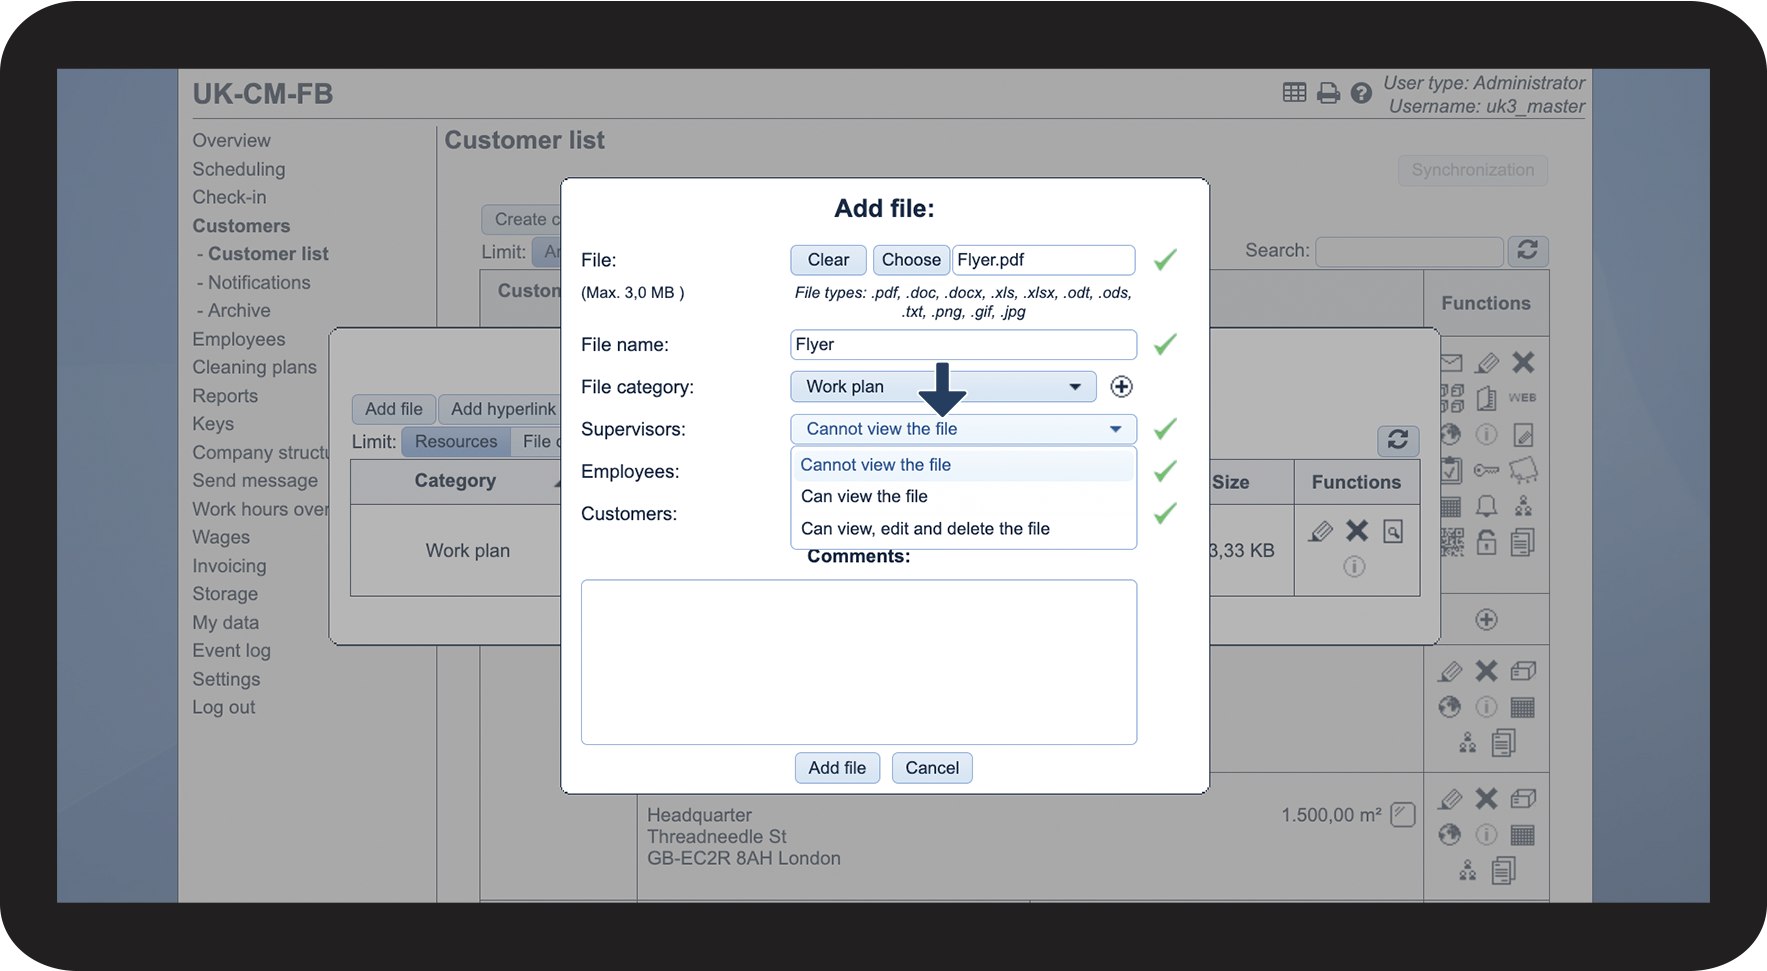
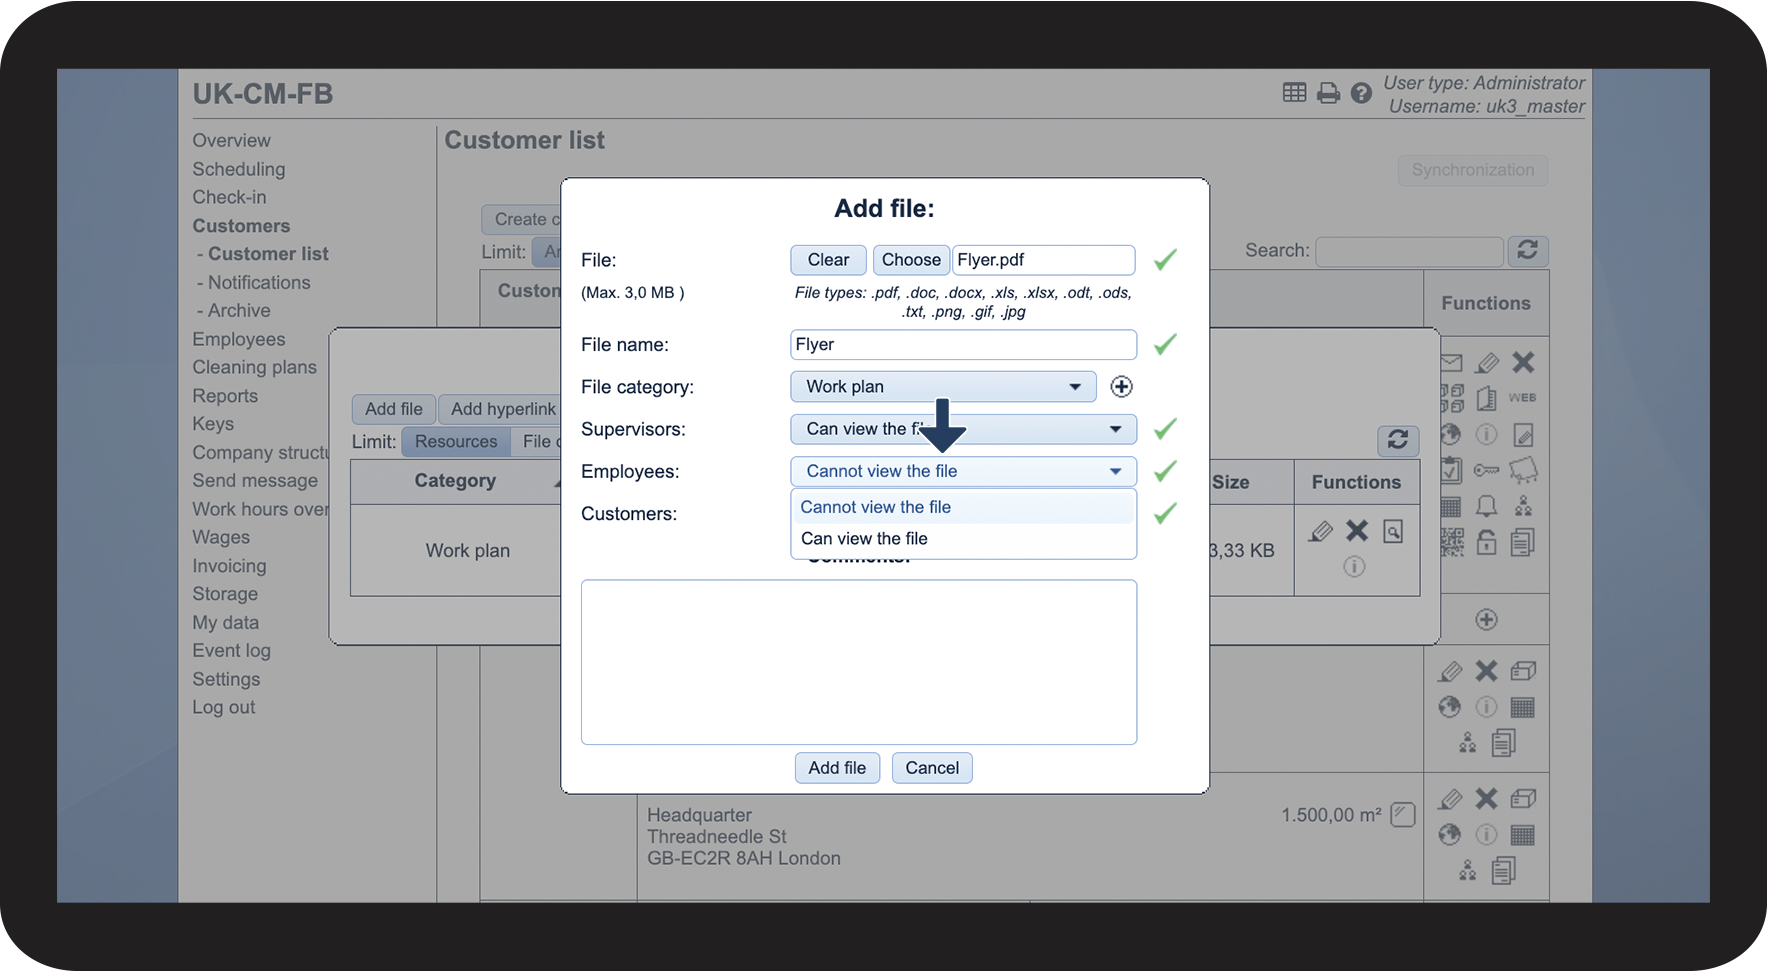
NOTE:
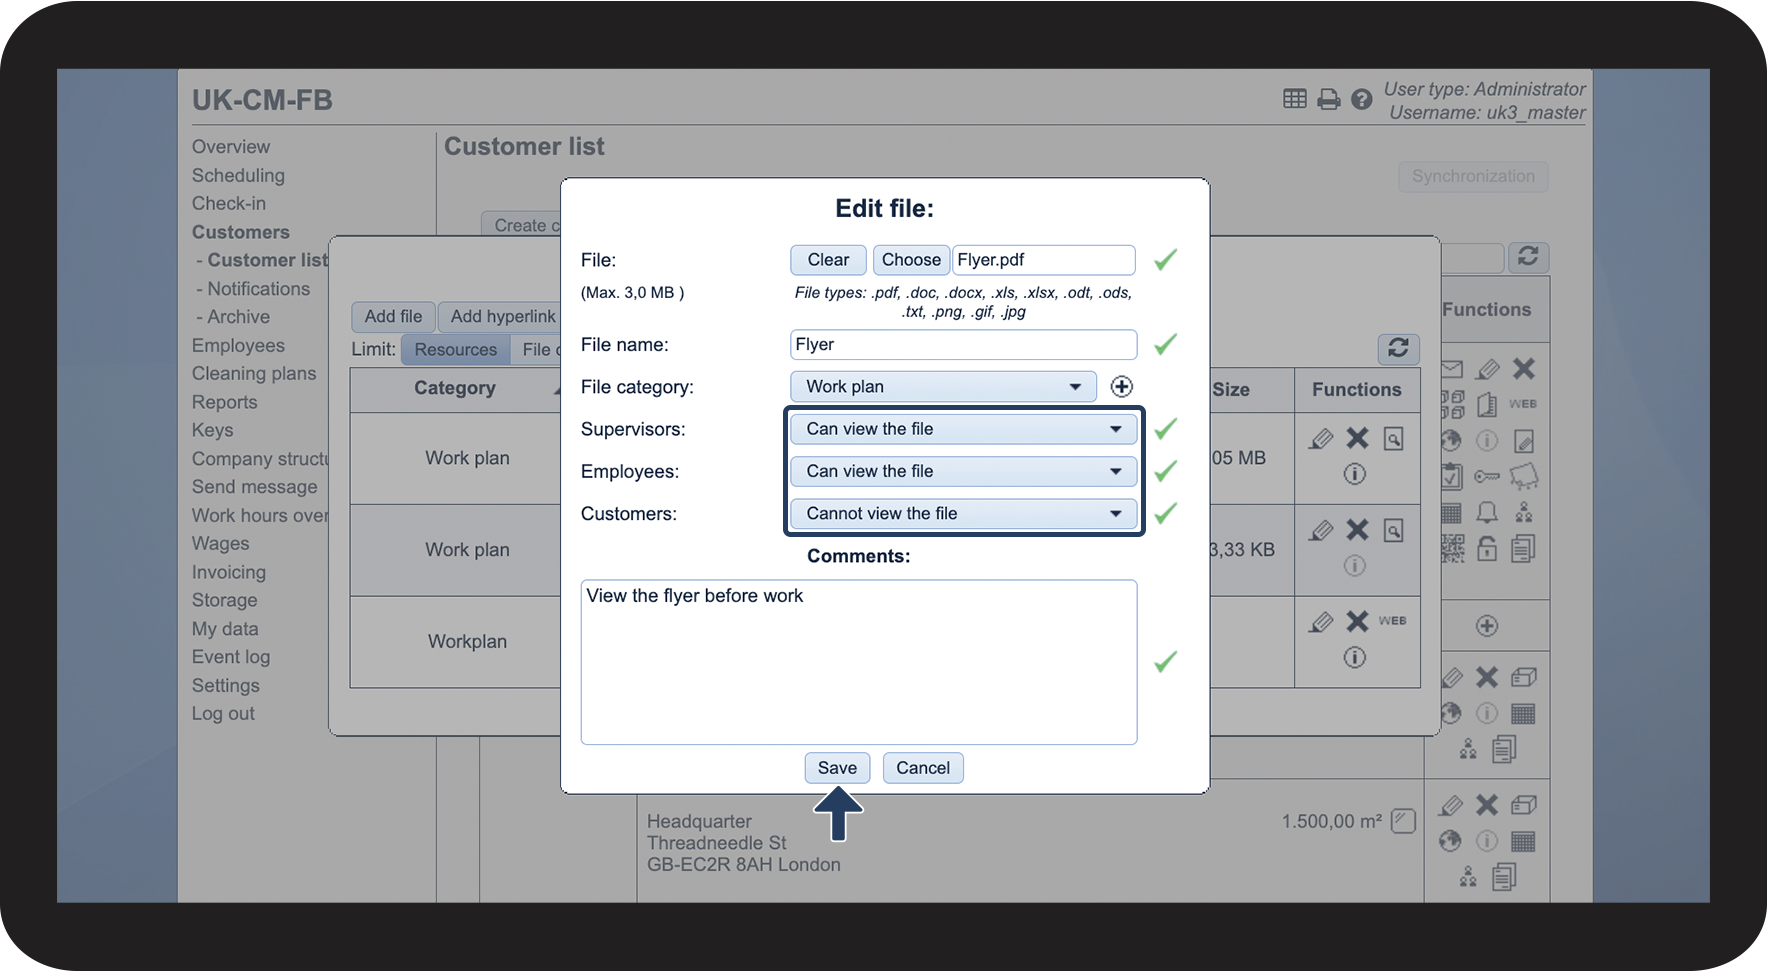
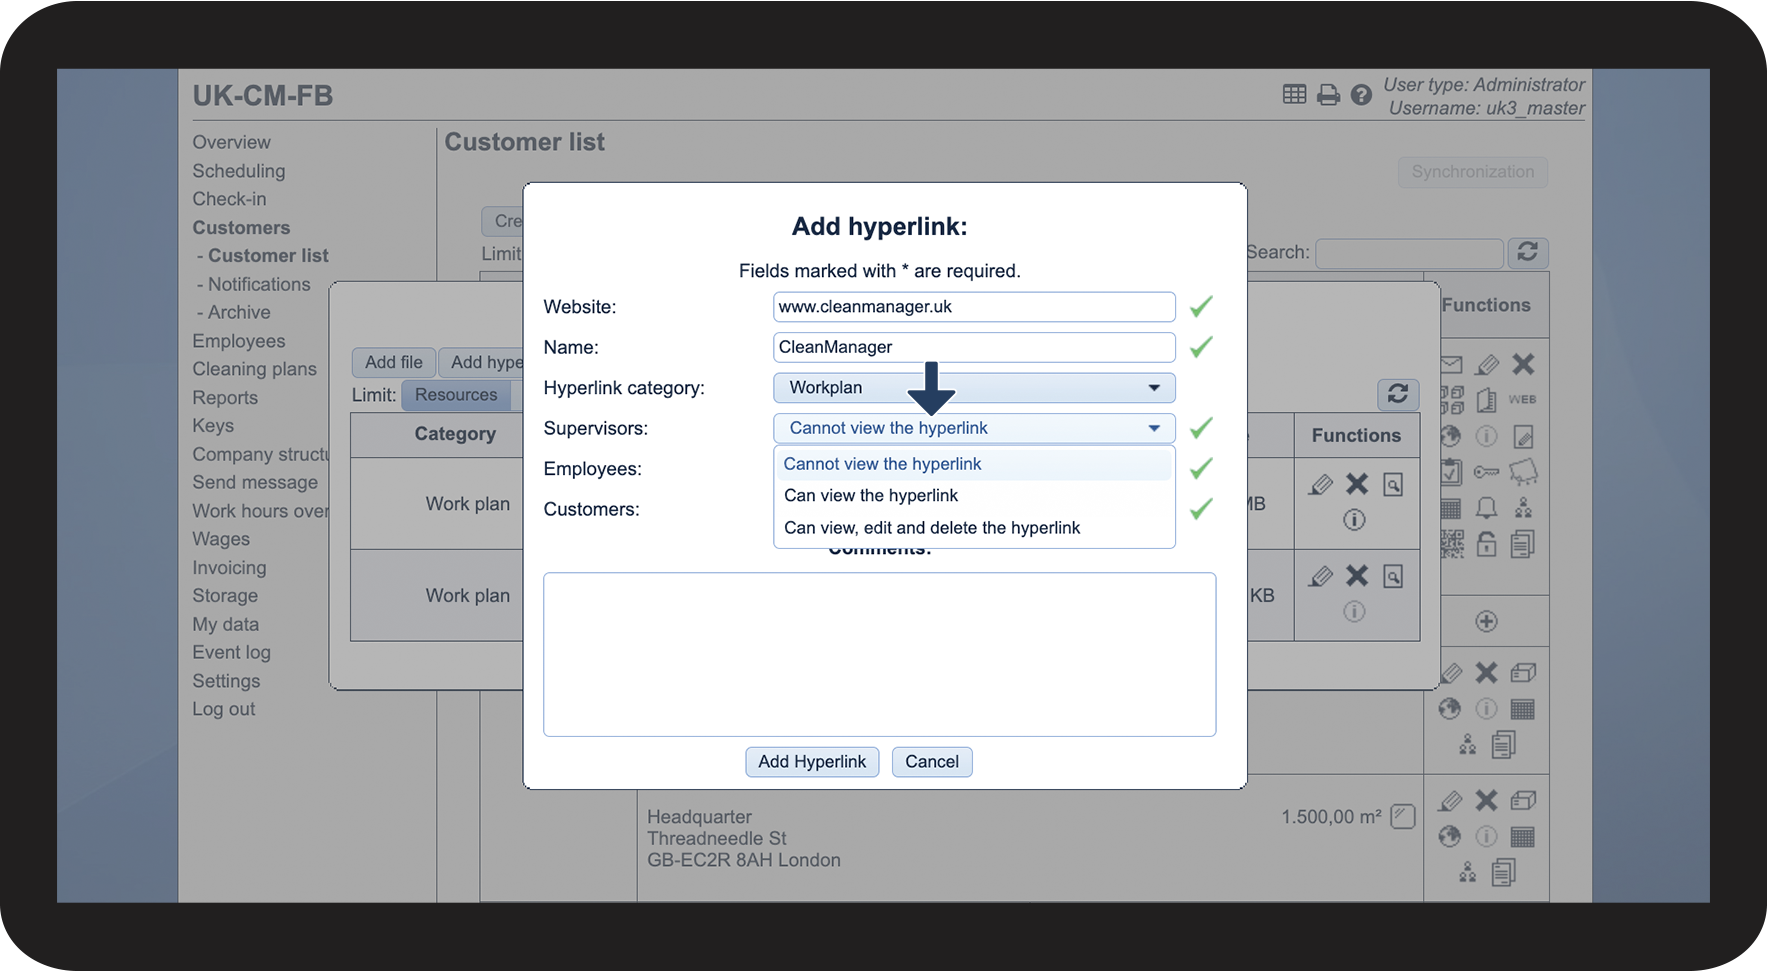
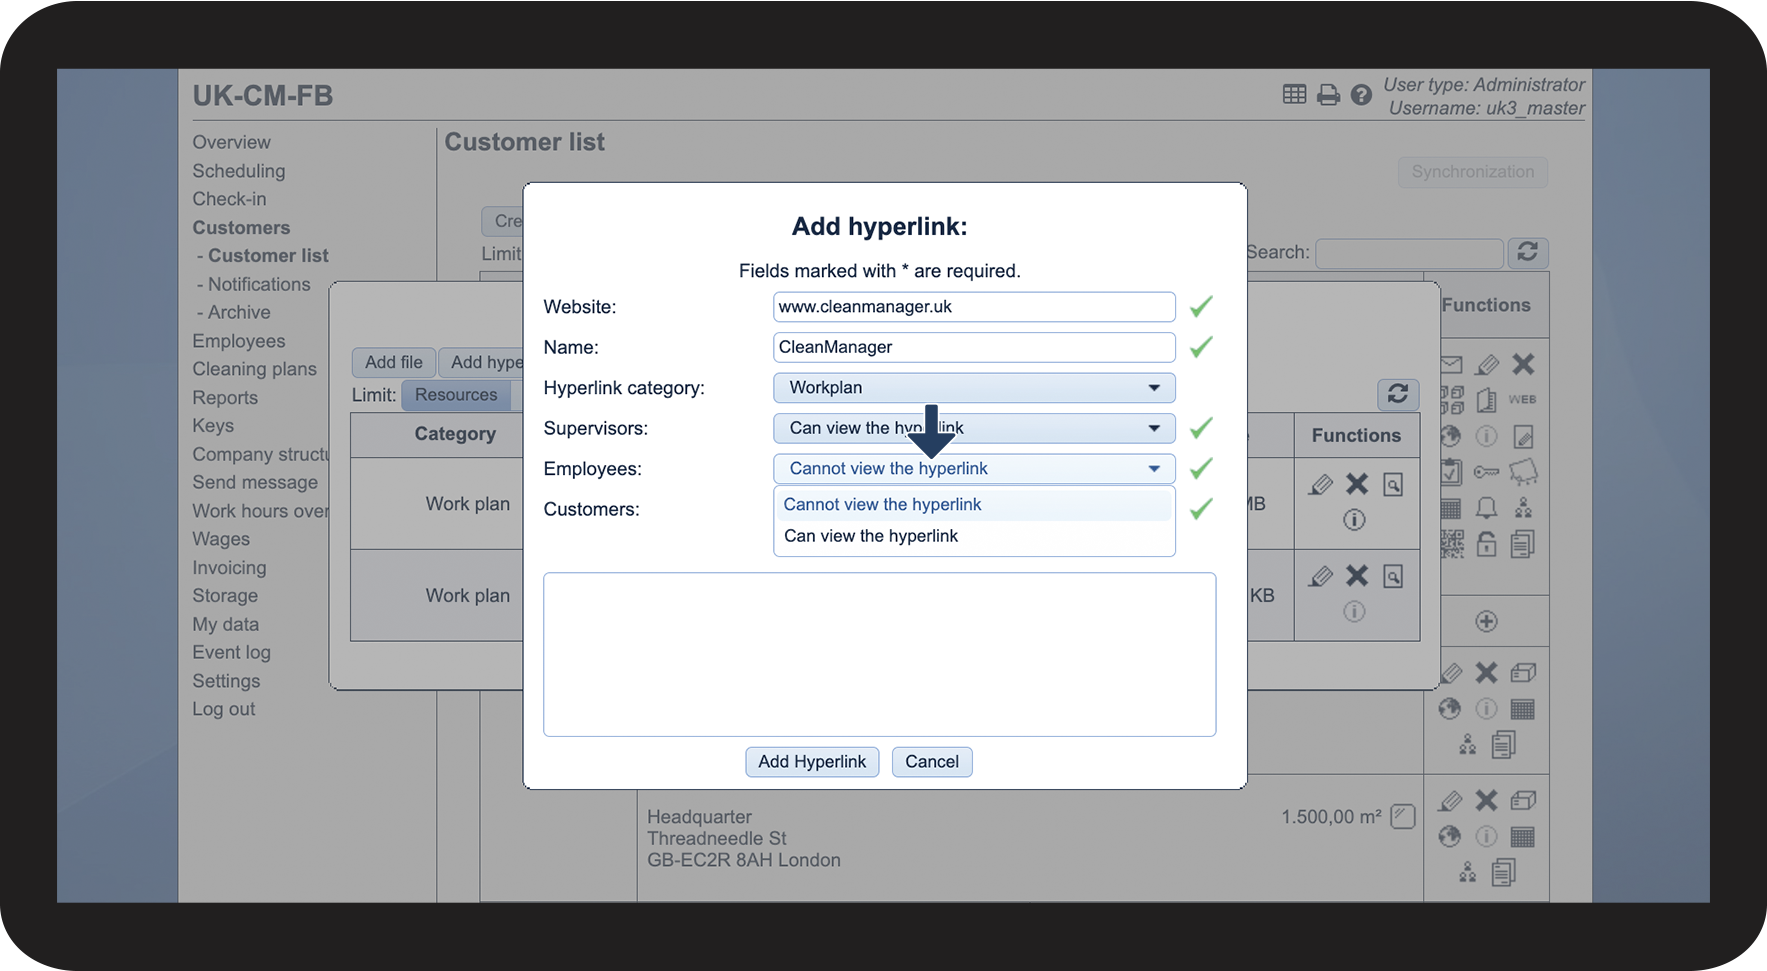
The administrator can set up permissions for both supervisors and employees. Supervisors can only set up permissions for employees.


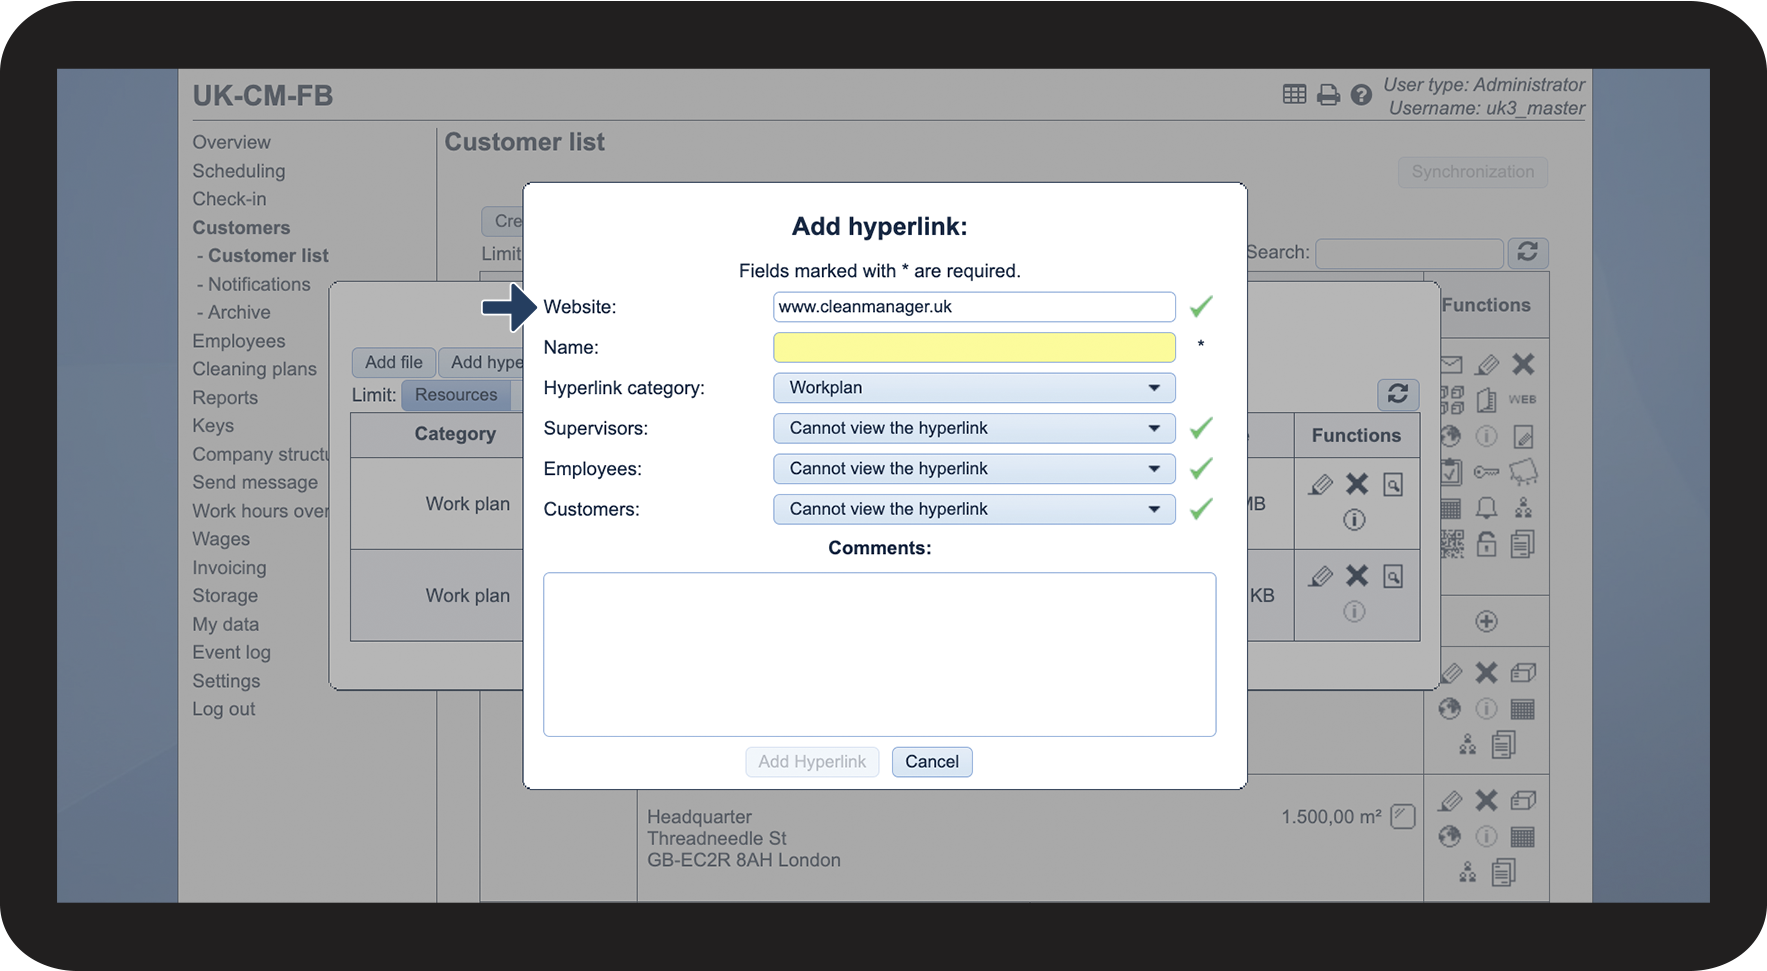
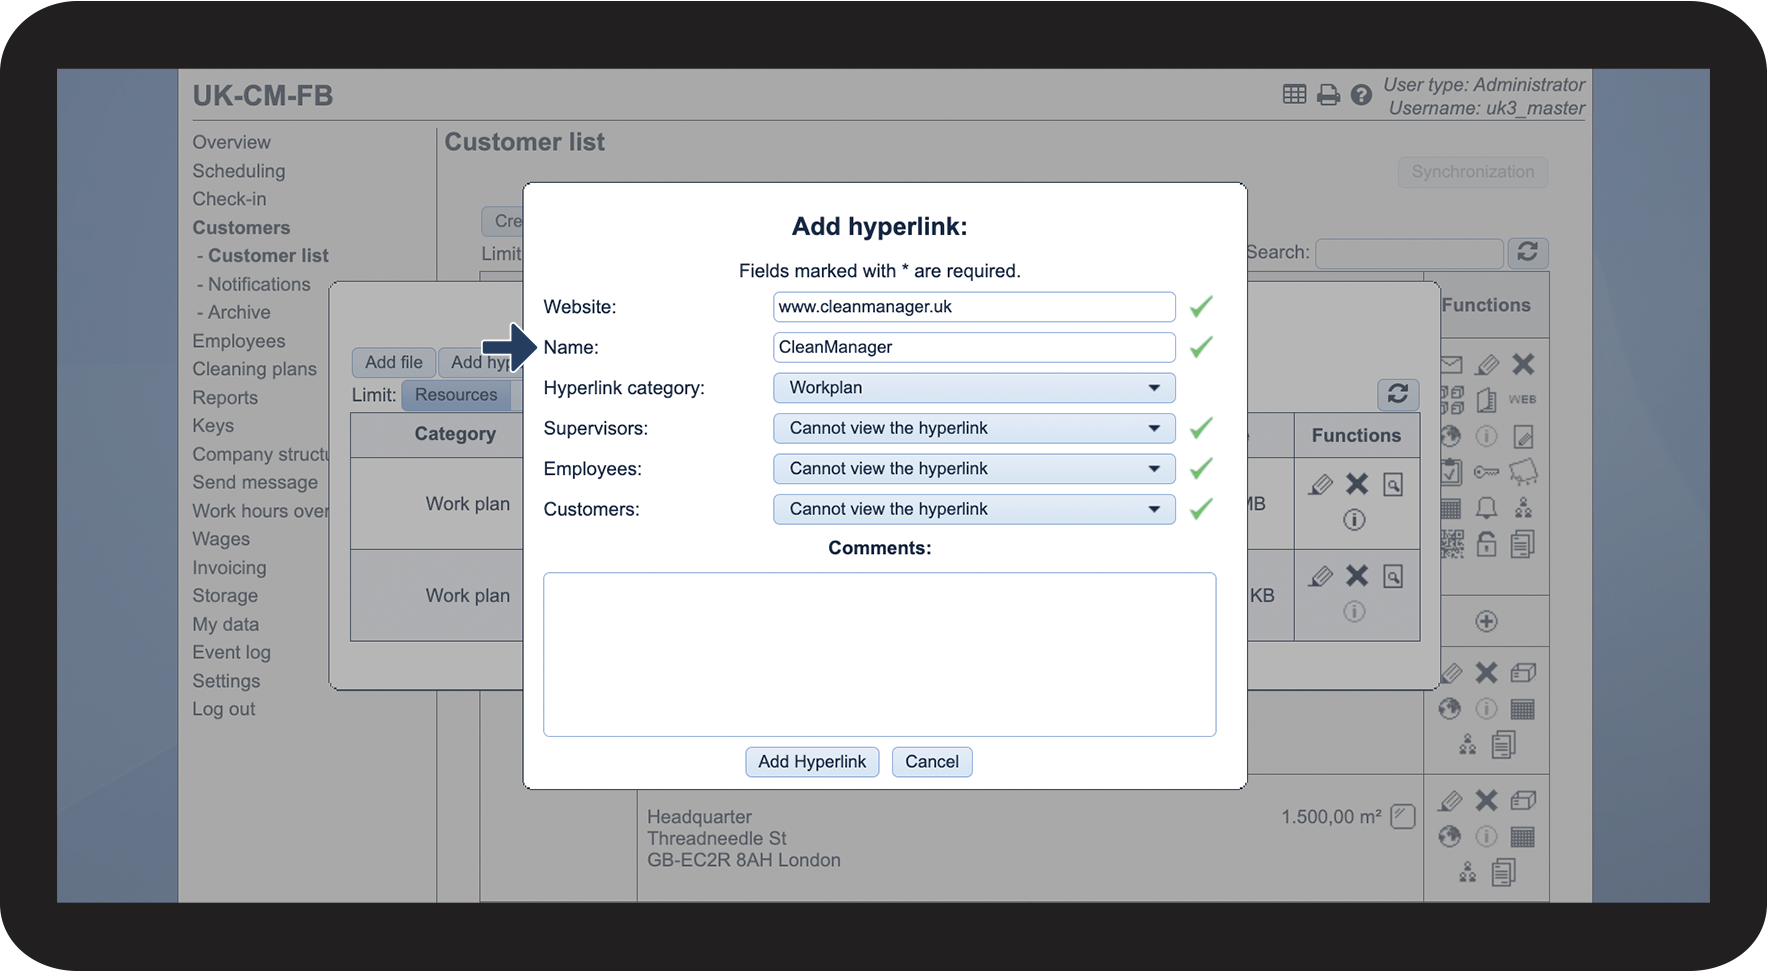
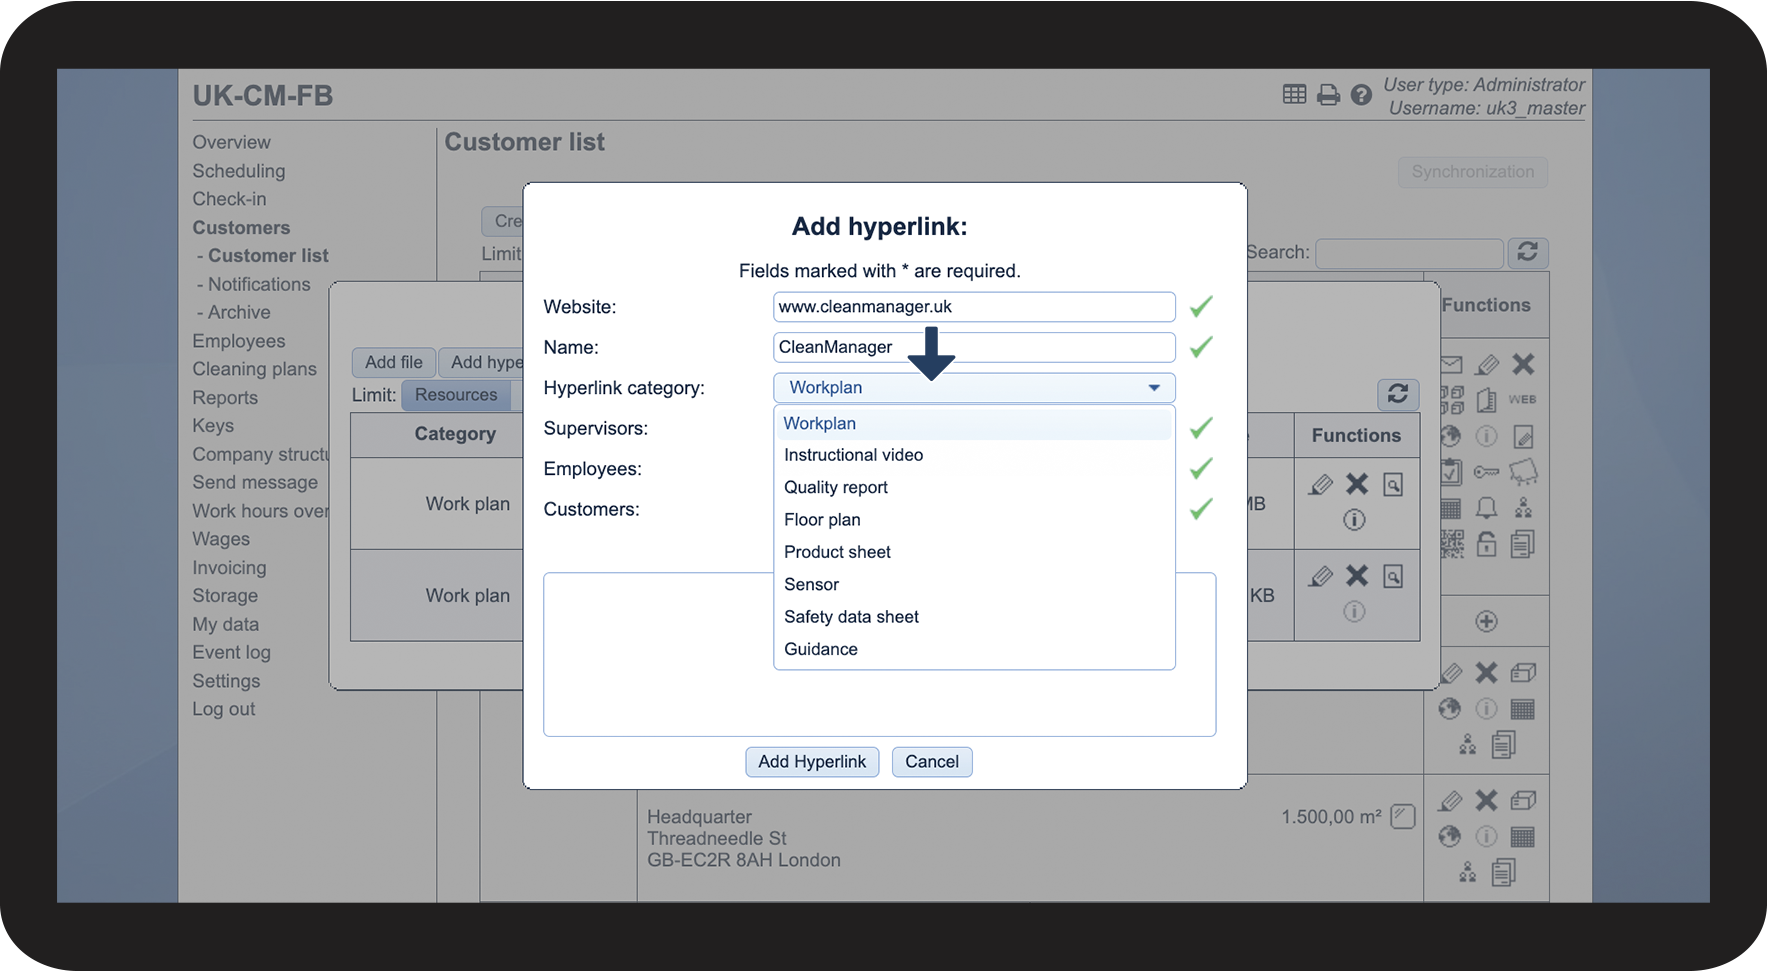
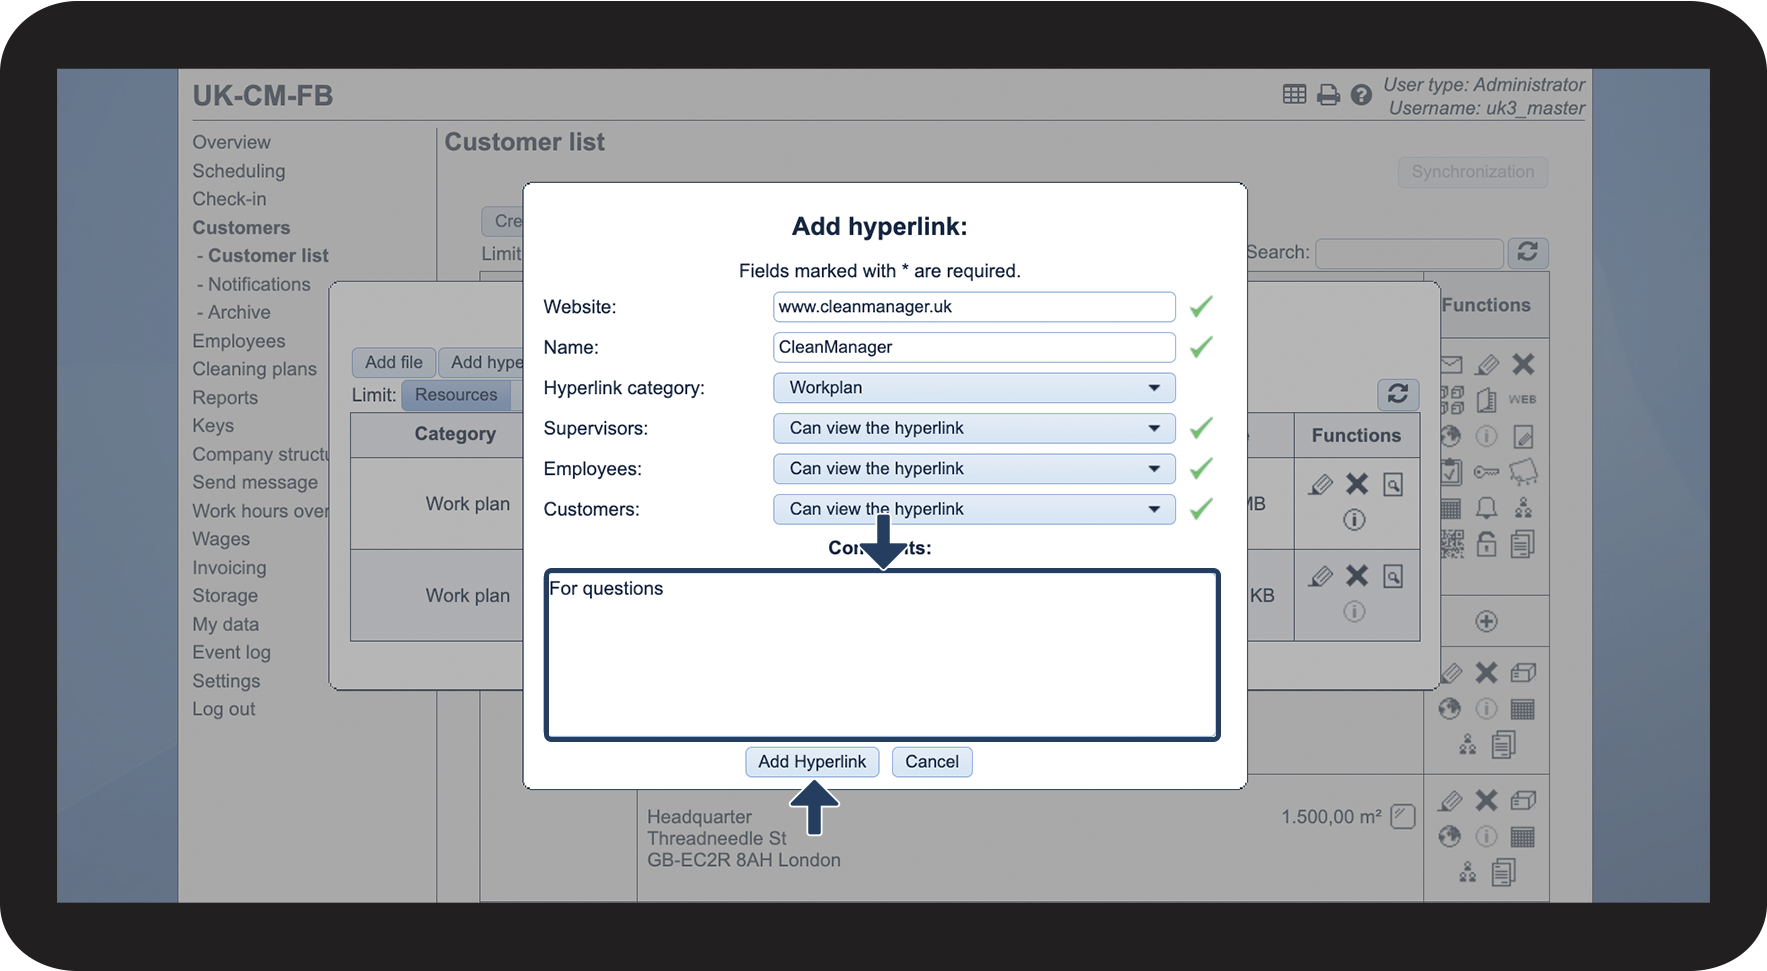
This is how you add a hyperlink to a customer

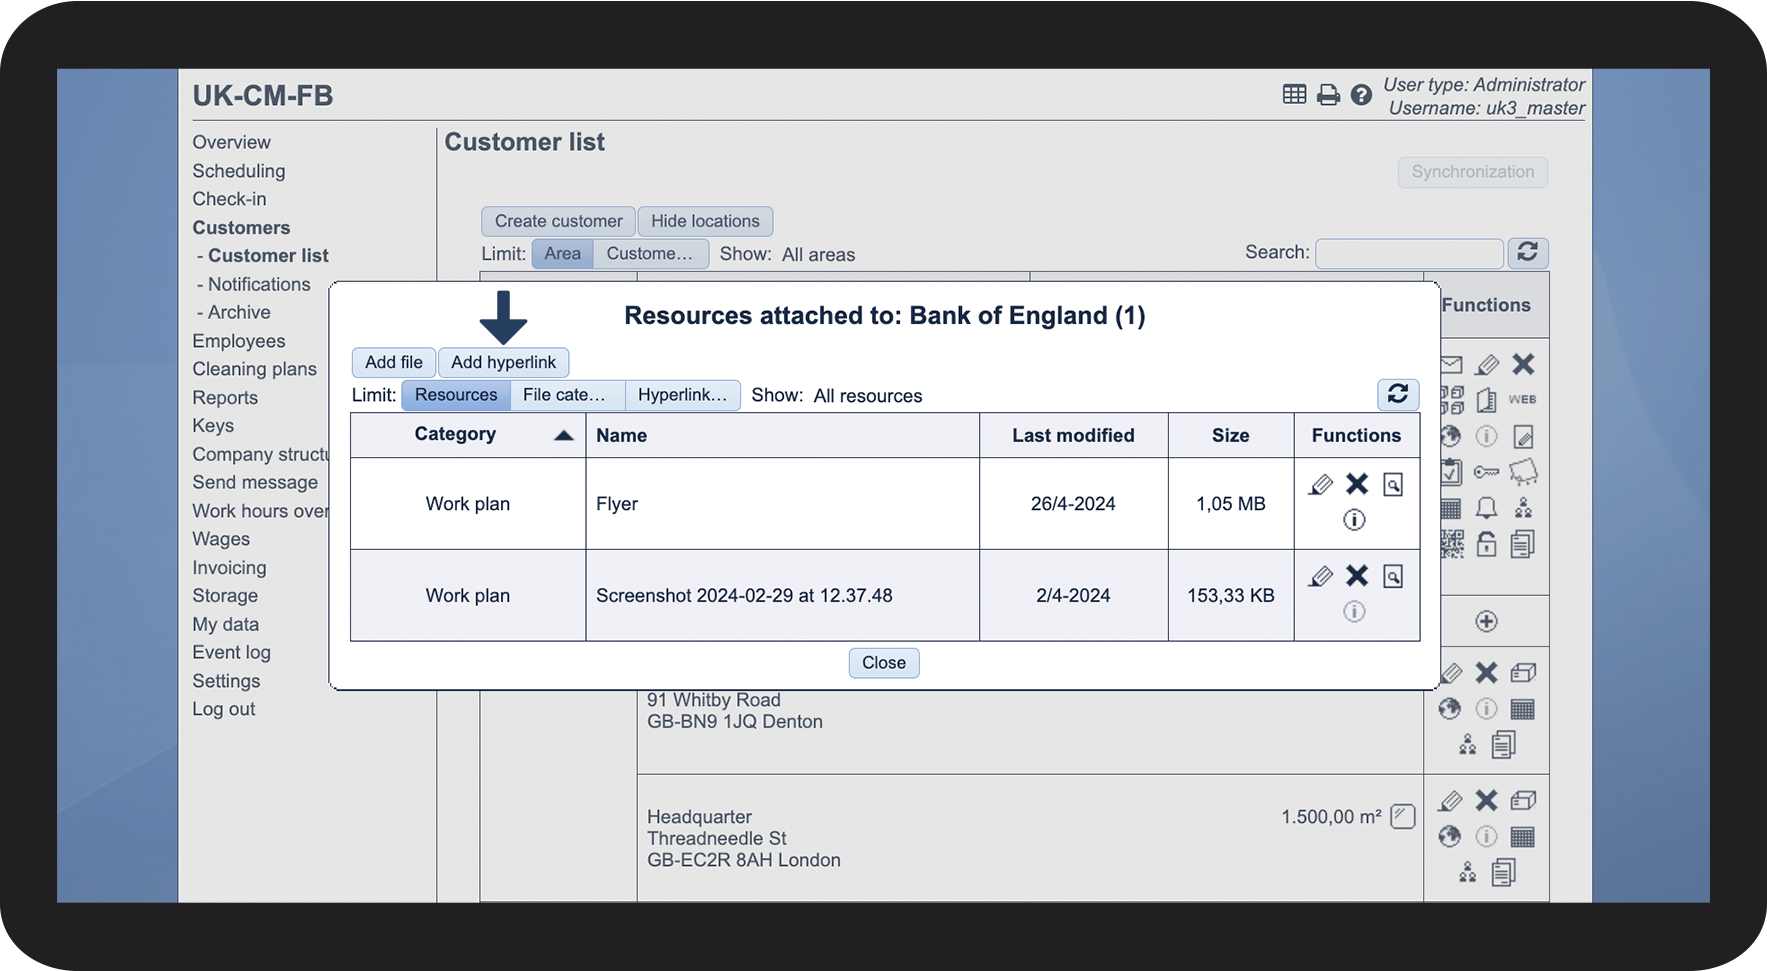
This is how you can see which attachments have been added to the customer

This is how you can edit resources that have been attached to a customer


This is how you delete resources that have been attached to a customer


NOTE:
The resource will be deleted permanently and cannot be restored.
This is how you specify which resources the employee can view