How do I grant customers access to CleanManager?
If you want your customer contacts to have easy access to information, such as the schedule for planned tasks, you can provide them with a login to CleanManager.
The administrator and supervisors can grant access to customer contacts, who will then be able to view data stored about them in the system, e.g. address and phone number, as well as their calendar.
NOTE:
Supervisors can only grant access to customer contacts in their assigned areas. For more information regarding this, go to Company Structure.
In this article, you will learn how to grant customer contacts access to CleanManager:
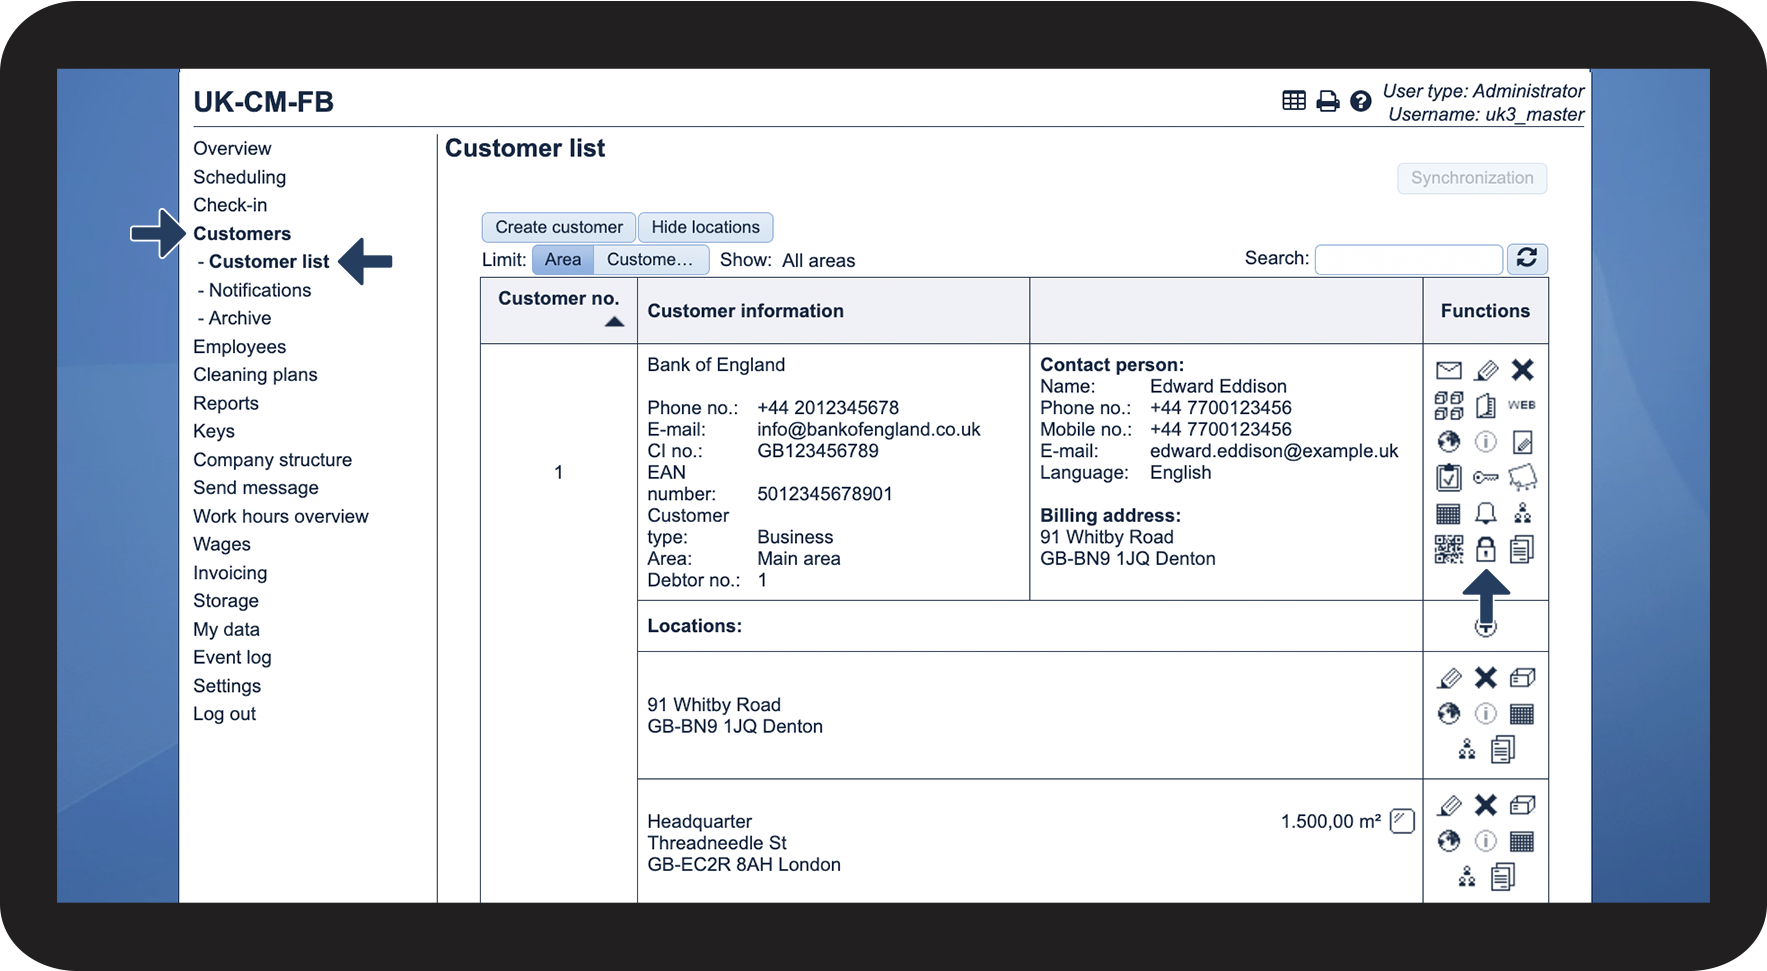
- How can I grant a customer contact access?
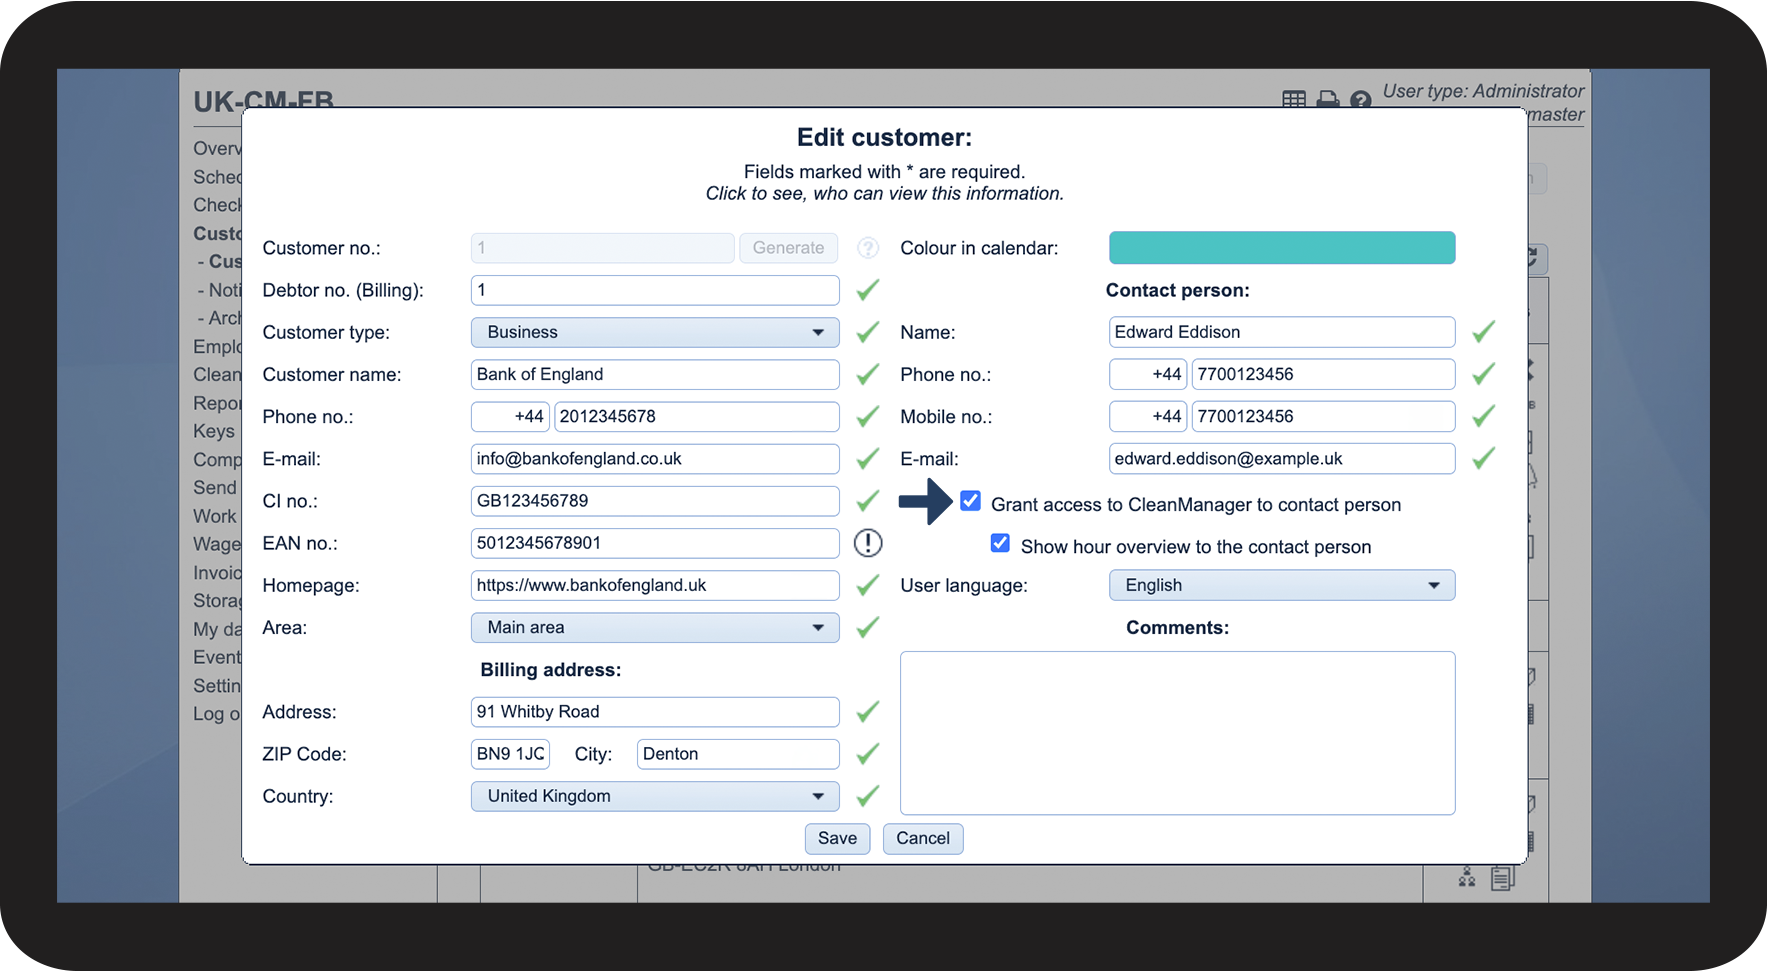
- How can I grant a customer contact access while editing the customer data?
- How do I revoke a customer contact's access?
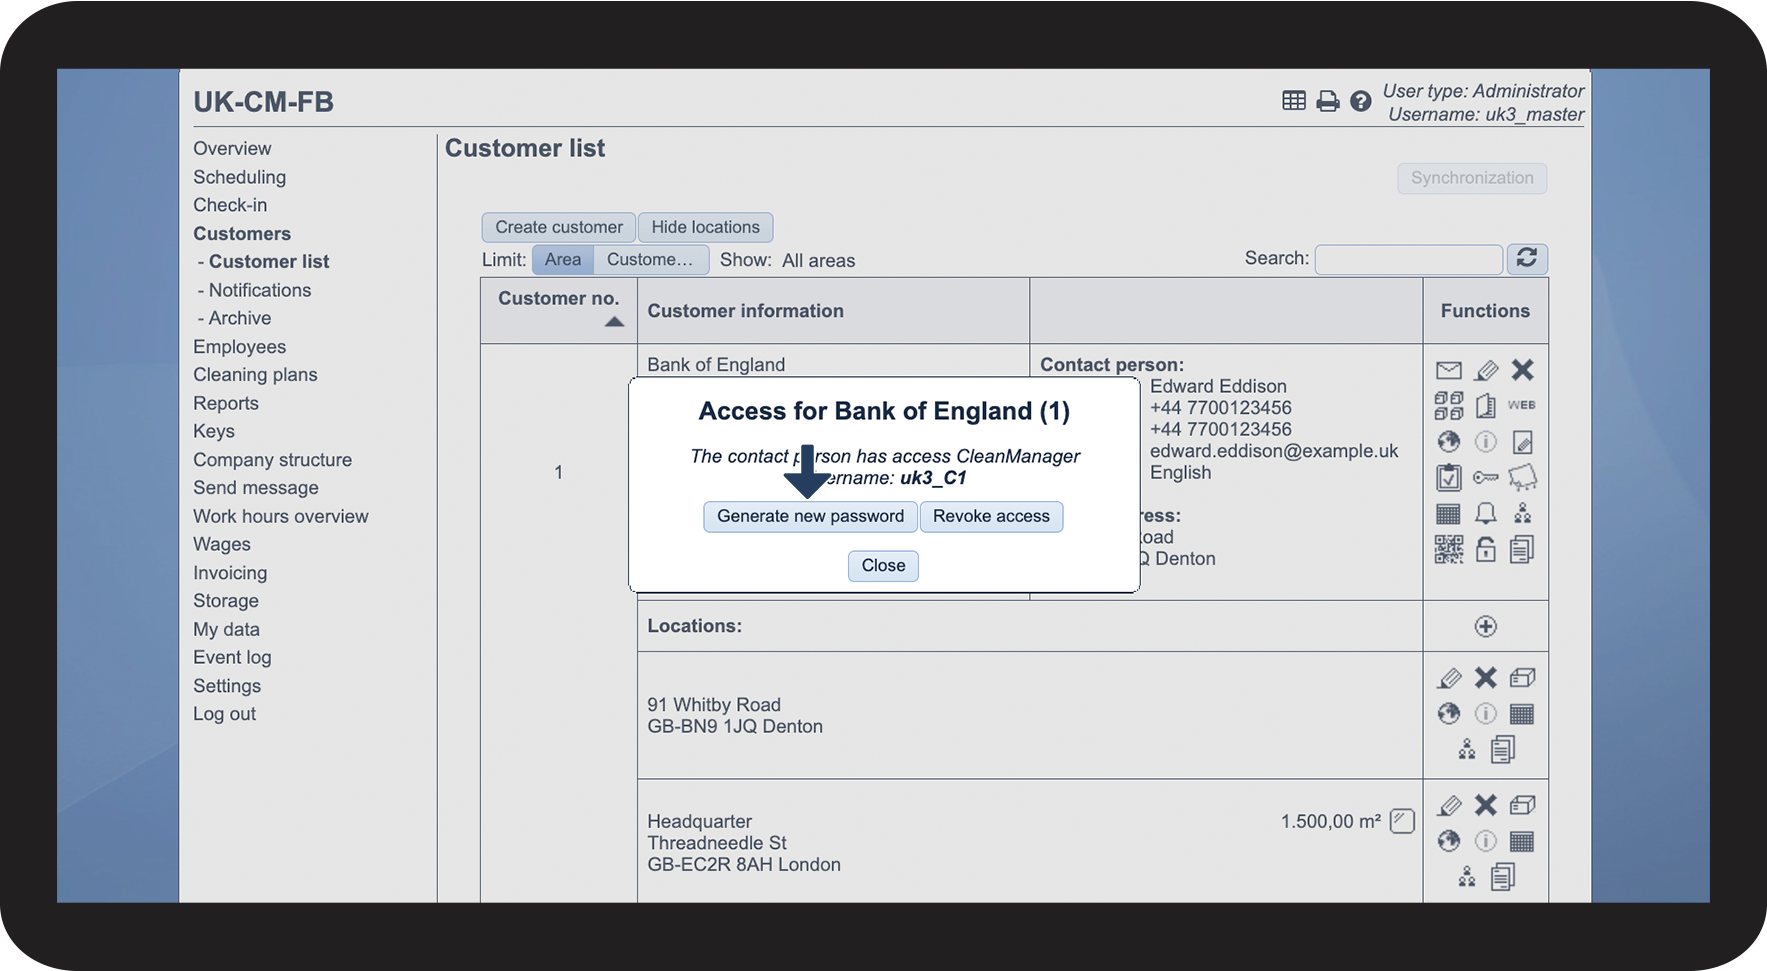
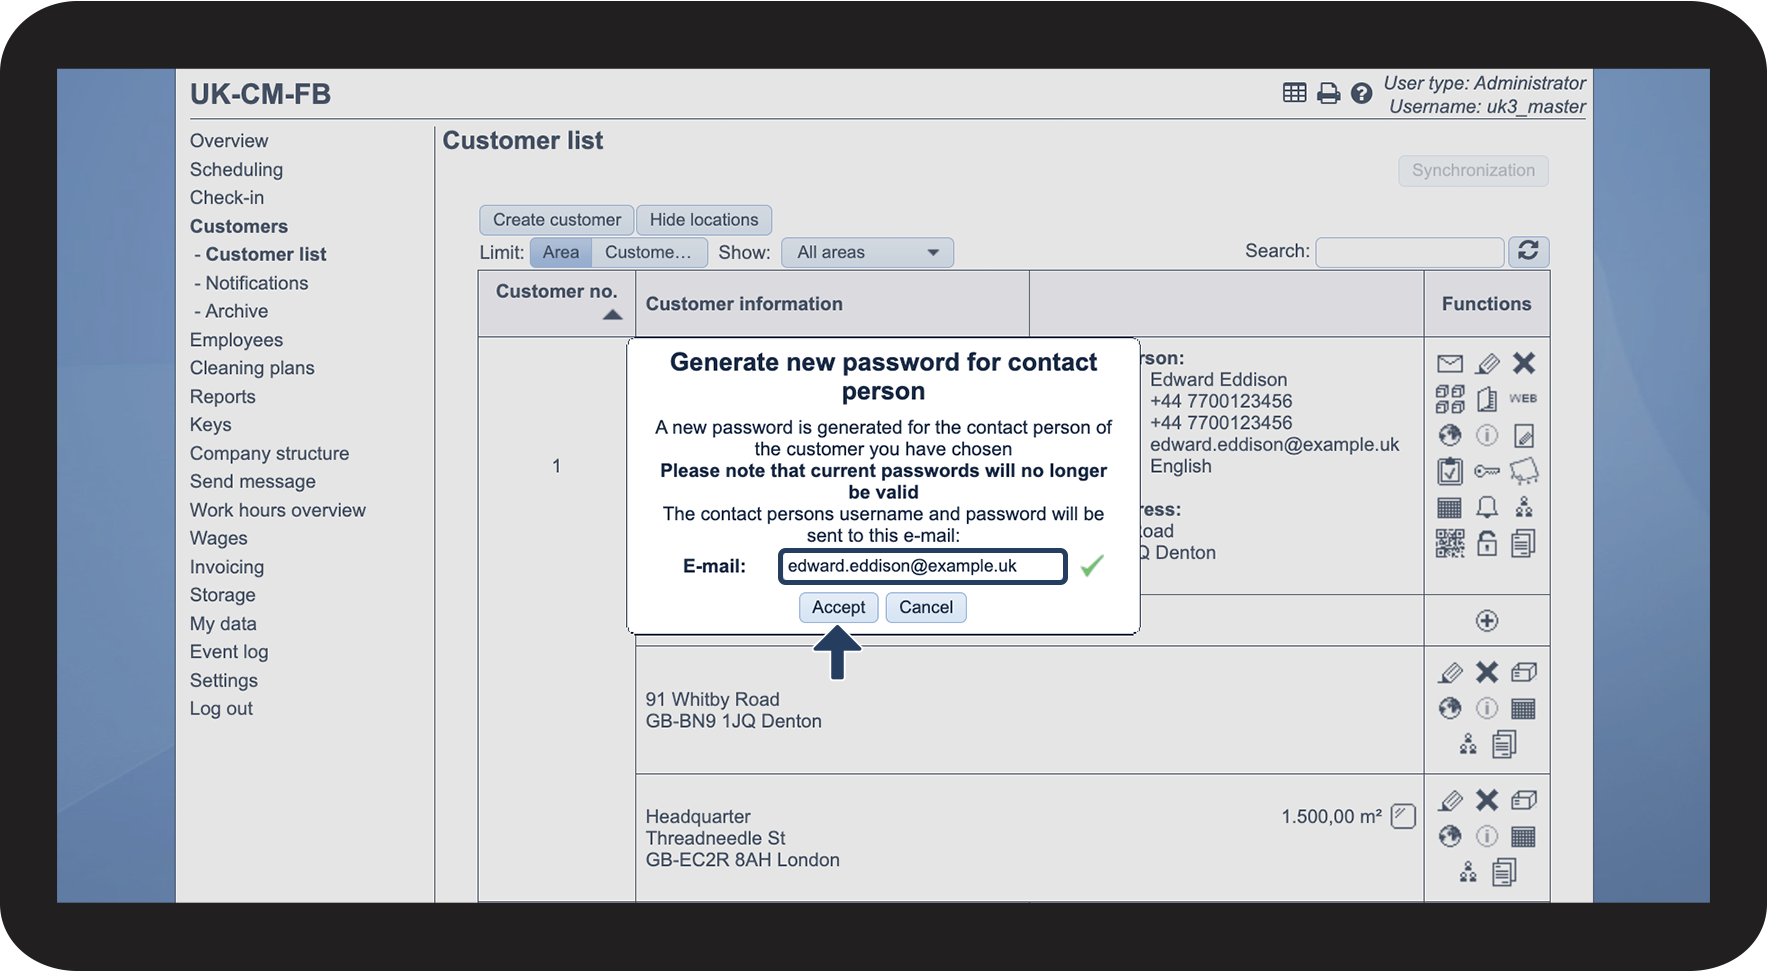
- How do I generate a new password for the contact person?
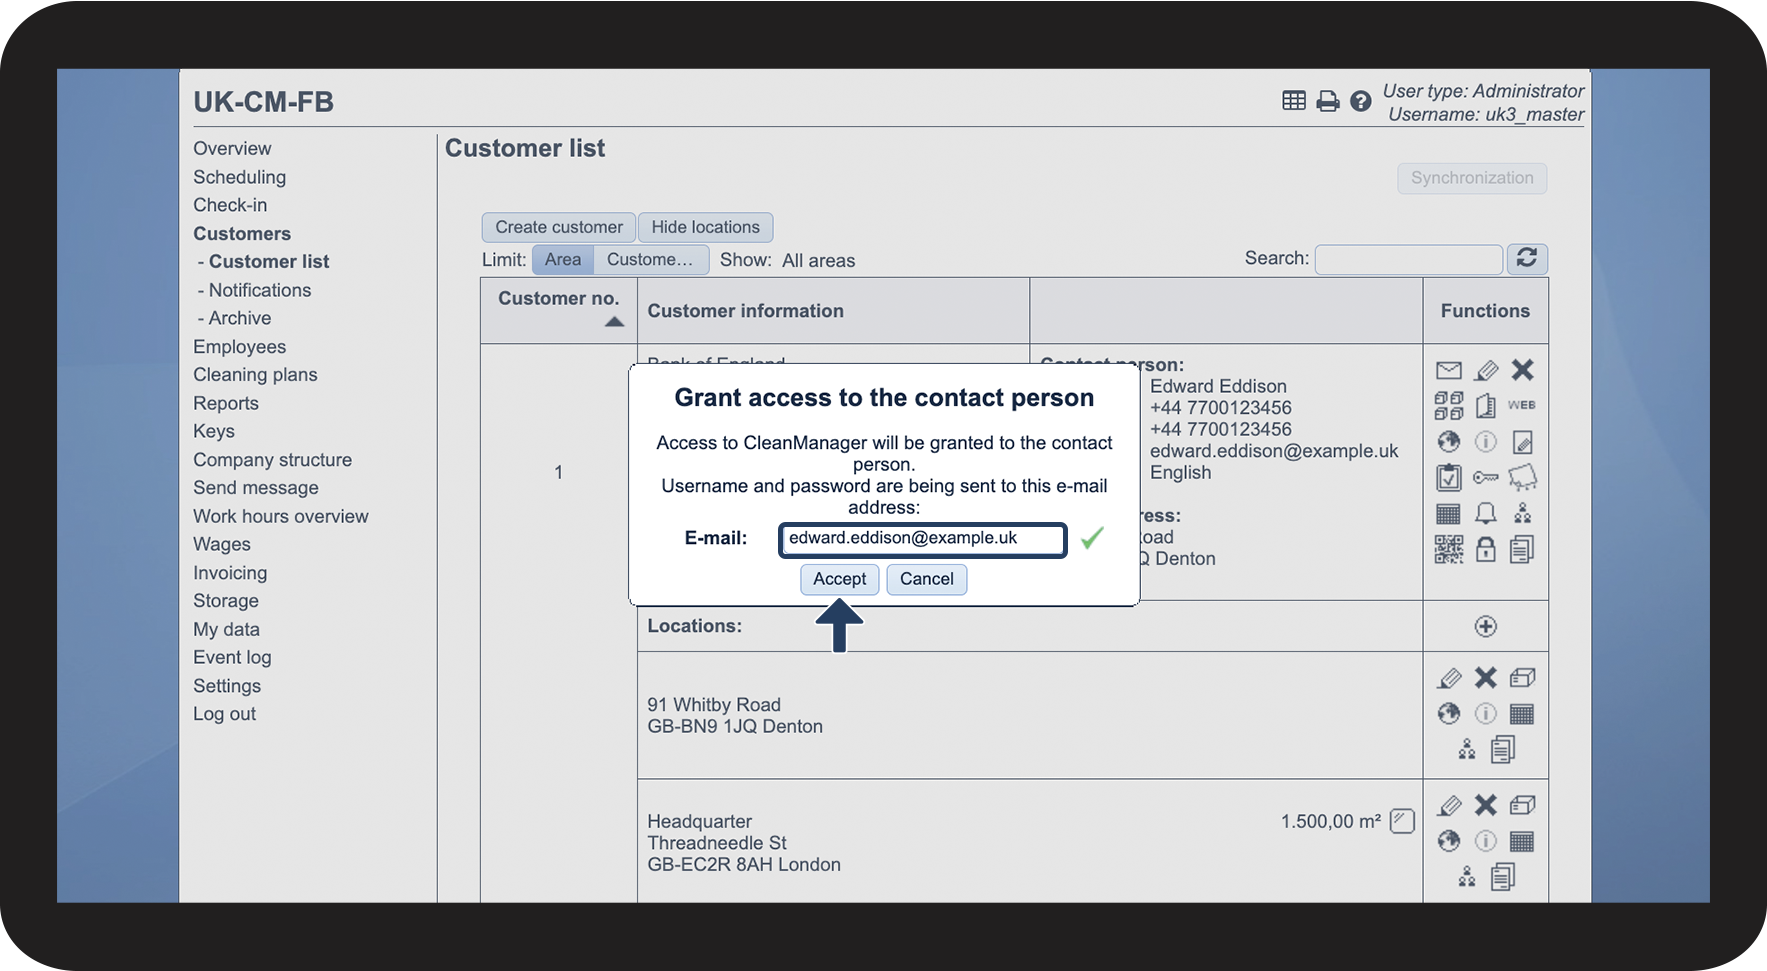
This is how you can grant a customer contact access

This is how you can grant a customer contact access while editing the customer


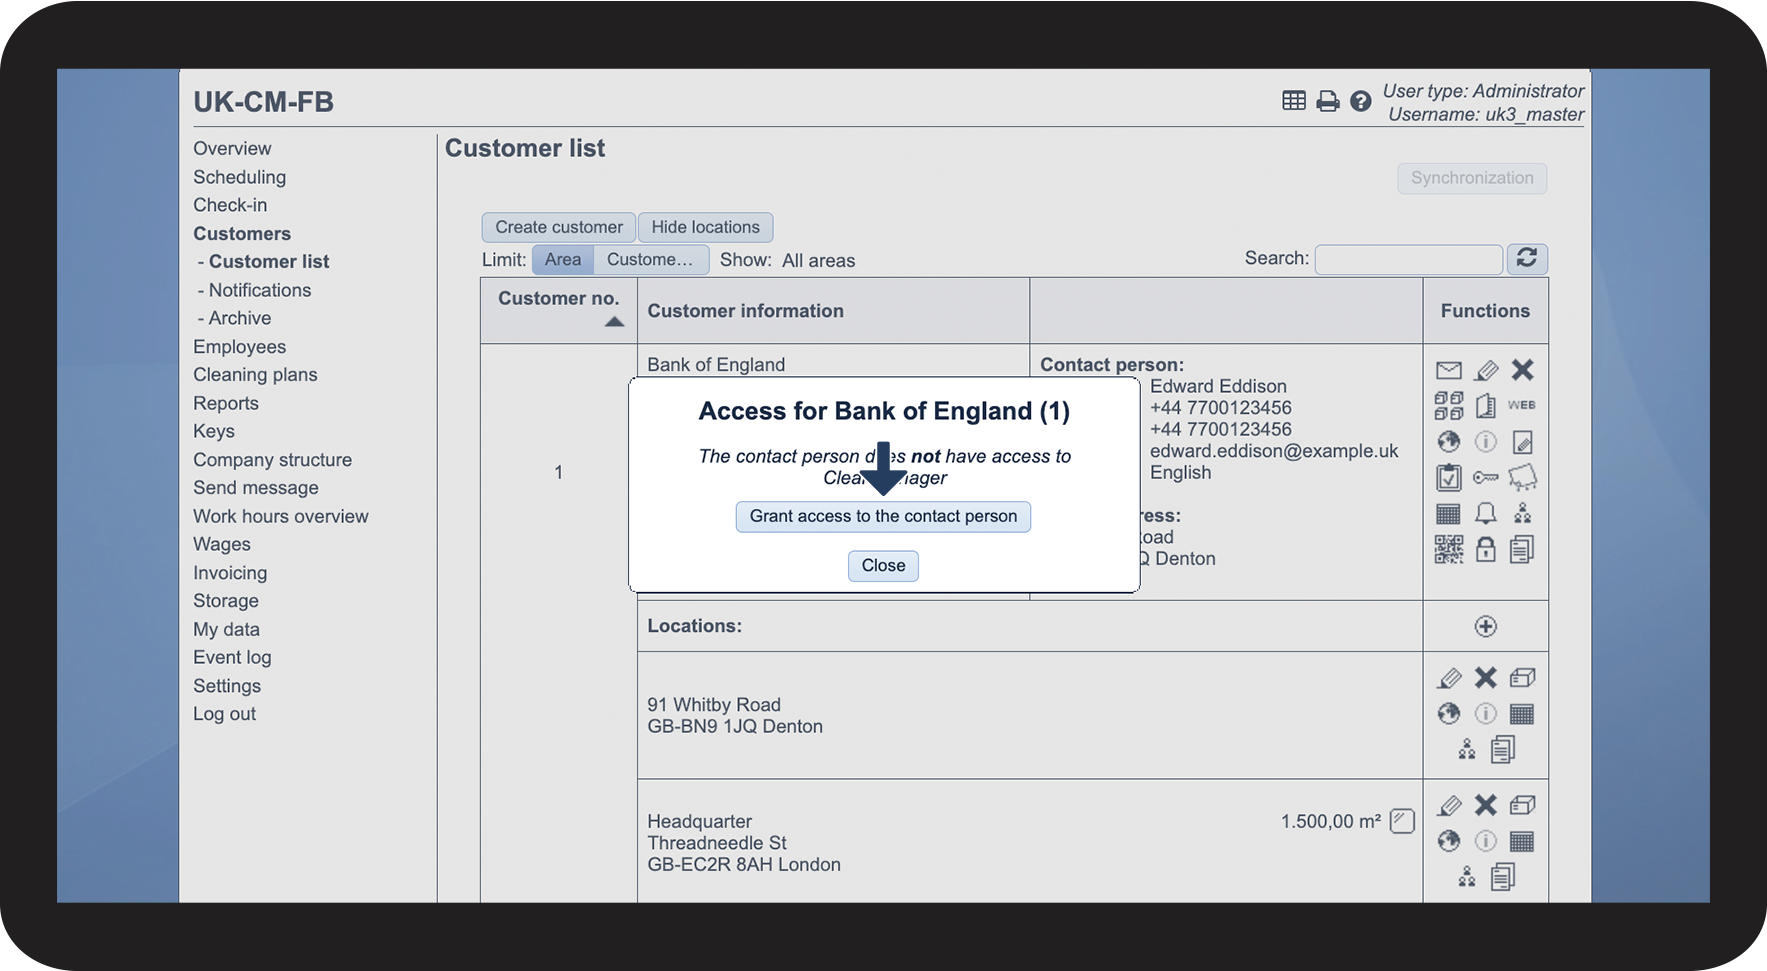
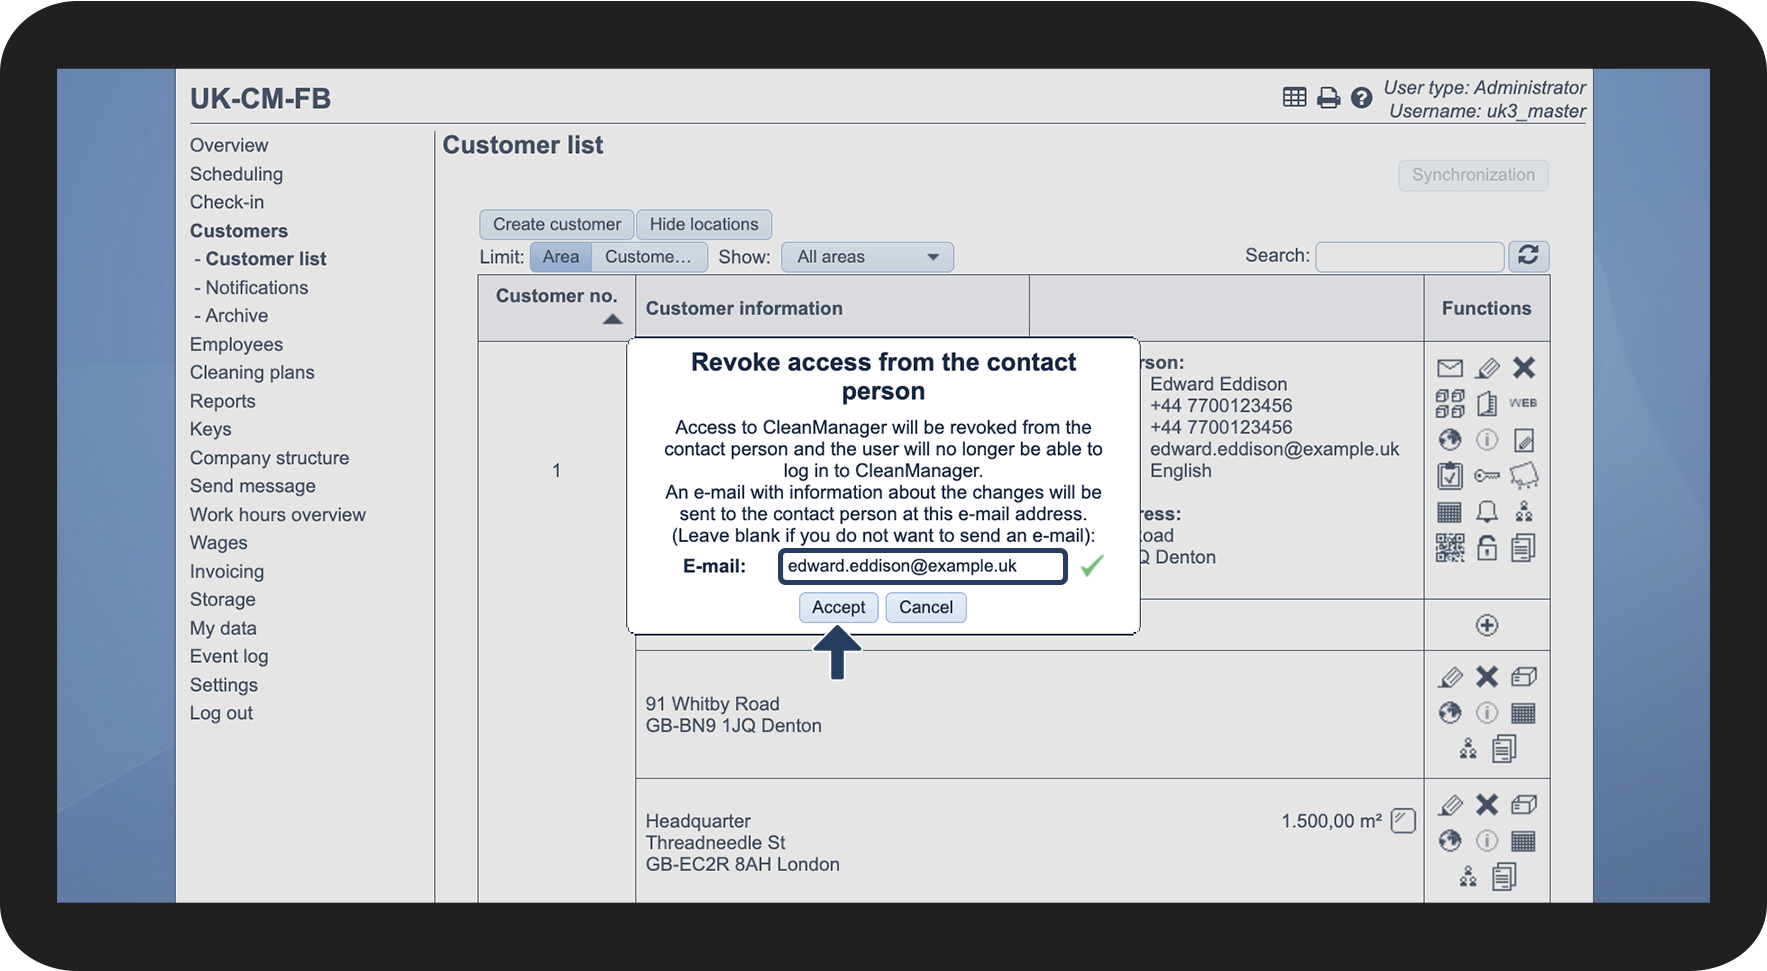
This is how you revoke the customer contact's access


INFO:
If you do not want to notify the customer contact, simply leave the field empty.
This is how you generate a new password for the customer contact